Posts with «featured» label

Create shapes over and over with the Dynablock 3D Printer

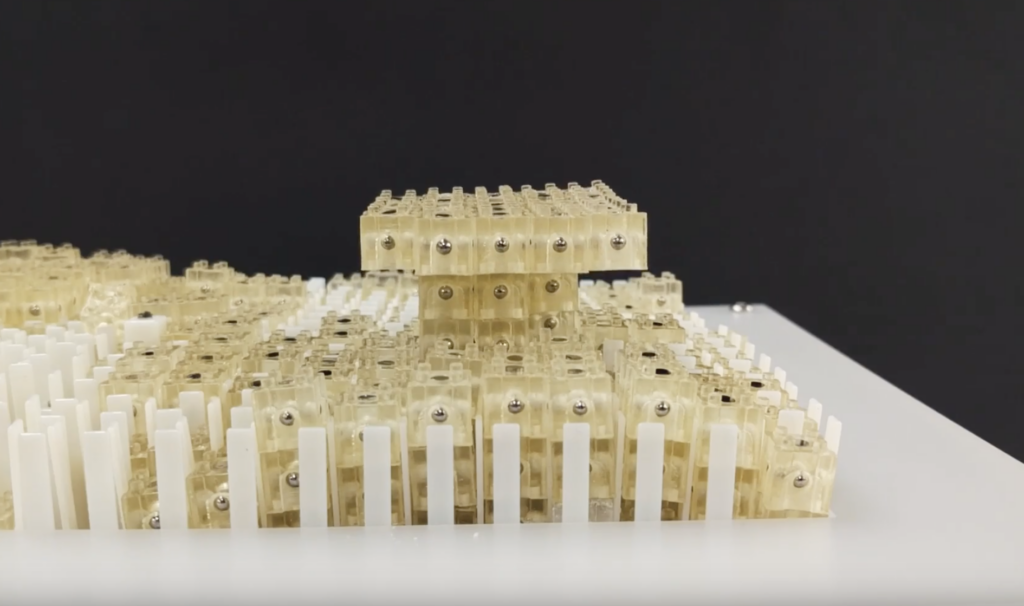
3D printing, while revolutionary in many aspects, generally means you’re stuck with what you print. Researchers at the University of Colorado Boulder and the University of Tokyo, however, have created a printing system called Dynablock, which attaches specialized magnetic blocks together that can used over and over.

The system uses an array of 24 x 16 motors to push the blocks into position one layer at a time, giving a possible “print” resolution of 384 blocks per layer. An Arduino Uno, along with shift registers and motor drivers are used to directly control the block placement motors, and user interface is handled by a JavaScript-based application.

Dynamic 3D Printing combines the capabilities of 3D printers and shape displays: Like conventional 3D printing, it can generate arbitrary and graspable three-dimensional shapes, while allowing shapes to be rapidly formed and reformed as in a shape display. To demonstrate the idea, we describe the design and implementation of Dynablock, a working prototype of a dynamic 3D printer. Dynablock can form a three-dimensional shape in seconds by assembling 3,000 9 mm blocks, leveraging a 24 x 16 pin-based shape display as a parallel assembler. Dynamic 3D printing is a step toward achieving our long-term vision in which 3D printing becomes an interactive medium, rather than the means for fabrication that it is today. In this paper, we explore possibilities for this vision by illustrating application scenarios that are difficult to achieve with conventional 3D printing or shape display systems.

More info can be found in the project’s research paper here, or check it out in action in the video below:

Animate a soda bottle structure with TrussFormer and Arduino

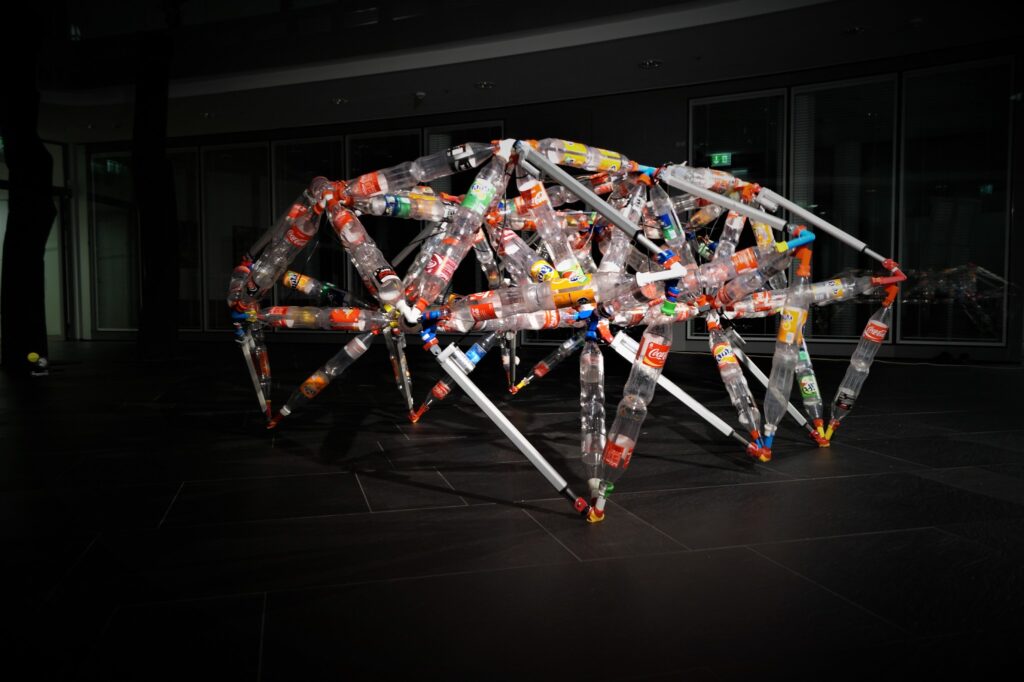
While you may not give soda bottles much thought beyond their intended use, researchers in Germany and the U.S. have been working on a way to turn empty bottles into kinetic art. 

The result of this work is a program called “TrussFormer,” which enables one to design a structure made out of soda bottles acting as structural beams. The structure can then be animated using an Arduino Nano to control a series of pneumatic actuators.

TrussFormer not only allows for animation design, but analyzes stresses on the moving assembly, and even generates 3D-printable files to form the proper joints.

TrussFormer is an integrated end-to-end system that allows users to 3D print large-scale kinetic structures, i.e., structures that involve motion and deal with dynamic forces.

TrussFormer builds on TrussFab, from which it inherits the ability to create large-scale static truss structures from 3D printed hubs and PET bottles. TrussFormer adds movement to these structures by placing linear actuators and hinges into them.

TrussFormer incorporates linear actuators into rigid truss structures in a way that they move “organically”, i.e., hinge around multiple points at the same time. These structures are also known as variable geometry trusses. This is illustrated on the on the example of a static tetrahedron that is converted into a moving structure by swapping one edge with a linear actuator. The only required change is to introduce connections at the nodes that enable rotation, i.e. hinges.

As for what you can build with it, be sure to check out the bottle-dinosaur in the video below! 

A linear actuator that won’t break the bank

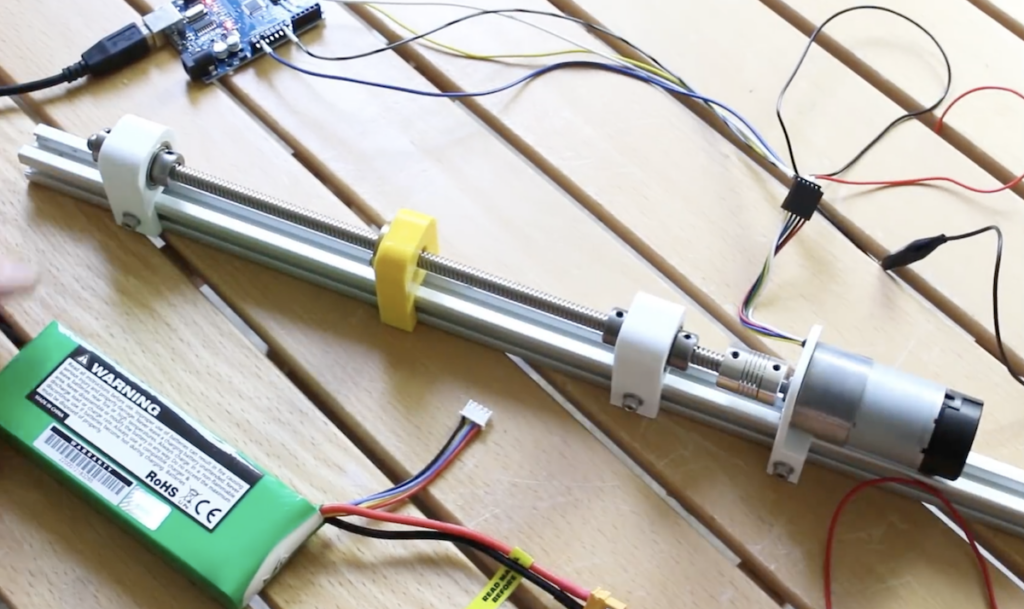
Extremely good linear actuators can be expensive and heavy, but what if you need something for relatively light applications? In the video below, James Bruton explains how you can make one using parts including a DC motor with a quadrature encoder, 3D-printed mounting, and a lead screw assembly.

His device uses an Arduino Uno for control, using pins 2 and 3 as interrupts to ensure correct rotation—and thus linear travel—sensing. Proper movement is facilitated with a pair of PID loops to regulate both the position and velocity, even under differing load and battery conditions. 

Arduino code and CAD information can be found on GitHub, while an explanation of the project is seen in the video below. 

Arduino Blog 19 Oct 15:32

InfiniTouch: Interact with both sides of your smartphone

Besides, perhaps a longer battery life, what would make your smartphone experience better? If you said a more versatile interaction method than poking one side with your thumb, researchers in Germany may have just the thing.

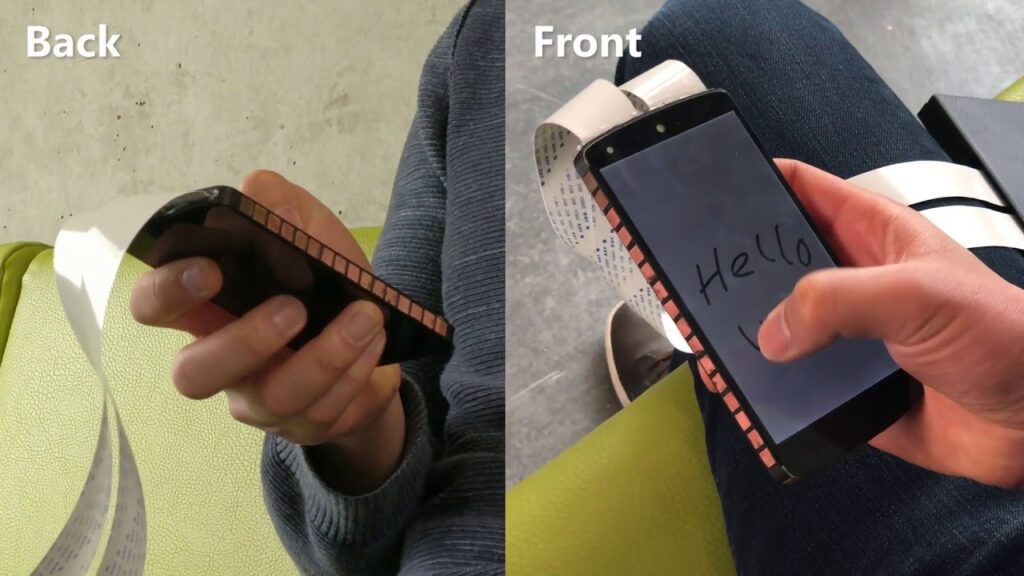
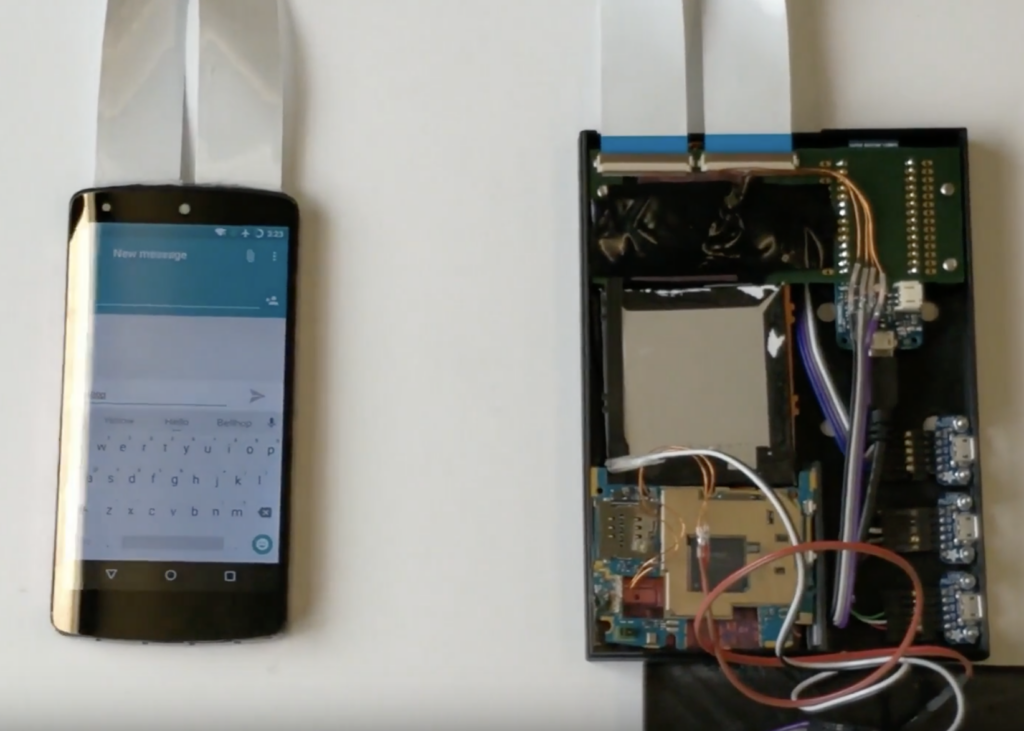
InfiniTouch morphs two LG Nexus 5 phones into one, with their touchscreens stacked back-to-back. This allows for not only thumb interaction, but also program control with the four fingers that normally only grip the device. It can even tell what finger your using via a convolutional neural network. 

In order to save space, most of the electronics are housed in a separate hardware container, including the phone boards as well as an Arduino MKR1000. 

More info is available in the project’s research paper, and a short demo can be seen in the video below.

3D wire bending with Arduino!

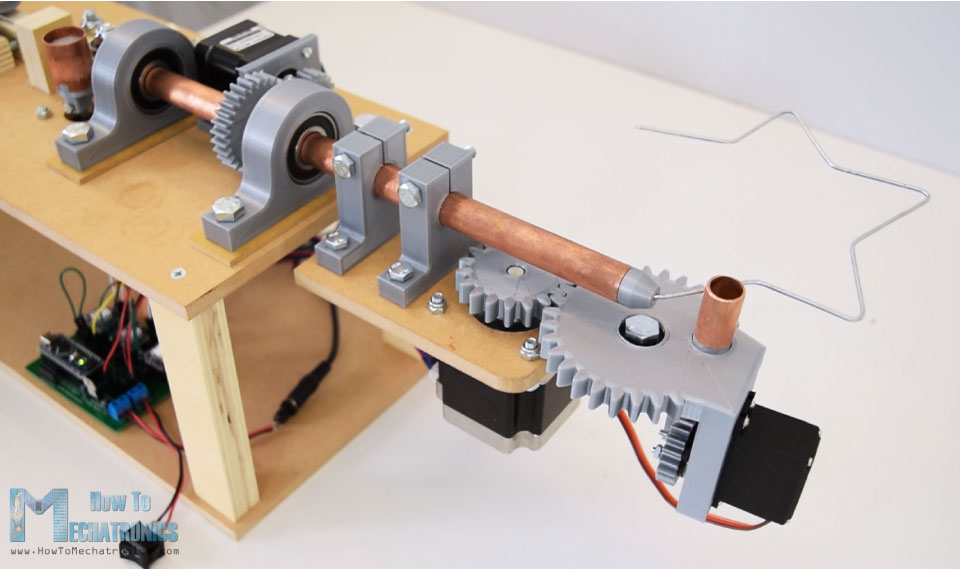
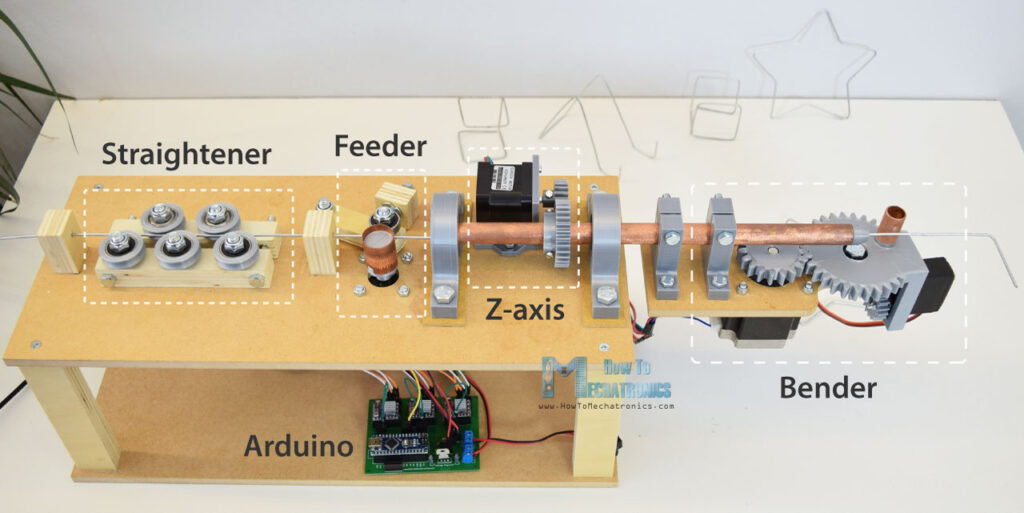
If you thought that automatic wire bending was solely the purview of expensive industrial machinery, think again. How To Mechatronics has come up with a bender that not only twists wire left and right, but can rotate to create three-dimensional shapes.

The heart of the system is an Arduino Nano, which controls three stepper motors for wire manipulation via DRV8825 driver boards. A servo motor is also implemented in order to push a piece of copper tubing into place to physically bend the wire. 

As noted, the device does have some trouble moving the wire when its straightening rollers are tight, but this likely could be perfected with a little more work. If you’d like to take a crack at it, code and build files are available here.

Arduino Uno controls a trio of singing pumpkins

Halloween is just around the corner, and to celebrate, fadecomic decided to set up a trio of singing animatronic pumpkins to belt out scary songs. 

The project uses a Raspberry Pi for high level control and browser interface, and sends animation commands to an Arduino Uno via USB serial.

The Uno takes this data and translates it into actual pumpkin movements coordinated with music. The resulting trio of pumpkins each use their own servo to lift the top of the foam gourd up like a gigantic mouth, and also feature PWM-driven LED eyes. A light show controlled by SSRs completes the spooky musical effect. 

Build info is available here and the Arduino code can be found on GitHub.

Paper-cut light box replicates the Philadelphia skyline and its actual moon phases

Rich Nelson wanted to make a unique gift for his brother, and decided on a paper-cut light box of Philadelphia’s skyline, the city where he lives. 

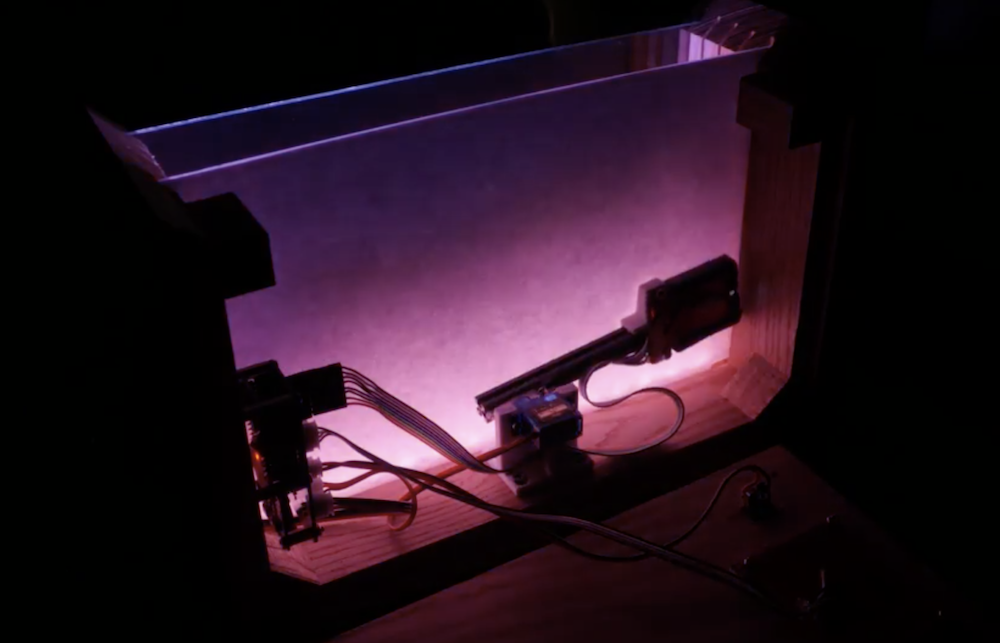
The resulting device is controlled by an Arduino Nano, and not only features a trio of lights and layers to represent buildings and foliage, but also a moving sun and moon display that changes depending on the actual time and date.

Timing is accomplished via an RTC module, while the sun/moon is displayed on a small TFT screen that moves across the sky using a servo motor and extension arm. The build can be seen in the video below, and code as well as CAD info is on GitHub for your perusal.

Arduino Blog 16 Oct 14:32

FacePush adds extra realism to your VR experience

Haptic feedback is something commonly used with handheld controllers and the like. However, in a virtual reality environment, it could also be used with the other interface surface attached to your body: the VR headset itself.

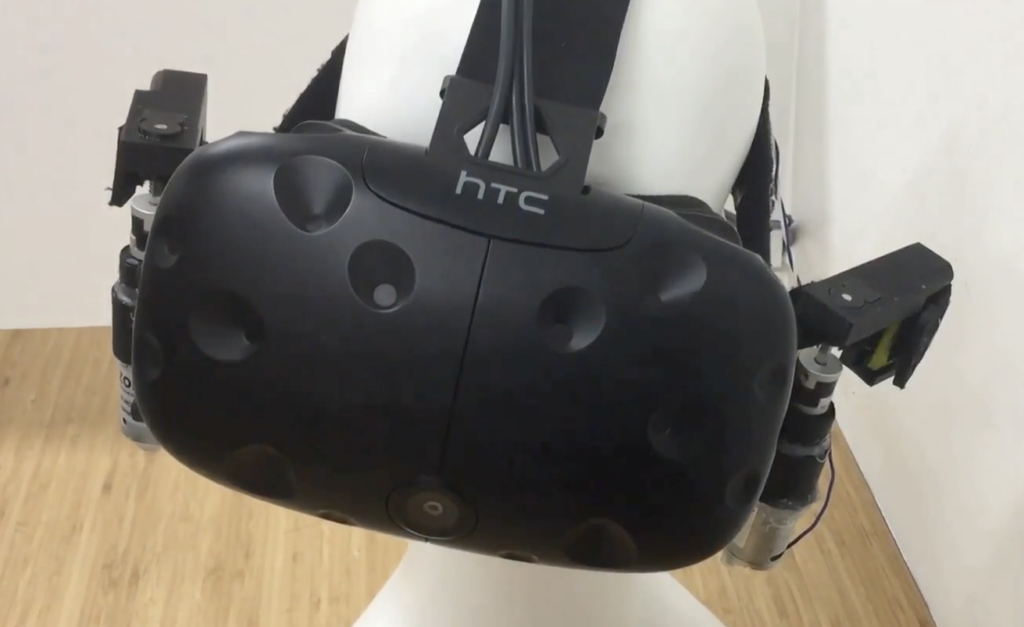
That’s the idea behind FacePush, which employs an Arduino Uno-powered pulley system to place tension on the straps of an HTC Vive headset. A corresponding pushing force is felt by the wearer through the headset in response to this action, creating yet another way to help immerse users in a virtual world. 

Applications tried so far include a boxing game, dive simulator, and 360-degree guidance You can check it out in a short demo below, and read more about it in the full research paper here.

Neon skulls illuminate to the MIDI beat

LEDs, whether single-color or programmable, have enabled makers to create a wide variety of vibrant projects at a reasonable price. Neon sign projects, which require sophisticated glass making techniques as well as high voltage for control aren’t as common, but do still have their adherents. Some have even experimented with making them sound reactive.

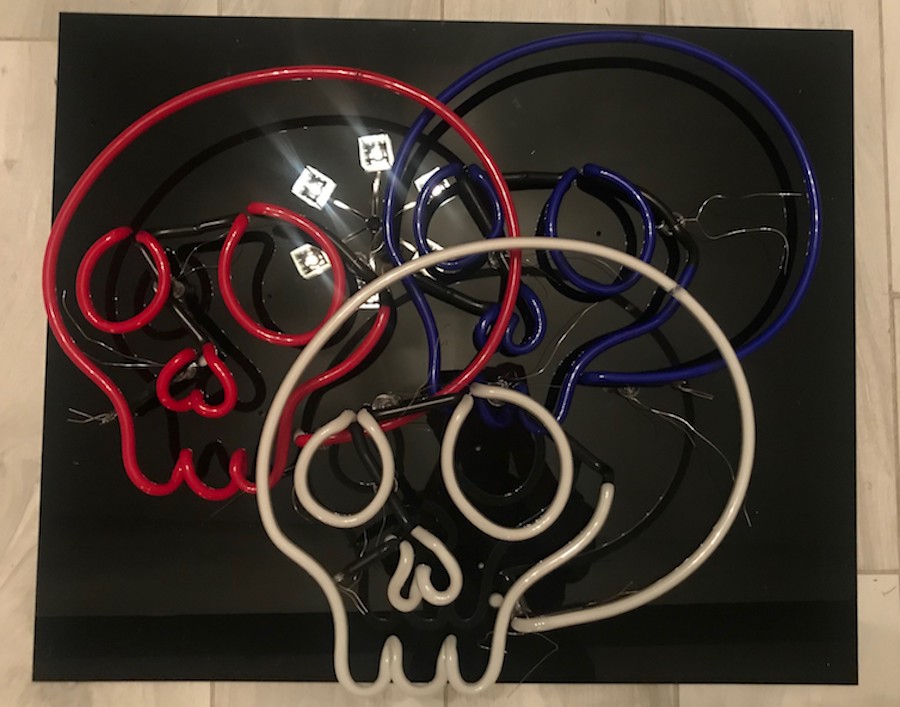
Up until now, sound control meant using a microphone to detect audio signals and flash accordingly. David Garges, however, is using an Arduino Leonardo equipped with an Olimex MIDI shield to individually activate three neon skulls, crafted by artist Dani Bonnet. 

His setup can be programmed via MIDI directly, or can use beat analysis software to activate the proper lights depending on audio output. 

There has been much desire in the Neon Art community for clean and responsive musical interaction with high-voltage Neon Signs. Currently, the existing infrastructure uses a microphone to detect audio and flash accordingly. Unfortunately, due to this method of processing the Neon always responds with a small delay. Clapping and shouting can also disrupt the interaction when using an on-board microphone.

This project solves that problem by transmitting musical data via MIDI protocol to a controller which activates then activates Neon Tubes accordingly. I have designed and built a system that takes a slightly different approach but accomplishes what the Neon Art community desires.

This project offers two performance modes: one that allows for electronic artists to perform seamlessly using MIDI instruments, and one that allows DJs to feed BPM analysis to the system to synchronize the Neon flashing with actual recorded music which enables Real-Time Audio-Controlled Neon.

Be sure to check out the demo in the video below!

Announcing Arduino’s Coordinated Vulnerability Disclosure Policy

A little less than a month ago, I joined Arduino as their Chief Information Security Officer. I’ve been in touch with the team for the past couple of months and feel incredibly lucky to be part of such a talented and driven group of people.

We’re working hard on developing a robust, well-rounded security program that fits our organisation and busy improving our security posture across all departments. I am a true believer that it all starts from introducing a strong culture of security awareness — where employees feel confident and empowered to take action against security issues.  

Today, I’m thrilled to announce the first release of Arduino’s Coordinated Vulnerability Disclosure (CVD) Policy.

We used some great references when putting it together and we’d like to give them a shout out here: HackerOne’s VDP guidelines, CEPS’ report on “Software Vulnerability Disclosure in Europe,” and the US DoJ Cyber Security unit’s VDP framework. We also took into consideration recent Senate testimony of experts in vulnerability disclosure in the role hackers can play in strengthening security, Dropbox’s announcement on protecting researchers and 18F’s own policy. I even wanted to publicly thank Amit Elazari Bar On, a doctoral law candidate (J.S.D.) at UC Berkeley School of Law and a Lecturer at UC Berkeley School of Information Master in Cybersecurity program for her useful advices and for providing the amazing “#legalbugbounty” standardisation project.

We’re also happy to announce that all of the text in our policy is a freely copyable template. We’ve done this because we’d like to see others take a similar approach. We’ve put some effort in to this across our teams and if you like what you see, please use it. Similarly, if you have improvements to suggest, we’d love to hear from you.

What is CVD?

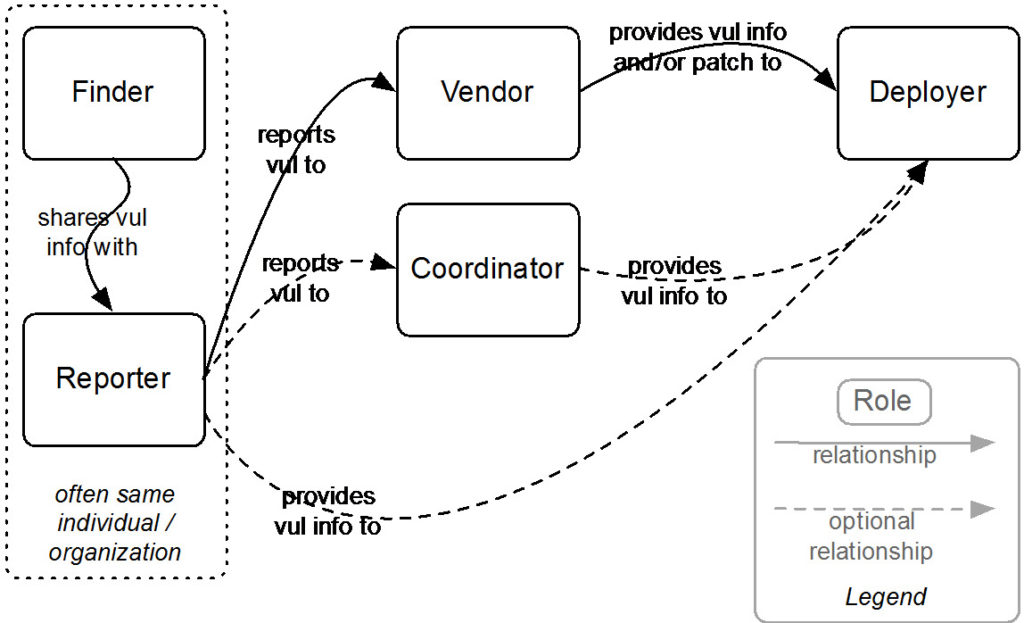
Coordinated vulnerability disclosure (CVD) is a process aimed at mitigating/eradicating the potential negative impacts of vulnerabilities. It can be defined as “the process of gathering information from vulnerability finders, coordinating the sharing of that information between relevant stakeholders, and disclosing the existence of vulnerabilities and their mitigation to various stakeholders, including the public.”

Figure 1: Relationships among actors in the CVD process. Source: “The CERT Guide to Coordinated Vulnerability Disclosure,” Software Engineering Institute, Carnegie Mellon University

Why is it important for us?

At Arduino, we consider the security of our systems and products a top priority. No technology is perfect, and Arduino believes that working with skilled security researchers across the globe is crucial in identifying weaknesses in any technology. We want security researchers to feel comfortable reporting vulnerabilities they’ve discovered, as set out in this policy, so that we can fix them and keep our information safe.

If you believe you’ve found a security issue in our products or services, we encourage you to notify us. We welcome working with you to resolve the issue promptly.

This policy describes how to send us vulnerability reports and how long we ask security researchers to wait before publicly disclosing vulnerabilities.

Where can I find it?

A copy of the policy is published on our Vulnerability Disclosure Policy page. The official document lives in GitHub. If you would like to comment or suggest a change to the policy, please open a GitHub issue.

Thank you for helping keep Arduino and our users safe!

— Gianluca Varisco