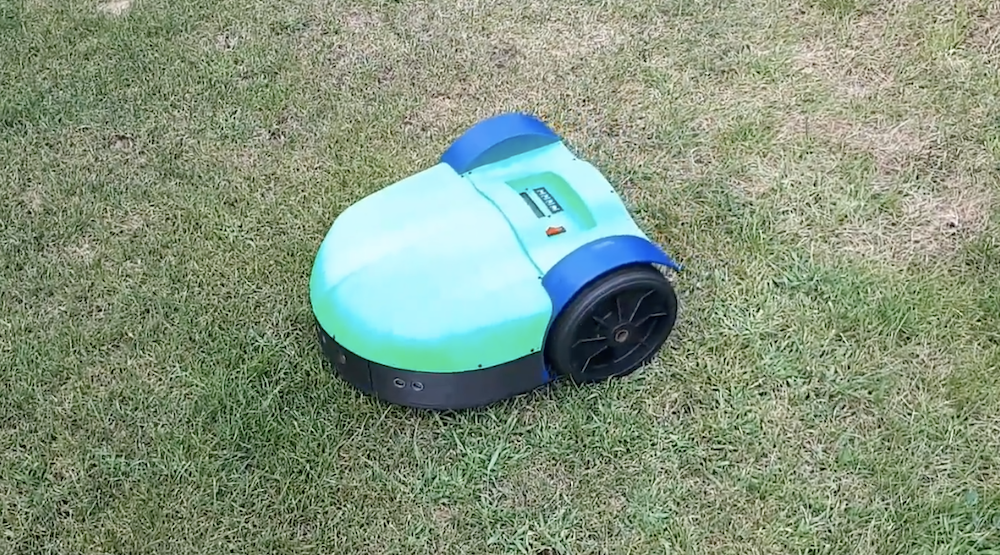
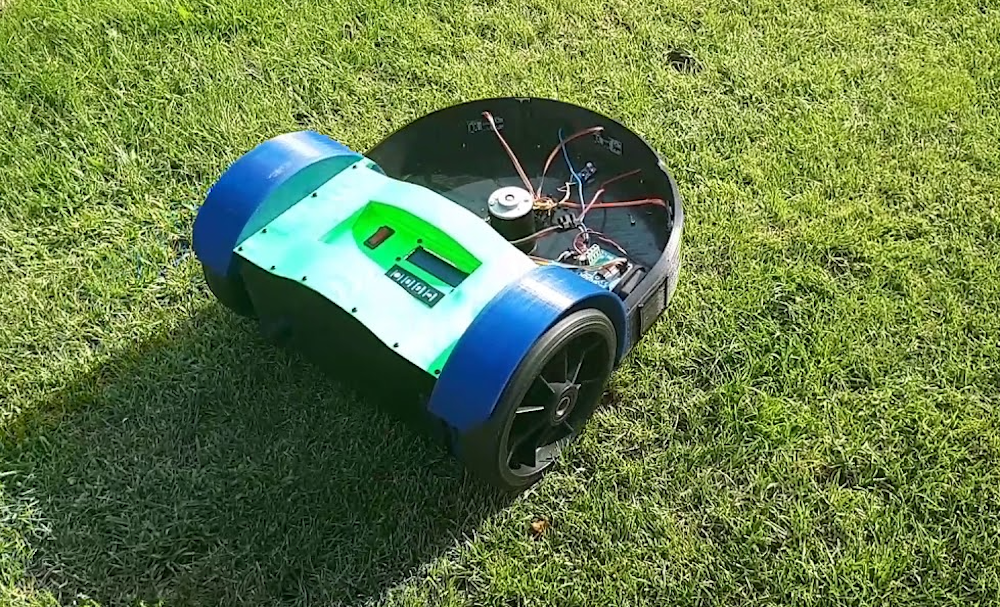
Do you enjoy mowing your lawn? No? Well now you can ‘simply’ print a robot to do it for you, based on German mechanical engineer Philip Read’s design. His Roomba-esque device uses a pair of gearmotors for movement, an array of three ultrasonic sensors for obstacle avoidance, and a perimeter wire/sensor to keep it within the designated boundary.
An Arduino Mega is employed as the main processing unit for the robotic mower, however a separate Nano onboard helps measure battery voltage as well as current when charging. Meanwhile, an Arduino Uno along with a motor driver are used to control the perimeter wire setup.
Extensive build info is available on the project’s write-up, and a short demo can be seen in the video below.
Fully autonomous robot lawn mower. The mower project includes the mower itself a boundary wire control station and an optional charging station. The mower navigates within the boundary wire which is positioned (pinned) around the perimeter of the garden. Once the mower senses the perimeter wire, it stops reverses and moves off in a new direction. The mower also has 3 sonar sensors to detect objects in the mowers path. Once the mowers battery is exhausted, the mower uses the boundary wire to navigate itself back to the charging station. All this can be customised in the Arduino software or completely re-written to your personal preferences.
Commercial mowers with this specification cost upwards of 600€ ($680).
Obviously, you’ll want to use such a device in an area devoid of kids or pets
We at Arduino believe that the combination of our technology and your passion make it possible to have an impact on everyone’s everyday life. Ingenuity, innovation, and social good are the cornerstones of our community, and we want to celebrate those traits with a contest whose winners will be announced on Arduino Day.
The Arduino Day Community Challenge aims to award the best community projects that can have a lasting effect on some or all of us. Seven winning entries will be selected, one in each of the following categories:
Social innovation
Kids and education
Home automation
Environment & space
Robotics
Audio and visual arts
Small scale manufacturing and startups
Prizes include boards, hardware, and other goodies valued up to €1,000. If you want to apply, please fill out this form by March 3rd. Aside from a description, you will need to upload a photo or video of your work. The winners will be announced on Arduino Day during the live stream from our official celebration in Milan.
And remember: we are seeking inspirational, problem-solving projects that represent the core values of Arduino Dayandcan improve the lives of others! Let’s make a difference, together.
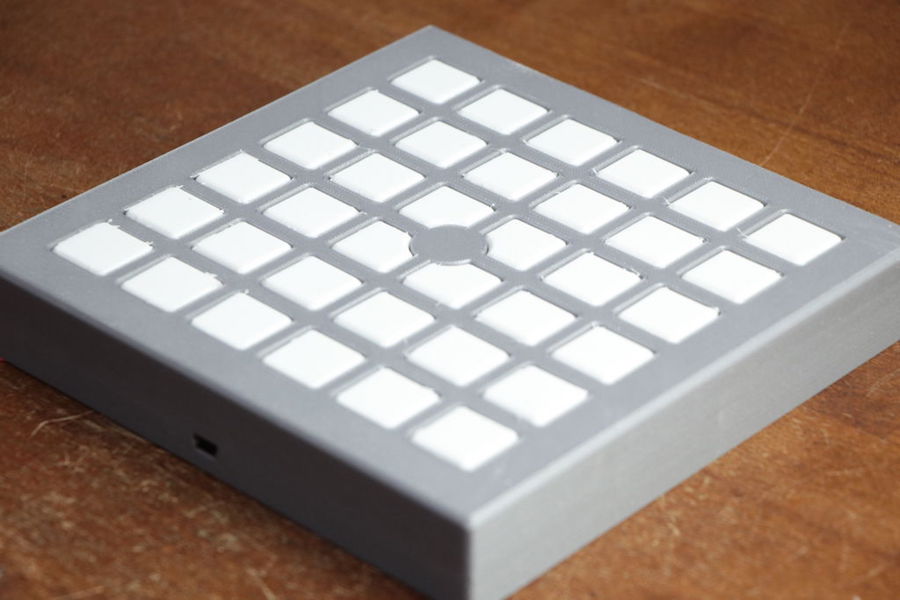
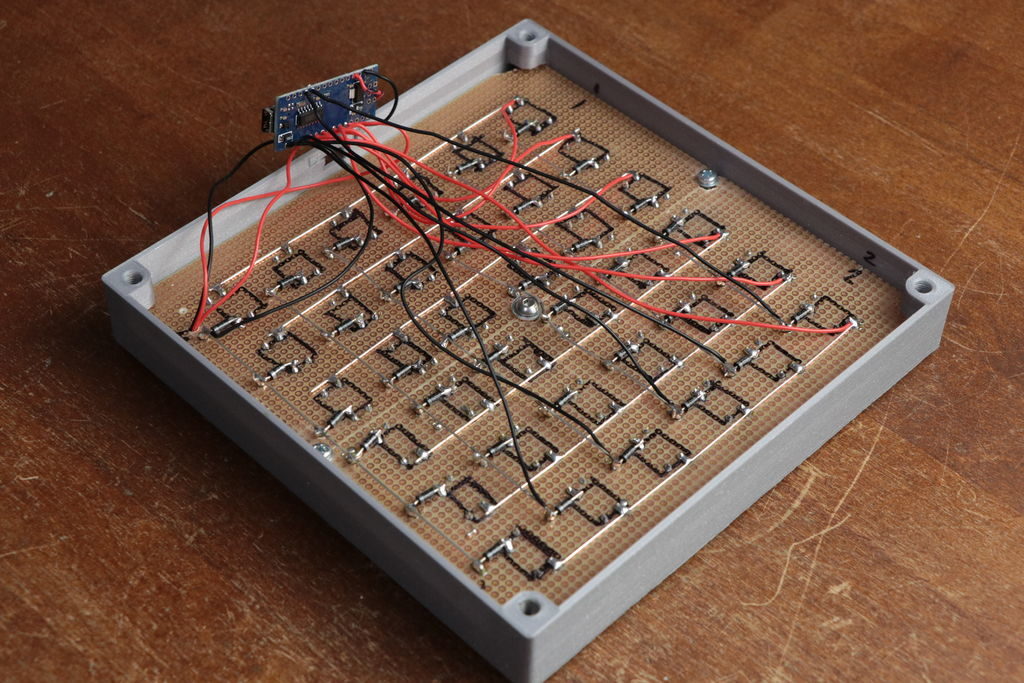
If you’ve ever seen a MIDI pad with dozens of light-up buttons producing electronic music, you may have considered building one using an Arduino. As shown in GreatScott!’s latest write-up, you can indeed create your own Novation Launchpad-like device using a Nano for control, but the real question is should you?
In the video below, GreatScott! shares how made a 6×6 pad, using a 3D-printed body and buttons arranged in a matrix to save I/O, along with WS2812B LEDs. He also goes over the MIDI protocol, which he was able to implement using loopMIDI and Hairless MIDI to serial bridge for Arduino interface.
While the DIY option may or may not be right for you, the concepts presented could be applied to a wide range of electronic musical interface projects.
In this episode of DIY or Buy I will be showing you how I created my own Launchpad. That means I will show you how I combined a design idea with 3D prints, WS2812 LEDs, tactile switches and an Arduino to create a proper MIDI instrument. While building I will also tell you a bit about a keyboard matrix and in the end determine what advantages the DIY Launchpad offers.
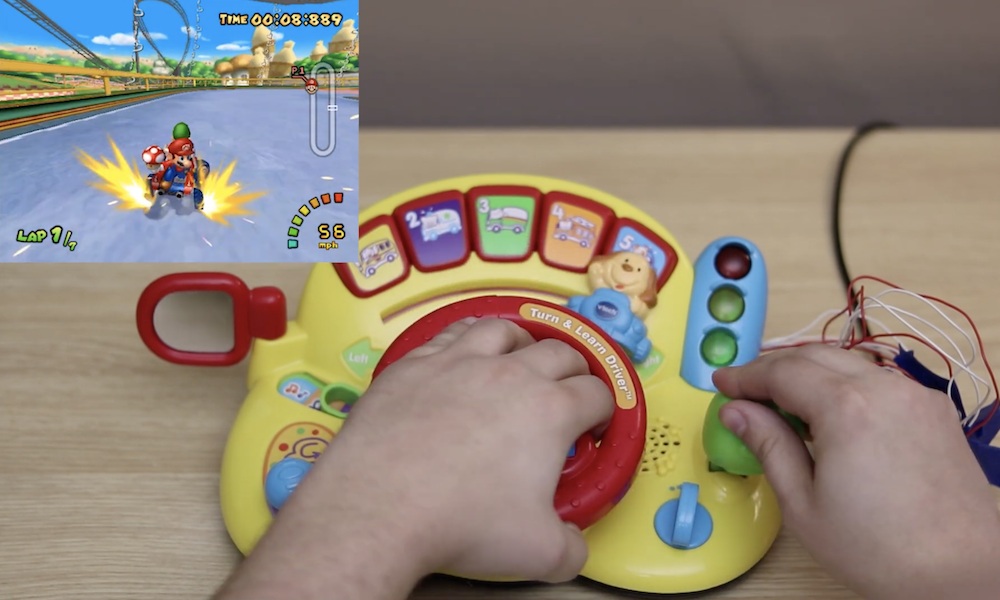
YouTuber “Insert Controller Here” has been creating gaming controllers out of a variety of objects, like bananas, mayonnaise, and meat. For his latest iteration, the YouTuber decided to convert a VTech Turn and Learn Driver into—what else?—a Mario Kart: Double Dash steering console.
As seen in the video below, the build consists of disassembling the toy, then soldering wires to the correct points to recreate steering wheel input, braking, and throttle. An Arduino Leonardo is used for the gaming interface, allowing Mario and Luigi to make it around the track by turning the wheel and applying brakes, while the accelerator is simply “shifted” into place.
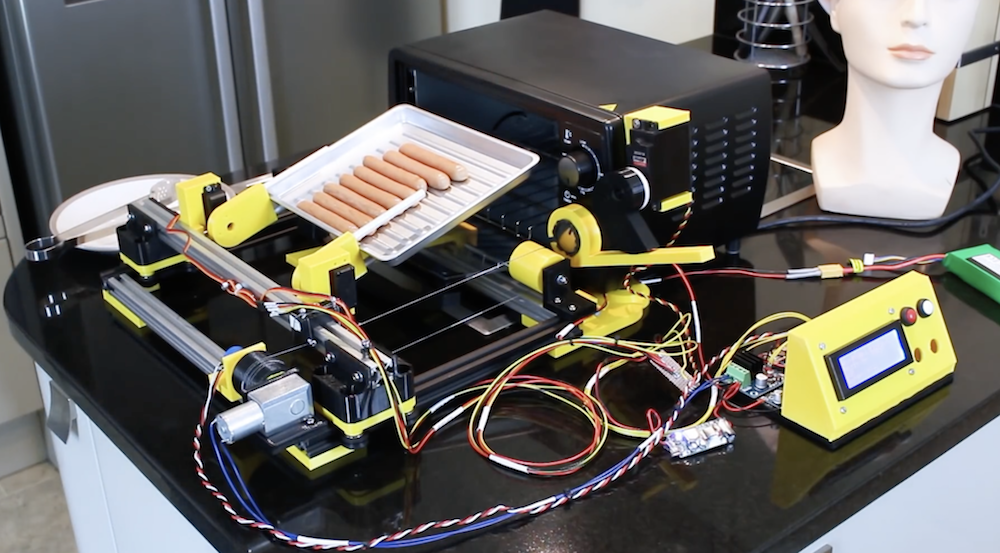
As seen in our earlier post, James Bruton has been working on a breakfast-making robot, and has now moved from boiling eggs to making toast… or apparently hot dogs/sausages as shown in the video’s demo.
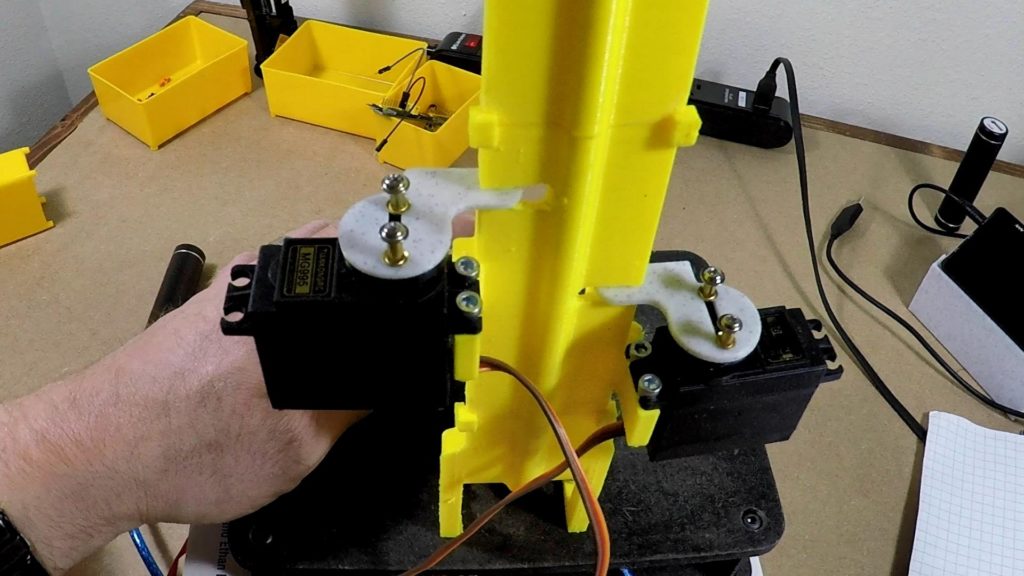
What he’s come up with uses a one degree-of-freedom gantry assembly to move servo-powered forks into position. These can then manipulate a cooking tray as needed to heat food up, flipping it out into a hand-held container when done. Two other servos take care of turning the device on and opening the door.
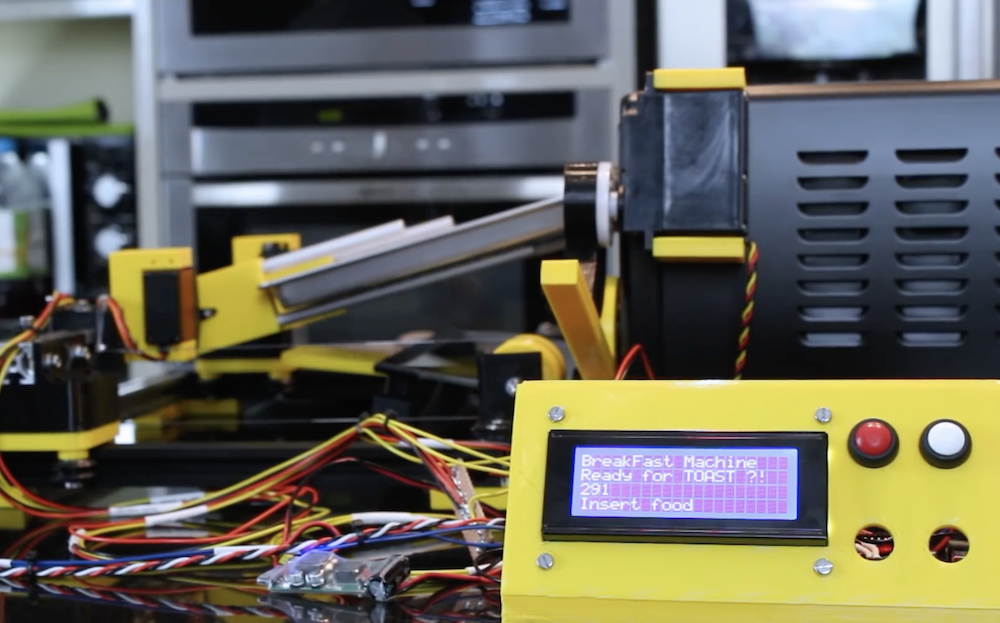
The control setup looks extremely similar to the previous build, with control via buttons, an Arduino Mega, and a small LCD display. Bruton notes that the Mega is used here because of its multiple serial ports, which will be useful to link everything together in the future.
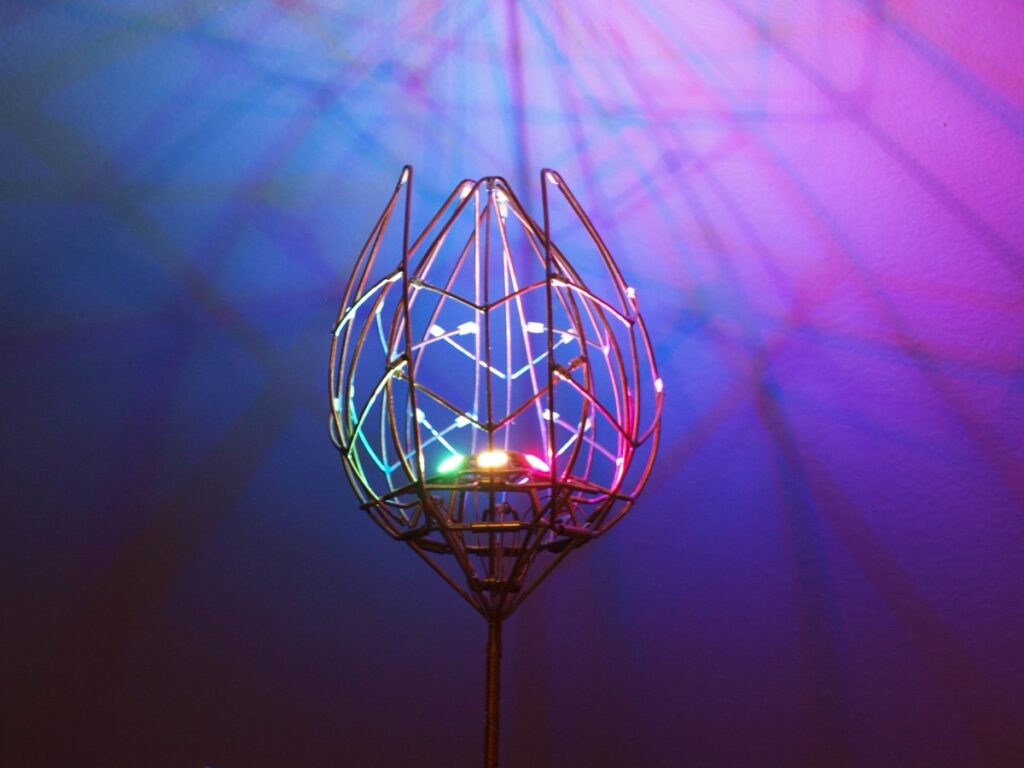
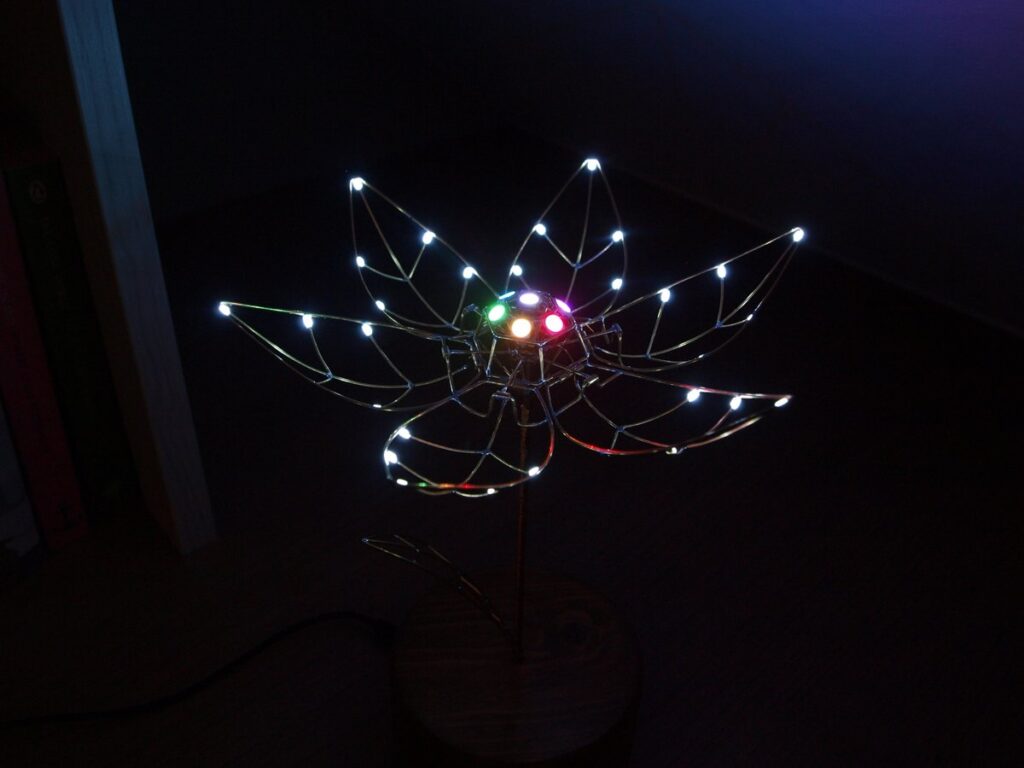
Tulips come in all shapes and sizes, but Jirí Praus has created a mechanical version like nothing you’ve ever seen. It’s masterfully crafted as a gift for his wife, using bent wire to form its six petals and stem.
In order to make this present truly amazing, however, a servo-driven linkage system opens up the tulip when touched, exposing seven programmable LEDs in the center, along with 30 bright white SMD LEDs on the petals themselves.
Control for the freeform flower is accomplished via an Arduino Nano, hidden inside its wooden base. It’s a truly spectacular build, shown below illuminating the surrounding area with a brilliant light and shadow pattern.
As recently announced, Arduino Day 2019 will be celebrated on March 16th. If you plan on organizing your your own event, don’t forget to submit your proposal by March 3rd!
We have already received a hundred submissions from all across the globe and will continue to update our map regularly with new events — we are hoping to make it even bigger and better than last year!
As we prepare for the festivities, we have an important announcement for our community: the Arduino team will be holding this year’s official event at Milano Luiss Hub for Makers and Students in Milan, Italy.
The Official Arduino Day program will include an exhibition area with Arduino projects, a talk area, and an activity space for kids. The event is organized in collaboration with Manifattura Milano, a local initiative dedicated to craftsmanship, urban manufacturing and Industry 4.0 promoted by Milan Municipality – Labour Policies department.
We are currently seeking makers, speakers and activities for the Official Arduino Day in Milan. If you are able to physically attend and/or want to showcase your creations and their impact on your community, please fill out this form by March 3rd. Additionally, we are looking for volunteers to help out during the event, welcoming guests and assisting visitors. If you are interested in this opportunity, please feel free to complete this application. The call for local makers and volunteers will be powered by WeMake.
On Arduino Day, we will also support LoRa and the City, a hackathon organized by Codemotion and A2A, that will take place in Milan at Casa dell’Energia from March 16th to 17th. If you want to join the hackathon as an individual or a group, apply here — the winners of the two challenges (urban mobility and monitoring and energy and sustainability) will receive a €3,000 Amazon coupon.
Stay tuned over the next few weeks as we will be providing updates on the Official Arduino Day agenda. In the meantime, don’t forget to apply on the Arduino Day website and share your celebration on social media using the hashtag #ArduinoD19.
Come annunciato di recente, il 16 marzo celebreremo Arduino Day 2019; se volete festeggiare con noi e organizzare un evento community, avete tempo fino al 3 marzo per mandare la vostra proposta attraverso questo form!
Abbiamo già ricevuto un centinaio di candidature da tutto il mondo e continueremo ad aggiornare regolarmente la nostra mappa con nuovi eventi: speriamo di renderlo ancora più grande rispetto agli scorsi anni!
Mentre ci prepariamo per la festa, abbiamo un annuncio importante per la nostra community: Official Arduino Day, ovvero quello organizzato dal team Arduino, per il 2019 si terrà al Milano Luiss Hub for Makers and Students a Milano!
Il programma prevede un’area espositiva con progetti Arduino, un’area talk e uno spazio per con attività gratuite per i più piccoli. L’evento è organizzato in collaborazione con Manifattura Milano, l’iniziativa dedicata all’artigianato, alla produzione urbana e all’Industria 4.0 promossa dal Comune di Milano – Assessorato Politiche del Lavoro.
Call for maker and volunteers! Stiamo cercando maker e speaker per l’Official Arduino Day a Milano. Se puoi partecipare fisicamente all’evento e vuoi mostrare il tuo progetto o raccontare l’impatto che ha avuto sulla tua comunità, completa questo form entro il 3 marzo. Stiamo anche cercando volontari e volontarie che diano una mano durante l’evento, dando il benvenuto ai nostri ospiti, oppure aiutandoci con le attività. Se ti interessa questa opportunità, compila questo form. La call for maker and volunteers di Milano e dintorni è supportata da WeMake.
Durante Arduino Day, daremo supporto ad un’altra iniziativa a Milano, LoRa and the City, un hackathon che avrà luogo presso la Casa dell’Energia tra il 16 e il 17 Marzo. Se vuoi partecipare come singolo o con il tuo gruppo, clicca qui – in palio per le due sfide dell’hackathon (Urban Mobility and monitoring and Energy and Sustainability) ci saranno due buoni da 3000 € per Amazon.
Continua a seguirci, durante le prossime settimane condivideremo tutti i dettagli dell’agenda di Arduino Day. Nel frattempo, non dimenticarti di mandare la tua application attraverso il sito di Arduino Day e di condividere i festeggiamenti sui social con l’hashtag #ArduinoD19.
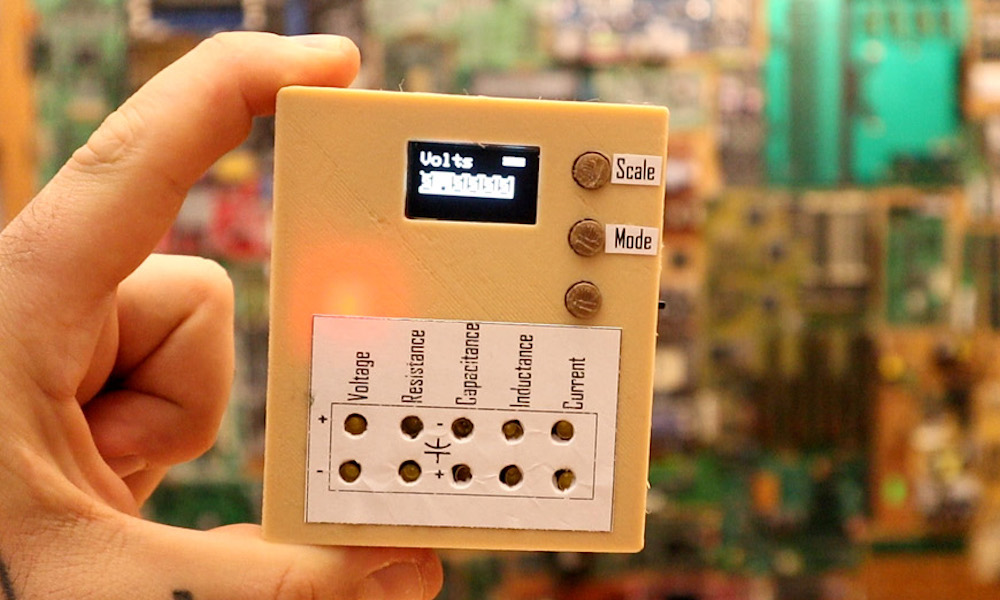
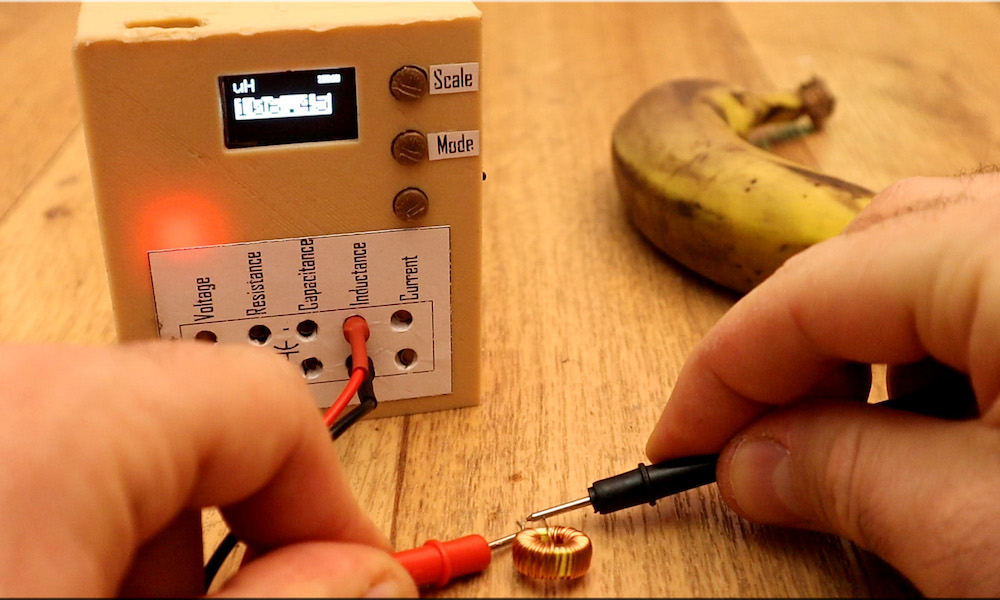
If you ever wondered about building your own multimeter, YouTuber Electronoobs shows us just how to do so with an Arduino Nano.
Aside from the Nano, he’s using a 128×64 OLED screen to display stats and battery level, and a 16-bit ADC for precise measurements. Power is provided by a small onboard LiPo battery, and he’s even included a charging module to help keep things topped off. Everything is housed inside a custom 3D-printed case.
The device doesn’t just measure voltage, resistance, and current, but is capable of reading capacitance and inductance as well—measurements that you wouldn’t necessarily expect on a commercial meter. If you’d like to create your own, the schematic and code are available on Electronoobs’ site.
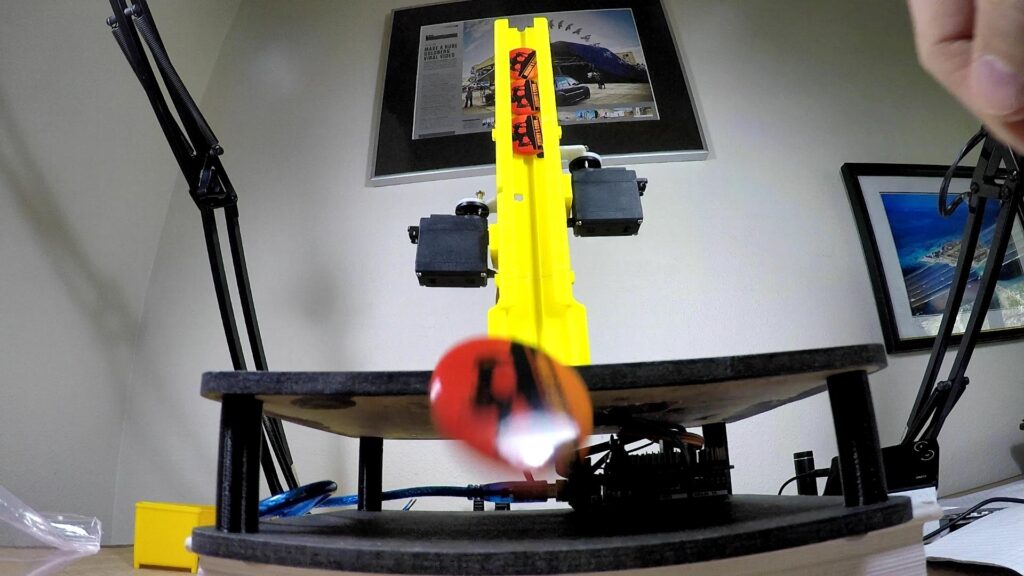
Giving away buttons at Maker Faires or trade shows is a great way to promote your brand, but what if you want to dispense these trinkets in style? That was the idea behind this automated button dispenser mechanism from Jeremy S. Cook, which drops buttons one at a time, and uses a capacitive sensor to detect when someone presses a marked “activation circle” on its base.
When triggered, the Arduino Uno commands two servo motors in sequence to release the lower button, while holding the other stacked buttons in place. The button-in-motion then proceeds down a 3D-printed slide, shooting out into the receiver’s hands—or floor depending on one’s reflexes!
Be sure to check out the build process in the video below, and you can find code/print files on GitHub if you’d like to make your own!
Fluoride can be healthy in certain concentrations, but above a certain level it instead has the opposite effect, causing serious dental and bone diseases. While the cost and benefit of any substance use has to be carefully weighted, up until now, verification that water source isn’t contaminated—above just 2 ppm—has been the purview of well-equipped laboratories.
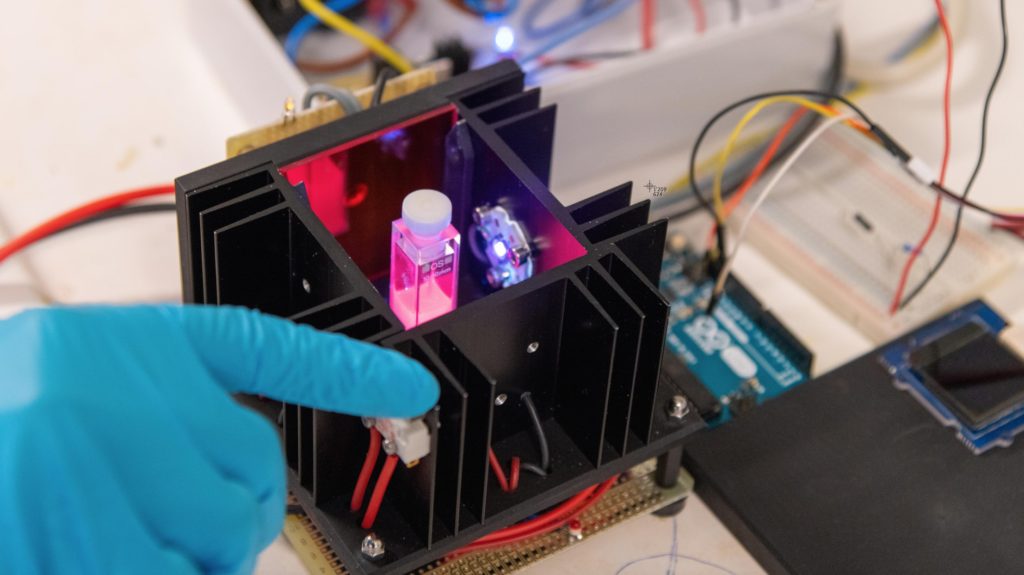
The prototype device used with SION-105 to detect fluoride anions in drinking water (Photo: Marie-Thé and Etienne Roux)
Researchers at EPFL in Lausanne, Switzerland, however, have come up with a technique that can accurately determine fluoride concentrations using only a few drops of water. The key to this development is a new compound known as SION-105, which is normally luminescent, but darkens when it encounters fluoride. This means that instead of more expensive laboratory equipment, UV LEDs can be used with a photodiode to quantitatively measure the substance’s appearance, and thus the quantity of fluoride in drinking water.
A photograph of SION-105 suspended in solvents with (L) and without (R) fluoride ion contamination. (Photo: Mish Ebrahim)
From the images in EPFL’s write-up, the prototype test apparatus appears to utilize several commonly available components, including an Arduino Uno and small OLED display for user feedback.
Published in the Journal of the American Chemical Society (JACS), the device is named SION-105, is portable, considerably cheaper than current methods, and can be used on-site by virtually anyone.
The key to the device is the design of a novel material that the scientists synthesized (and after which the device is named). The material belongs to the family of “metal-organic frameworks” (MOFs), compounds made up of a metal ion (or a cluster of metal ions) connected to organic ligands, thus forming one-, two-, or three-dimensional structures. Because of their structural versatility, MOFs can be used in an ever-growing list of applications, e.g. separating petrochemicals, detoxing water, and getting hydrogen or even gold out of it.
SION-105 is luminescent by default, but darkens when it encounters fluoride ions. “Add a few droplets of water and by monitoring the color change of the MOF one can say whether it is safe to drink the water or not,” explains Mish Ebrahim, the paper’s first author. “This can now be done on-site, without any chemical expertise.”