Posts with «featured» label

Intuitive Arduino clock has seven alarms and three LED displays
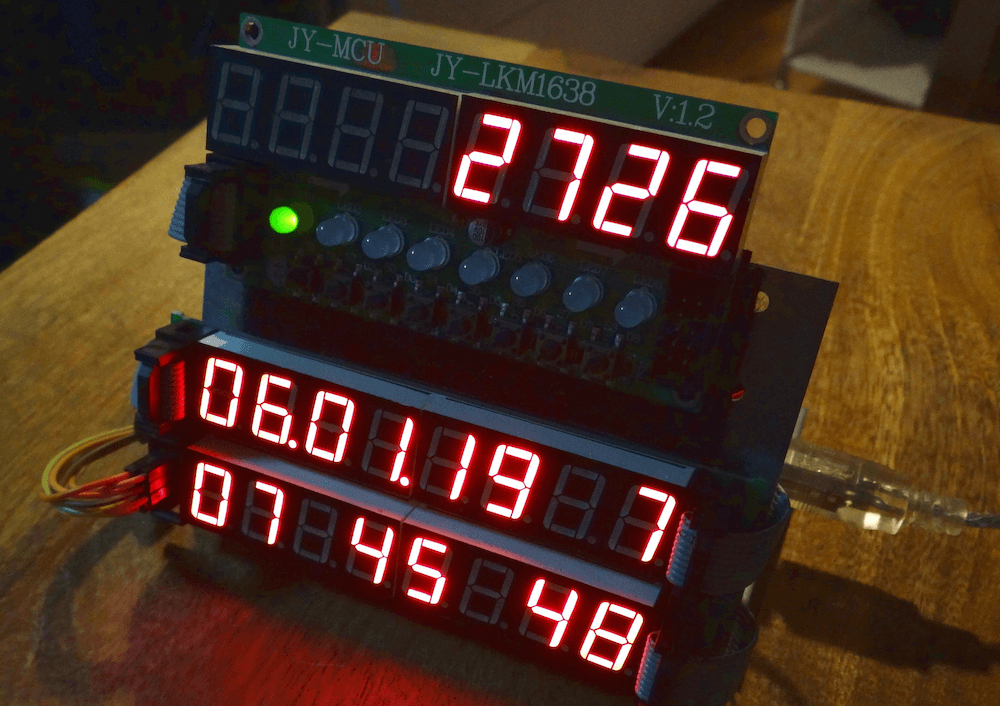
Alarm clocks of old—and certainly many of those today—require several button pushes to set things up properly. Maker Michael Wessel, however, decided to implement his own take on a more intuitive clock, creating a device that features three separate eight-digit seven-segment LED panels. Eight buttons allow for direct manipulation of each of the digits, with their own dedicated LEDs.

The info on display includes time and date, as well as temperature, and it can even show how many days, hours, or minutes have passed since a special pre-programmed day. Up to seven audible alarms are available, which can be silenced by a loud noise (e.g. clapping your hands) via a sound sensor. 
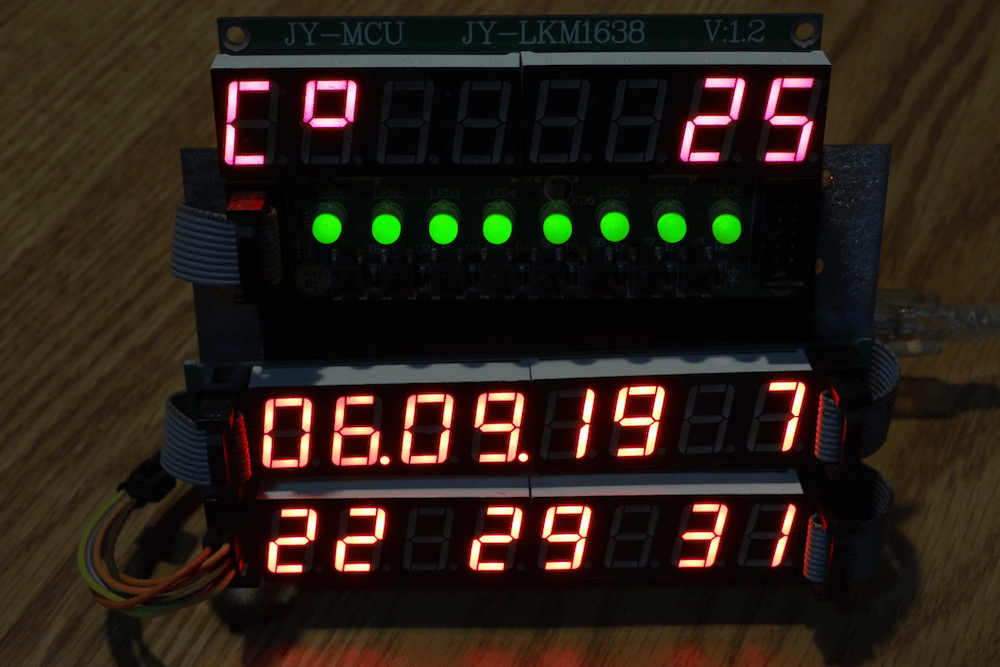
The clock is controlled via an Arduino Mega, along with an RTC module to keep things accurate.

I remember I always had to set all digital clocks for my grandparents in the ’80s — these clocks and watches always required some complicated button juggling! So, here it is: a DIY LED alarm clock that my grandparents would have been able to set and use without my help! 

An Arduino-based LED clock with 7 individual alarms, highly intuitive user interface, temperature display, and display of days / hours / minutes passed since a special date, e.g., your birthday. An active / ringing alarm can be disabled by making a loud noise, e.g., by clapping your hands. Timer-based PWM sound output for alarm melodies. 

The Arduino’s EEPROM is being used to store the alarms of course, and the DS3231 RTC is battery backed up, so it survives a temporary power outage and you won’t be late for work the next morning. 

This was put together rather quickly, thanks to off the shelf components, Velcro and existing Arduino libraries for them! The clock can be built for about $30 – 40. 
Portable Arduino Bot lets you test ideas on the go

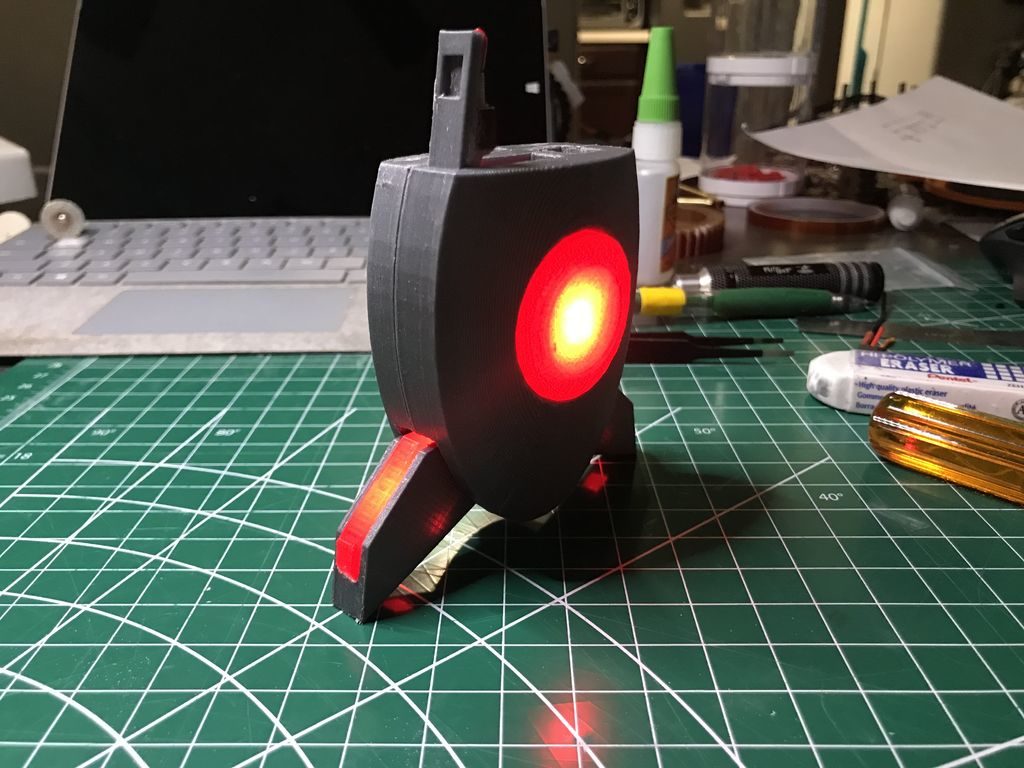
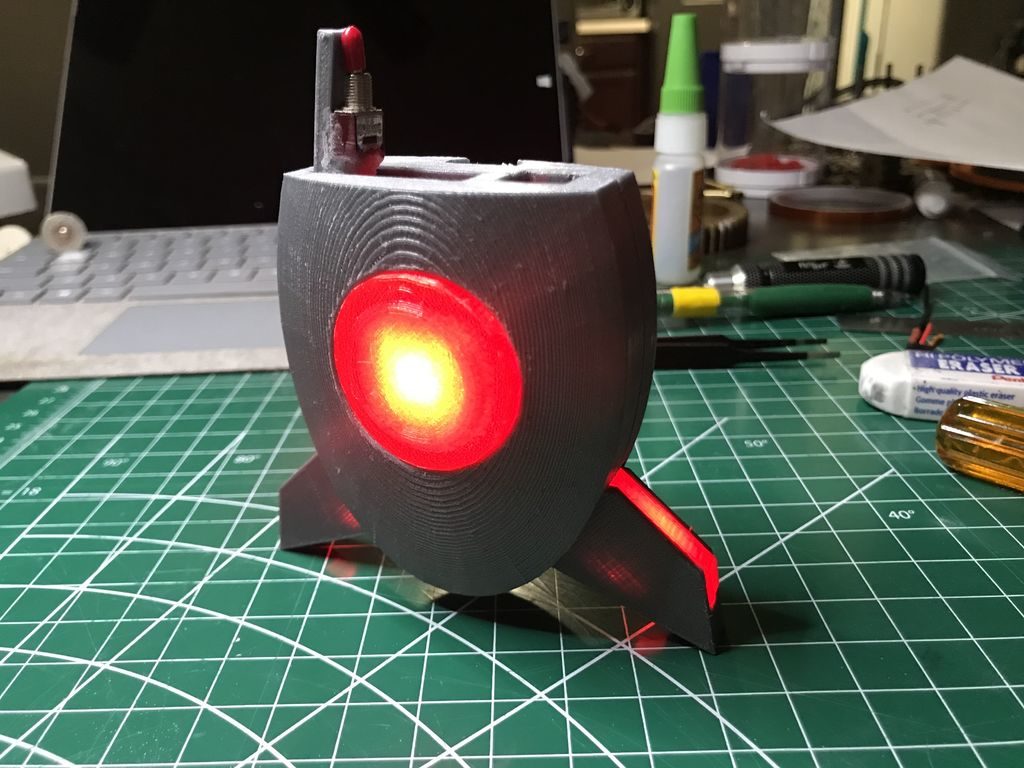
As you experiment with Arduino boards and programming, you’ll likely have ideas that you want to test right now. Unfortunately, you can’t always have the entire project with you to try out. With that in mind, Khang Nguyen has designed the Portable Arduino Bot.

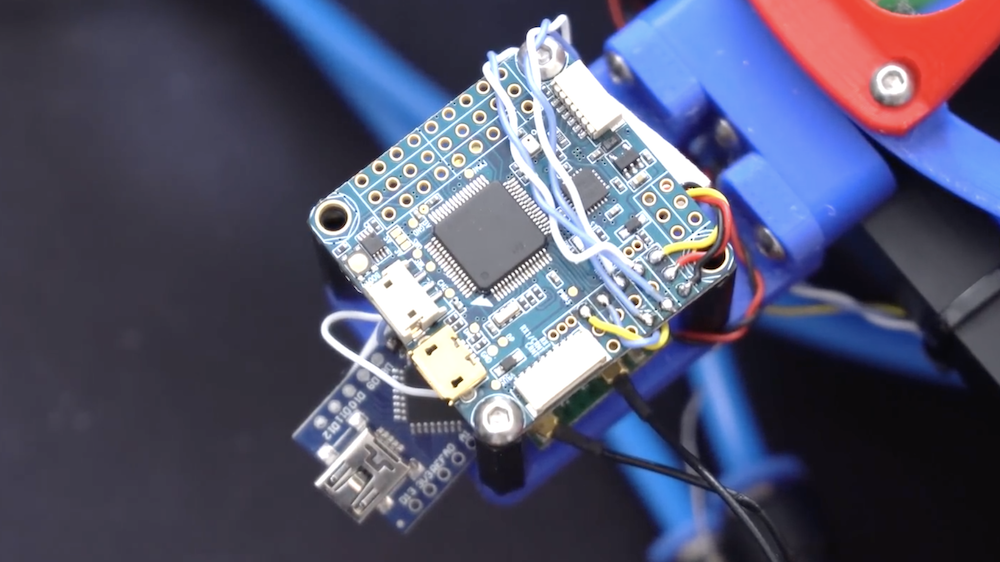
This sci-fi-inspired device packs an Arduino Nano inside, along with an on/off switch, a microswitch, three LEDs, and a LiPo battery for power. To protect these components, the bot features a nice 3D-printed enclosure, complete with foldable feet that make it look like a small robot or even spaceship. 

While it won’t replace all the tools you have at home, it appears to be a great way to carry out testing, and as shown in the videos below, to play sounds with the addition of a buzzer!

Synchronized bike lighting inspired by nature

Having a light on your bike at night is important for safety, but what if those headlights could talk to others sharing the road with you? Well now it can, using the [Bike] Swarm by Alex Berke, Thomas Sanchez, and Kent Larson from the MIT Media Lab.

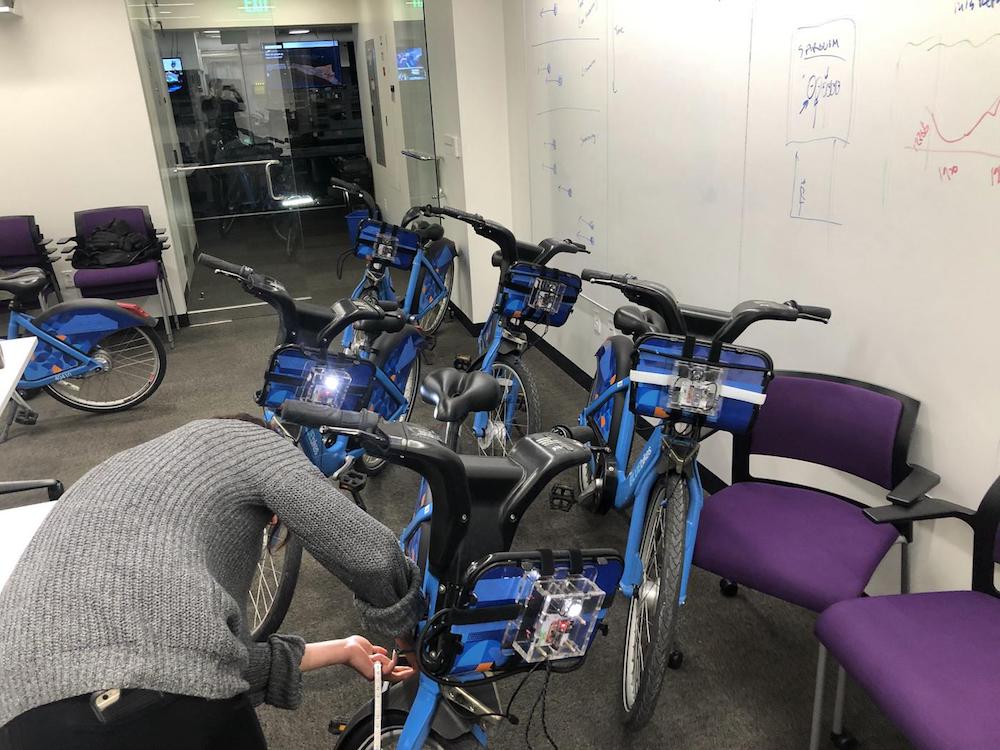
Their device—or collection of devices—controls a bicycle’s lighting via an Arduino and LED driver, and features an nRF24L01 wireless module to communicate with others in the vicinity. When another rider is encountered, the bikes sync their lights up automatically. 

The team has already designed and fabricated prototypes, then strapped them onto local city bike share program bikes for testing. 

It’s an interesting effect when two bikes pass, but as shown in the video below, things get much more fascinating when a handful of bikes can coordinate both their direction and light pattern.

As bikes navigate city streets after dark, they are often equipped with lights. The lights make the bikes visible to cars or other bikers, and the hazards of traffic less dangerous.

Imagine that as solitary bikes come together, their lights begin to pulsate at the same cadence. The bikers may not know each other, or may only be passing each other briefly, but for the moments they are together, their lights synchronize. The effect is a visually united presence, as groups of bikes illuminate themselves with a gently pulsing, collective light source.

A surfing “desk toy” that you can actually ride

If you’ve ever played with desk toys portraying a beach with liquids that splash around, this project by Lena Strobel, Gabriel Rihaczek and Guillaume Caussarieu takes things up several levels as a surf simulator that you can actually ride.

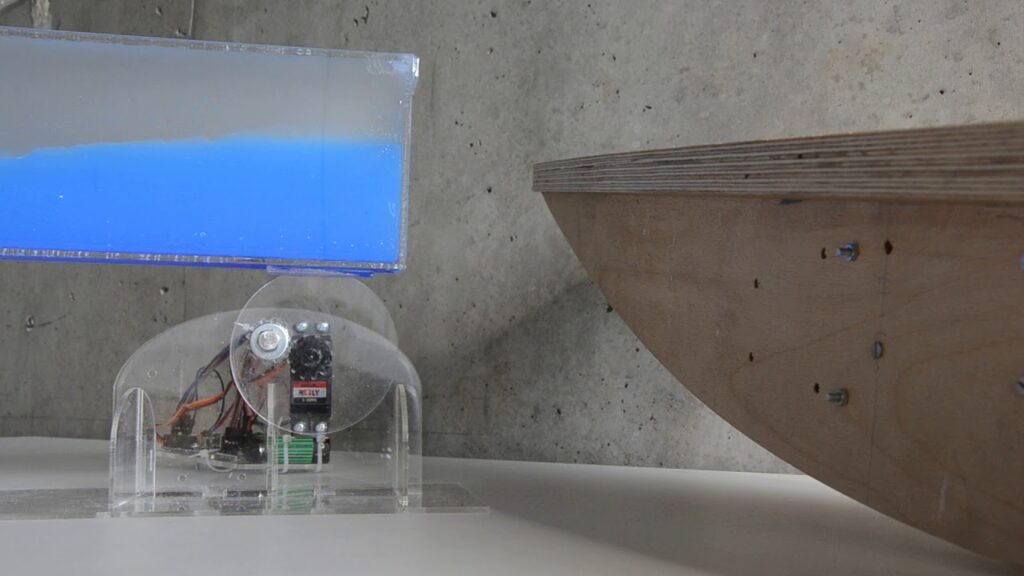
The device features two parts — an oil/water wave diorama which sloshes around using a servo actuator and a wooden “surfboard” large enough for a person to stand on.

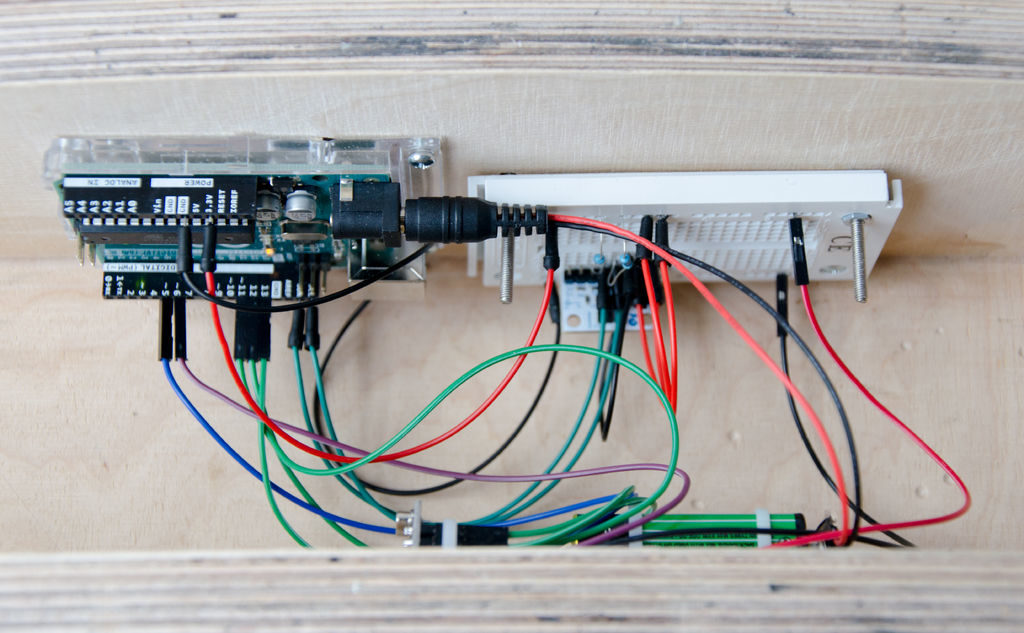
The board is curved on the bottom enabling for someone to tilt it back and forth with their body movement, while a three-axis accelerometer handles angle measurement. This data is then passed from an onboard Arduino Uno to a second Uno that drives the diorama’s servo via nRF24L01 radio transceivers. 

The result is an actual body-controlled wave motion, and a distraction that looks like a lot more fun than simply pushing a tank around with your finger!

Do you feel a sudden urge of going surfing, but there is no large body of water nearby? Are you scared of deep and turbulent waters? Or are you just to lazy to go outside? Then the Ultra Realistic Surfing Simulator is the perfect solution for you! It allows for a close to reality surfing experience from any place imaginable. As a two part system, motion is sensed by a board and translated into wave motions of an ocean diorama.

Arduino Blog 18 Jun 18:21

This self-balancing mech is piloted by an insect

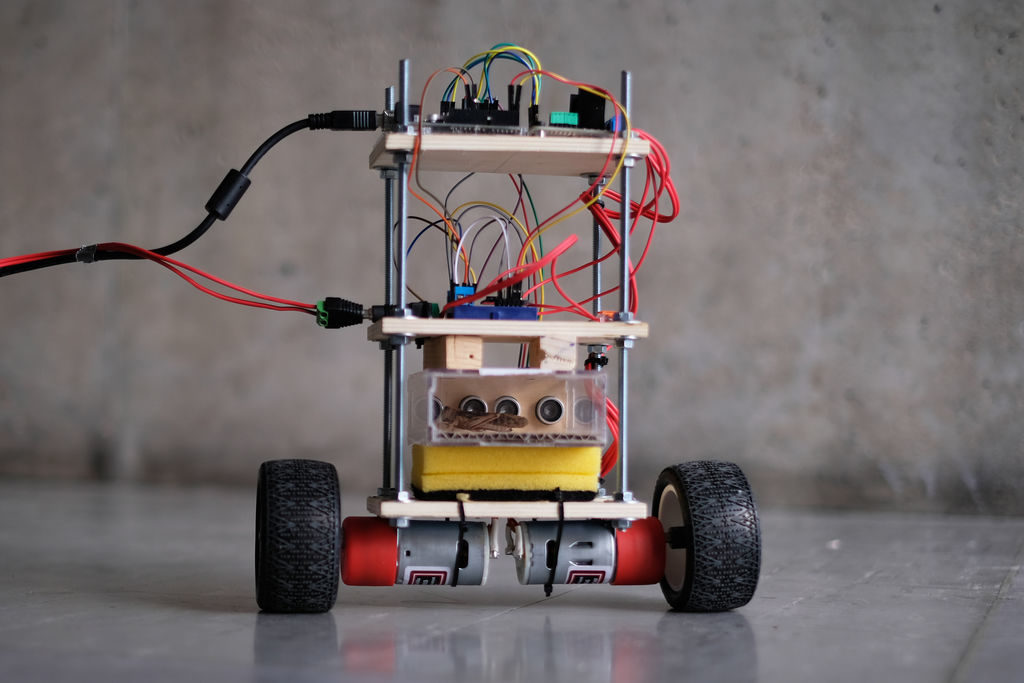
You’ve seen self-balancing robots, where a pair of wheels suspend a mass above them in what’s known as an inverted pendulum configuration. As neat as they are, the “Augmented Arthropod” by Grzegorz Lochnicki and Nicolas Kubail Kalousdian puts a new spin on things. 

The structure for the build consists of three platforms separated on threaded rod and a couple of rather standard DC gear motors. Electronics include an Arduino Uno, a BNO055 IMU, and an L298N motor driver. 

Where things get a bit interesting, though, is that the mech is piloted by the movements of an insect placed inside a plastic case using two HC-SR04 ultrasonic sensors. 

Perhaps the most valuable part of the project write-up is the discussion about how it balances via PID, or proportional, integral, and derivative control. 

Building gas thruster-controlled drone

In the Earth’s atmosphere, a drone can adjust its heading by varying the speed of the propellers, and thus the thrust output of each. If you wanted to land something on a lunar surface, or maneuver a spaceship, the lack of atmosphere means a different technique must be used.

While not going to space (yet), Tom Stanton decided to create a demonstrator for this technique, similar to how the manned Lunar Landing Research Vehicle (LLRV) operated in the 1960s and ’70s. Stanton’s device employs a central electric ducted fan (EDF) to hold the craft up, while three compressed air nozzles provide most of its directional control. 

In action, an RC flight controller’s signals are modified by an Arduino Nano to accommodate this unique control scheme, pulsing out bursts of air via three solenoid valves.

Check out the build and experimental process in the video below, culminating with untethered tests starting at around 17:30.

Wake up to this unique VFD alarm clock!

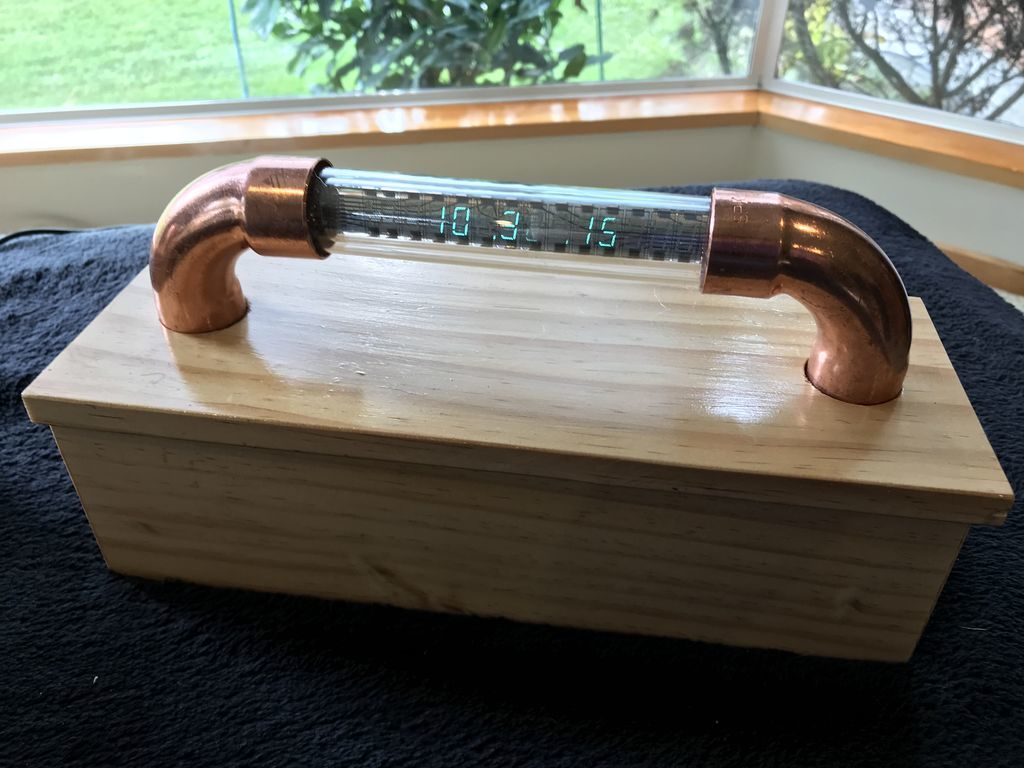
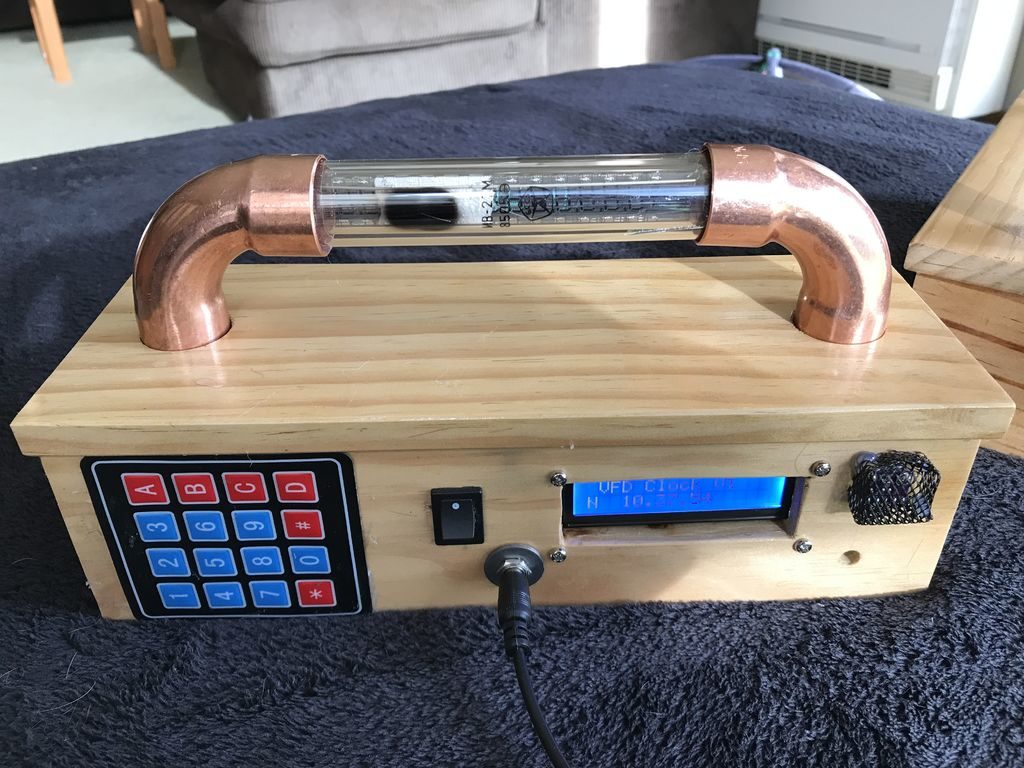
If you’re a fan of novel timepieces, then you’ll want to check out Christine Thompson’s VFD Alarm Clock.

The device features a USSR-manufactured IV-27V 7-segment tube, capable of displaying 13 numbers or letters via a 24V supply, though the MAX6921 chip used here means that only 10 grids are used.

10 characters, however, are plenty to show time, date, humidity, temperature, and pressure, plus the text “WAKE UP!” when an audible alarm sounds.

The clock runs on an Arduino Mega, along with an RTC module, a keypad, and secondary LCD screen on the back to assist with setting it up.

3D printer converted into a cheap bioprinting rig

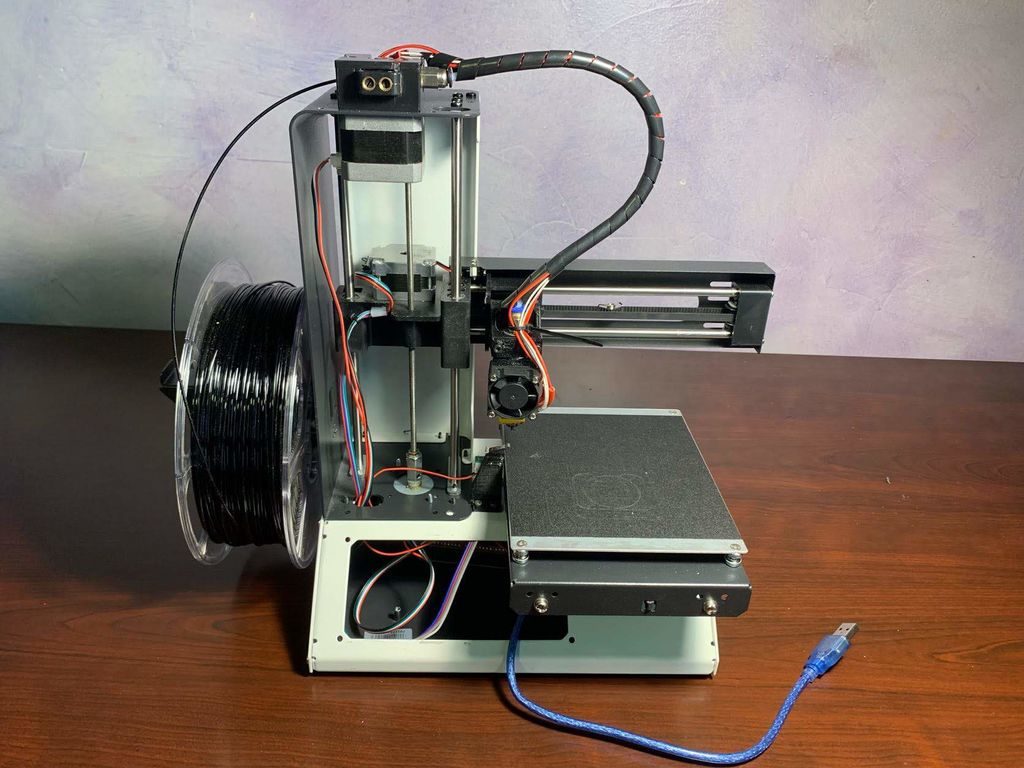
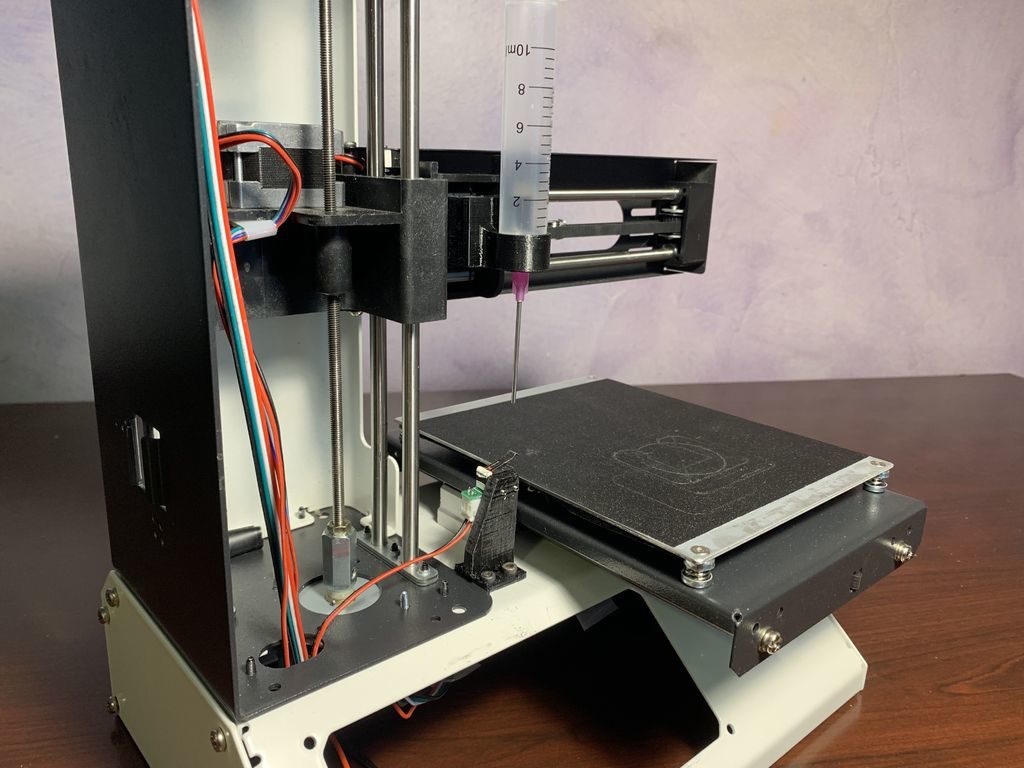
While most 3D printers deposit melted plastic in carefully controlled positions to build up a physical model, a similar process called “bioprinting” can be accomplished with biological materials. Commercial bioprinters can cost tens of thousands of dollars or more, but as shown here you can make your own using the shell an inexpensive desktop machine. 

In this example, a Monoprice MP Select Mini V2 is stripped down to its bones and motors, subbing in an Arduino Mega and RAMPS 1.4 stepper driver board.

A syringe-like extruder is added to push out custom bioink, and the Z-axis switch mounting and Marlin firmware is modified to accommodate the new device. The homing sequence is modeled in the video below, giving a short snippet of how it works.

Flowboard provides visual learning environment for coding

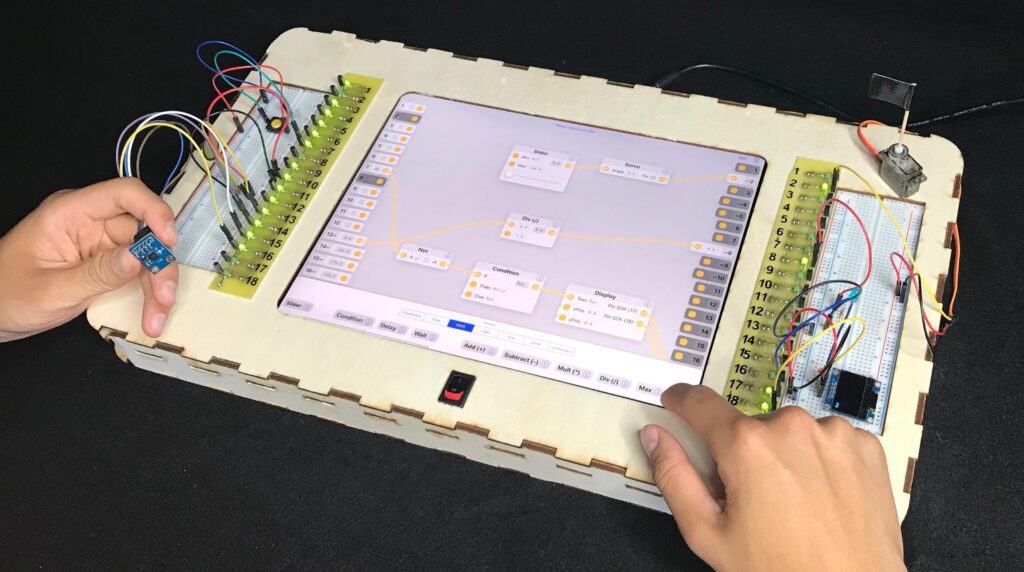
Embedded programming using the Arduino IDE has become an important part of STEM education, and while more accessible than ever before, getting started still requires some coding and basic electronics skills. To explore a different paradigm for starting out on this journey, researchers have developed Flowboard to facilitate visual flow-based programming.

This device consists of an iPad Pro and a set of breadboards on either side. Users can arrange electrical components on these breadboards, changing the flow-based program on the screen as needed to perform the desired actions. Custom ‘switchboard’ hardware, along with an Arduino Uno running a modified version of Firmata, communicate with the iPad editor via Bluetooth.

With maker-friendly environments like the Arduino IDE, embedded programming has become an important part of STEM education. But learning embedded programming is still hard, requiring both coding and basic electronics skills. To understand if a different programming paradigm can help, we developed Flowboard, which uses Flow-Based Programming (FBP) rather than the usual imperative programming paradigm. Instead of command sequences, learners assemble processing nodes into a graph through which signals and data flow. Flowboard consists of a visual flow-based editor on an iPad, a hardware frame integrating the iPad, an Arduino board and two breadboards next to the iPad, letting learners connect their visual graphs seamlessly to the input and output electronics. Graph edits take effect immediately, making Flowboard a live coding environment.

Want to learn more? Check out the team’s research paper here. 

Hoverboard motors turned into an RC skater

While the hoverboard craze has faded somewhat, the good news is that this means their powerful wheel motors can easily be found on online auction sites. Lukas Kaul took advantage of this component’s availability and created his own “HoverBot,” which as shown in Felix von Drigalski’s video below, acts as something in between a radio-controlled skateboarder and a rather large self-balancing bot.

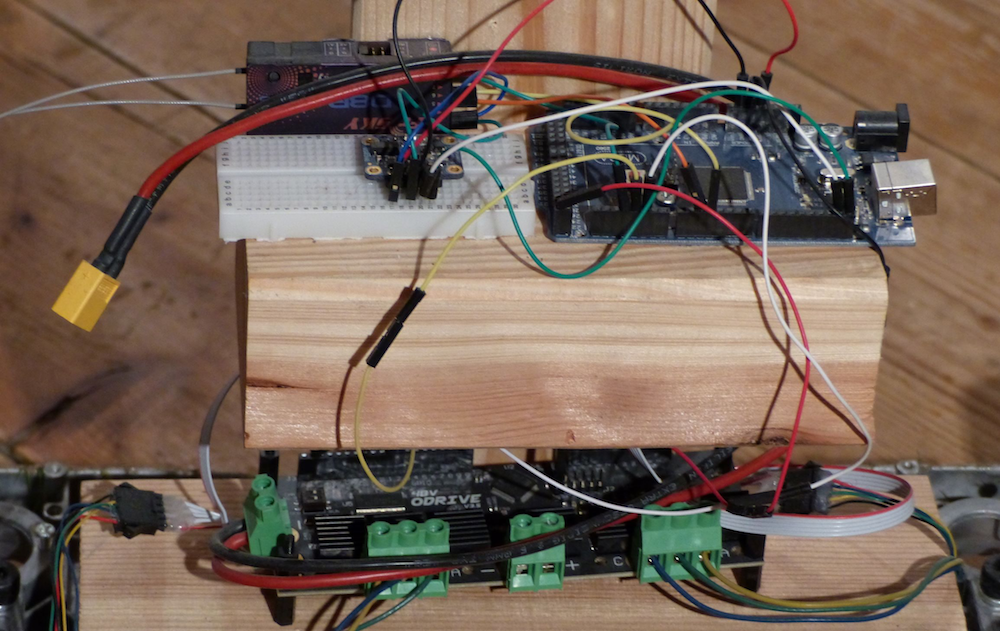
The device is built around an Arduino Mega, which takes input from an RC receiver, along with a Bosch BNO055 IMU, and passes appropriate signals to the motors through an ODrive controller. 

The HoverBot is a bit unsteady at high speeds, requiring close operator supervision. However, it looks like a lot of fun, especially when attempting tricks—sometimes successfully—at a skate park.