Posts with «featured» label

Become a certified member of the Arduino community

As recently announced, the Arduino Certification Program : Arduino Fundamentals is a structured way for you to enhance and validate your Arduino skills. Although the exam has been available in the U.S. since May, we’re excited it to roll out to the EU and rest of the world (except Brazil).

Arduino Fundamentals provides you with the opportunity to gain official recognition for your knowledge in Arduino-related electronics, programming, and physical computing. If you pass the test, you will be rewarded with an Arduino Fundamentals certificate in your name containing a unique QR code to ensure authenticity. 
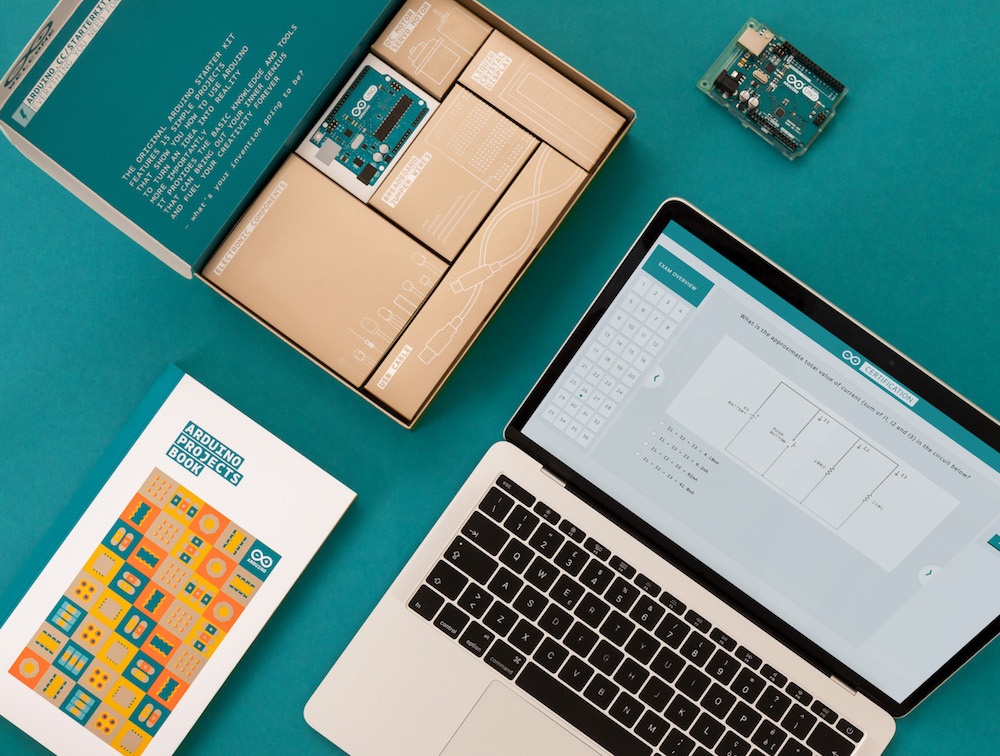
If you think you can answer 36 questions in 75 minutes, then you can become a fully certified member of the Arduino community and enhance your resume for just $30.

A free online demo is also available to help give you an idea of the types of queries you will be challenged with. Feeling confident in your Arduino abilities? Then what are you waiting for? Go ahead and give it a try!
Announcing the new Arduino Create Maker plan!

Arduino Create, the integrated online platform that enables makers and professional developers to write code, access content, configure boards and share projects, now offers users the ability to upgrade their service by opting for the Create Maker plan to experience the Arduino IoT Cloud to the fullest.

Aside from no ad interruptions in their working space, for a monthly fee of $6.99 USD (plus applicable taxes), Create Maker plan subscribers will enjoy an array of extra features and benefits over the free Create plan.

Here’s a quick glimpse of what subscribers can look forward to:

  • 250 sketches allowed in your sketchbook
  • 200MB space to store sketches and libraries
  • Unlimited compilation time to verify code and upload it to your board
  • Five ‘things’ (connected objects) and 20 properties per each ‘thing’
  • Access to set up and remotely control five of each cloud-enabled Arduino board type 
  • Access to set up and remotely control three cloud-enabled Linux devices
  • Access to set up and remotely control one cloud-enabled generic third-party board
  • Custom library editing
  • Web Editor support for third-party boards (ESP8266)
  • Access to Arduino Create Chrome app

All of the above are in addition to the standard features that are available to all Arduino Create users, such as an always up-to-date online IDE and the option to tap into the power of the community on the Arduino Project Hub by browsing projects and making them their own. Users can sharetheir builds and receive feedback from others, while the in-depth guided flows make it easy to configure online services like the Web Editor and Cloud.

Ready to subscribe? If you’re fortunate enough to be one of the first 1,000 to do so, we’ll include a FREE MKR WiFi 1010 board with your monthly plan!

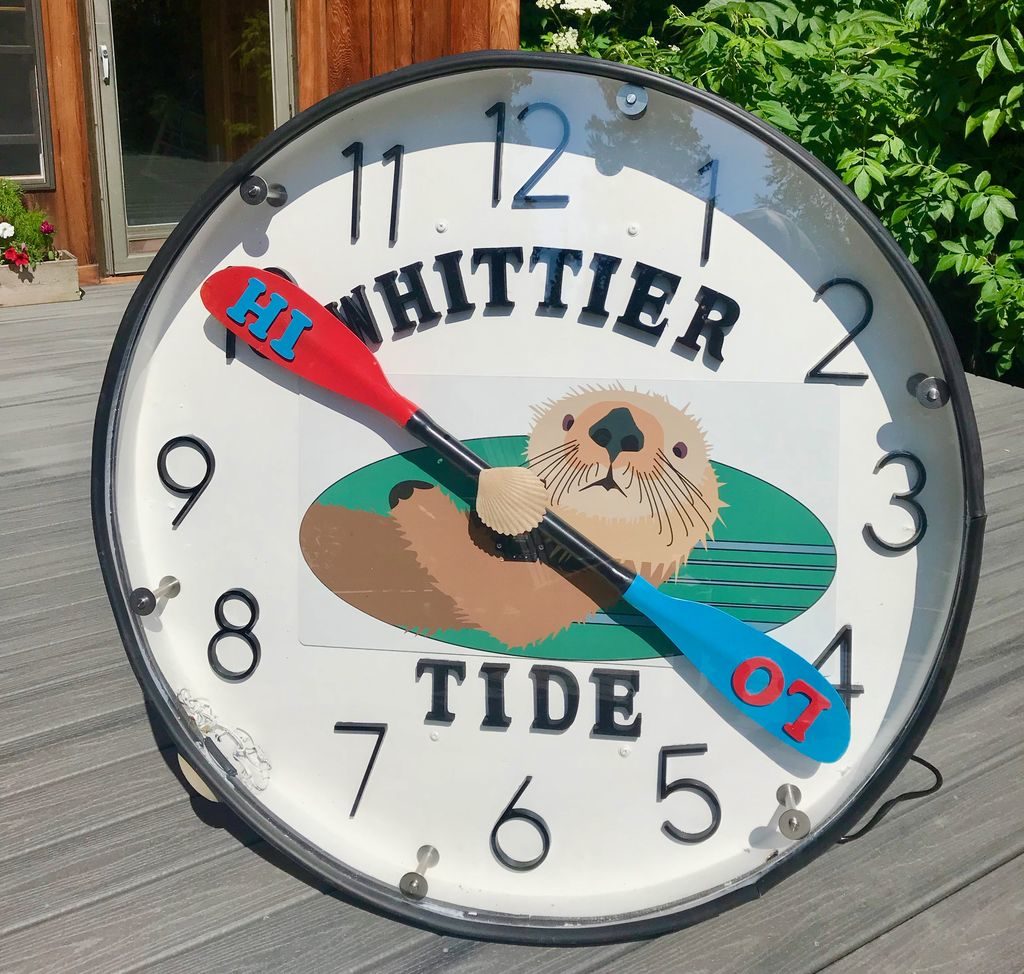
A giant tide clock like no otter!

As a gift for friends that operate tours of Prince William Sound in Alaska, maker ‘rabbitcreek’ decided to make a humongous (4’ diameter) tide clock, controlled by dual Arduino Nanos. 

One Nano operates the adorable—though very large—otter on the clock’s face via a servo and gear reduction setup that holds a kayak paddle to indicate high and low tides. The other board handles the unit’s RGB LED lighting, which shines the appropriate color to indicate the vast swings in daylight time of that region.

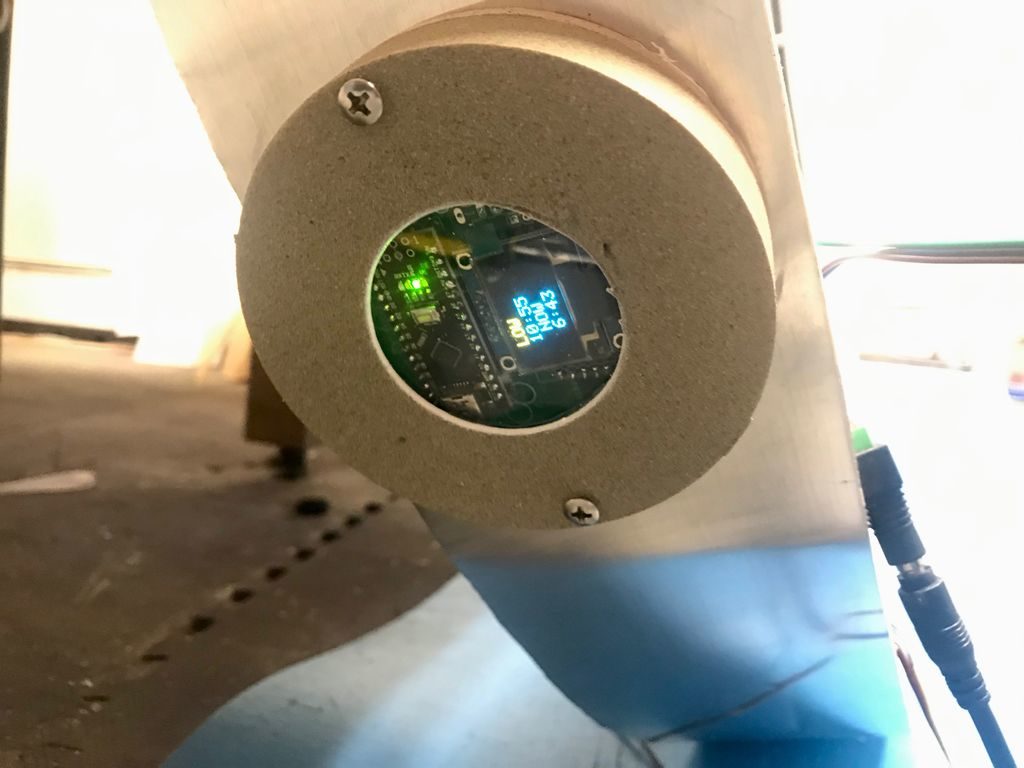
An RTC module for each Nano provides accurate timekeeping—thus proper tide and daylight indications—and a small monitor is used for maintenance tasks. It’s a brilliant build that is certain to delight residents and tourists to the area alike!

A 3D-printed, Arduino Due-based MIDI jammer keyboard

Michael Koopman wanted to learn piano. However, after finding this pursuit frustrating, he instead decided to assemble his own 3D-printed MIDI jammer keyboard, inspired by the AXiS-49 interface pad. 

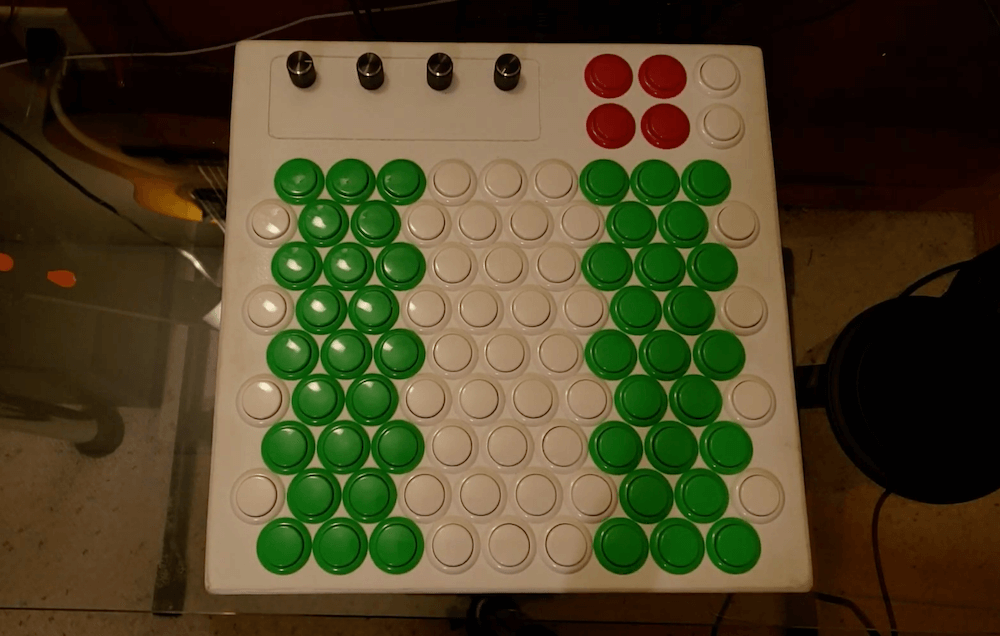
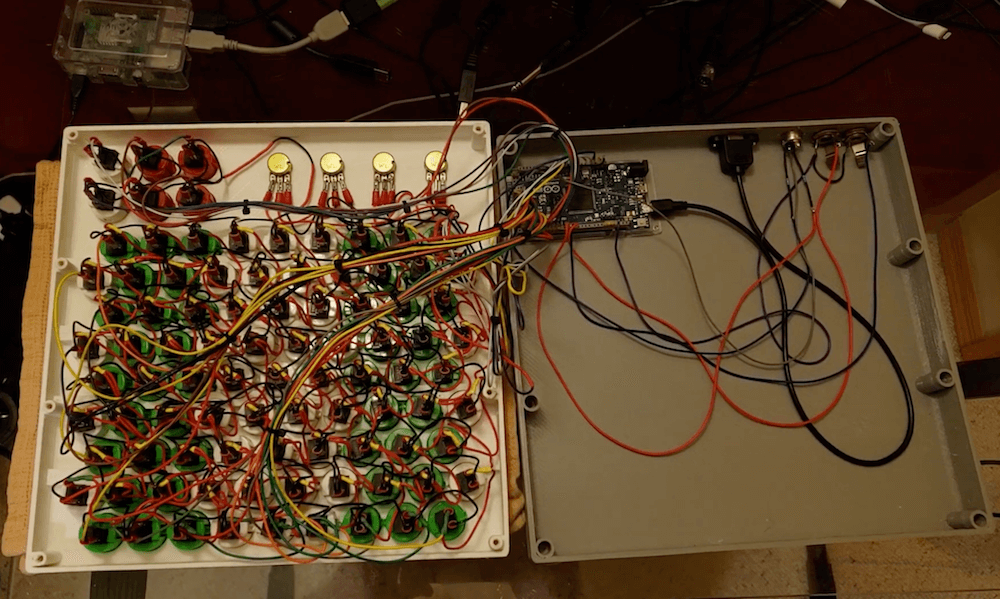
His instrument is controlled via an Arduino Due, with 85 buttons arranged in a diagonal pattern. This allows for whole steps on the horizontal axis, fourths on one diagonal, fifths on the other diagonal, and octaves on the vertical axis. 

This configuration enables the device to be used in a variety of ways, and features an additional six buttons and four potentiometers to vary playing style, along with ¼ inch jacks for auxiliary inputs. 

As seen in the video below, while Koopman had a hard time with the piano, apparently that wasn’t case with his MIDI keyboard, as he’s able to play it beautifully—even using two at a time around 8:15!

A fun Fibonacci clock for math fans

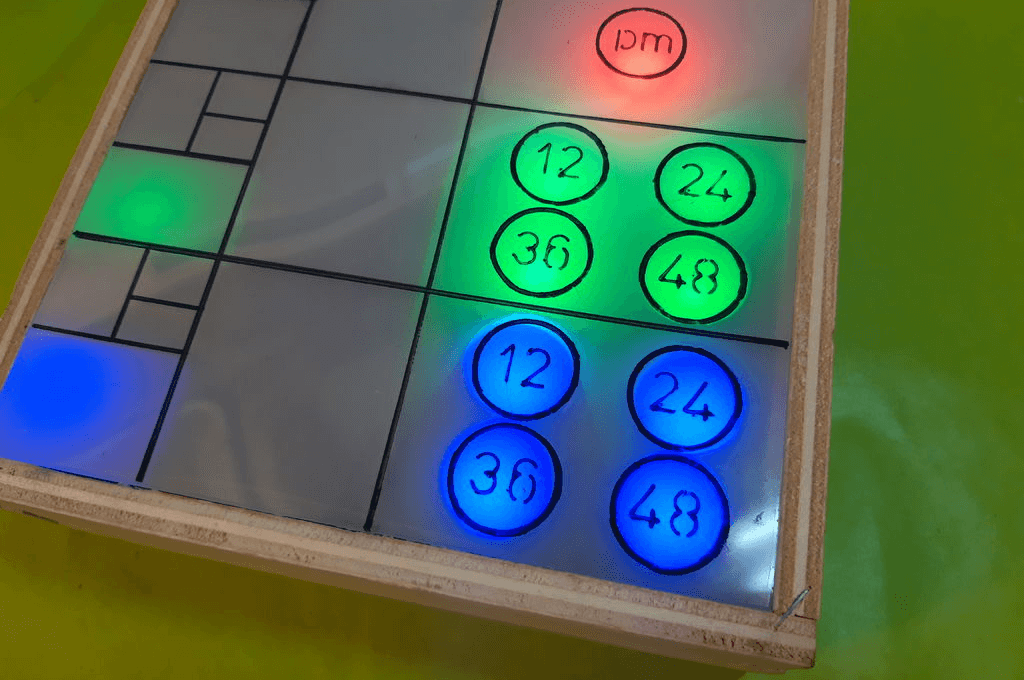
In the early 1200s, Fibonacci introduced a series of numbers that now bear his name, starting with 0, then 1, and continuing on as the sum of the two preceding numbers. This gives values of 0, 1, 1, 2, 3, 5, 8, and so on, and after being prompted by a friend, “TecnoProfesor” decided to turn this numerical pattern into a clock.

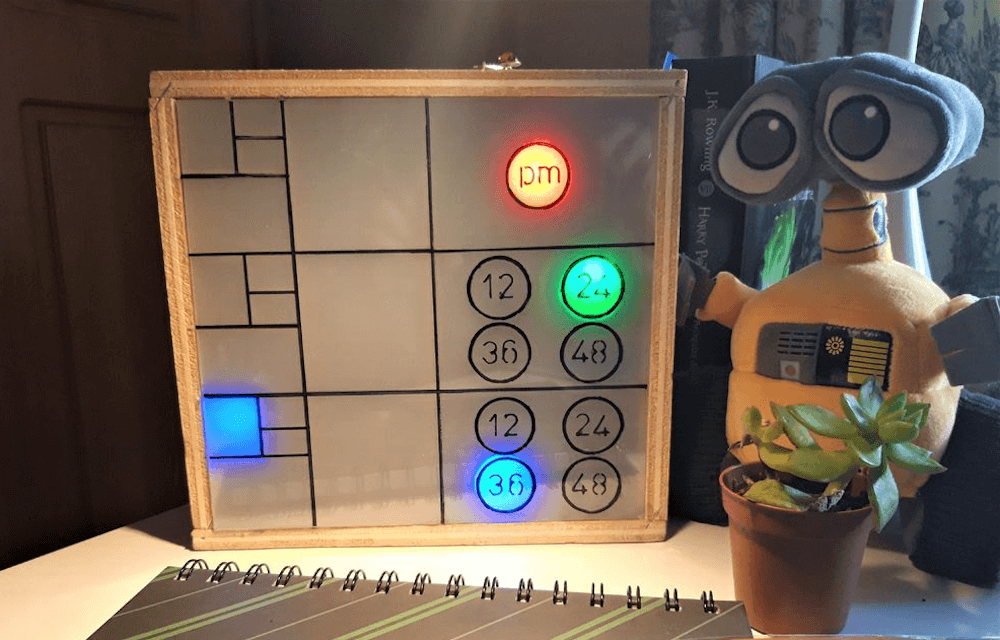
The concept here is that instead of using the conventional 1-12 to display the time, this device uses blocks corresponding to Fibonacci numbers 1-5, with circular icons adding increments of 12 for minute and second values. 

It’s an interesting concept, somewhat akin to the world of binary or even word clocks. The build consists of an Arduino Mega and a DS3231 RTC module for control, a wood and methacrylate housing, and a number of programmable RGB LEDs to indicate numbers.

A custom Mazda MX5/Miata TFT cockpit gauge cluster

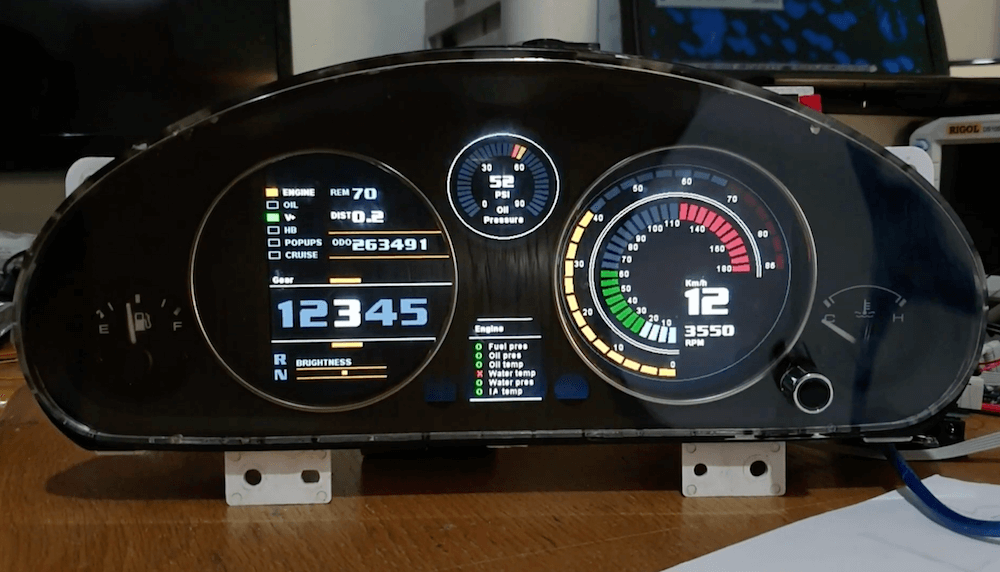
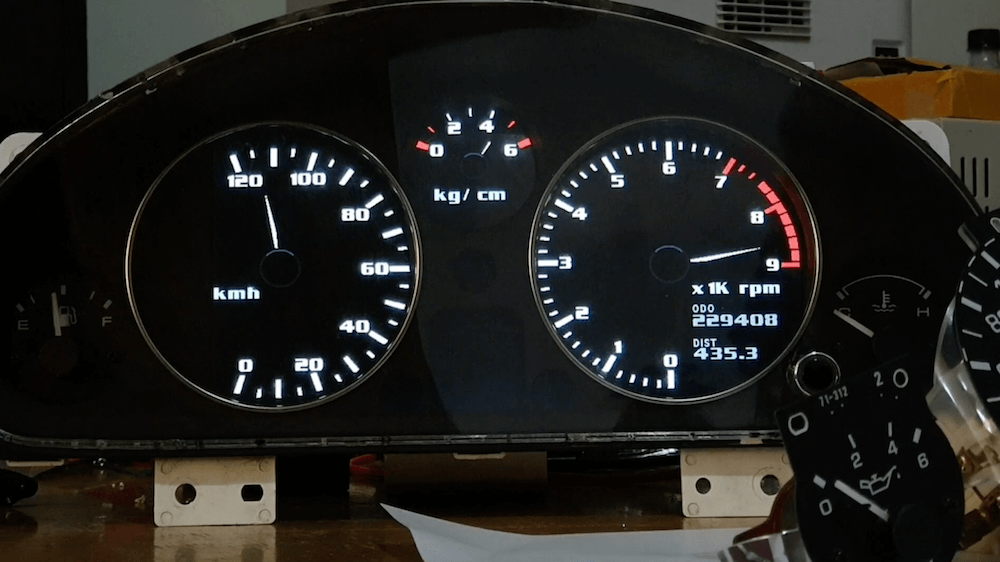
Nearly any car comes with the proper dashboard to get you from point A to point B, but what if you want something all your own displaying important stats? While there’s not a lot of technical info on the build, Jroobi’s MX5/Miata Arduino-based TFT cockpit project is sure to inspire, whether via the first or second iteration shown below.

The first version puts RPM and KPH values on coaxial sliders in the right circular display. That leaves the second round display for info such as what gear you’re in, along with auxiliary displays for extra data. The second splits up RPM and KPH between the main circles. It also features interesting light-up alerts in the middle, as well as a gauge similar to the first on the top. 

The first iteration—and presumably the second—includes a clever user interface setup, where a rotary encoder surrounds the existing trip reset button for brightness control while still preserving its reset ability.

This color wheel instrument lets you ‘hear’ the rainbow

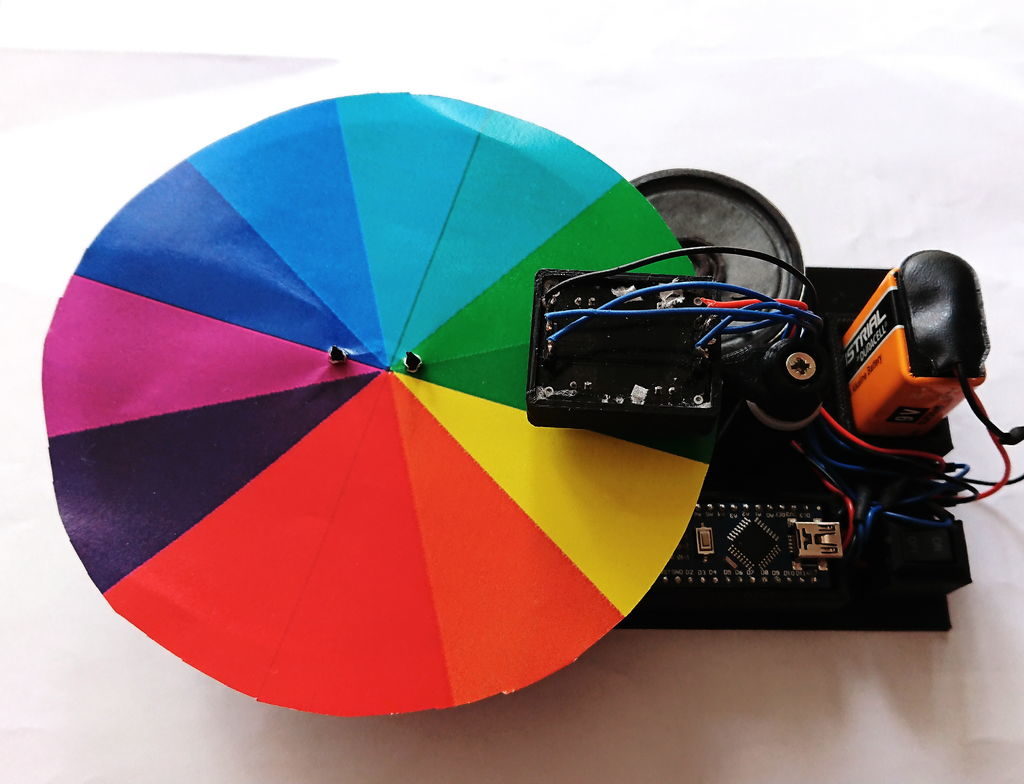
How we see colors is an interesting concept, and as a conversation starter about the physics of color and sound, maker Marcin Poblocki created his own ‘Color Instrument.’

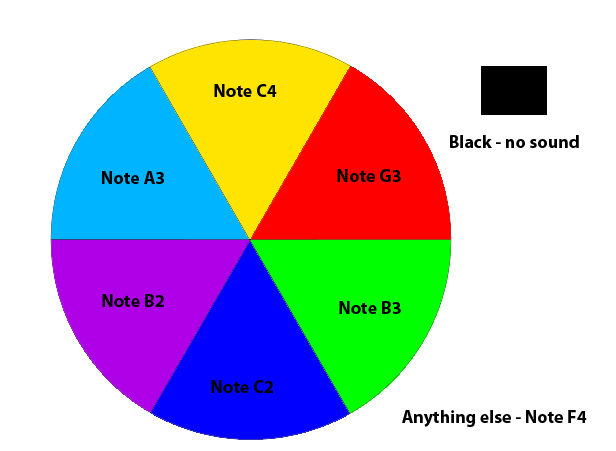
Poblocki’s device rotates a wheel of colors around under a TCS3200/TCS230 sensor via a continuous rotation-modded SG90 servo motor. An Arduino Nano then spits out the tone corresponding to the color it senses using a small speaker, allowing for simple songs to be produced according to hue arrangements. 

It’s a neat idea that could be taken in many different directions. At the very least, it would certainly spark conversation, perhaps questioning, as noted in the project write-up, why the color pink isn’t included in the natural light spectrum.

Arduino Blog 10 Jul 19:25

Facere-Bot is a portable machine that draws iconic photos

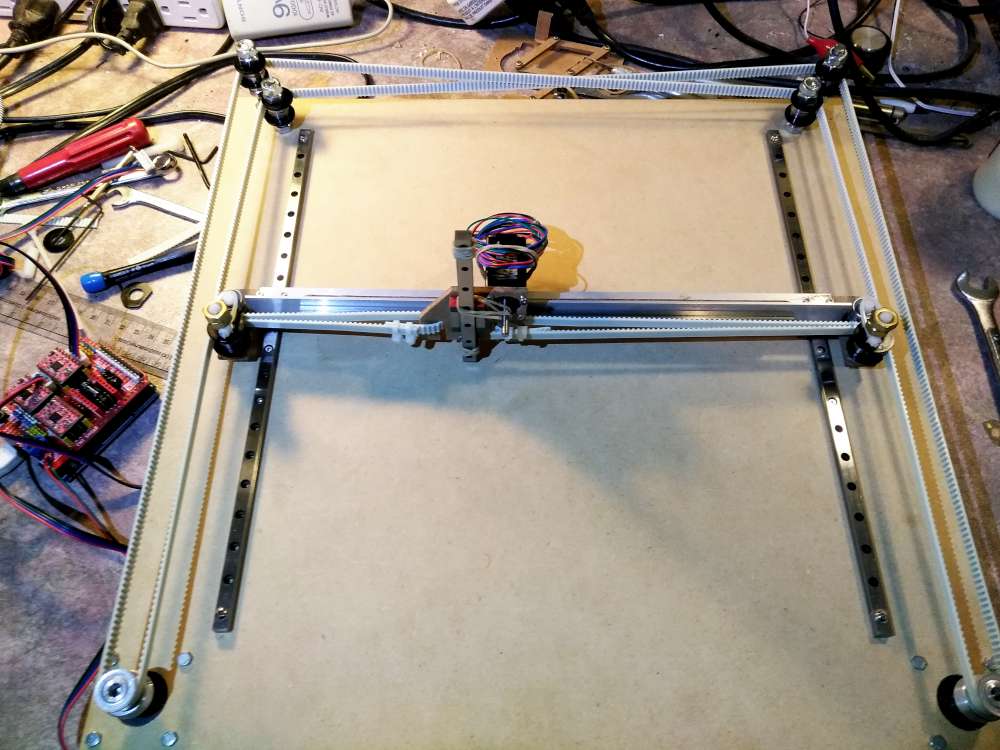
Inventor Artist Darcy Whyte wanted a drawing robot that was light enough to carry around, and could quickly produce drawings. Naturally, he turned to an Arduino Uno, along with a CNC shield and a trio of A4988 stepper drivers. These control a NEMA 8 and two NEMA17 stepper motors in a gantry-style artistic setup.

The build is able to drag a marker across a page, apparently varying pressure applied with the z-axis, and thus how much ink is applied. In another mode, a pen can be used, which wobbles back and forth to create volume when needed. 

Both methods, as seen in the clips below, can sketch a very recognizable—though certainly distinct—portrait of Marilyn Monroe, or presumably whatever other image you choose to program in.

Arduino Blog 10 Jul 00:45

BluePump protects and controls your pool’s filter pump

Most pools feature a powered pump system to help filter out debris, but what if your water level gets too low? Pumps designed for ‘wet’ operation generally don’t work well when water isn’t present, so Luc Brun came up with an innovative monitoring solution dubbed “BluePump.”

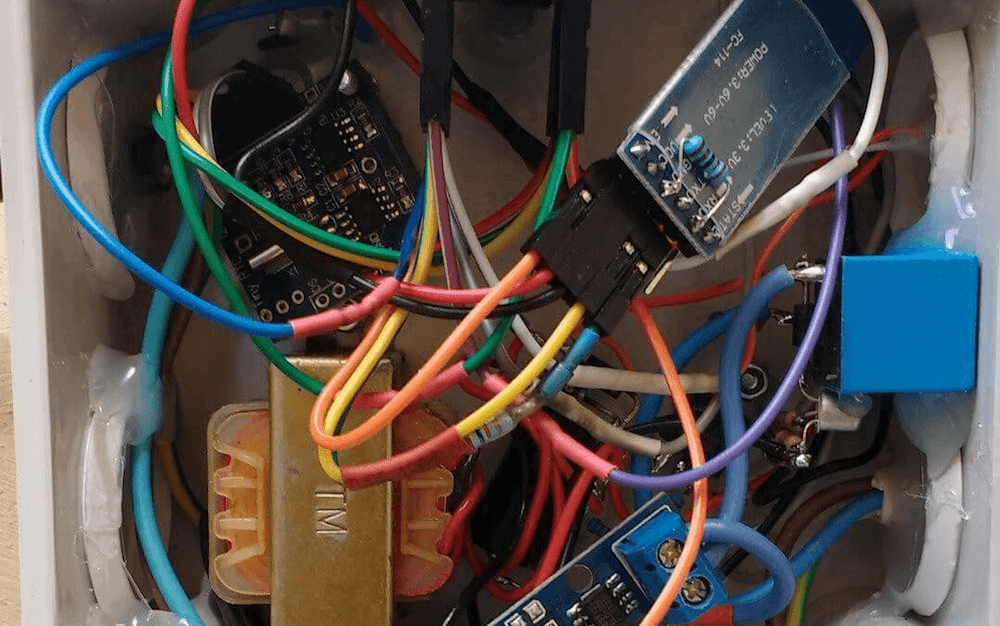
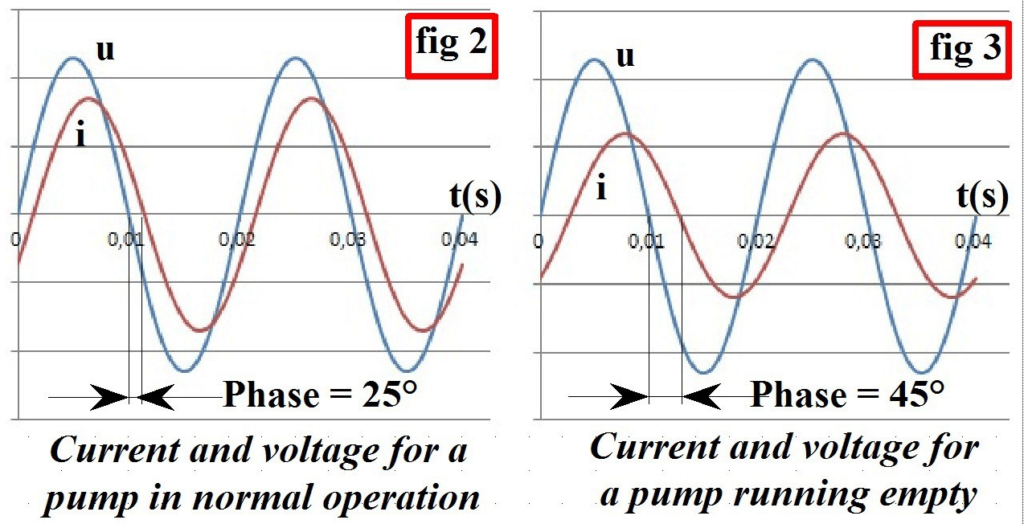
His setup uses an Arduino Nano and an ACS712 sensor to observe both voltage and current, detecting the phase shift between the two. If this shift is too large, this indicates dry operation, and shuts down the pump via a relay until things are resolved. 

To complement this ability, BluePump also includes a temperature sensor, an RTC, and a Bluetooth module, allowing it to schedule cleanings as needed, or work under human control via a custom Android app.

Arduino Blog 09 Jul 20:45

This machine creates images using Skittles as pixels

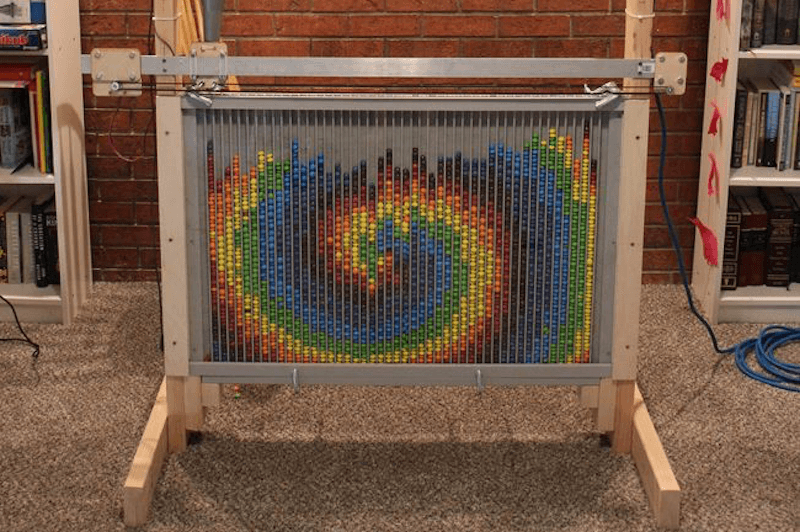
Skittles candies come in various vibrant colors. While they may be a tasty treat, JohnO3 had another idea: to create an amazing automated display for the little circles. 

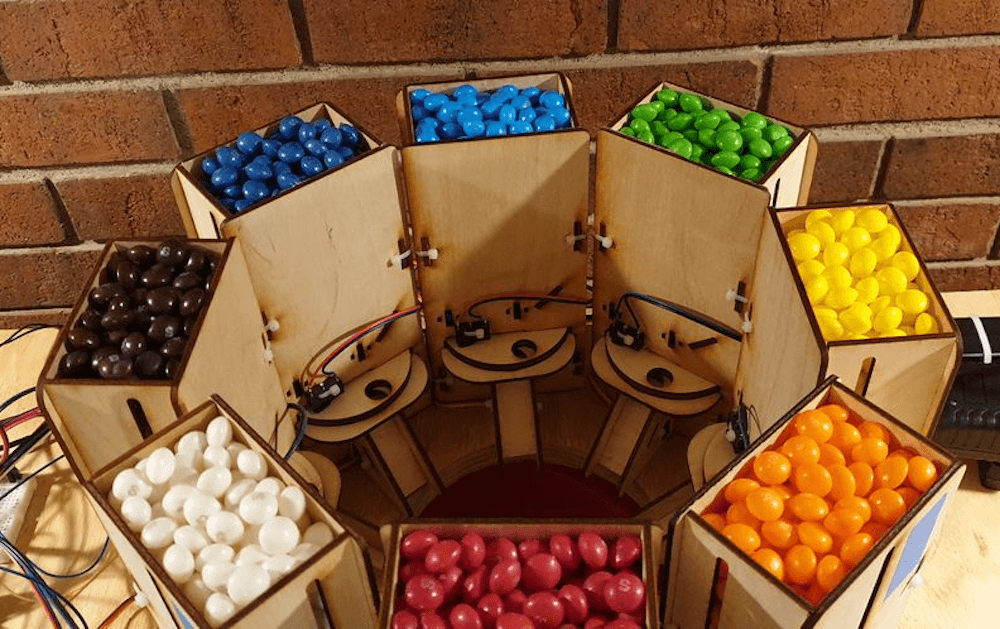
His device, dubbed the “Skittle Pixel8r,” uses an Arduino Mega to pull a dispensing funnel between one of 46 channels, covered on one side with a piece of glass.

On top of the shuttle mechanism, eight boxes release the correct flavor/color into an intermediate tube via individual metal gear servos. The Arduino then commands the linear axis to move the funnel to the appropriate bin. This process is repeated 2,760 times until an image, measuring up to 785 x 610mm (31 x 24 inches), is completed. 

The Skittle Pixel8r an incredible build, and perhaps we could see it expanded even further to not just dispense, but also sort Skittles as an all-in-one auto art installation! Code and files for the project can be found here.

Arduino Blog 09 Jul 16:55