Posts with «featured» label

Why we chose to build the Arduino Nano 33 BLE core on Mbed OS

This post is from Martino Facchin, who is in charge of the firmware development team at Arduino. Hopefully this is the first of a series of posts describing the inner workings of what we do.

The new, shiny and tiny Nano 33 BLE and Nano 33 BLE Sense are on their way to becoming a serious threat to any hacker’s summer vacation. (I’d recommend spending a couple of days at the lake or beach anyway despite the board’s awesomeness!)

Quoting Sir Isaac Newton (who walked the same streets of Cambridge, UK that the Arm engineers use to get to work everyday), starting from scratch is not always a clever idea. Tens of thousands of man-hours have been spent since the beginning of computer science to reinvent the wheel, sometimes with great results, other times just bringing more fragmentation and confusion.

Since we didn’t have an official Arduino core for the Nordic nRF52840 Cortex-M4 microcontroller, which the Nano 33 BLE and Nano BLE Sense are based upon, we took a look at the various alternatives:

  • Using Nordic softdevice infrastructure
  • Writing a core from scratch
  • Using Mbed OS as a foundation

Option one looks juicy but clashes with a cornerstone of Arduino: open-source software. In fact, softdevice’s closed source approach limits the user’s freedom.

Option two would take a lot of burden on our shoulders for a single board, making the core not very reusable.

So, we went to option three: basing the core on Mbed OS foundation, sharing its drivers and libraries.

As many of you may know, Mbed is a fully preemptive RTOS (real-time operating system), meaning you can run multiple “programs” (more specifically, threads) at the same time, much like what happens in your notebook or smartphone. At Arduino, we have been looking for an RTOS to use on our more advanced boards for a long time but we never found something we liked until we started working with the Mbed OS. Programming an RTOS is usually quite complicated (every university grade course on operating systems will be full of frightening terms like ‘mutex’ and ‘starvation’), but you don’t have to worry if you just want to use it as an Arduino; setup() and loop() are in their usual place, and nobody will mess with your program while it’s running.

But if you want to do MORE, all Mbed infrastructure is there, hidden under the mbed:: namespace. As a side effect of reusing its drivers, we can now support every Mbed board in Arduino with minimal to no effort. Plus, the structure of the core allows any Mbed developer to use Arduino functions and libraries, simply by prepending arduino:: before the actual function call.

Mbed also supports tickless mode; in this way, every time you write delay() in your code, the board will try to go in low power modes, knowing exactly when to wake up for the next scheduled event (or any external interrupt). We are able to achieve an impressive 4.5uA of lower consumption while running a plain old Blink on the Nano 33 BLE (a minimal hardware modification is needed to obtain this value but another blog post is coming). As for Bluetooth support, you can start creating your BLE devices today using the wonderful https://github.com/arduino-libraries/ArduinoBLE but we support plain Cordio APIs as well, in case you need features not yet available in Arduino BLE.

And of course, it’s all open-source! 

If you just want to make awesome projects with its plethora of onboard sensors, fire up your Arduino IDE, open the board manager and search for Nano 33 BLE; one click and you are ready to go! 

If you want to hack the core, add another Mbed board or merely take a look, your next entry point is the GitHub repo. Don’t be shy if you find a bug or have a suggestion; we love our community, and will try to be as responsive as possible. 

Arduino selects Auth0 as standardized login for ecosystem

We are excited to announce that we’ve selected Auth0 as the identity management platform of choice for Arduino. We will replace our own Single Sign On solution with Auth0 for all public facing web properties, including Arduino Create and other apps.

We discovered that our own homegrown authentication solution would not scale to meet the rapidly developing needs of the growing global community and decided to reach out to Auth0. In addition to Single Sign On, Arduino will take advantage of Auth0’s new Universal Login, which enables developers to completely customise their branded authentication experiences quickly, and Device Flow for browserless or input-constrained devices.

“We wanted a robust platform to replace our SSO solution but also give us the flexibility to do cool, new things in the device authentication space. Auth0 is a brand we admire, and their API-based approach makes it easy to migrate our login data in a way that’s completely transparent for the customer. We are excited to welcome them to our global community.” – Gianluca Varisco, Arduino CISO

We plan to leverage the power of both communities and events, and explore a technical partnership in the IoT domain. Auth0 currently secures more than 2.5 billion logins per month for 21 million users.

“I have been using Arduino for years as the brain for my personal projects, so working with them in a business capacity is really rewarding. When you empower the developer with simple, powerful tools, the whole business benefits. We are excited by the reach of the Arduino community and aligned in our mission to help the developer in their journey to innovate.” – Eugenio Pace, Auth0 CEO and co-founder 

Arduino Blog 28 Jul 11:13

Plywood printer uses a unique mix of manufacturing methods

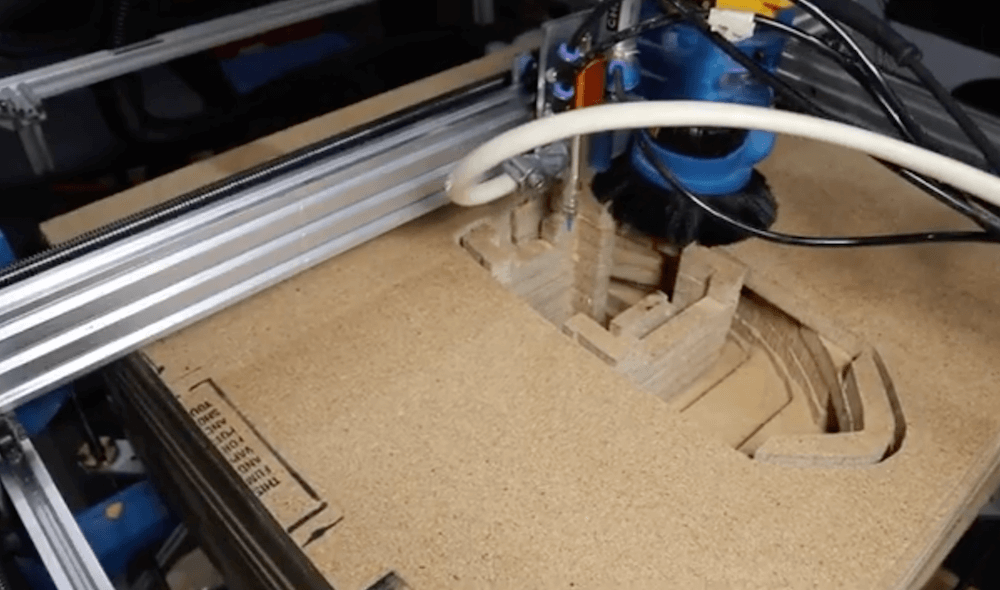
Sure, we’ve seen low-cost DIY 3D printers with wooden frames before, but not a 3D printer that actually ‘prints’ wood. That’s exactly what Shane Wighton and his Formlabs hackathon team have done. (Although probably more along the lines of a hybrid additive/subtractive CNC machine that makes parts out of 3/4″ plywood.)

The device first cuts each layer out with a router, applies glue automatically, and then feeds subsequent layers onto a stack to be cut in the same manner. The result of these combined layers is a block of wood with a very large “benchy” inside, revealed with a bit of manual cutting.

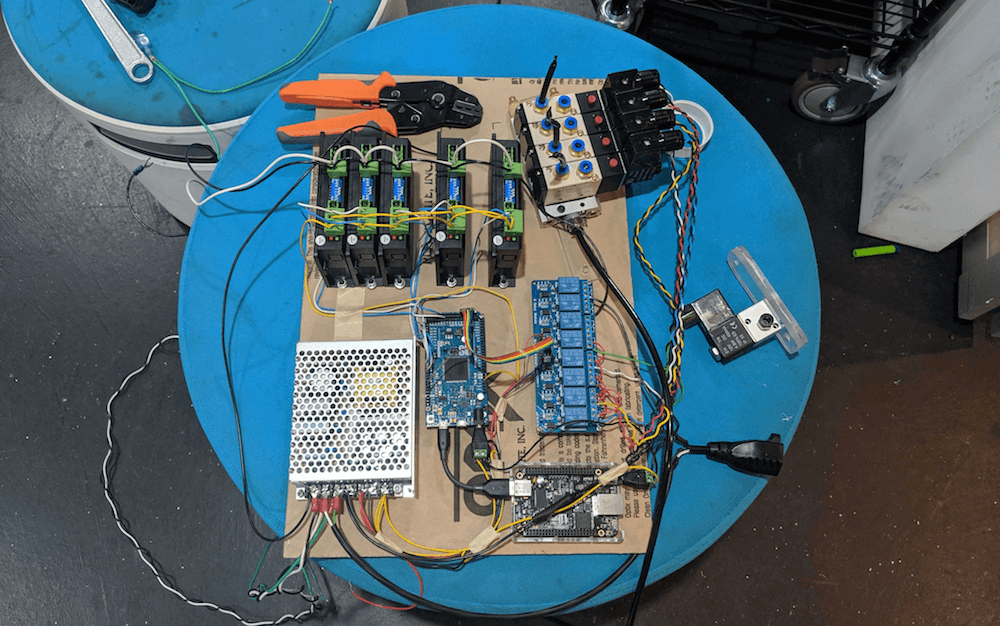
Motion control is handled by an Arduino Due, which interfaces with a number of stepper drivers to move the router, while an off-the-shelf relay board triggers the pneumatics, lights, and even a horn to indicate when a job is complete.

More details on the build are available in Wighton’s write-up here and you can see it in action below!

Low-quality wireless audio transmission with Arduino

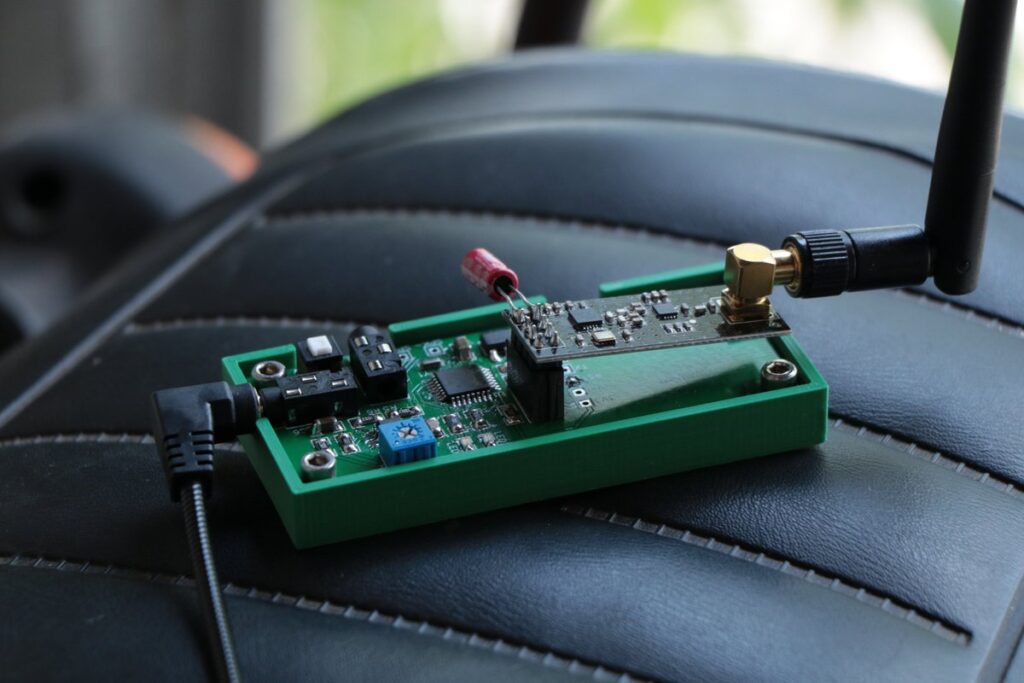
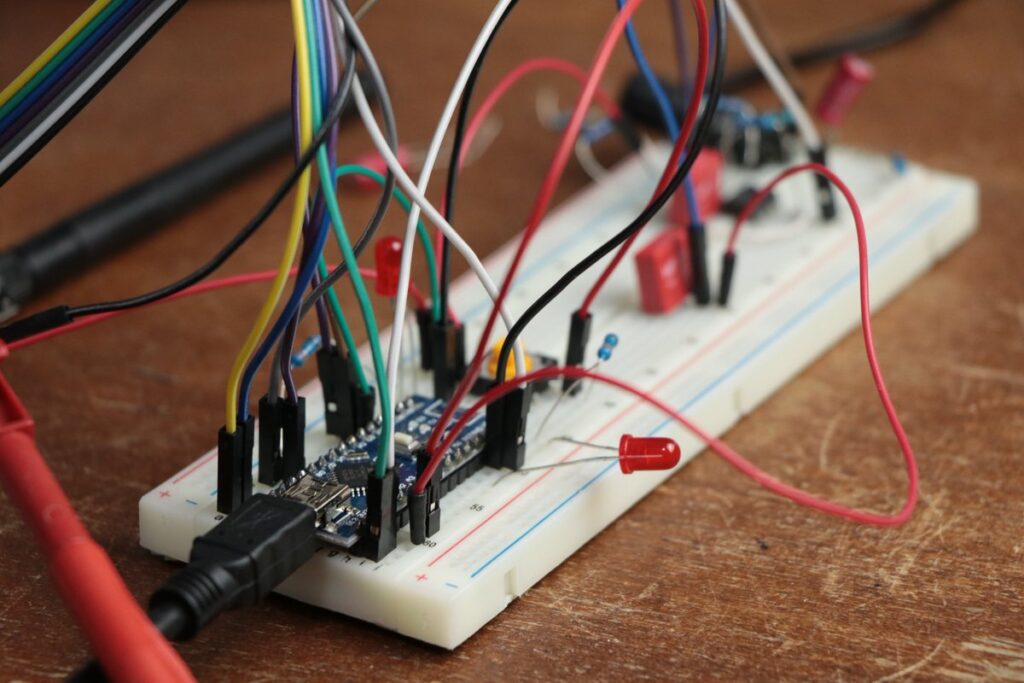
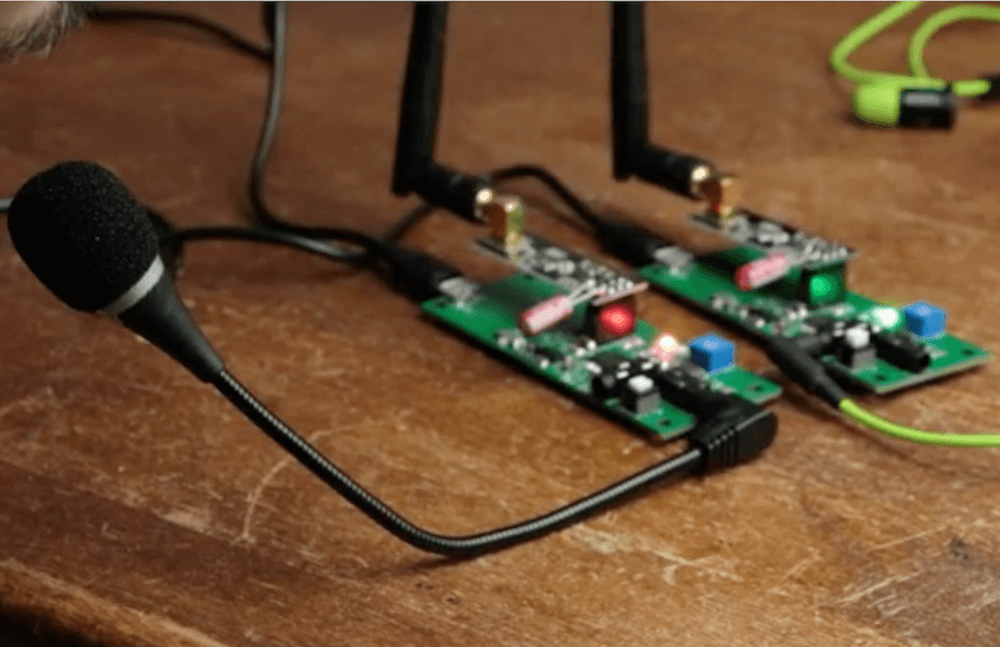
After considering the price of helmet-mounted headsets for motorcycle or moped use, YouTuber GreatScott! decided to try making his own. His walkie-talkie prototype consisted of two Arduino Nano boards, using nRF24L01+ transceivers and a small speaker for PWM audio output.

After a test demonstrating wireless transmission, the design was transferred to custom PCBs, programming their ATmega328P with an Uno acting as an ISP. The audio results are, at this point, barely intelligible. Nevertheless, it’s an interesting experiment, showing that this type of communication is possible using the RF24Audio library with an Arduino-based system. 

If you think you could do things better, or that he’s missed something obvious, the PCB design is available here, so be sure to chime in on the video’s comments if you have an idea!

Arduino Blog 25 Jul 22:00

Visualizing magnetic fields in three dimensions with an Arduino magnetometer

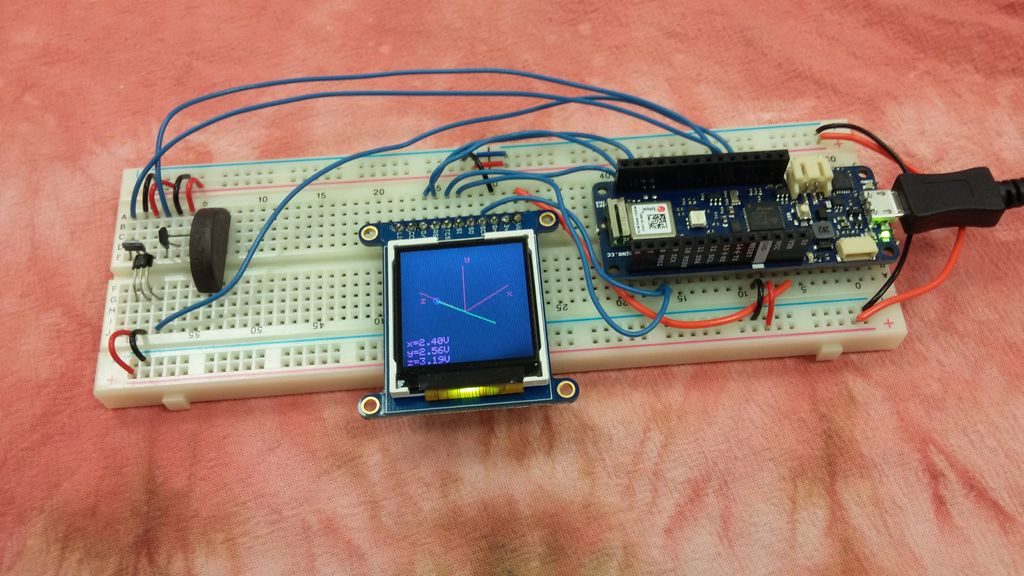
As humans, we can’t detect magnetic fields, but we take advantage of this phenomenon every day in the form of motors and various sensors. Even electrical wire produces a field when current flows through it. You can sense magnetism with a compass, but if you want to visualize it in three dimensions, maker ‘amamitof7’ has a solution in the form of this Arduino magnetometer.

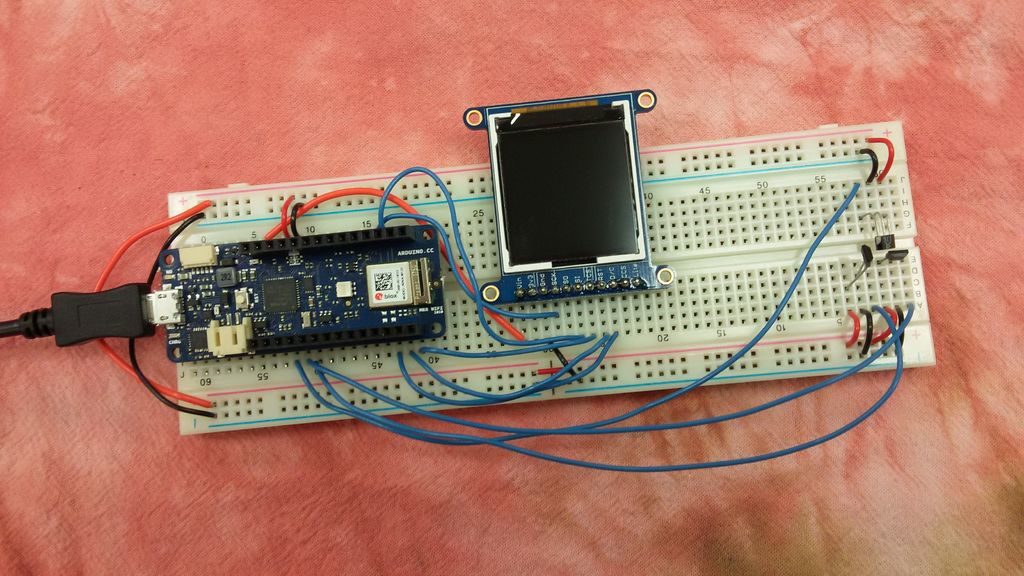
The device uses a trio of analog Hall effect sensors to measure the strength of the magnetic field. This data is fed to a MKR WiFi 1010 (or Uno), which generates an isometric representation of the field on a small TFT display. 

One could see this used in a variety of diagnostic applications, or perhaps as an excellent physics teaching tool.

Standbeest-inspired ClearCrawler robot clomps around on 8 legs

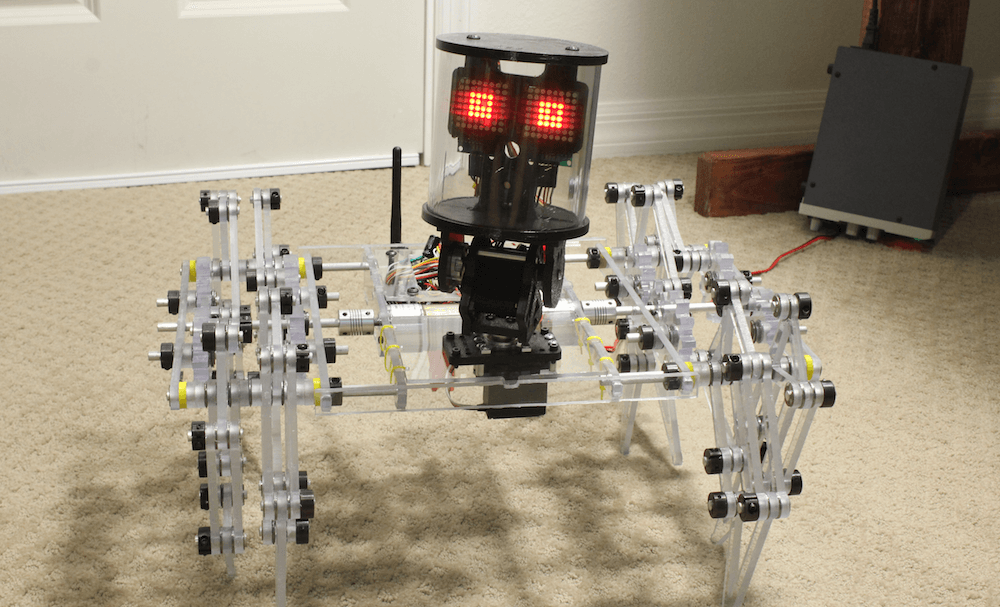
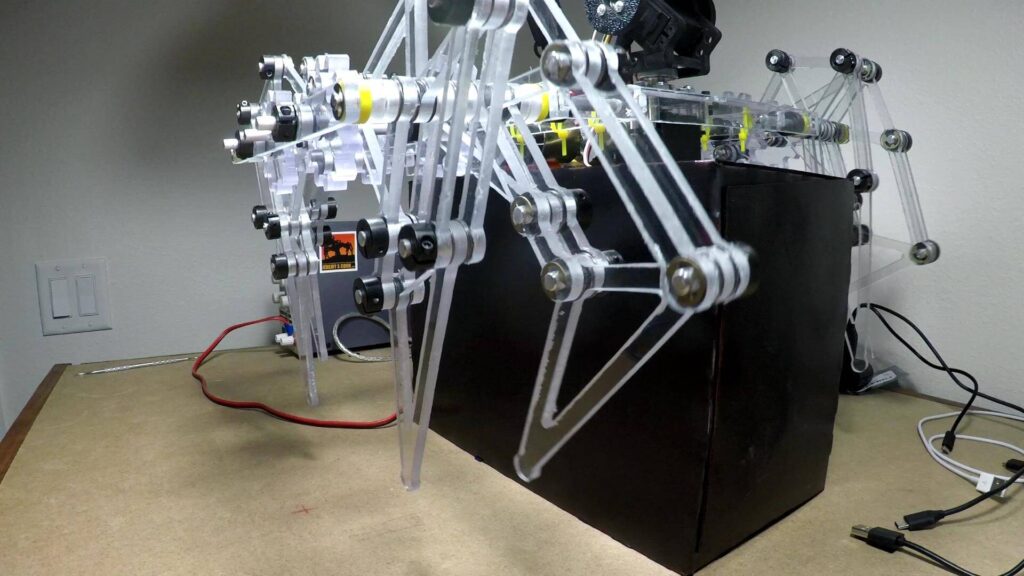
When you want to build a walking robot, the normal route is to individually control each leg with a number of servos or other actuators. Maker Jeremy S. Cook, however, took a different approach with his ‘ClearCrawler,’ using only a pair of motors to power eight legs. These legs are divided up into sets of four on either side of the bot, allowing for differential control similar to a tank.

The leg linkage design is based on Theo Jansen’s Strandbeest mechanism, and a clear head is also implemented with a pair of 8×8 MAX7219 LED matrix eyes. Onboard control is handled by an Arduino Nano and an L298N driver board, while an Uno with a joystick shield serves as the user interface. Radio transmission is via two nRF24L01 modules.

Code for both the transmitter and receiver can be found on GitHub.

Arduino Blog 23 Jul 19:40

Shower monitor helps you save water and money

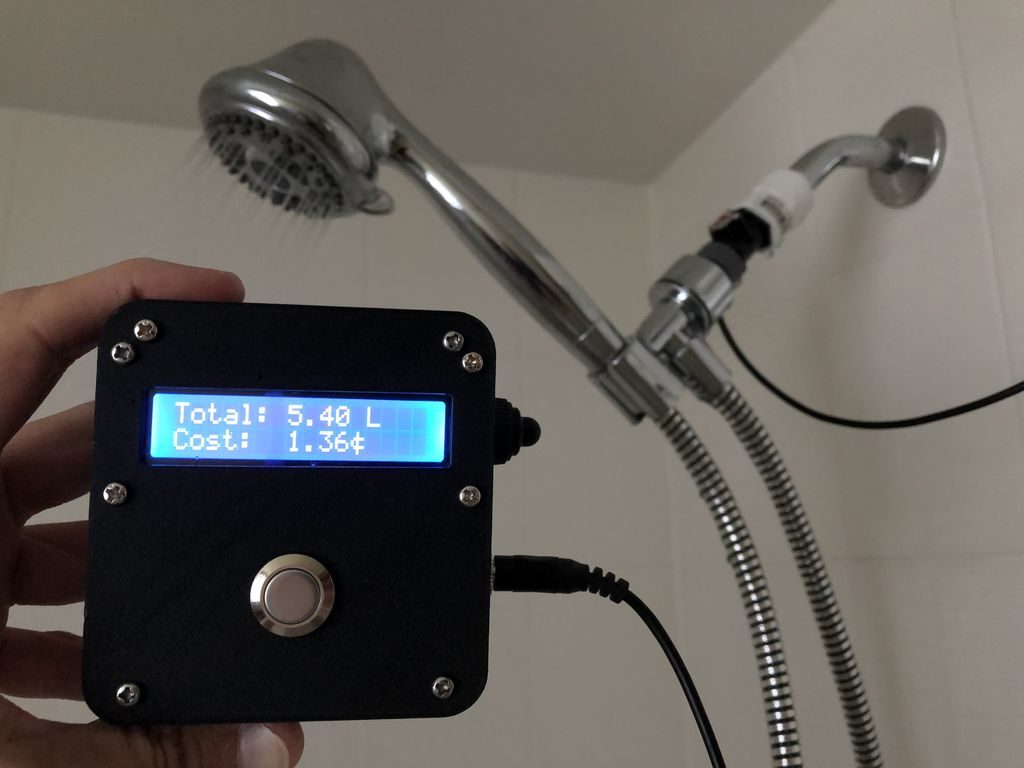
You (hopefully) take regular showers or baths, but how much water do you use each time you step into your facilities? If you don’t know the answer, then this monitor by LiamOSM could be just what you need.

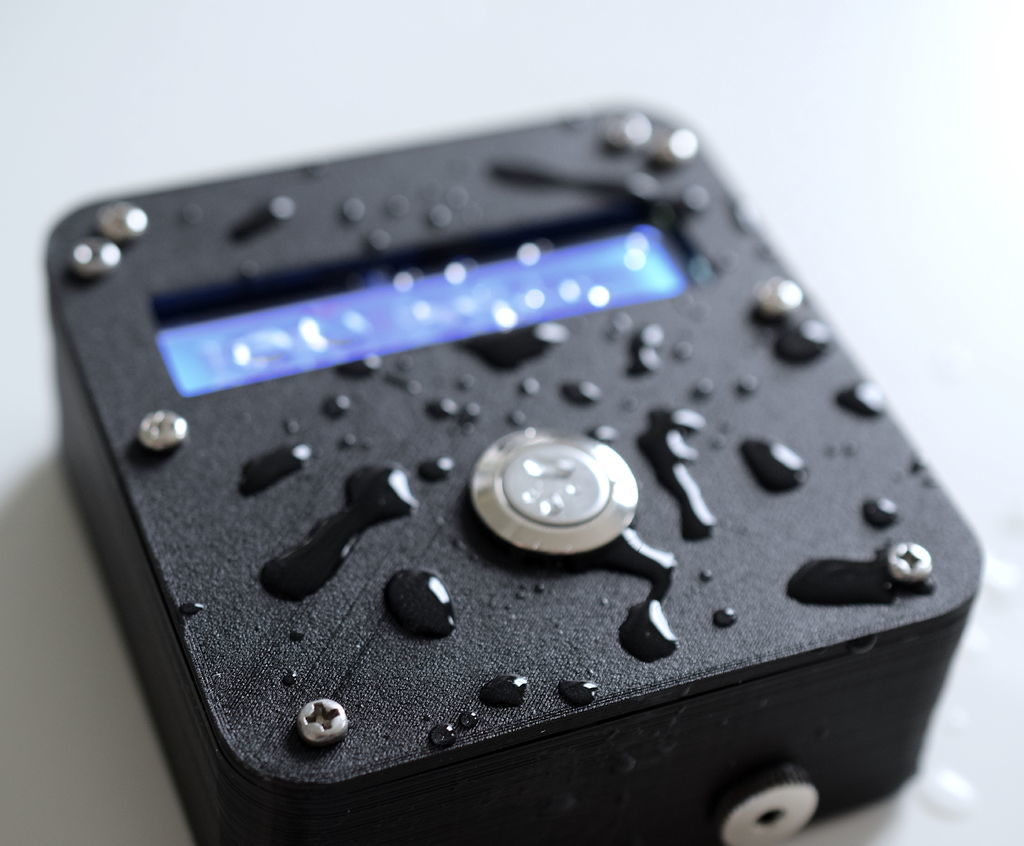
The device uses a flow sensor plumbed inline with a shower head, which transmits pulses to an Arduino Nano setup. This Nano, which resides in a nicely 3D-printed enclosure, measures these pulses and outputs the amount of water you’ve used to a 16×2 LCD screen, along with its cost calculated according to your particular utility rates. 

Using such a monitor would likely be an eye-opening experience, and the inexpensive flow sensor used here could be a great tool for other projects as well.

Which uses more water – a bath or a shower?

I was recently thinking about this question, and I realized that I don’t actually know how much water is used when I shower. I know when I’m in the shower sometimes my mind wanders, thinking about a cool new projects idea or trying to decide what to have for breakfast, while water is just gushing down the drain. It would be a lot easier to reduce my water consumption if I actually knew how many litres I was using each time!

I did a bit of research, and found that different shower heads can use anywhere from 9.5 litres (2.5 gallons) per minute to less than 6 litres (1.6 gallons) per minute, if you have a flow restrictor installed. A very old shower could use even more water. 

I decided to design and build a device that would display the total volume of water used per shower, the cost of the water, and the flow rate. I’ve had this device installed for a few weeks, and it’s really handy to have a live readout of the amount of water being used.

Zeus is a humanoid that can hold a conversation

As seen in the videos below, Zeus is a metallic humanoid robot capable of moving its head and arms around, featuring a pair of hand grippers that should be quite useful when the time comes. For now, creator Luis appears to be focusing on its vocal skills, with plans to eventually teach it how to walk.

The robot can engage in conversation with its companion, whether it’s answering questions like “What’s your name?” with“My name is Zeus,” or “What’s your favorite movie?” with “I wasn’t that impressed with the special effects, also the plot was not deep.” Zeus even lets Luis know when he “has no idea what to say.”

Zeus’ communication and movement are accomplished through a variety of hardware, including an Arduino Mega and an AAEON UP board, as well as an Intel RealSense Camera SR300 for vision. Luis is also using CMUSphinx for voice recognition, eSpeak for text-to-speech and AIML chatbot for interactive responses.

Perhaps we’ll see this ~1/2-sized humanoid traipsing around on its own in the future, though hopefully its comment about “taking over the world” was just a joke!

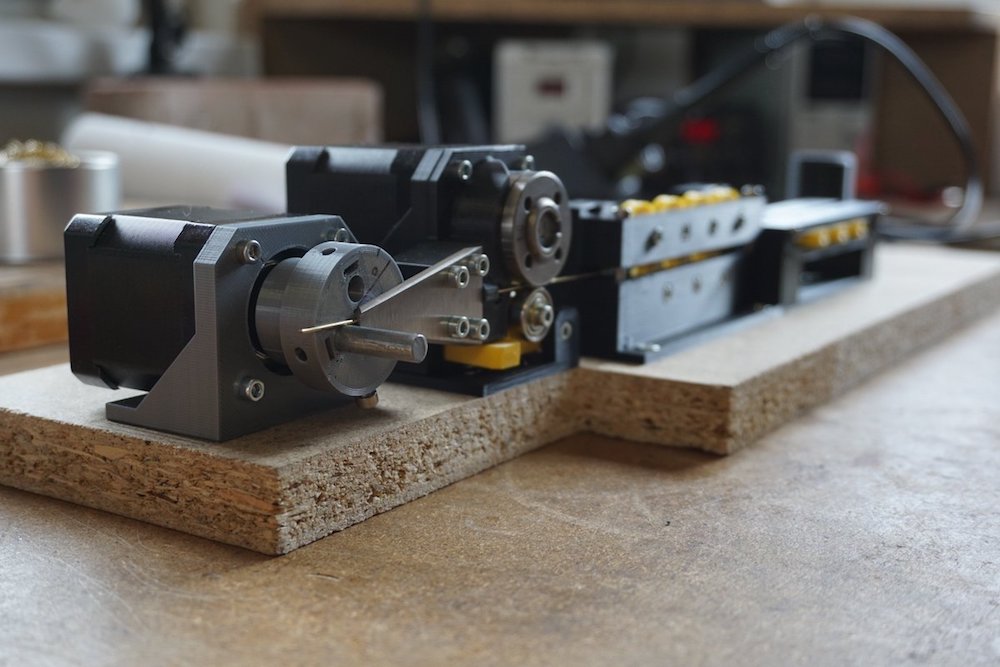
This machine bends brass wire with precision

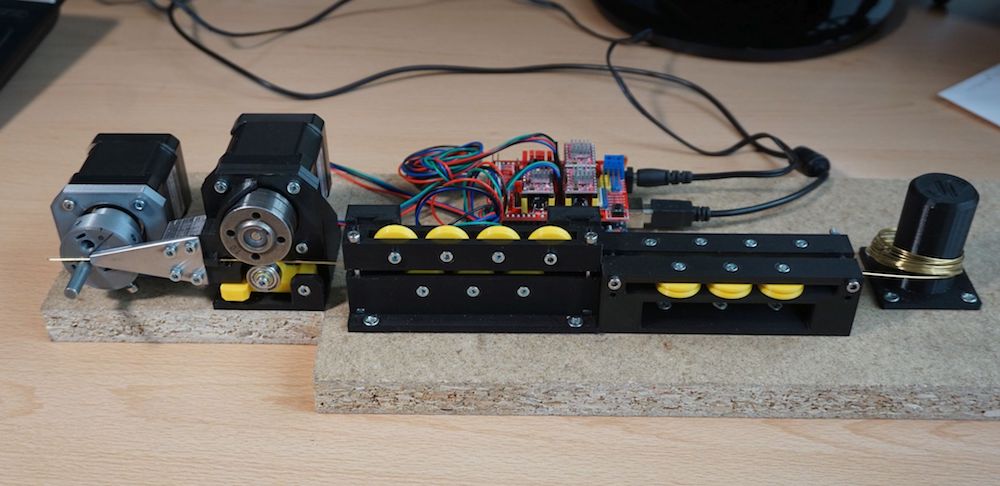
Jiri Praus enjoys using brass wire for his freeform sculptures, but isn’t a fan of making the same bends over again. To solve this problem, he designed a CNC machine to handle that task for him.

His device features a series of rollers to straighten out the wire, with a servo-driven puller that utilizes a roller normally used with a welding machine. A second servo then precisely bends the wire into shape, creating squares, hexagons and even springs under the control of an Arduino/CNC shield. 

You can see the project in action in the videos below, and if you want to build your own, the STL files for this mostly 3D-printed setup are up on GitHub.

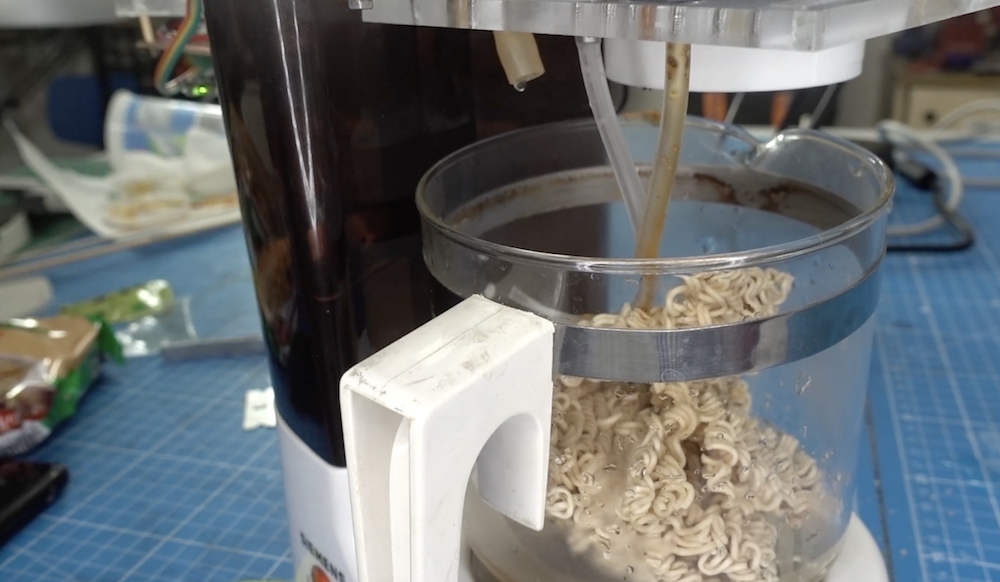
Upcycle an old coffee pot into an IoT ramen maker

Ramen noodles can be a quick snack or meal, but per this IoT ramen maker by Clem Mayer, you don’t even have to run to the microwave to prepare them. 

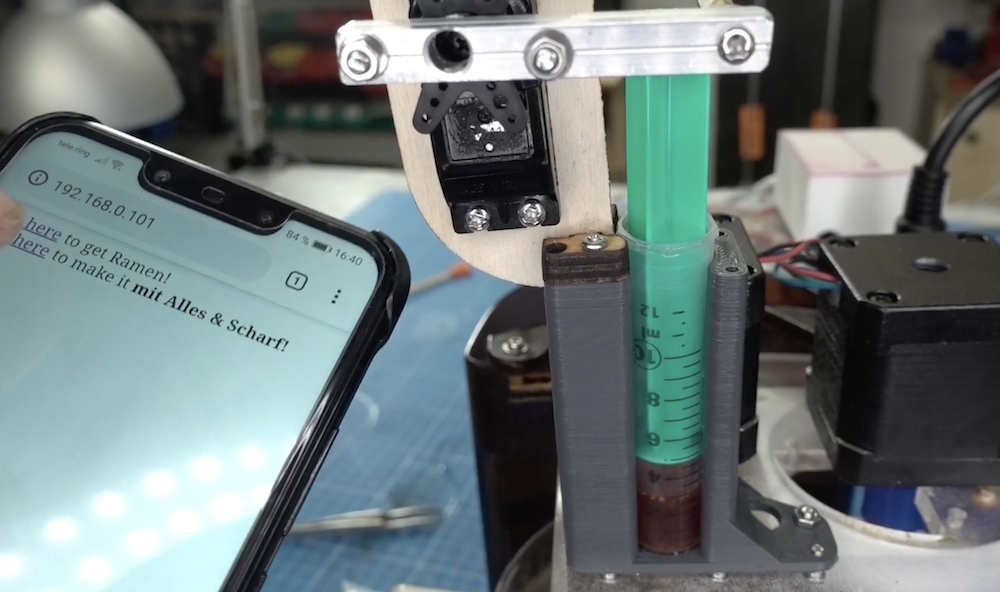
His project used a vintage electric filter coffee machine to heat and dribble water into the waiting brick-o-food, then a stepper-driven pusher adds flavor powder. More seasoning can be dispensed via a servo-actuated syringe, and another stepper is used to stir everything.

The setup is controlled by a MKR WiFi 1010 board, giving Mayer the ability to start meals/mix in hot sauce from the convenience of his phone via a simple web app. Results are… edible-ish, but if you want to build your own, files and more info can be found here.