Posts with «featured» label

Vintage LED display prototype revived with Arduino
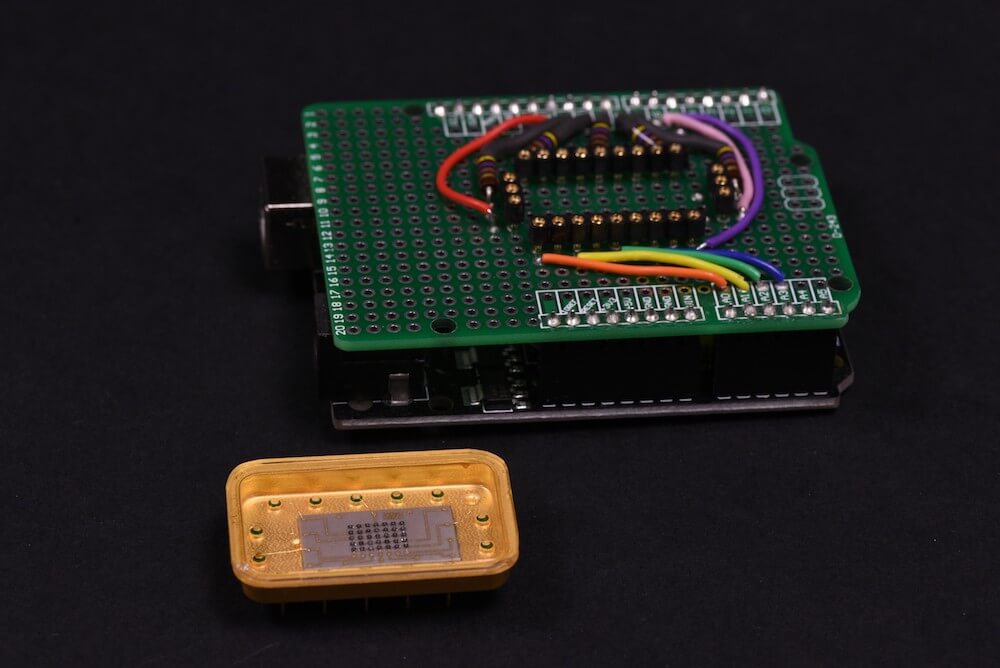
Patrick Hickey has been collecting retro LED indicators and displays for decades, and his rarest item is an HP 5082-7002—a 5×7 dot matrix LED display in a beautiful gold and (possibly) sapphire enclosure. This device is so rare, in fact, that he believes it to be a prototype, somehow relegated to eBay for gold salvage.

Hickey wasn’t able to find any reference to the unit—much less a datasheet—even after extensive research. Instead, he went to work reverse engineering the HP 5082-7002 following the tracks of the PCB to work out how the rows and columns are connected. 

He then designed a test shield for an Arduino Uno with sockets on which the mystery device could sit. With this piece of hardware built, he can now create simple pictures and animated sprites on it using pulsed Arduino outputs.
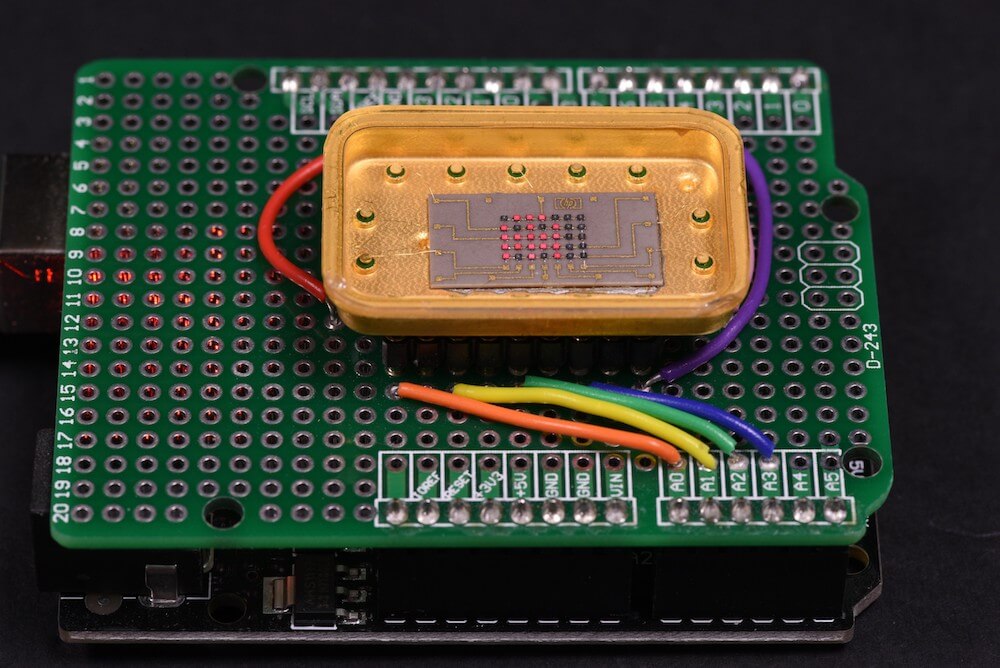
I followed the tracks to work out which pins are connected rows and columns, and set out to build a test shield for an Arduino Uno.  I decided to drive them as “rows” of 5. The max output of Arduino I/O pins is rated at 40mA, so in theory, I could simultaneously power up to 5 LEDs in parallel at 8mA using 1 pin. In practice, using strobe/multiplexing, the duty cycle is much less: 1/7 or 1/5 depending if you drive by rows (7) or columns (5) respectively. The 5 current limiting series resistors are 470 Ohms (¼ Watt). My preference is to use carbon composition resistors (e.g. Allen Bradley). I love the “retro look” of them and I think they compliment the vintage LEDs.  

I had already written Arduino code for testing some TIL-305 matrix displays, so it was relatively simple to transpose the pins in my sketch for this configuration. The test code permits animations of up to 150 different alphanumeric characters/symbols, and (of course) some animated sprites inspired by retro video games.
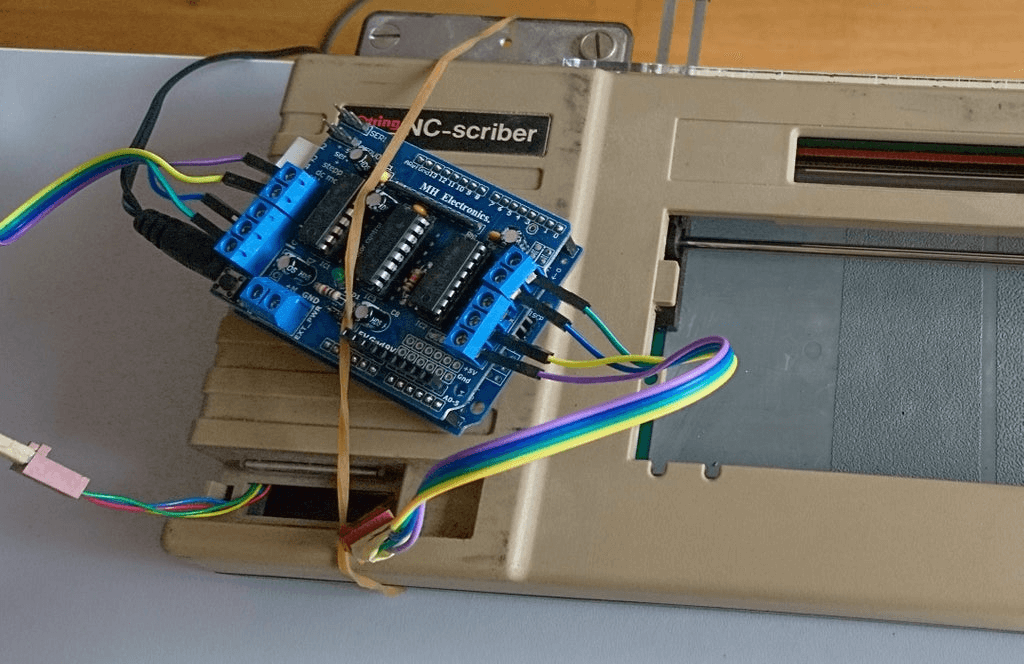
1980s plotting device turned into a handheld whiteboard tool

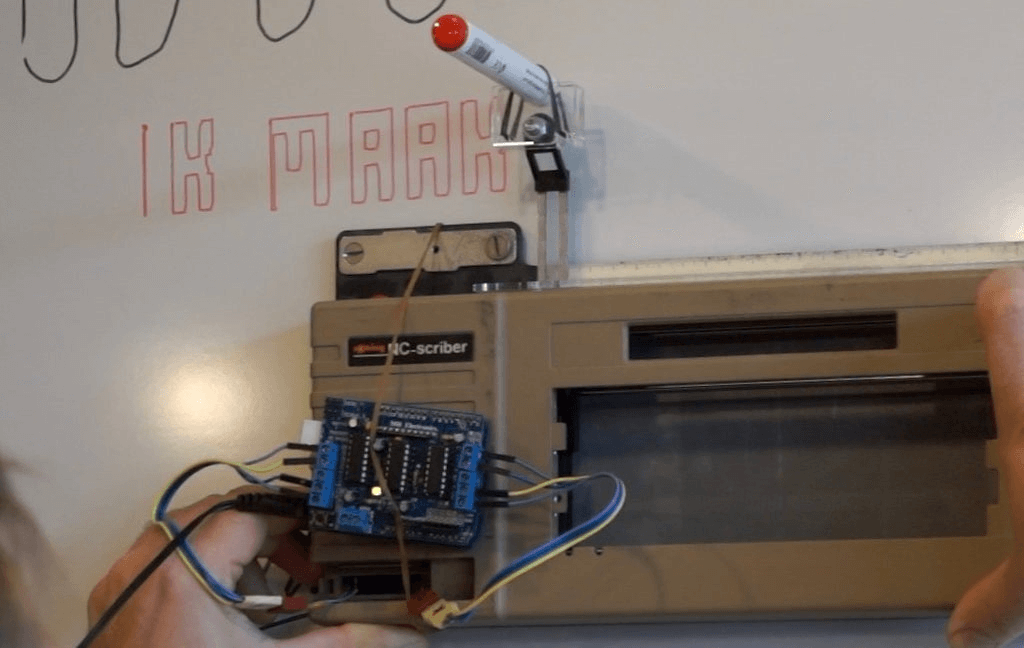
Writing on a whiteboard isn’t an easy task for many people, including instructor ‘Kenyer,’ whose lettering can be on display for a semester or more. Rather than accept his imperfect penmanship, he modified a 1980s-era Rotring NC-Scriber—originally meant for mechanical drawing use—to do this for him.

His project runs on an Arduino Uno and motor shield, along with custom mount for erasable markers. Phrases are programmed via the setup section of the sketch, but he hopes to implement the device’s keyboard for control with the help of a different motor driver in the future. 

You can see it plotting away in the video below, while code and additional info can be found in Kenyer’s write-up.  

Arduino Blog 21 Aug 19:26

Simulating a flip clock on an Arduino-driven LCD screen

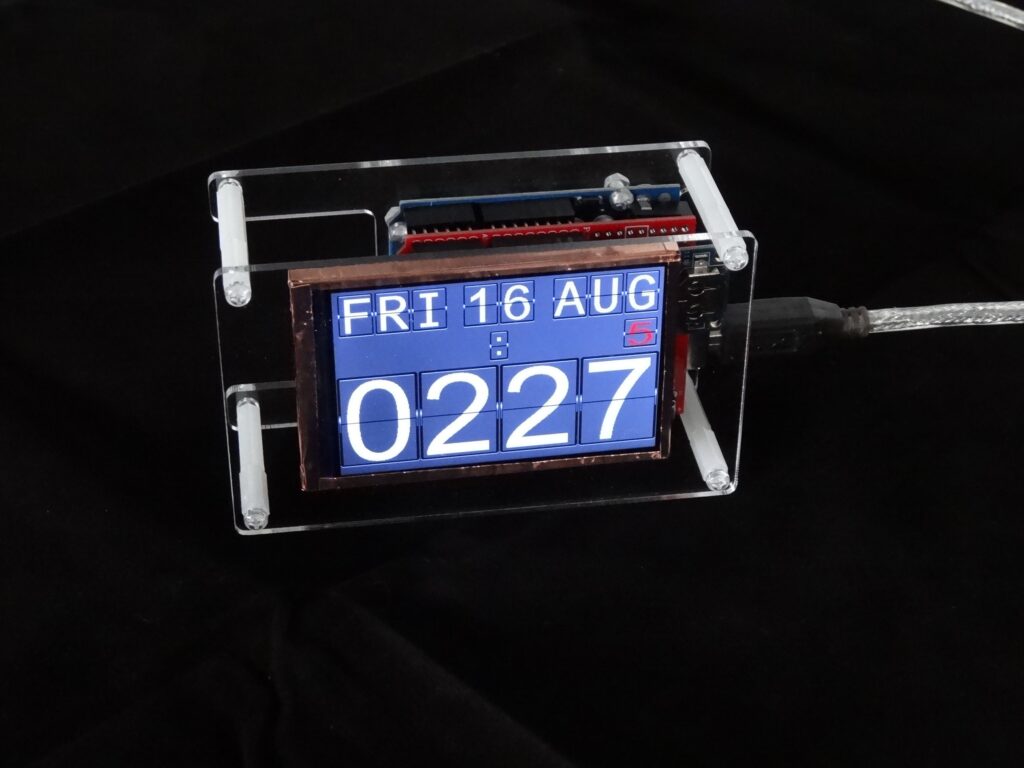
Although flip clocks may be extremely interesting electromechanical devices, with rolling flaps to show what time it is, they’re also fairly complicated if you want to build one yourself. Mark Wilson, however, took a different approach with his project, simulating the output on a 320×240 LCD display.

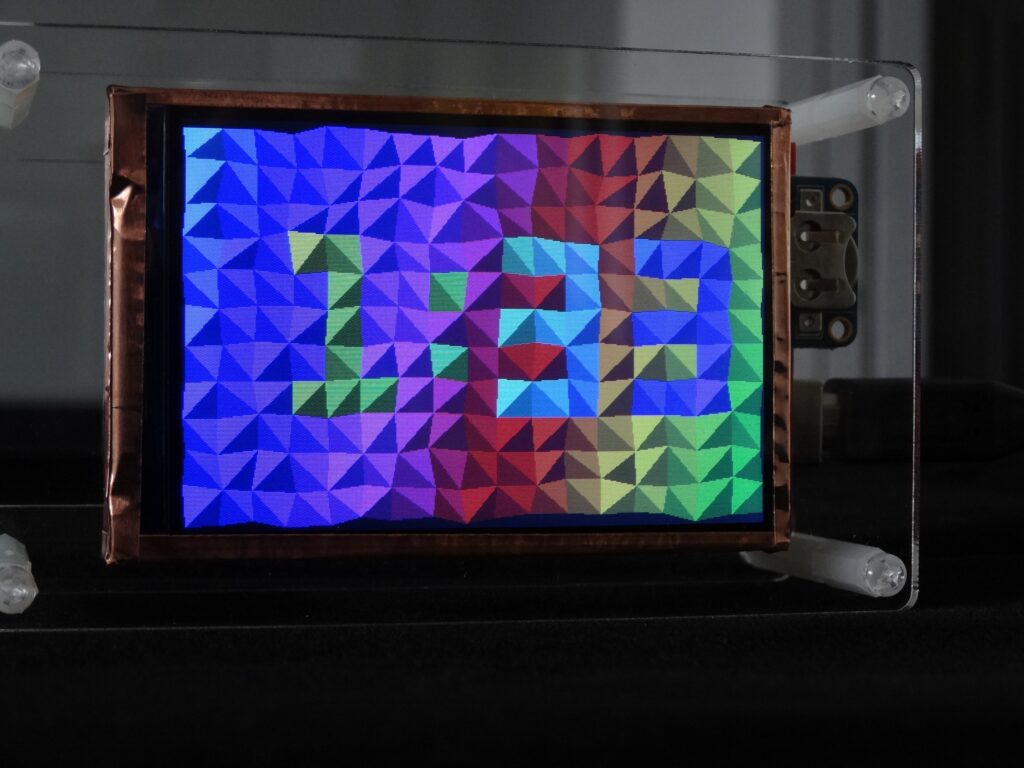
The clock is powered by an Arduino Uno and a DS3231 RTC module, allowing it to show the time, date, a blinking colon, and even the days until the trash/recycling needs to be put out. Alternate screens are available as well, including a Pong clock, triangle clock, and cube clock, which can be individually selected or set to randomly cycle if you so desire. 

For its housing, Wilson chose a minimal acrylic/standoff design that seems to suit it well, and you can see it in action in the short demo clip below.

This thermochromic 7-segment display colorfully shows the temp and humidity

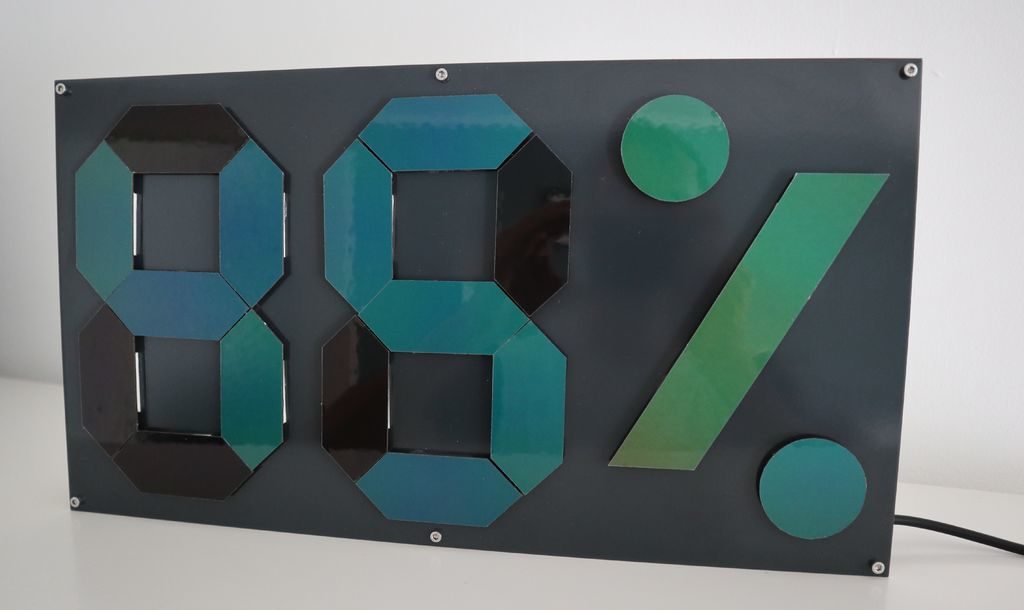
Instead of controlling his temperature and humidity display directly, maker Zaphunk did things a bit differently, driving the temperature of each segment with a Peltier element, or thermo-electric cooler (TEC), to change its color. 

Each segment is made out of a thermochromic material, cycling from a black off state to a greenish hue when on, for a device that can—somewhat ironically—show the temperature by changing its temperature.

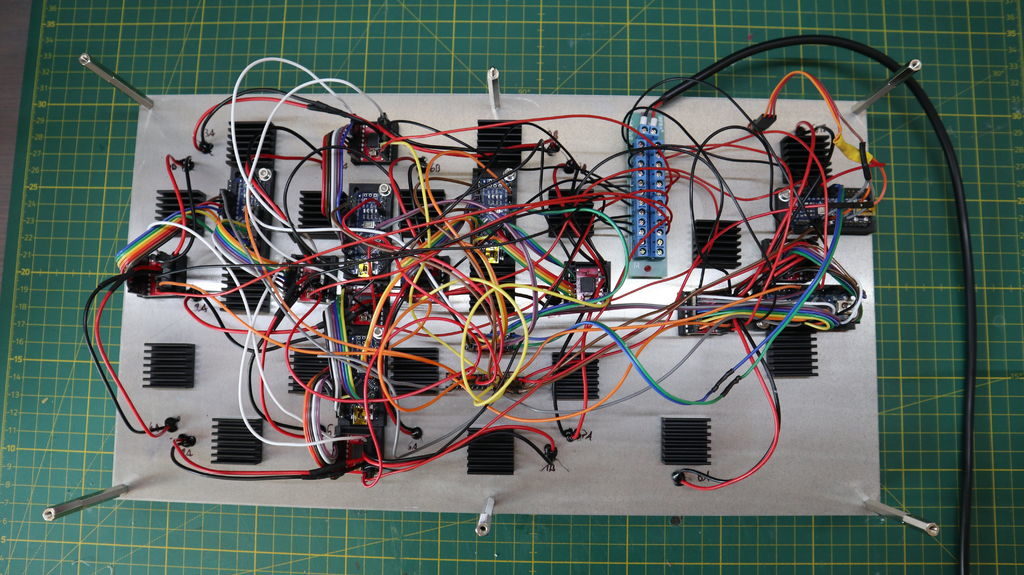
Ambient conditions are read via a DHT22 sensor, and everything is controlled by a half-dozen Arduino Nanos. This number boards were needed in order to power the nine dual motor drivers that handle the Peltier elements, each of which require two PWM outputs, along with 5 IO pins. 

The display looks great in the video below and Arduino code is found on GitHub.

Horizontal laser harp is like none you’ve ever seen before

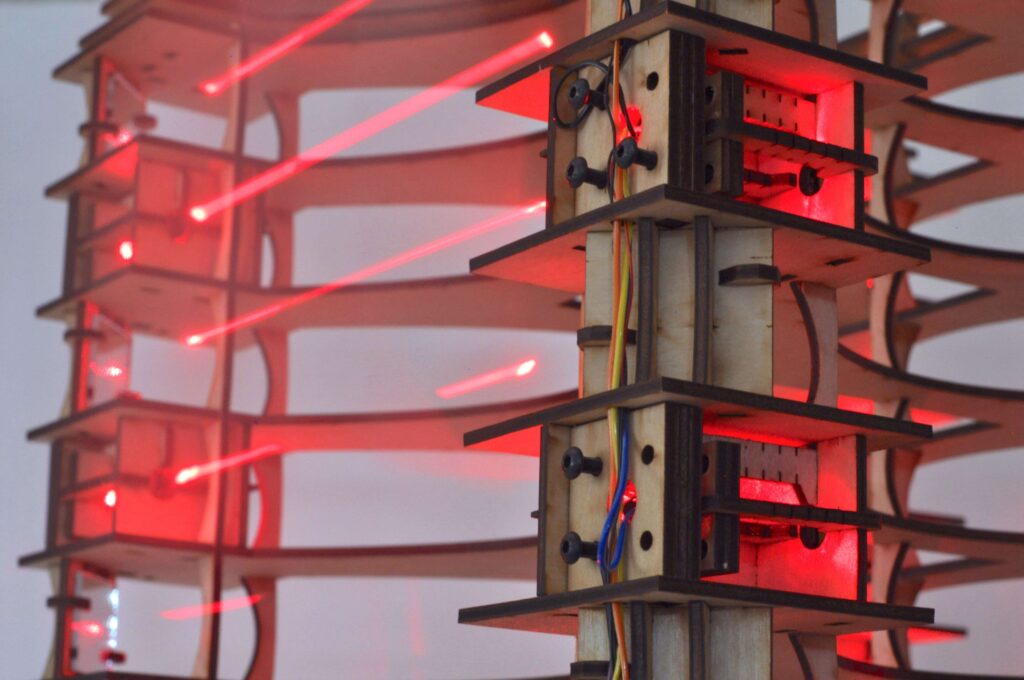
Apparently not content with a traditional laser harp, Jonathan Bumstead set out to take things in a different direction. What he came up with is a device whose laser strings are arranged horizontally, and loop though its boxy structure for an amazing audiovisual effect. 

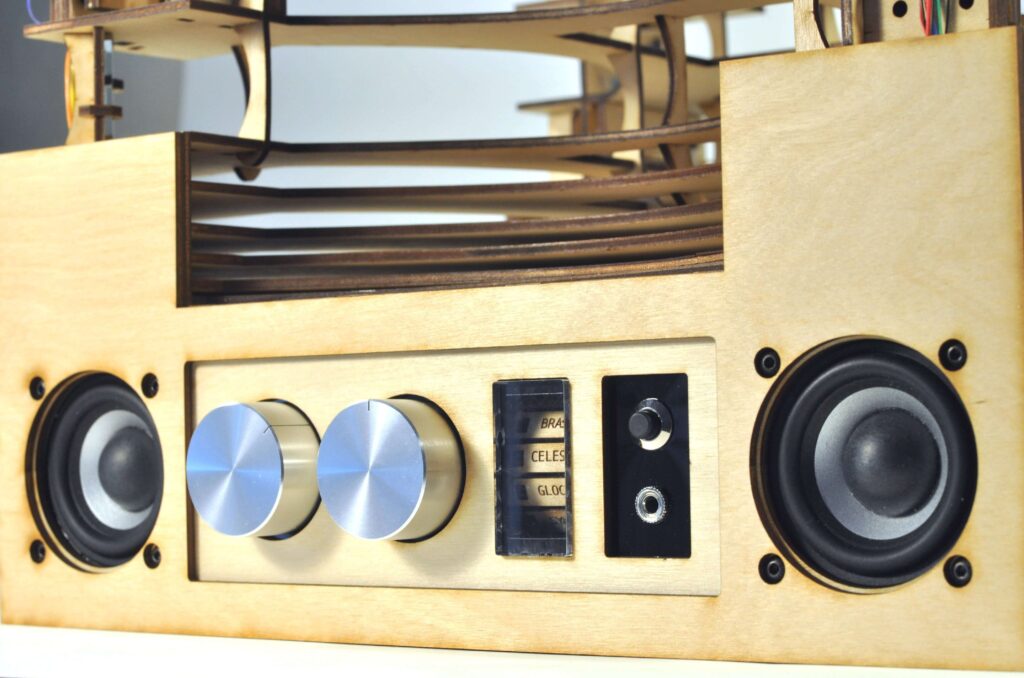
The aptly named Upright Laser Harp is divided up into six rows, which each contain two laser/photoresistor pairs for an instrument total of 12 notes. Each laser is reflected once before hitting its photoresistor to wrap the entire structure in light, and values are sensed by an Arduino Mega as note inputs. Sounds are then generated by an Adafruit Music Maker Shield, and different MIDI instruments are selected with a rotary switch and a stepper-based electromechanical display system. 

Laser harps are musical devices with laser beam “strings.” When the beam is blocked, a note is played by the instrument. Usually laser harps have the beams travel vertically in the shape of a fan or vertical lines. 

In this project, I built a laser harp with stacked laser beams that propagate horizontally. The beams reflect off mirrors to form square shaped beam paths. Instead of a MIDI output like my previous laser harp, this device has built-in MIDI player so the output is an audio signal. This means the device does not have to be connected to a computer or MIDI player (e.g. keyboard) to play sound. Both built-in speakers and audio output jack are available for playing music.

Be sure to check out the mini-concert and build details in the video below!

LED matrix made touch sensitive with infrared control

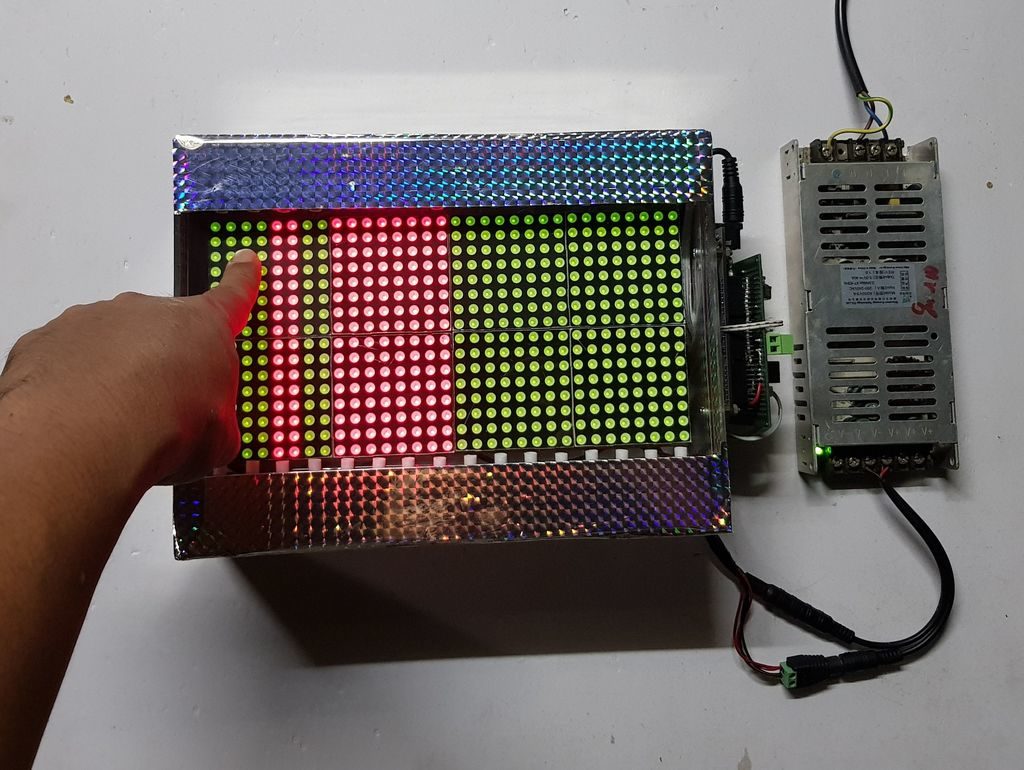
If you’d like to integrate touch functionality to your LED matrix project, then tuenhidiy may have just the thing for you. 

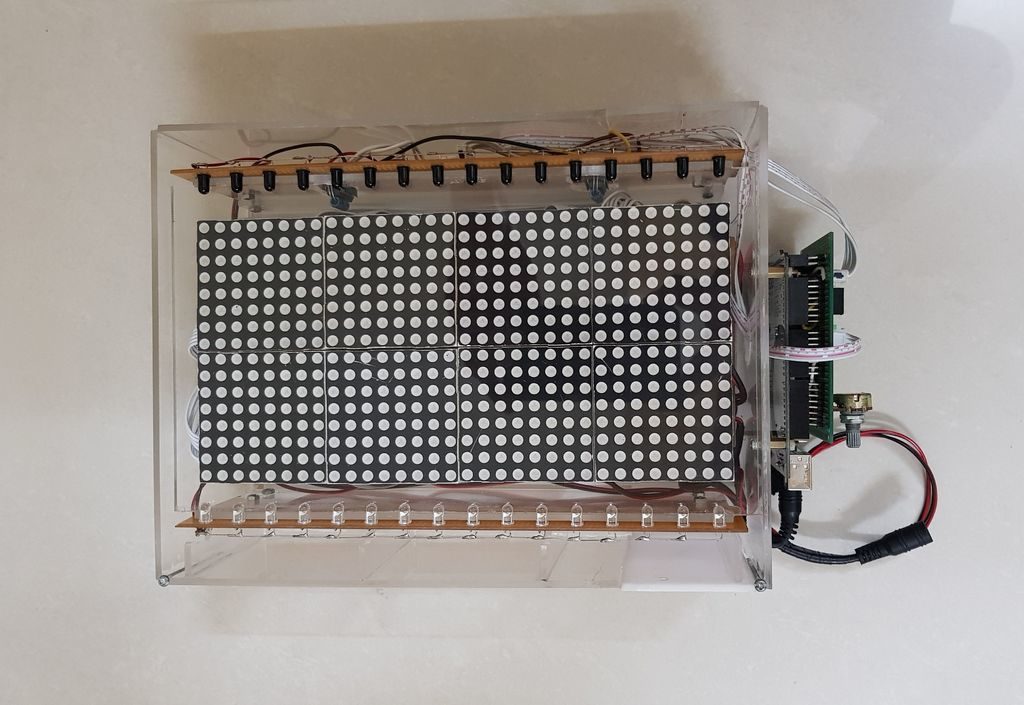
The setup uses 16 pairs of IR emitter and receivers arranged down the length of the bi-color 16×32 matrix to tell when one has inserted a finger or other object into an area. When sensed, it changes the corresponding column on the display from red to green or back again.

An Arduino Mega is used for overall control of the device, along with shift registers and multiplexers/demultiplexers to account for the massive amount of IO needed. 

Code for the build is available on GitHub, and you can see it demonstrated in the video below.

Automating a chop saw with Arduino

YouTuber “Absorber Of Light” needed to cut thousands of tiny aluminum pieces with a chop saw, and after paying someone to do this for him, decided to instead automate the process. 

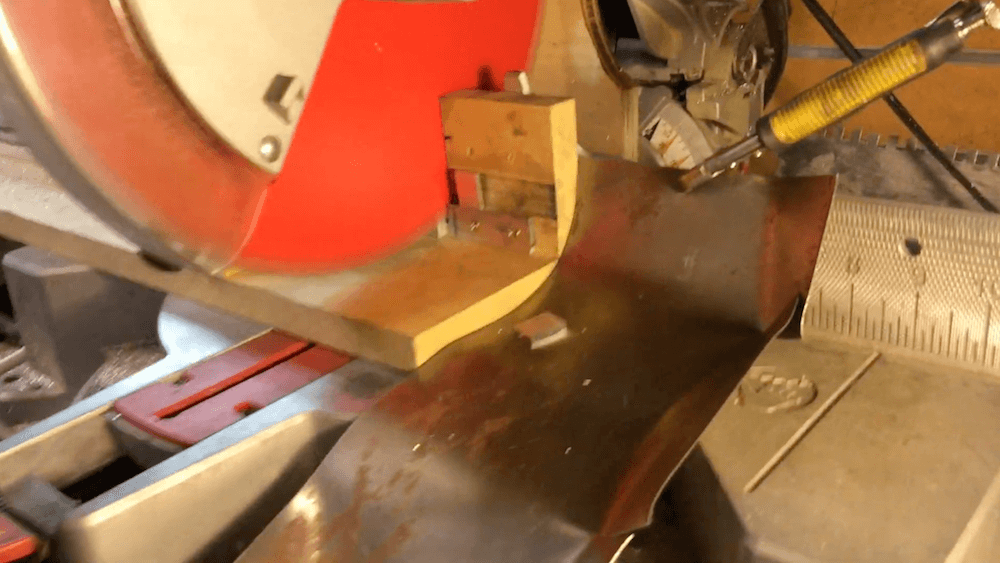
His system is controlled by an Arduino Uno, and moves strips of aluminum under the saw using stepper motor and threaded rod assembly—a sort of very simple CNC. Once in position, a second stepper activates a linear actuator via a physical H-bridge relay setup with cams and microswitches. This actuator pushes the saw into the aluminum strip, cutting it to an impressive ±.002 in, or ~.05 mm tolerance.

You can see it in action in the video below and find the project’s code in the description.

Cutting thousands of these small pieces of aluminum with the help of an Arduino and a couple of stepper motors. They will eventually become brackets to fasten computer monitors to metal enclosures.

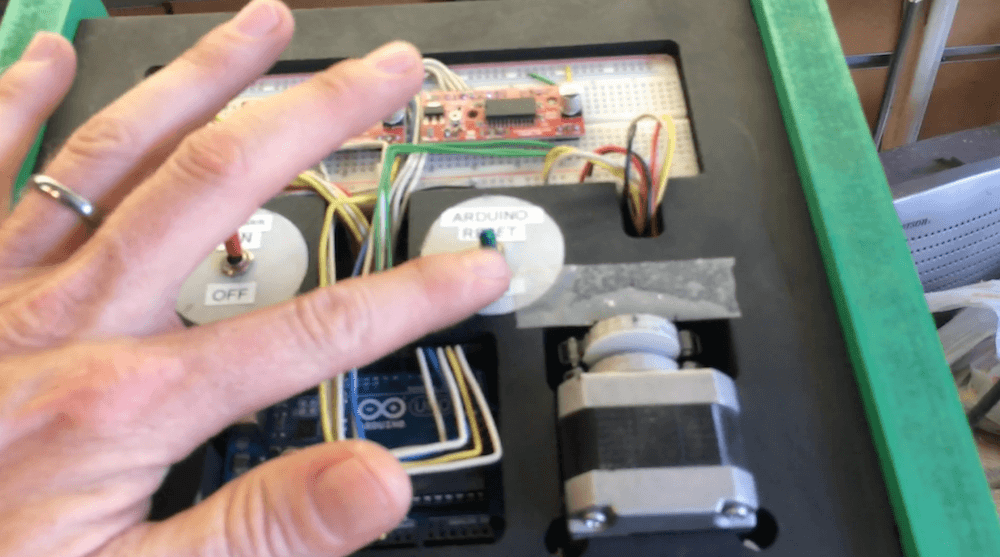
The brackets measure .750″ x .547″ x .125″, tolerance is quite decent at + or – .002″ I tried to keep the code as simple as possible because I’m not much of a programmer and didn’t want to spend too much time on it. The loop is triggered by the Arduino reset button. The linear actuator is controlled by an H-bridge with 4 simple switches activated by one of the steppers.

Toy piano converted into a self-playing instrument

Upon obtaining a small toy piano, Måns Jonasson went to work “Arduinoizing” it with 30 solenoids to hammer out tunes. 

A MIDI shield is used to pipe commands from a computer to the Arduino Mega that’s used for control, and after experimenting with discreet wiring and electronics for each of the solenoids, he switched to motor shields as outlined here to simplify the setup. This, along with a new version of the solenoid holders he designed, cleaned up the build nicely, allowing it to play a plinky version of the Super Mario Bros. theme song.

Be sure to check out the Mario themed auto-concert in the video below, plus a video outline of its construction, below. 

Create Agent – Windows installer tampering while preserving Authenticode signature

Arduino Create Agent is a plug-in that was designed to help Arduino users connect their devices to the Arduino Create platform. The plug-in lets your browser communicate with your device’s serial port from a web application.  

We chose Bitrock’s InstallBuilder, a powerful and easy to use cross-platform installer creation tool, for generating the Arduino Create Agent installers (Windows, macOS, Linux). Those binaries are then served through our global CDN.

Yesterday, Bitrock has published an important security advisory in which they stated that Windows binaries generated with InstallBuilder versions earlier than 19.7.0 are vulnerable to tampering even if they contain a valid Authenticode signature. A specially crafted payload can be appended to an existing installer and trick the installer initialization code to execute code included in it, while the existing signature remains valid.

The issue, originally reported to them by Youfu Zhang of Chaitin Security Research Lab (@ChaitinTech), got addressed by releasing an updated version of InstallBuilder so all their customers could re-build and re-release their installers. CVE-2019-5530 has been assigned to this issue (CVSSv3 score of 6.7).

Once we’ve been notified, and given the potential impact of this security issue, we worked around the clock to re-build and re-release our Agent’s Windows installer. Version 1.1.89 has now been released through our official channels.

Please note that all versions of the Windows installer before version 1.1.89 are vulnerable to CVE-2019-5530.

Because this issue can be exploited with existing binaries already released, we also want to remind all of you to only download installers from official sources.

If you have any questions regarding this security issue, or if you need any help with upgrading your installer, please do not hesitate to contact Arduino Support through e-mail at support@arduino.cc.

Arduino Blog 13 Aug 11:53

Reviving an old CNC router with Arduino

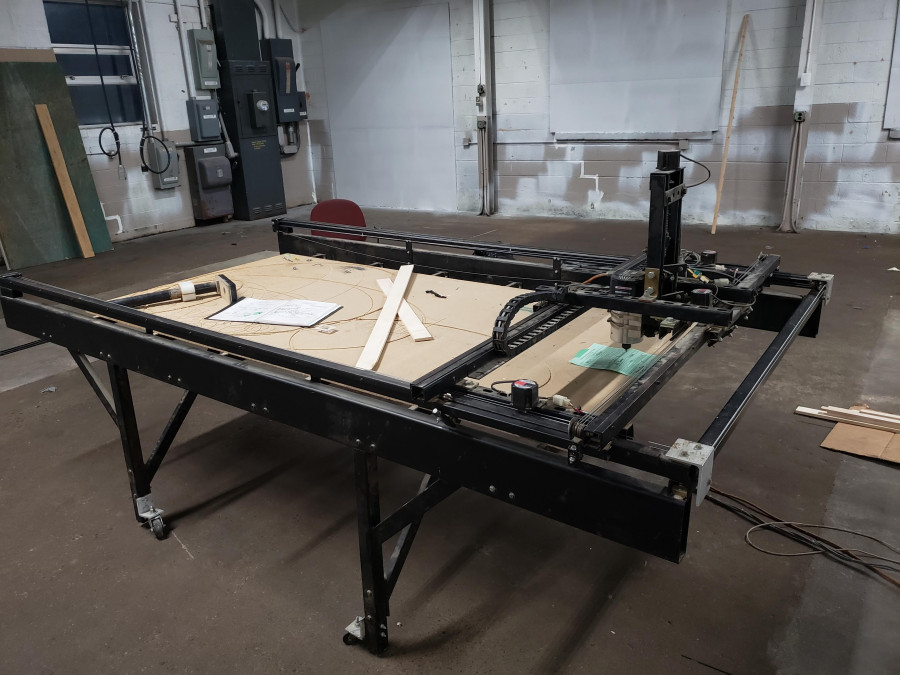
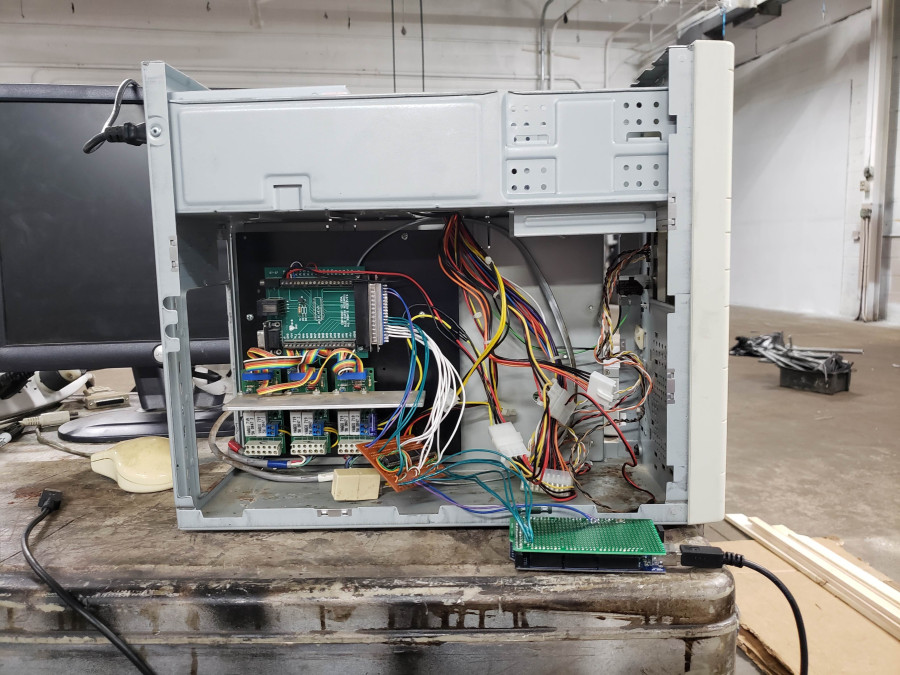
Makerspace i3Detroit was the recent recipient of a free yet non-functioning CNC router. While out of commission when received, the device’s mechanical components and motors appeared to be in operational condition, plus it had a large work surface. The decision was made to get the CNC up and running for now, with the eventual goal of turning it into a plasma cutter.

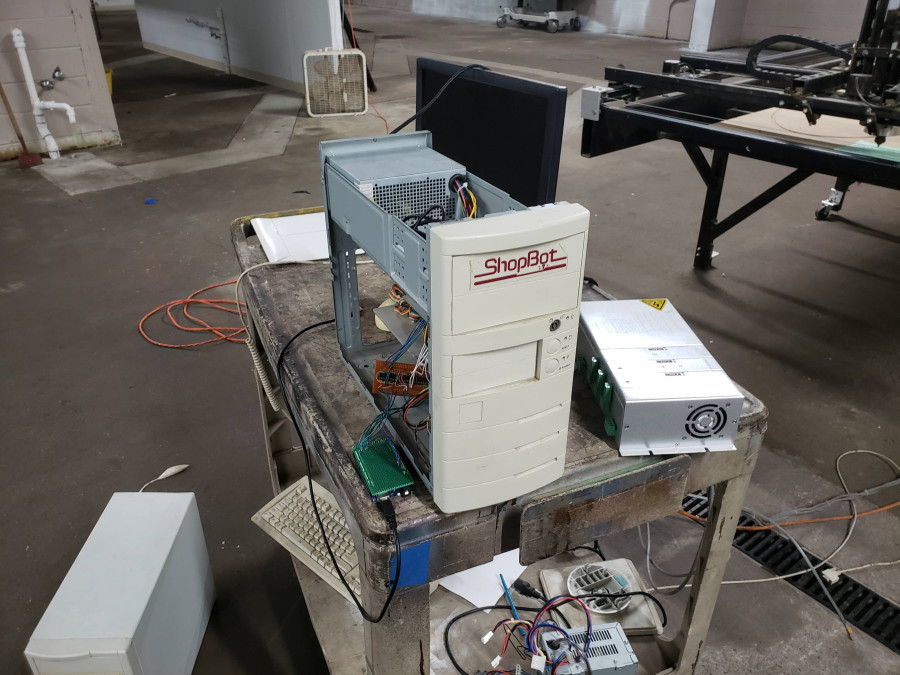
First, they booted up its (Windows 95) computer and replaced a power supply on the controller. An adapter board for the controller was then built using info from this Arduino Forum post, allowing the router to be controlled with an Arduino Mega running grbl firmware. 

Although there is still some work to do, it can be seen happily jogging along in the video below, and appears well on its way to becoming a usable machine!