Posts with «robotics» label

Build your own robotic arm out of cardboard

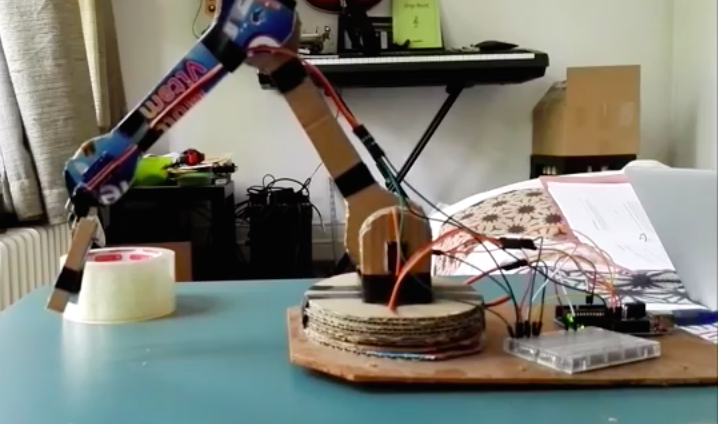
From our Chairigami Maker Faire booth furniture to Google VR headsets, we’ve seen various use cases for cardboard. Added to that list is a robotic arm, courtesy of Uladz Mikula.

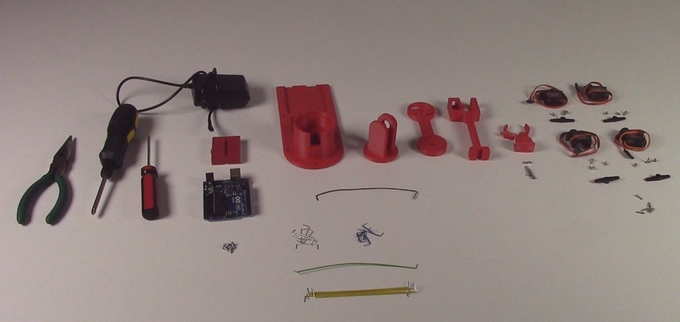
According to the Maker, the design can be replicated in two hours using Arduino and four servo motors. Aside from the electronics, the project also calls for a piece of hardboard for the base and three clips.

The arm, which Mikula calls “CARDBIRD,” can be controlled in one of two ways: either from a PC using a Processing program or remotely via an IR pult/receiver. Ready to build your own? Check over to its Instructables page!

Nvidia Jetson TX1 Cat Spotter and Laser Teaser

The Jetson TX1 Cat Spotter uses advanced neural networking to recognize when there's a cat in the room — and then starts teasing it with a laser.

Read more on MAKE

The post Nvidia Jetson TX1 Cat Spotter and Laser Teaser appeared first on Make: DIY Projects and Ideas for Makers.

Sandwich bot gets peanut butter everywhere but the bread

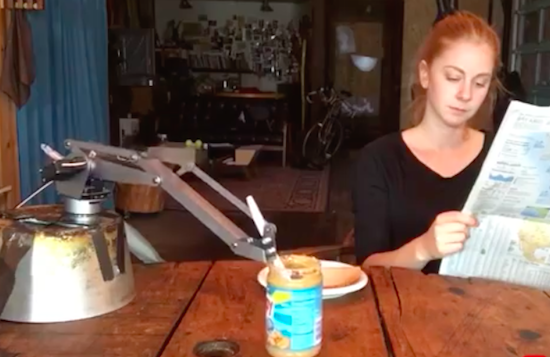
What do you do when you’re the Queen of S****y Robots and you’re in the mood for a peanut butter and jelly sandwich? You have a remote-controlled bot make one for you, of course. This is exactly what Simone Giertz set out to do in her latest hilarious project using a pair of robotic arms: one holds a plastic knife for spreading, while the other is puppeteered by her friend, Fiona.

Although this sandwich robot may not be making any PB&Js anytime soon, Giertz’s video will surely have you LOL-ing. Enjoy!

Talk to the (animatronic) hand!

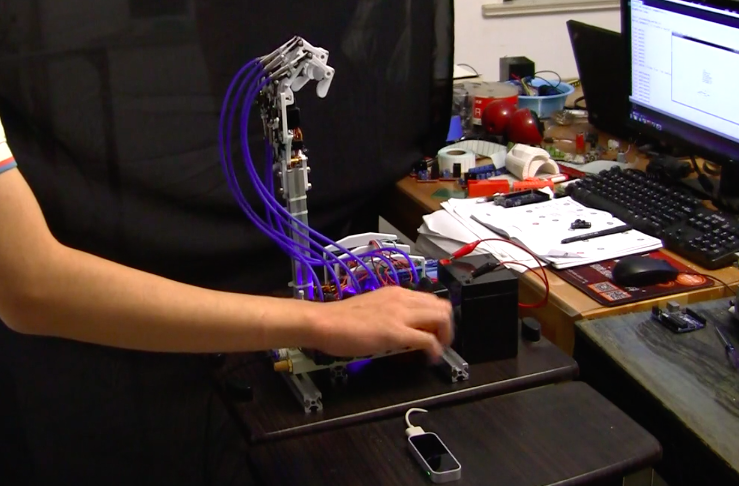
Maker Shuang Peng has created a 13 DOF animatronic hand using an Arduino Mega, seven servo motors, and six air cylinders, along with a Leap Motion sensor for control.

As briefly described on his Instructables page:

There are various ways to control the hand. I’ve tried the Leap Motion sensor and the data glove, which catches my motion via Processing. Then the Processing communicate with the Mega via serial. Now, I’m trying to use EMOTIV Insight EEG sensor to control it.

Did a Solar-Powered Autonomous Boat Just Cross the Pacific Ocean?

Damon McMillan built a robotic boat. Not just any robotic boat. This one is sailing across the world's oceans. And it's just simple and elegant enough to work.

Read more on MAKE

The post Did a Solar-Powered Autonomous Boat Just Cross the Pacific Ocean? appeared first on Make: DIY Projects and Ideas for Makers.

These Arduino bots move plants to sunny and shady spots

What do you do when you want your plants to grow but you lack a green thumb? Give them wheels and the ability to seek out sunny and shady spots on their own. This was media artist Kathleen McDermott has done.

The aptly named Sunbot and Shadebot are robots that help houseplants tour the outside world. Sunbot uses photocell (light) sensors to look for sunny places to rest, while Shadebot employs the same sensors to locate shadowy spots.

Both platforms are made out of a recycled fan case and wood, along with an Arduino, DC motors, rechargeable batteries and solar panels.

See them in action below!

Arduino Blog 12 Aug 21:21

The little Arduino robot arm that could!

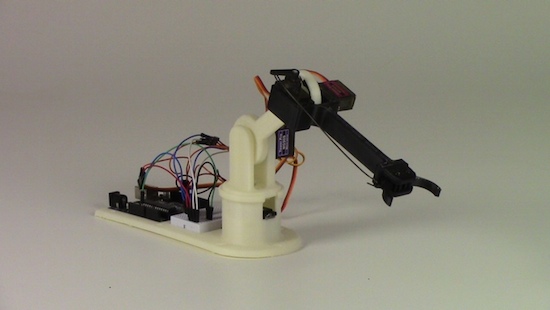
As its name would suggest, the LittleArm is a mini 3D-printed robot that began as a weekend project. Its creator Gabe Bentz wanted a small arm that was easy to work with, and one that wouldn’t require him to dig deep into his wallet. So, as any Maker would do, he decided to design his own low-cost device.

After showing the LittleArm off, it wasn’t before long that he was approached by some STEM teachers in the area who wondered if the kit was something they could use in their classrooms. Ideally, every student should have one to tinker with, but unfortunately today’s systems tend to be too expensive and quickly loose parts and pieces. This is a problem that LittleArm is looking to solve.

The arm is powered by an Arduino Uno and four identical metal-geared micro servos, while all other mechanical components are 3D-printed. There’s also a modular gripper that’s actuated by a servo along with rigid end-effectors for various tasks. What’s more, a basic GUI enables you to control the arm, its gripper, the speed, as well as use its record function to train the robot to perform a specific task and then watch it play out the sequence.

The entirely open-source gadget comes as a DIY kit that can be purchased or built from scratch. Want one of your own? Check out Bent’z Kickstarter page here, and see the LittleArm in action below (including some of its dance moves).

Our Journey in Building a Glove-Controlled Robotic Gripper

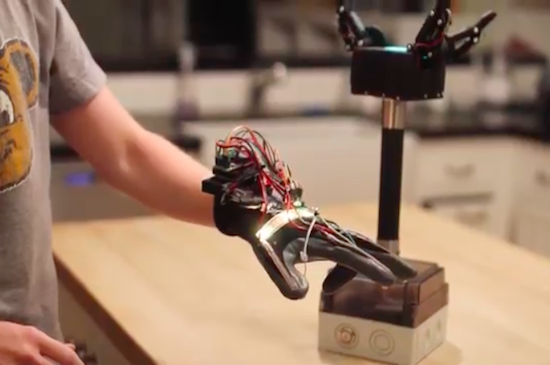
Graham and Sam worked together to create a robotic gripper controlled with a glove and strong enough to hold household items.

Read more on MAKE

The post Our Journey in Building a Glove-Controlled Robotic Gripper appeared first on Make: DIY Projects and Ideas for Makers.

This Telepresence Robot from the 1800s Helps Promote Metal Shop

AR-Duo is a steampunk telepresence robot that shows off the skills and ingenuity of a school's metal shop.

Read more on MAKE

The post This Telepresence Robot from the 1800s Helps Promote Metal Shop appeared first on Make: DIY Projects and Ideas for Makers.

Grab things with an Arduino robotic gripper

Sam Baumgarten and his friend have developed a pretty rad robotic gripper with the help of Arduino and 3D printing. The gripper itself consists of three large hobby servos joined to the fingers with a linkage. The underactuated fingers have a force sensor under each contact point, while the control glove is equipped with tiny vibrating motors at the fingertips. This, of course, provides haptic feedback to ensure that the user doesn’t crush anything–the greater the pressure, the stronger the motors vibrate.

The gripper is mounted to a handle with abrasive tape–the same kind found on staircases and skateboards. The tape is also used on each finger for optimal gripping. A box at the base of the pole houses all of the electronics, which include an Arduino Pro Mini for controlling the addressable LEDs on top, another Arduino for handling the communication and fingers, and a battery for power.

Aside from the vibration motors, the glove features flexible resistors on the back of the fingers, an LED strip for visualization, a breakout board for measuring the resistance from the flex sensors, a battery, an Arduino Uno for processing, and an XBee module for transmitting the signals to the Arduino in the gripper.

If you think this sounds awesome, wait until you see it in action. Baumgartnen has shared a demo of the project, along with a detailed breakdown of his build. Kudos to Hackaday for finding this incredible piece of work!