Posts with «featured» label

Malduino Elite – First Impressions

A while back, I wrote an article about Malduino, an Arduino-based, open-source BadUSB device. I found the project interesting so I signed up for an Elite version and sure enough, the friendly postman dropped it off in my mail box last Friday, which means I got to play around with it over the weekend. For those who missed the article, Malduino is USB device which is able to emulate a keyboard and inject keystrokes, among other things. When in a proper casing, it will just look like a USB flash drive. It’s like those things you see in the movies where a guy plugs in a device and it auto hacks the computer. It ships in two versions, Lite and Elite, both based on the ATmega32U4.

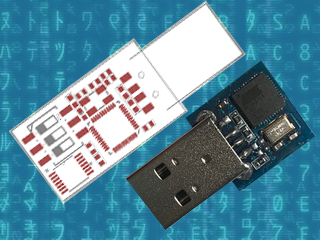
The Lite version is really small, besides the USB connector it only contains a switch, which allows the user to choose between running and programming mode, and a LED, which indicates when the script has finished running.
Original Malduino Elite sketch and Lite prototype

The Elite version is bigger, comes with a Micro-SD card reader and four DIP switches, which allow the user to choose which script to run from the card. It also has the LED, which indicates when a script has finished to run. This allows the user to burn the firmware only once and then program the keystroke injection scripts that stored in the Micro-SD card, in contrast to the Lite version which needs to be flashed each time a user wants to run a different script.

These are the two Malduinos and because they are programmed straight from the Arduino IDE, every feature I just mentioned can be re-programmed, re-purposed or dropped all together. You can buy one and just choose to use it like a ‘normal’ Arduino, although there are not a lot of pins to play around with. This freedom was one the first things I liked about it and actually drove me to participate in the crowd-funding campaign. Read on for the full review.

The Hardware

Malduino Elite vs USB flash drive

So the Elite board arrived as schedule and I found myself some time to look an it. Despite being longer than the Lite version, it’s still quite small, measuring roughly 4.6 cm x 1.1 cm (around 1.8 in x 0.43 in), which you can easily adapt to an old USB case, although you’ll have to cut some holes for the DIP switches and the Micro-SD card. In the crowd-funding campaign, the original sketch was for a 3 DIP switch version but the final Elite has four, which I found nice. I plugged it in to an old computer, after some consideration about which firmware it could ship with and what it could do to my laptop, and sure enough a red LED appeared. And that was it. Nothing else.

After playing around with the switches and exercising some RTFM, I realised that the firmware it ships with is probably some sort of Q.C. test for the dips, which makes the Malduino output the numbers 1 to 4 (actually simulating a keypress 1 to 4), depending on which switches are ON. So far so good, it works and I’ve seen worse PCB boards than this one. The board has holes for six pins, which I did not trace to the micro-controller and I don’t know what they are for.

The Setup

Setting up the Malduino requires that you have the Arduino IDE installed and up to date. You’ll need to open up the board manager and install the Sparkfun boards since the Elite is programmed as a ‘Sparkfun Pro Micro’ running at 3.3 V and 8 MHz. Then you need to go the Malduino Script Converter website which serves several purposes:

  • It allows to convert scripts between the Lite and Elite versions
  • It allows you to choose your keyboard layout language
  • It auto generates the Arduino project for you to import to the IDE

For the Elite version, just create a simple or even empty script to download the project, since when in ‘normal’ operation you will just flash the Malduino once and then use the Micro-SD card to store new scripts.

A note on flashing, if you are using a Debian-based distribution you might come across some problems like I did and not be able to flash the device. Like the user on this most useful post, my modem-manager was trying to talk with the Malduino after every reset and confused AVRDUDE to death. The solution is to add udev rules to “/etc/udev/rules.d/77-mm-usb-device-blacklist-local.rules”, kudos to [socrim]:

ACTION!="add|change", GOTO="mm_usb_device_blacklist_local_end"
SUBSYSTEM!="usb", GOTO="mm_usb_device_blacklist_local_end"
ENV{DEVTYPE}!="usb_device", GOTO="mm_usb_device_blacklist_local_end"

ATTRS{idVendor}=="1b4f" ATTRS{idProduct}=="9204", ENV{ID_MM_DEVICE_IGNORE}="1"
ATTRS{idVendor}=="1b4f" ATTRS{idProduct}=="9203", ENV{ID_MM_DEVICE_IGNORE}="1"

LABEL="mm_usb_device_blacklist_local_end"

The Software

Since I’m running Linux, a quick shortcut to run a command is the ALT-F2 combination. So I script that into a file and save it to 1111.txt. The Elite searches the Micro-SD card for a file corresponding to the current dip switch state. Lets say the dip switch 2 and 4 are ON. In this case, the software tries to find the file named 0101.txt and parse its contents (as in dip switch order 1,2,3,4 and not the binary representation of the number 2 and 4) . When it finishes, the red LED starts flashing quickly. My simple script was:

DELAY 2000
ALT F2
DELAY 1000
STRING xterm
DELAY 1000
ENTER
DELAY 1000
STRING id
DELAY 1000
ENTER

But it was not working. Almost all commands worked but the ALT-F2 combo was not functioning properly. Close, but no cigar. No ALT-F2, no run command window. I’ve already lazy-browsed the source code a bit because I really didn’t have a lot of time on my hands but I needed to figure this out. The offending code was this:

else if(equals(s,e,"F1",<strong>3</strong>)) Keyboard.press(KEY_F1);</pre>

else if(equals(s,e,"F2",<strong>3</strong>)) Keyboard.press(KEY_F2);
...
else if(equals(s,e,"F10",3)) Keyboard.press(KEY_F10);
else if(equals(s,e,"F11",3)) Keyboard.press(KEY_F11);

A custom equals function was receiving size 3 for the strings of the Function keys, like “F2”. It was ok for “F10”, “F11” and “F12”, but failed for the rest of the keys. Changing 3 to 2 did the trick, but my Portuguese keyboard layout started to interfere with other test scripts. So I changed the code to include PT and UK layouts, changing them in a #define at compile time.

It would be cool if it was possible to access the SD card from the computer as a regular USB volume. I don’t know exactly how feasible that is, but it does not come with the current firmware. I still wanted to be able to output the content of an arbitrary file on the SD card to the screen, so I added another script function called ECHOFILEHEX that outputs the content of a file in the SD card as escape characters. For example, if the file a.txt contains “AAA”, the script command ECHOFILEHEX a.txt would output “\x41\x41\x41”. This can be useful to echo binary files into printf or echo -e, in Linux hosts at least.

Meanwhile, I had some trouble reading the original code. You know, we all have different programming styles. Don’t get me wrong, I’ve been known to write some messed-up spaghetti code. I sometimes browse old projects looking for some libs or classes I coded and wonder ‘who the heck wrote this steaming pile of code?’ Me, it was me. Anyway, I started to change a bit here and there and ended up changing pretty much the entire code. That’s the beauty and the curse of open-source. If you’re curious you can check it out here.

Conclusion

All in all, and despite some bumps, I’m quite pleased with Malduino. It is what I expected: an open platform for BadUSB attacks that’s in its infancy. It’s awesome that we can all tinker with it, modify it, make it better or just make it suit our needs. I hope a real community can start so we can see its full potential emerge. My short list includes simulating other USB devices, better SD card management, and expanding the device via the unused pins. What would you add?

It’s a long way to go and a lot can go wrong, so good luck with the project [Seytonic]!


Filed under: Featured, reviews, security hacks

The ClearWalker is an 8-legged, Arduino-powered Strandbeest

What has eight legs, a tail, and is powered by an Arduino Mega? The ClearWalker, of course!

This Strandbeest-style walker employs two motors, controlled by individual H-bridge relay modules to traverse forwards, backwards, and slowly rotate to one side or another via a hesitating leg motion. You can see how the electronics (including a bunch of LEDs) were integrated into this build in the video below.

If you’d like to try a similar control scheme for your ClearWalker/Strandbeest/treaded vehicle using an Arduino and smartphone, you can find it outlined in this Arduino Project Hub post. For the rest of the steps in this quite involved build, and more rather zany inventions, be sure to check out the “Jeremy Cook’s Projects” YouTube page.

A ‘little helper’ for cutting square tubing

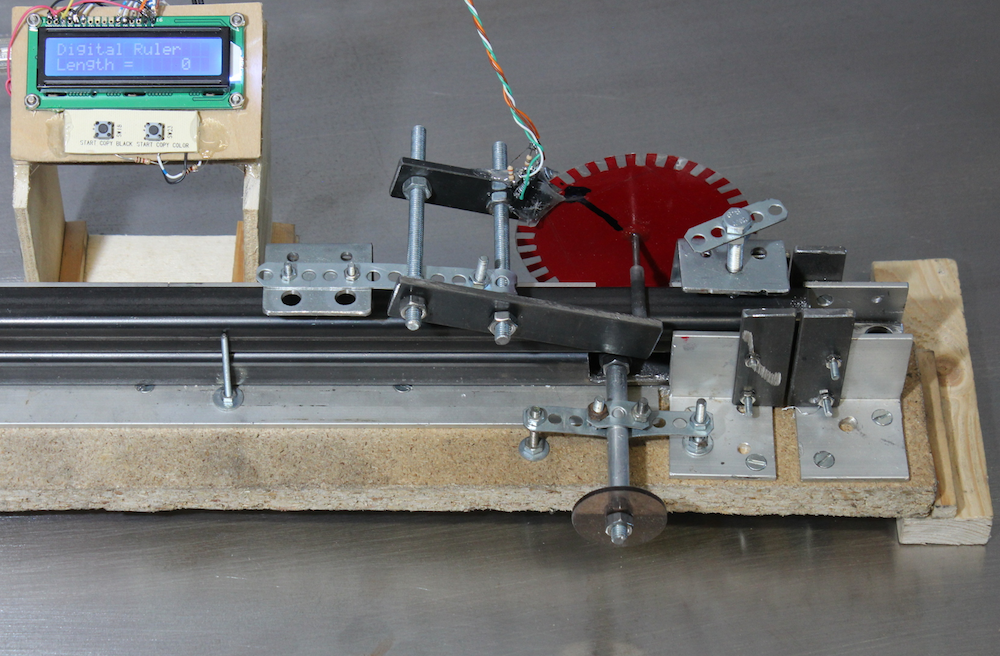
YouTuber “HomoFaciens” had quite a bit of square tubing to cut for his latest CNC router. As he’s known for combining simple tools with creative uses of electronic components, he came up with a jig that helps him precisely position his cuts.

This device works using an encoder made out of paper, tape, and a nail sharpened on both ends. Two IR emitter/receiver pairs send pulses to an Arduino Uno, which displays this number on an LCD screen. The machine is calibrated by measuring a known length of tubing verses the number of pulses for an actual distance measurement. Once set up, not only can the digital ruler be used to properly cut tubing, but can be put on a drill press for accurate hole placement!

Interested in building your own ‘little helper?’ Read more about the project on HomoFaciens’ page here, and see it in action below!

Arduino Blog 27 May 21:43

Log your hamster’s runs with Arduino

We’ve all seen hamsters in a cage, furiously running nowhere. Perhaps you’ve thought about the pointlessness of this activity, before going to the gym to lift weights up and down or run on a treadmill. From an outside perspective, both activities seem pointless, but when you realize the benefits, maybe tracking what “feats of strength” you’re able to accomplish, things become much more clear.

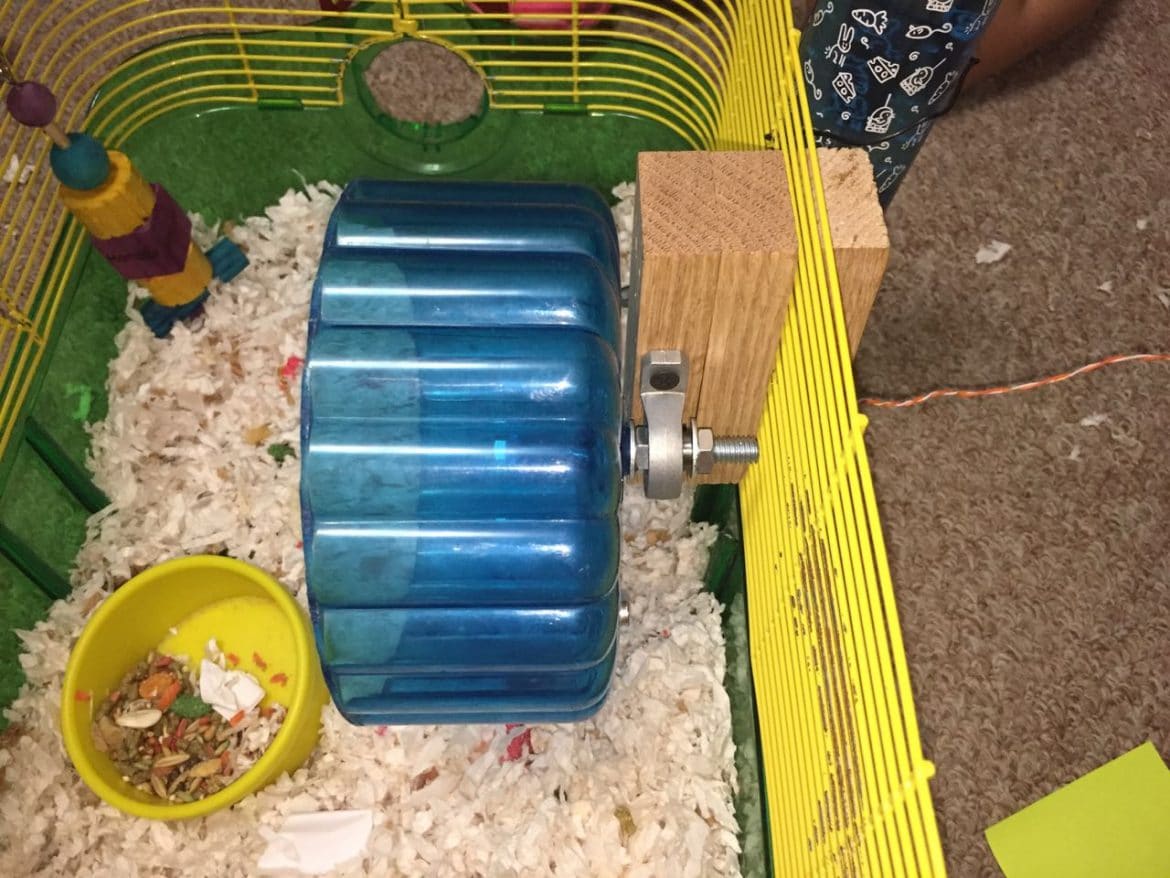
As seen on Hackaday, in order to track the activity of his daughter’s hamster, John Mueller implemented an Arduino Uno-based system that records revolutions using a magnet and a reed switch. Every time the magnet on the wheel passes the fixed switch, it triggers an Arduino input, recording how many revolutions, and thus how many miles the little guy runs each night. Results are quite impressive considering its size, recording over 3.5 miles on one occasion!

This type of encoder concept could be used in many different situations, such as logging bicycle speeds, or tracking motor stats.

Build your own Arduino balancing robot

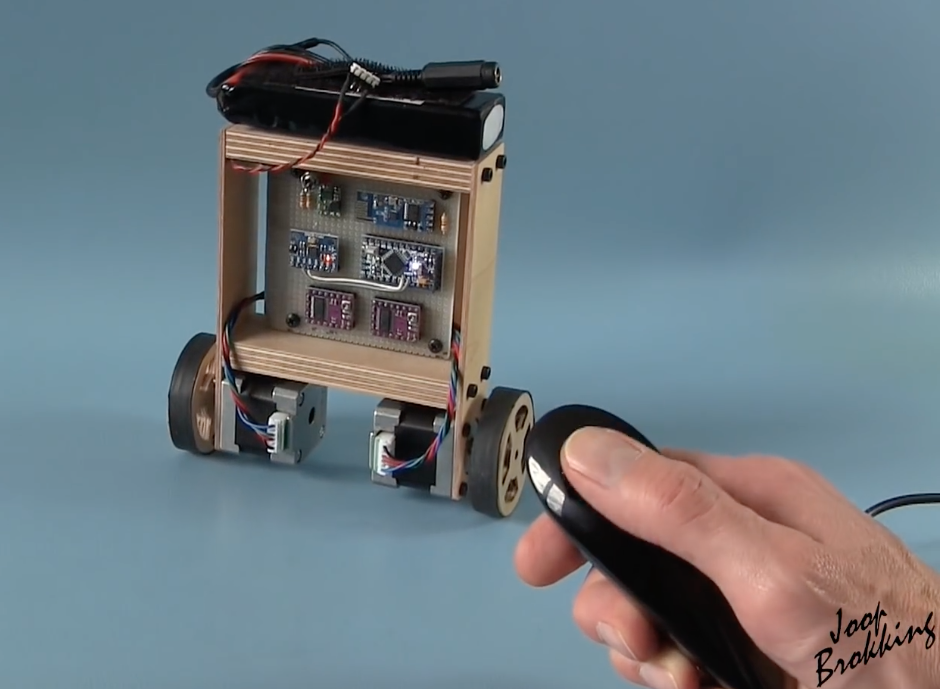
If you’re familiar with the Segway or other vehicles that balance in what is known as an “inverted pendulum” configuration, you may think that while interesting, creating something similar would be too complicated or out of your budget. Though perhaps still not simple, Joop Brokking takes you through his design for this type of bot in the video seen here, making it accessible if you’d like to build your own.

The robot, which will cost about $80 in parts, uses two stepper motors for greater movement precision than could be had with normal DC models, and employs an Arduino Pro Mini, along with an MPU-6050 accelerometer/gyroscope for control. It can be driven around by a Wii U-style nunchuck, which transmits to the robot via an Arduino Uno and wireless transceiver module.

You can find more info and product links for this project on Brokking.net.

Try to grab some candy with this Arduino claw machine

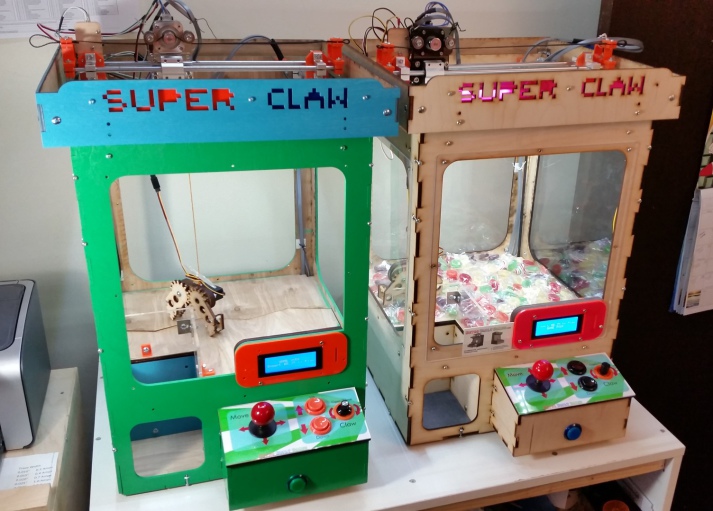
Depending on your point-of-view, you may see claw machines as an interesting device that can normally be ignored, or perhaps magnet for quarters that you must satisfy until you capture the stuffed animal that’s “so easy to get.” Maybe these gantry-crane gadgets would be a bit more fun if you could play them at home to your heart’s content. If that sounds appealing, then Ryan Bates of Retro Built Games has the perfect solution with his “Super Claw” machine.

This project, though on version four, is not currently for sale as a kit, but he is now selling his stepper driver board for the device, which links up to an Arduino Mega via an IDC cable. This takes advantage of the brick of I/O opposite the USB and power connector on the Mega to clean up wiring significantly.

You can buy the board here and check out his build page for lots more info on the (still ongoing) development process!

Ancient CRT monitor revived using an Arduino Uno

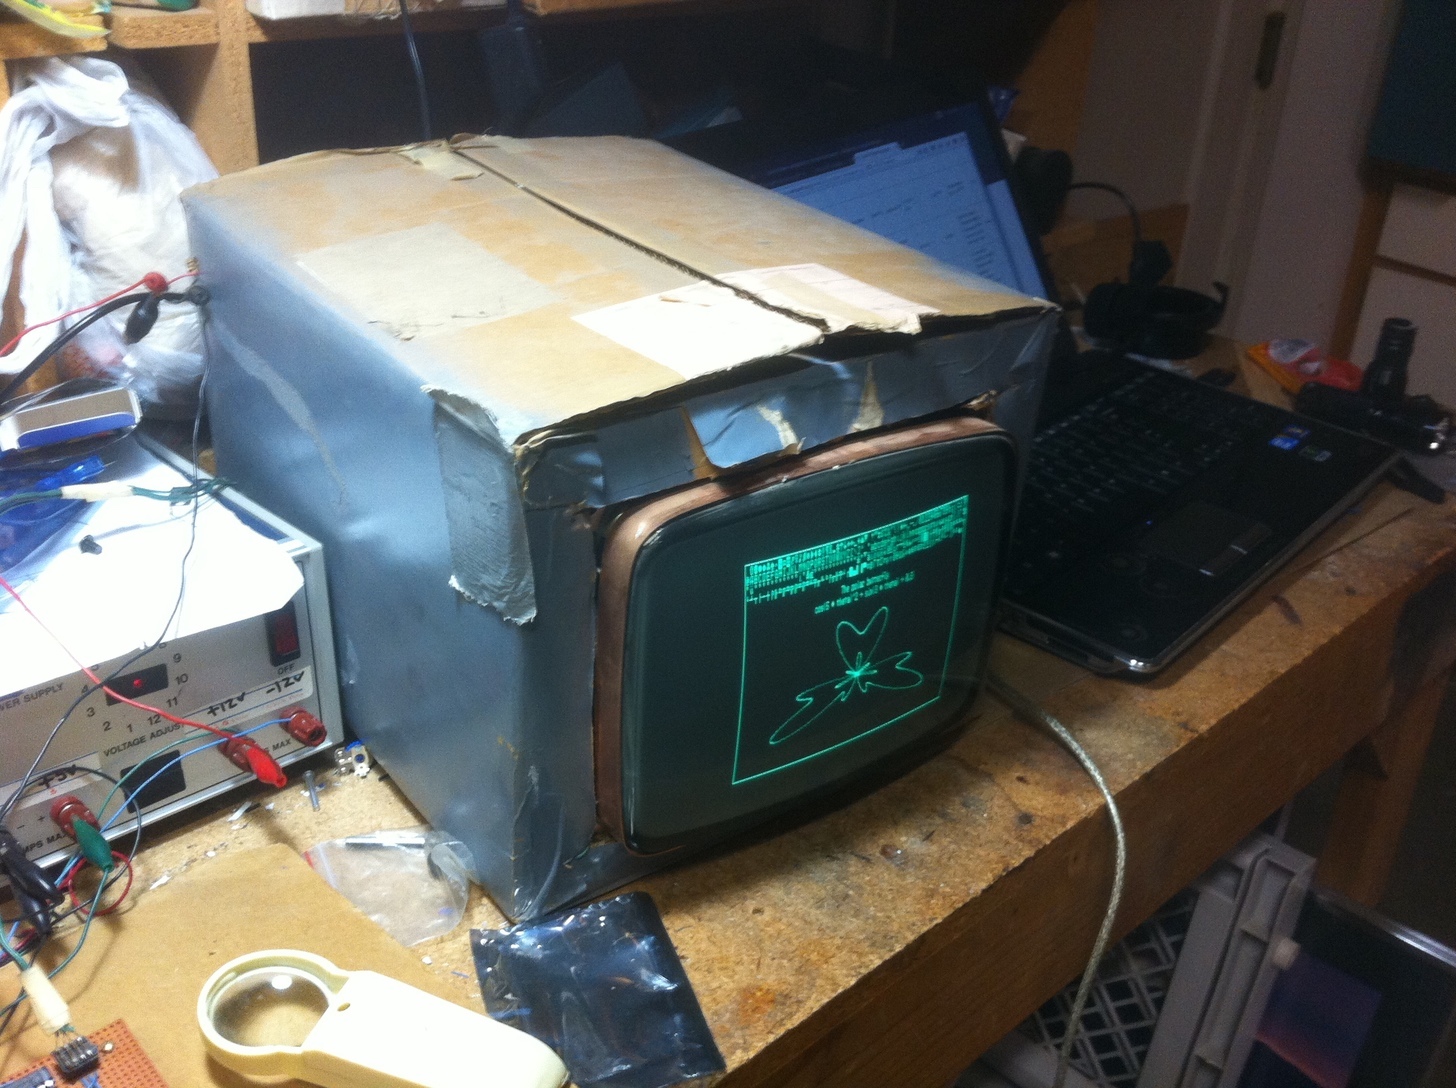
Hacker “MmmmFloorPie’s” senior project in college, in 1989, was a device based on the venerable Motorola 6800 chip that could record and play back sounds. It could also display these recorded waveforms on a monochrome CRT monitor. The monitor in question was purchased as a bare CRT for $20, and mounted in the cardboard box it was shipped in. Various risks aside, it’s quite an impressive setup.

As with many projects that seemed very cool at the time, this one sat in ‘FloorPie’s garage for many years, until it was finally powered up many years later. Naturally it didn’t work, but instead of giving up, an Arduino Uno shield was made in the form of the 68000 motherboard to send it the required signals.

Though it’s now much slower than the original, the CRT was brought back to life. You can find more about this build on Imgur or on ‘FloorPie’s Reddit post here.

Arduino Blog 16 May 16:03

Turn your door into an ‘alien portal’ using Arduino

As YouTuber Evan Kale puts it, his set is was kind of boring. He decided to spruce things up by turning his ordinary door into an “alien portal,” lining it with a strip of RGB LEDs. Though this may not be the first time you’ve seen this type of lighting in action, he directs our attention to a few interesting details about using them in typical Kale style.

One interesting note comes around the 4:50 mark, where he points out his portal is controlled using Hue Saturation Lightness (HSL) via a potentiometer instead of RGB. This keeps the glowing effect consistent, while allowing color adjustment.

For this project, he employed an Arduino Nano, which looks like a great choice since it needs a limited amount of I/O. Using this tiny board, the entire control package can fit into his small 3D-printed enclosure.

You can see a demo of Kale’s “alien portal” below, and check out his channel for more fun Arduino projects!

Arduino Blog 15 May 20:01

Arduino device helps keep dogs safe from overheating

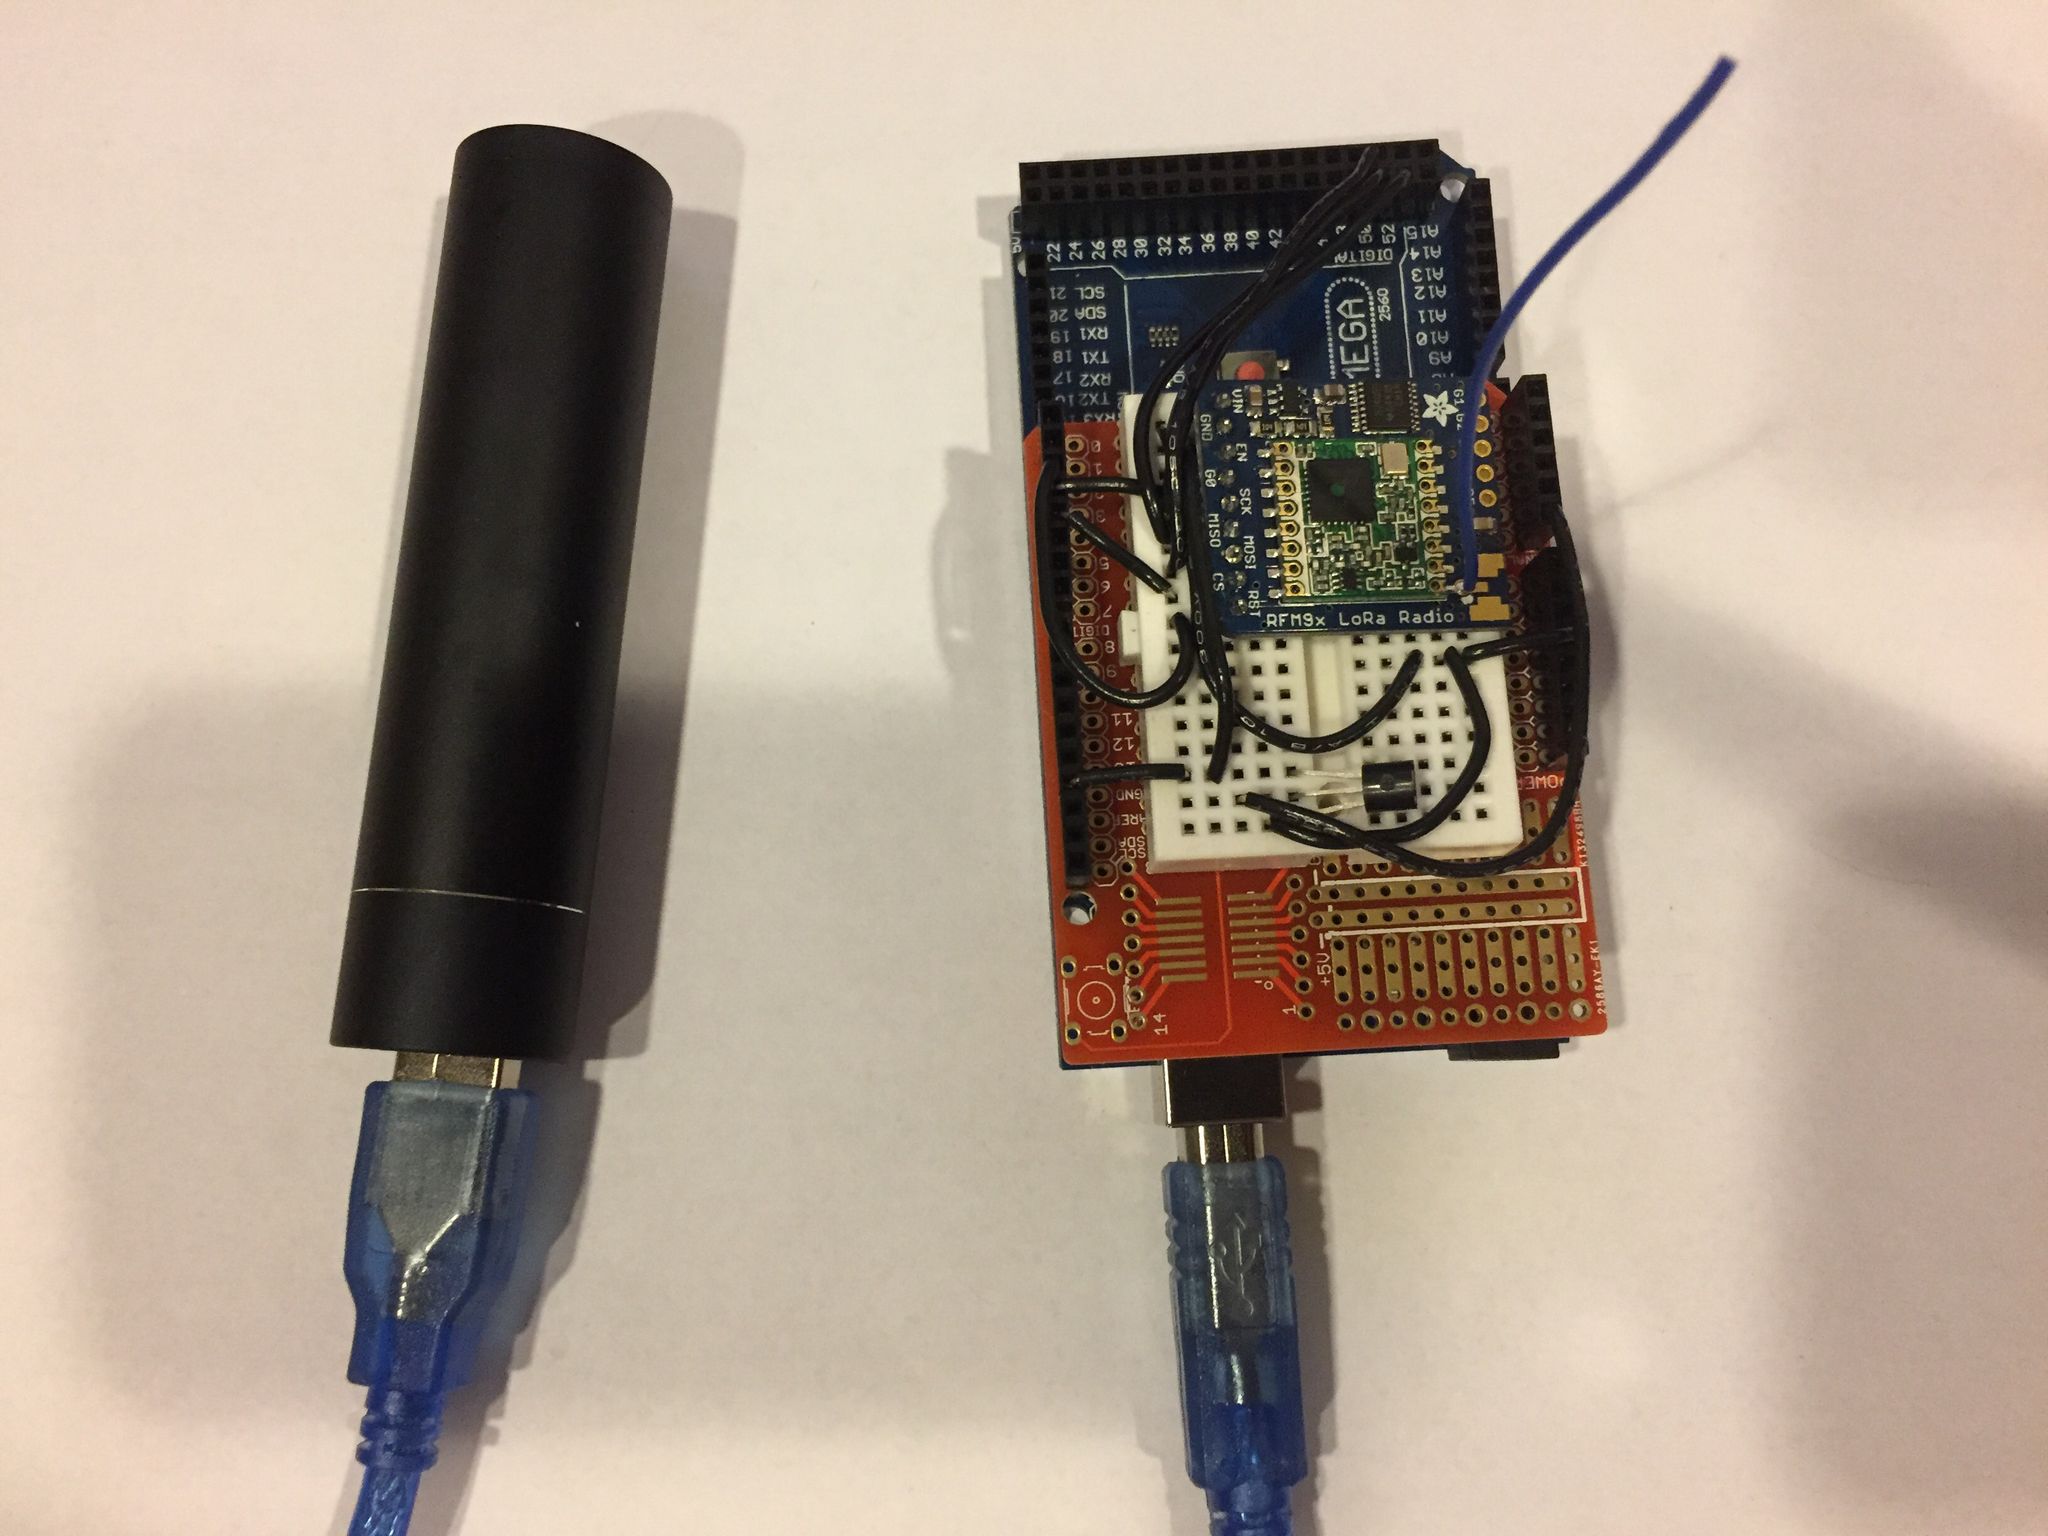
Pets bring an untold amount of joy into our lives, but unfortunately they aren’t allowed to go everywhere that humans are. Of course this makes sense in many situations, but if you’d like to take your dog with you wherever you go, this means occasionally leaving poochie in the car. Along with leaving the sunroof and windows open, this project’s author also came up with a transmitter and receiver to monitor the temperature inside of the car with a series of LED pulses.

The car unit consists of an Arduino Mega, along with a temperature sensor and LoRa transciever. The receiver takes this wireless information, which can be reliably read at a range of 250 meters (820 feet) in an urban environment, and gives the user a series of blinks to assure Max’s (the dog) human that he’s not overheating!

You can find the entire build’s write-up here, or check out its code on GitHub.

Grow your own salad with this rotating hydroponic system

You likely know that growing plants via hydroponics involves some sort of water and fertilizer solution. Perhaps, however, you don’t realize that these plants need to be removed from the water occasionally in order to air out the roots. Normally, this means that the water is raised and lowered.

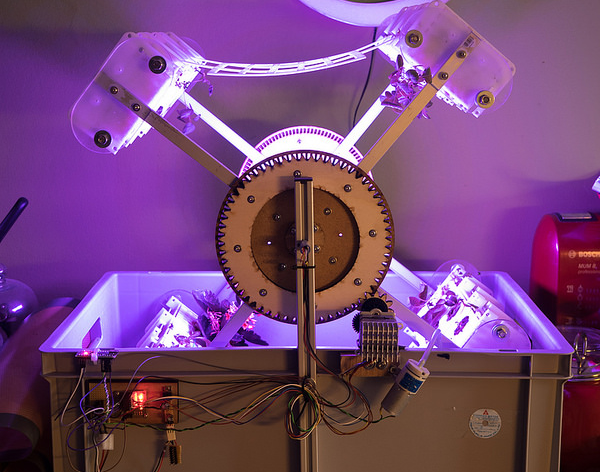
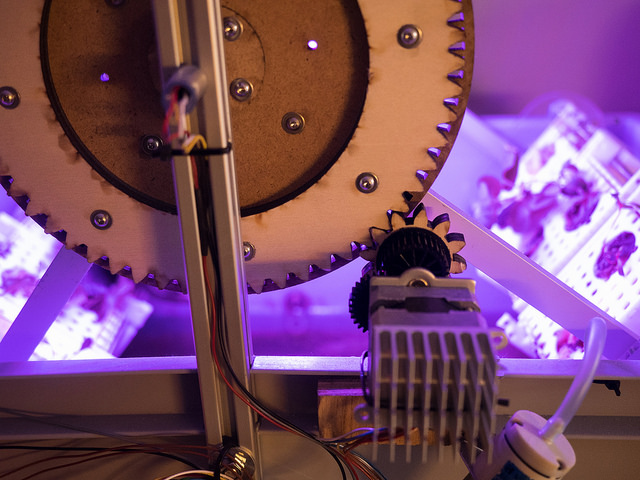
Peter Fröhlich, though, decided to go a different route, and came up with a device to physically raise and lower the plants using a large wheel, resembling a sort of Ferris wheel for plants!

The frame itself is a plastic bin he purchased at a local hardware store, while the wheel and its arms were made with components lying around his lab and other laser-cut parts. To make this interesting setup turn, he used a stepper motor from an old printer, controlled by an Arduino and stepper driver.

Want to grow your own salad right inside your home? You can find more details of this fascinating build in Fröhlich’s project write-up and on Hackaday here.