Posts with «featured» label

Give new life to an old electron microscope with Arduino

As seen here, although you might consider your oscilloscope and other test equipment to be pretty neat, you most likely don’t have anything nearly as cool as the scanning electron microscope that was dragged out of a shed at Benjamin Blundell’s local hackerspace.

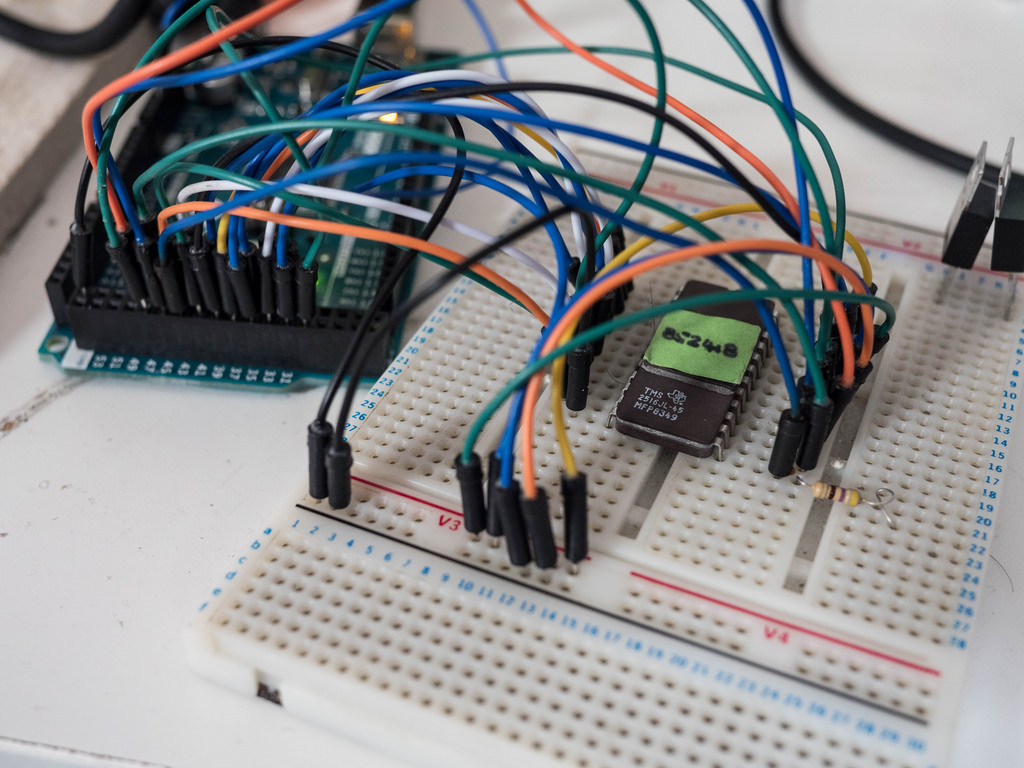
The small detail is that it doesn’t currently work. They’ve been able to track down the machine’s schematics, and Blundell was asked to get the contents off each of its ROM chips. Whereas this might have been difficult 20 years ago, he was able to hook chips up to an Arduino Mega and extract the contents of each one using code provided via his write-up.

Some of you might have watched the TV series, Halt and Catch Fire? If not, don’t worry, I won’t spoil it much. Basically, a couple of the lead characters decide to read the bios out of the latest IBM machine. It’s quite a dramatic moment, but the reality is perhaps somewhat more sober. Anyway, the process they had was quite involved, as it was the eighties after-all. Nowadays, we have things like the Arduino Mega that has enough digital input pins to read a ROM with ease.

While he still needs to figure out what’s going on with this information, they have a place to start and will hopefully have a very exotic tool running in the near(ish) future!

Build a light painting device with Arduino and LEDs

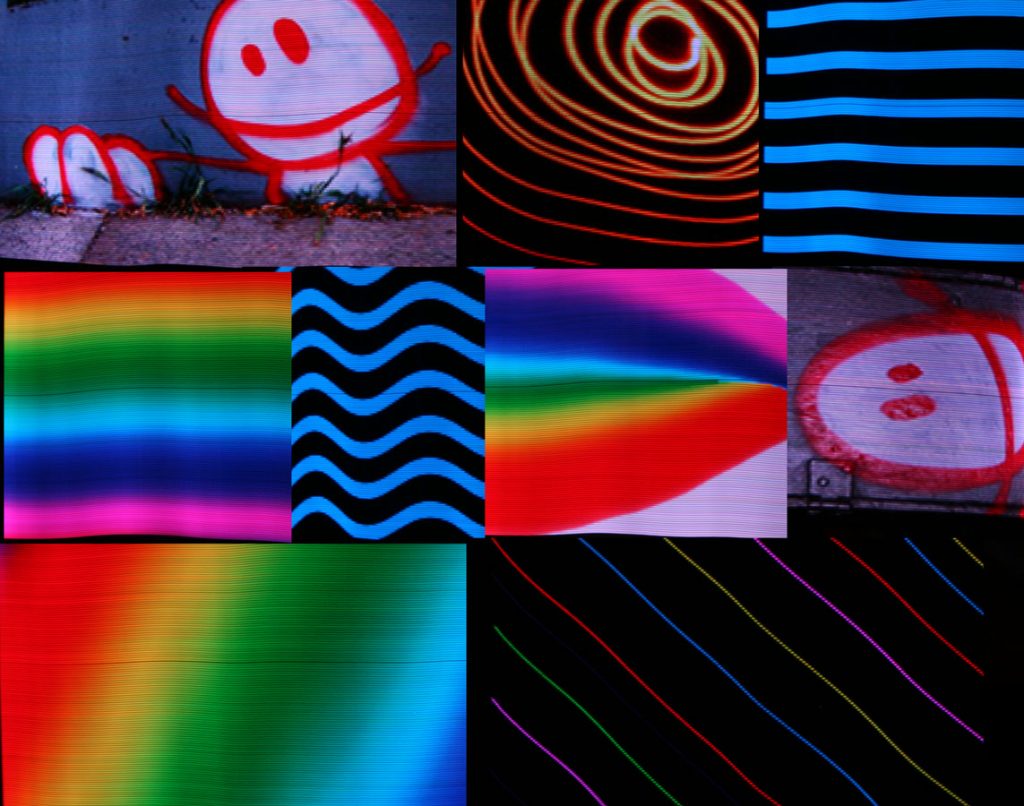
Graffiti with spray paint is generally impolite and illegal, but as hacker “Reven” shows in his write-up, you can get a very similar effect with long exposure photography and carefully-timed LEDs.

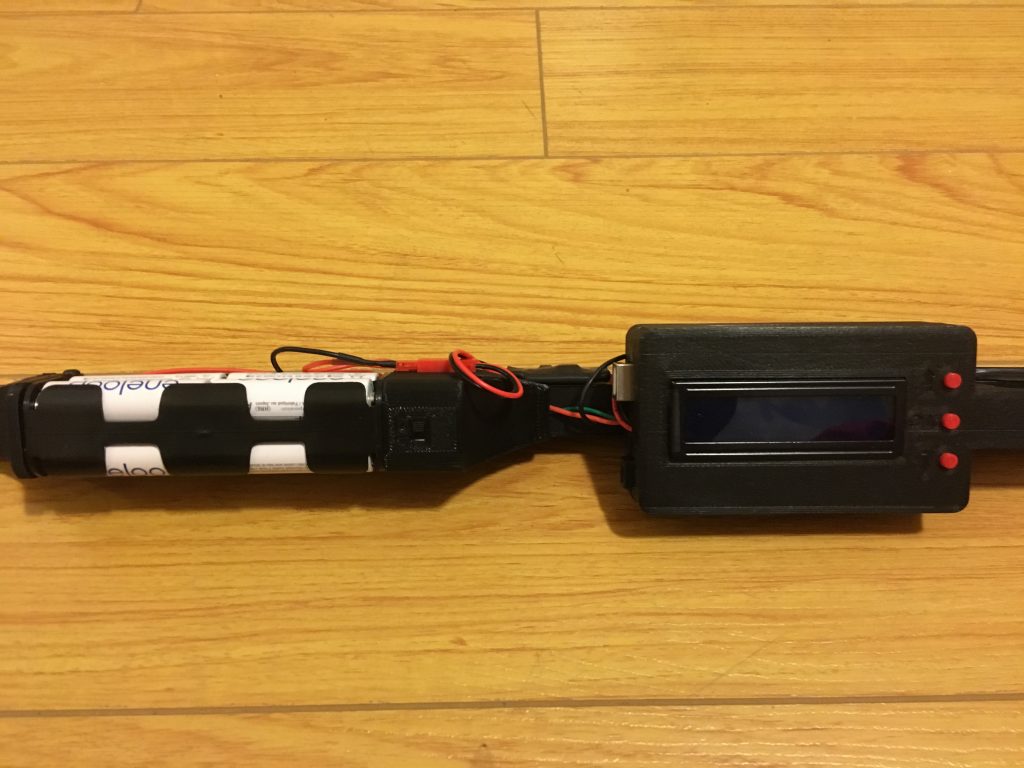
Instead of blindly moving a light point about to make this effect, he built his own handheld light painter using an Arduino Uno and a custom enclosure—shared on Thingiverse—to hold everything.

The project’s Arduino sketch can be found here, and adds a 16×2 LCD display to a light painting device conceived of by Phil Burgess for Adafruit, which enables to control the brightness of the LED strip as well as select and load various images from a micro SD card.

This has been done before, many, many times; and even commercially. But I wanted to build my own, both to learn in the process and because commercial options were out of my budget. I chose adafruit’s implementation as a starting point, because it worked on the hardware I already had and they have provided detailed instructions. I also wanted some additional features: I wanted to add a display and a menu system to be able to choose the image to display and adjust the settings (like brightness or speed). I also wanted to be able to turn off the brightness balancing that adafruit’s sketch did, because frame or animation painting wasn’t something I really needed. And most importantly, I adjusted the project to the materials I had at hand.

With this fantastic build in hand, Reven can now produce beautiful light graffiti wherever it’s needed!

Designing a fake dynamic price tag

Wile we know on some level that prices adjust to market conditions, with Amazon now owning Whole Foods, one could perhaps see a day when this happens electronically and instantaneously.

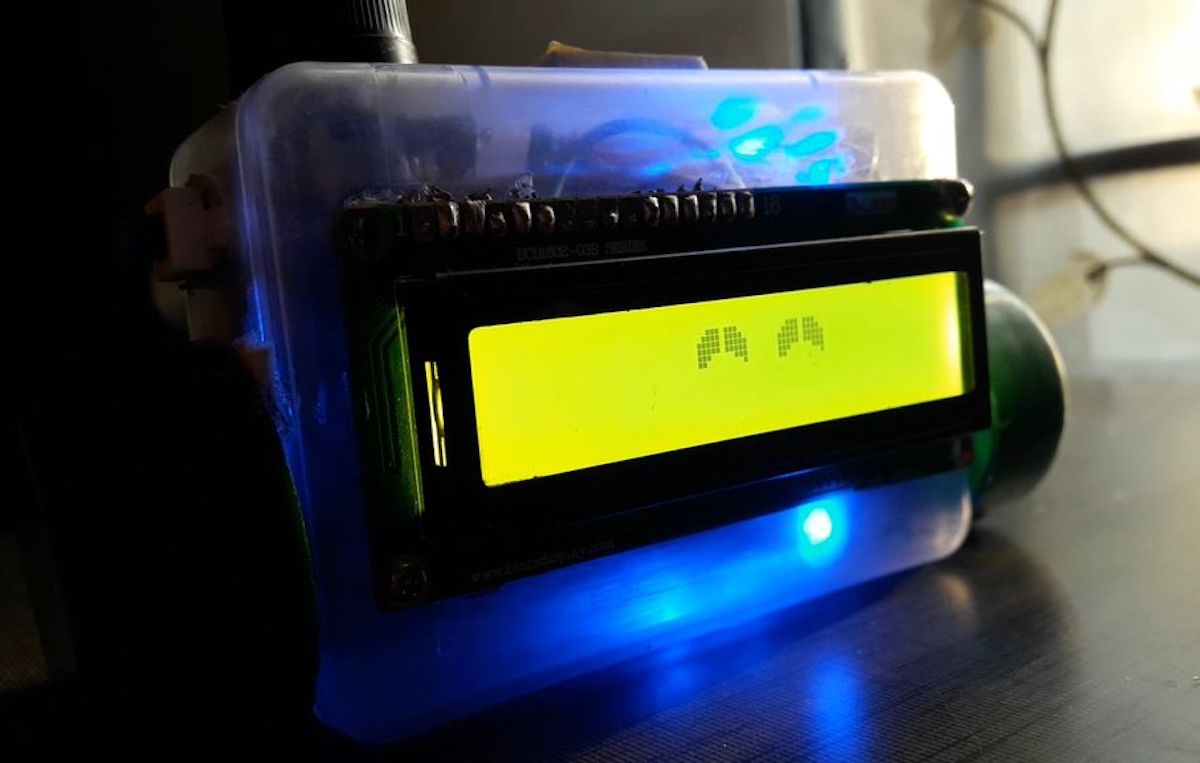
To get a preview of what this might look like, maker “msbirfday” decided to create a random price generator based on an Arduino Uno and a 16×2 LED display. This was then disguised as an official price tag, and set up in a store to observe how shoppers reacted.

The unit blends in nicely, and while employees might get annoyed at the device, it’s certainly an ingenious prank.

Amazon’s recent acquisition of Whole Foods Market made us wonder: what’s stopping dynamic pricing from stepping into the physical world of retail? What if the prices in a supermarket were just as flexible as those online?

Check out how it was made here, and see it in action in the video below!

Chat with Eve, the Arduino chatterbot

If you ever find yourself needing someone to talk to and can’t find a confidant—or perhaps even a pet—then the Eve chatbot by Debashish Buragohain will happily fill in.

This little robot uses Google Voice Recognition on an Android phone to listen to what you say and convert it to text, then pipes it over to the Arduino-based robot via Bluetooth. Eve processes the information and emits the proper audio response, stored on an MP3 sound module. Along with audio feedback, the robot’s LCD screen is able to form simple facial expressions to help convey emotions.

If you’d like to build your own, instructions and the needed files can be found here. You can also see Eve pleasantly chatting away in the video below!

Quadruped robot made entirely out of cardboard

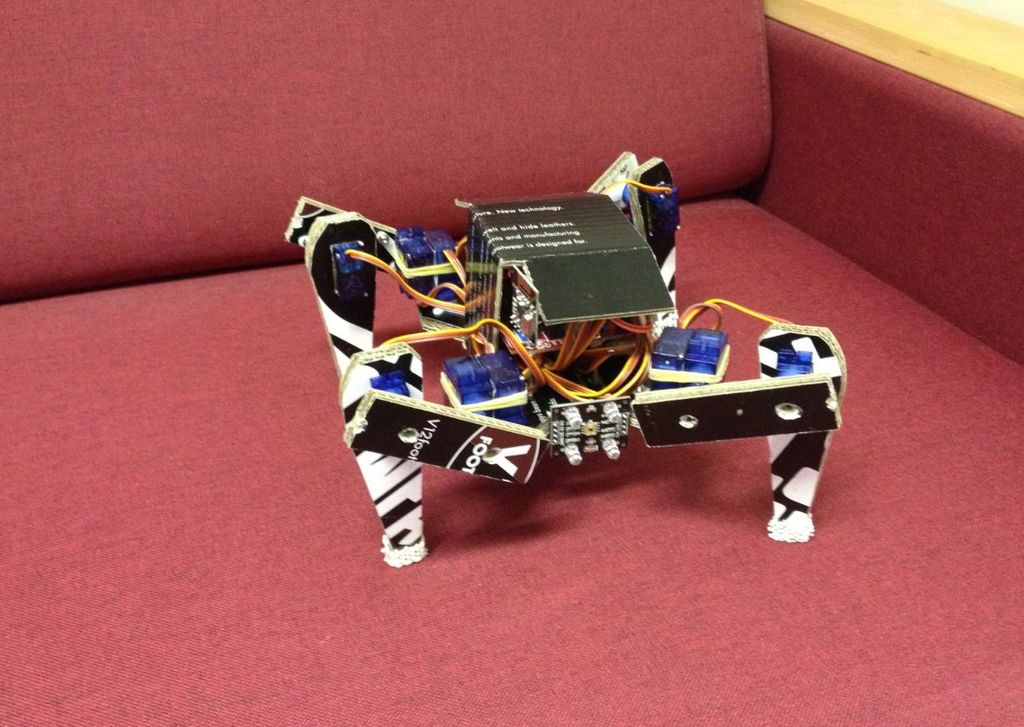
Walking robots can be a lot of fun, but many people would logically think that they need CNC equipment or a 3D printer to make this sort of bot. Creator “Raz85,” however, shows that this isn’t actually required, and built a quadruped using a structure comprised entirely out of corrugated cardboard.

Each of the four legs are driven using 9g micro servos, controlled by an Arduino Nano. A human operates the spider-inspired robot with a remote consisting of an Arduino Uno and a small joystick module, while pair of NRF24L01 radio transceivers provide a link between the robot and controller.

Despite its simple construction, the quadruped moves around impressively well…

Traktorino is an open-source DIY MIDI controller for DJs

A keyboard and mouse is a great user interface system for general computing tasks, but in other situations custom knobs, sliders, and lights would certainly be more fun. If you enjoy making digital music, then you should check out this low-cost, Arduino-based MIDI controller by Nerd Musician.

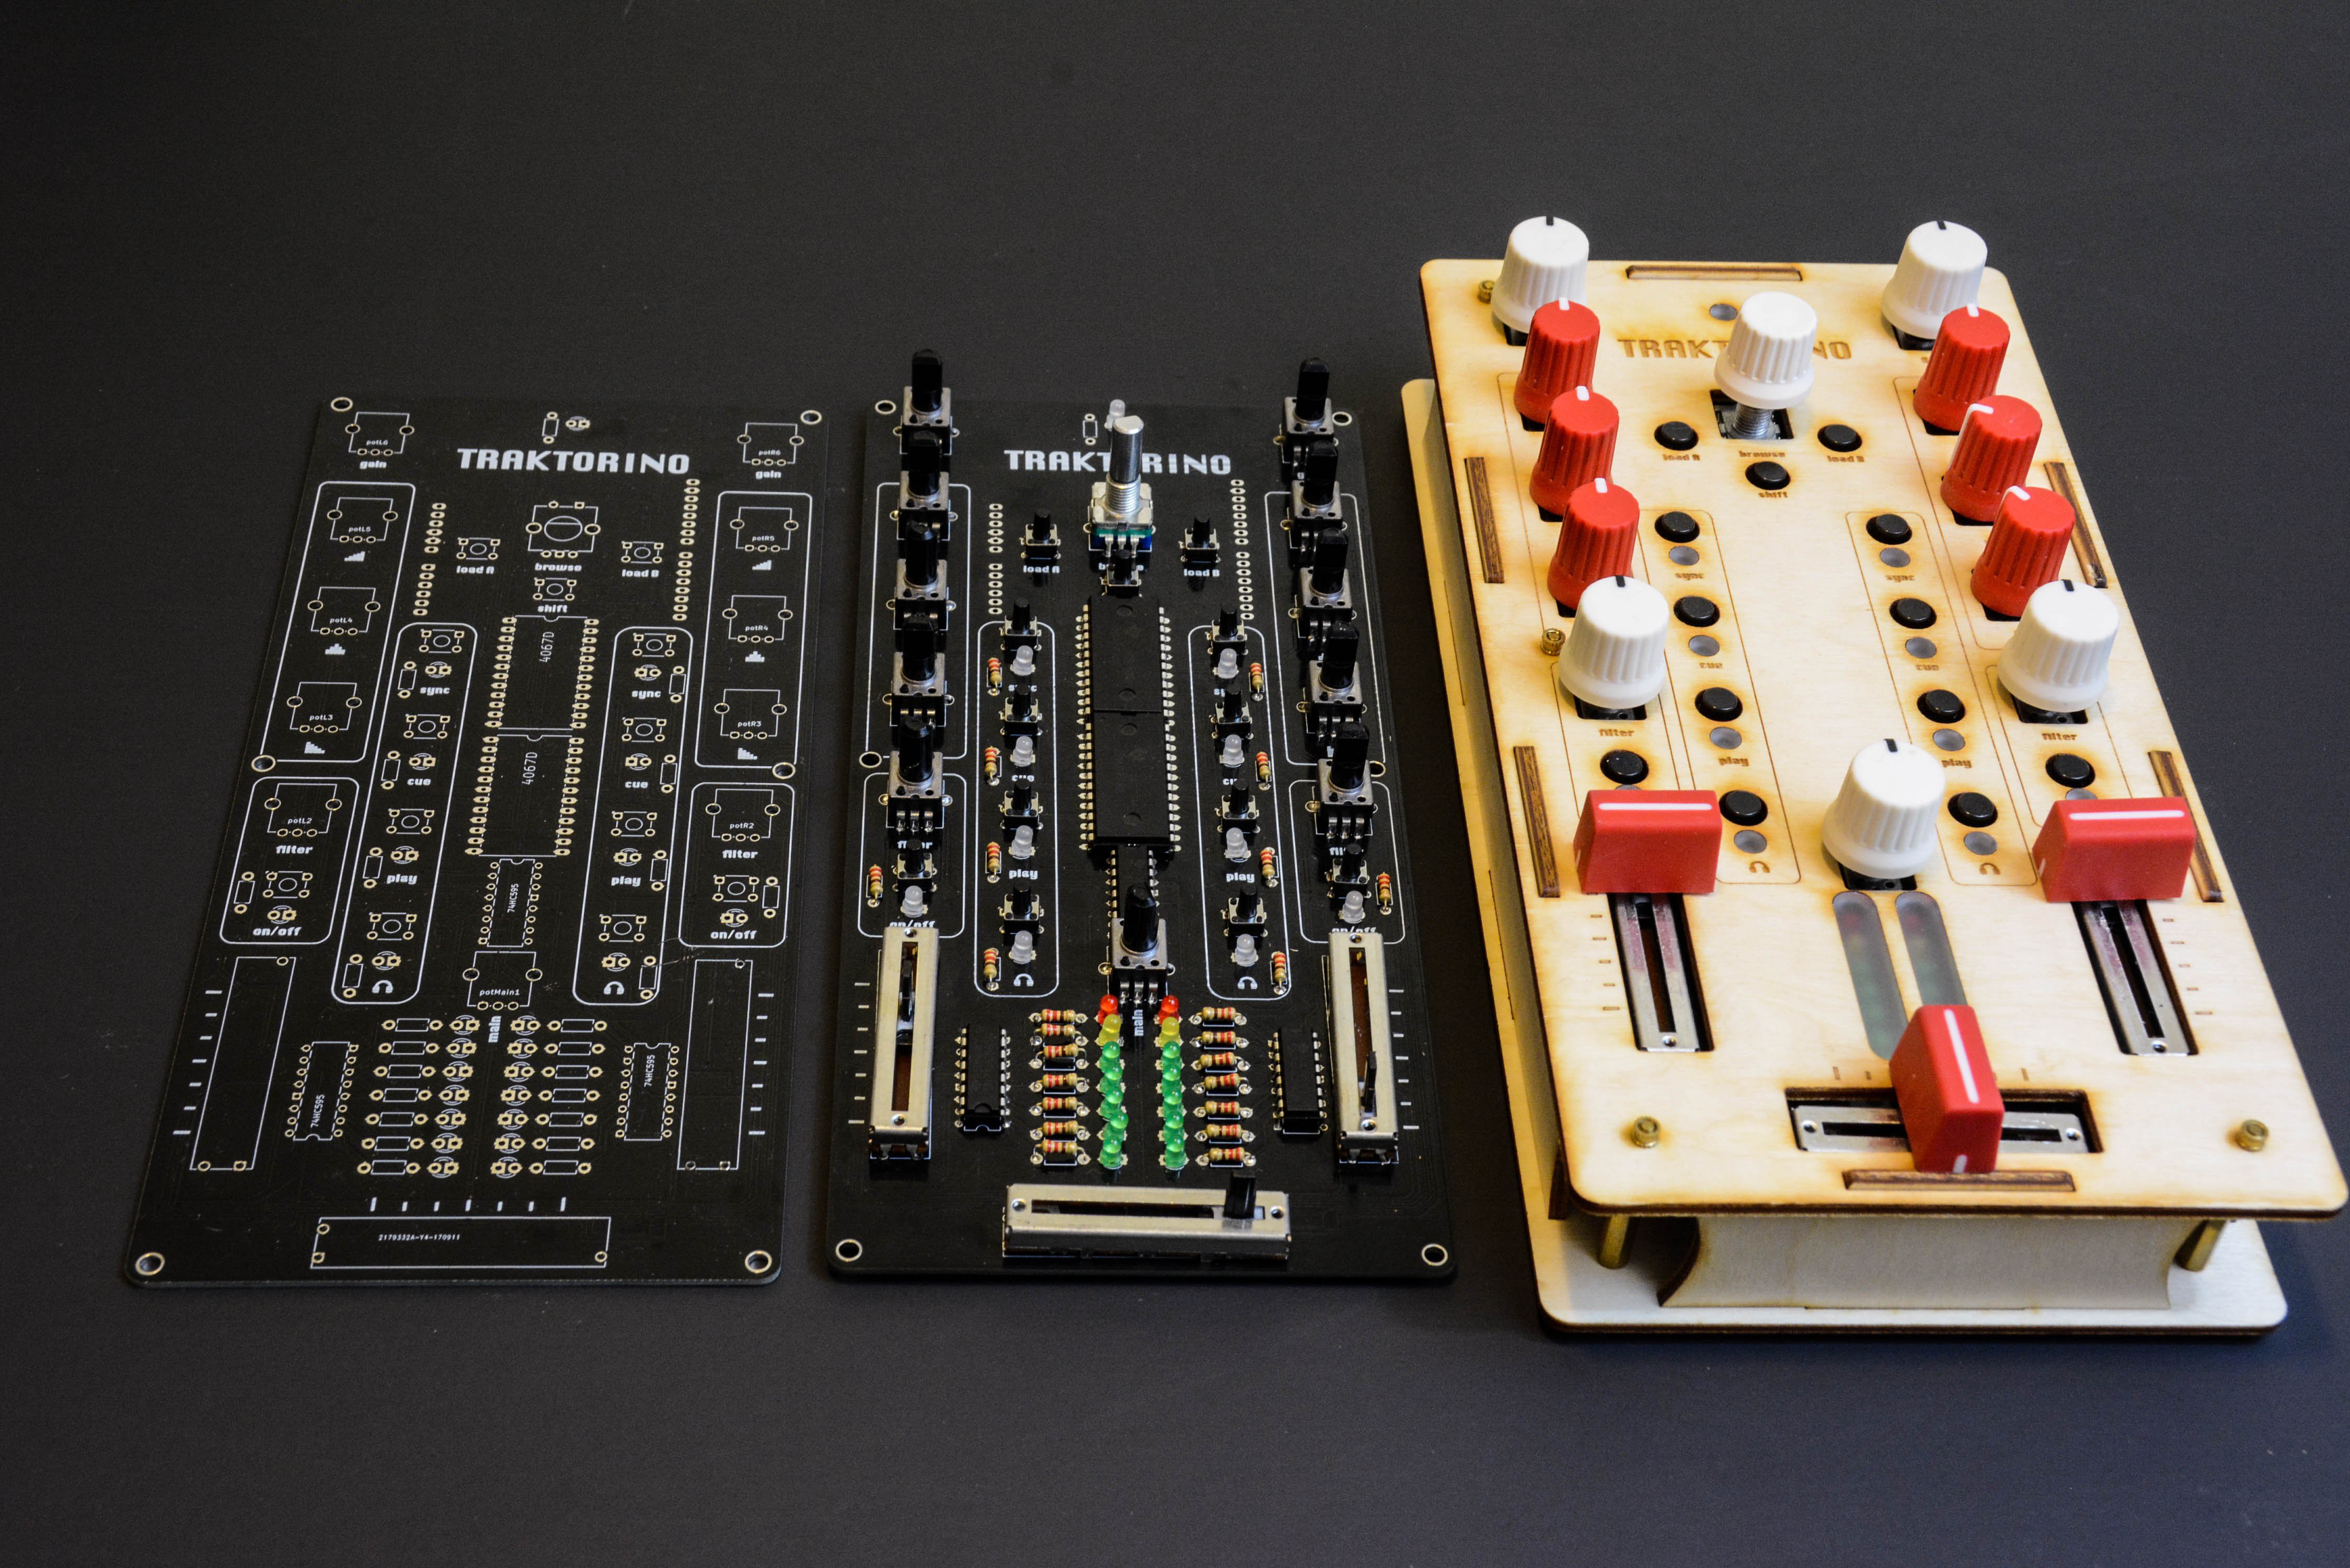
The Traktorino gives you access to a plethora of knobs and sliders, as well as LEDs for custom feedback in a laser-cut package. Internally, the device acts as an Arduino Uno shield, and is designed to control Traktor DJ software by default. It also supports other MIDI programs, and perhaps could even be adapted to work with other applications as well.

The Traktorino is a MIDI class compliant device, designed for controlling Traktor. It has several features and custom made mappings, so you can take the most of the software. However, it can do much more than that. The Traktorino can control any software that accepts MIDI, like Ableton Live, Serato, FL Studio, Logic, etc.

More information and build files can be found here and on GitHub. You can see it in action in the video below!

This window blinds controller follows the sun

Blinds let you see out and let the light into your dwelling, then flip them down when you need privacy or darkness. They do, however, have their disadvantages in that the cords constantly get mixed up and tangled, and—most importantly—they’re not automated!

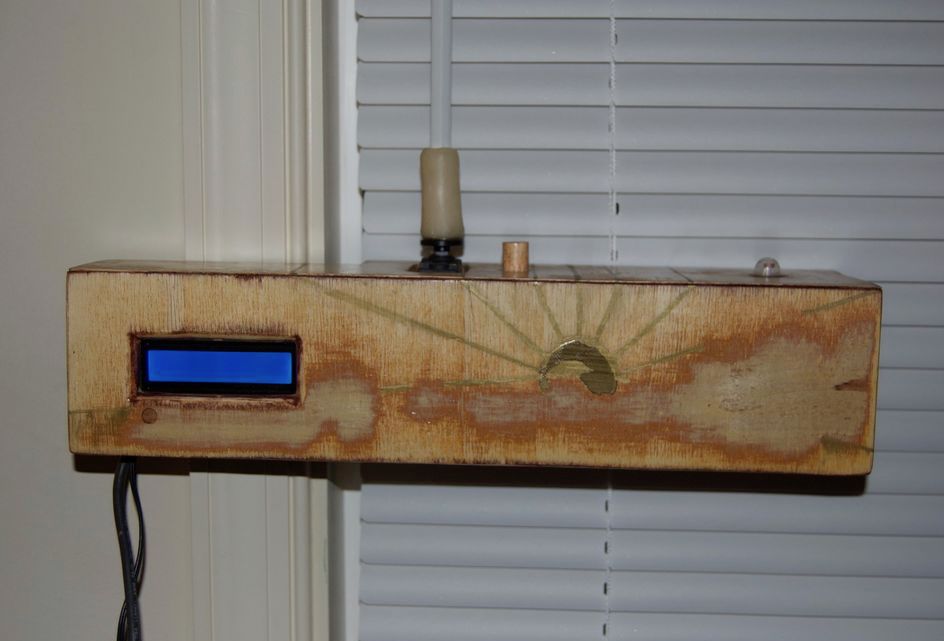
While we’ve seen several mods to the holder assembly for automation, cmp3mt’s device puts a different spin on things, holding the control rod with a sleeve made out of polymer clay, allowing it to turn with a continuous rotation servo.

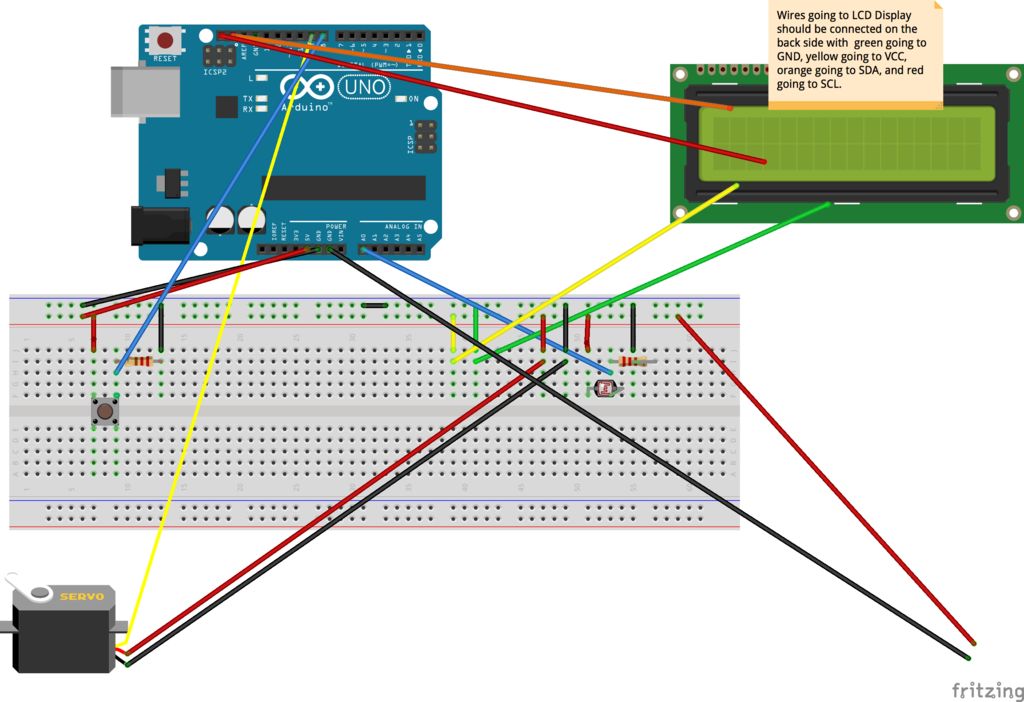
The setup is powered by an Arduino Uno and features an LCD display for user feedback. A button is used for manual control, or it can operate via a timer or even based on a light-dependent resistor that enables it to open and close with the sun.

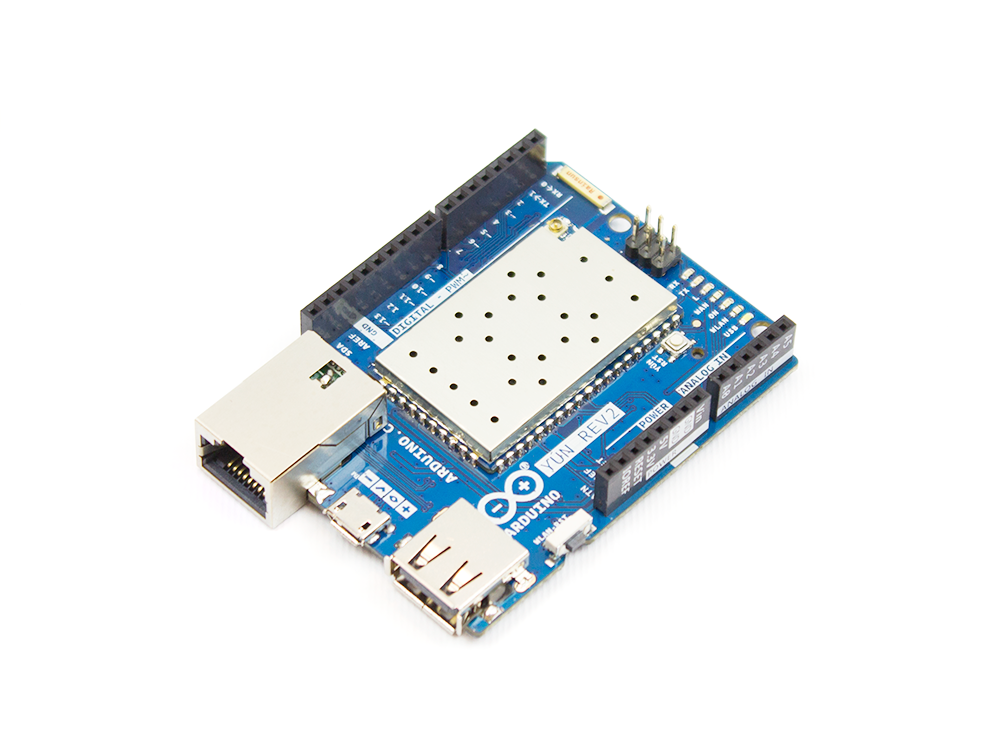
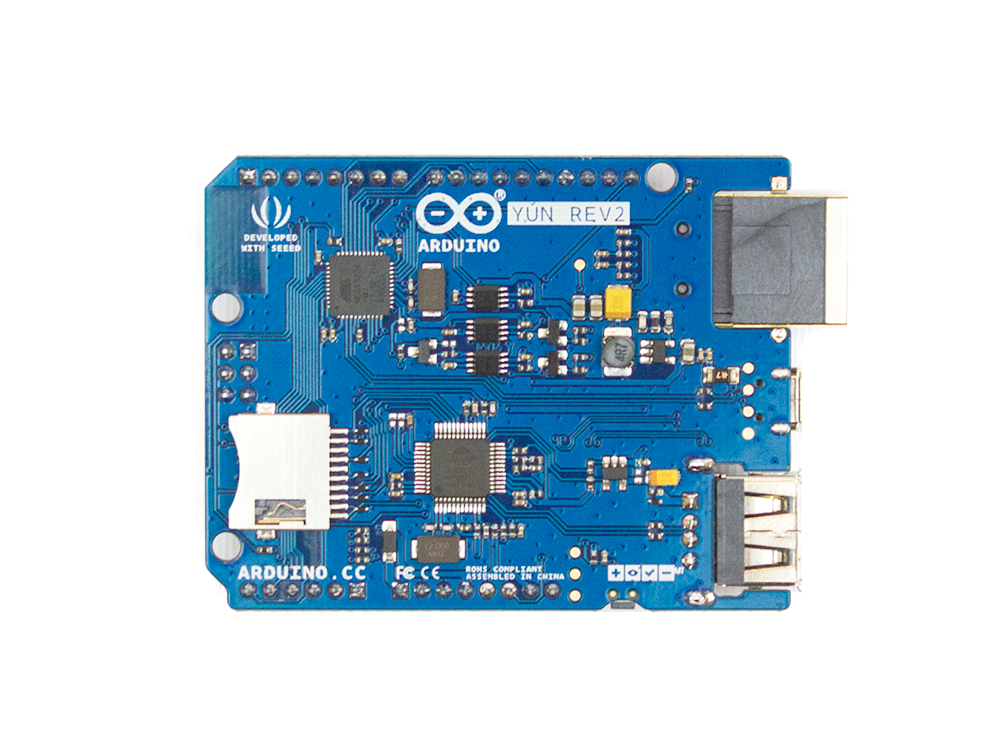
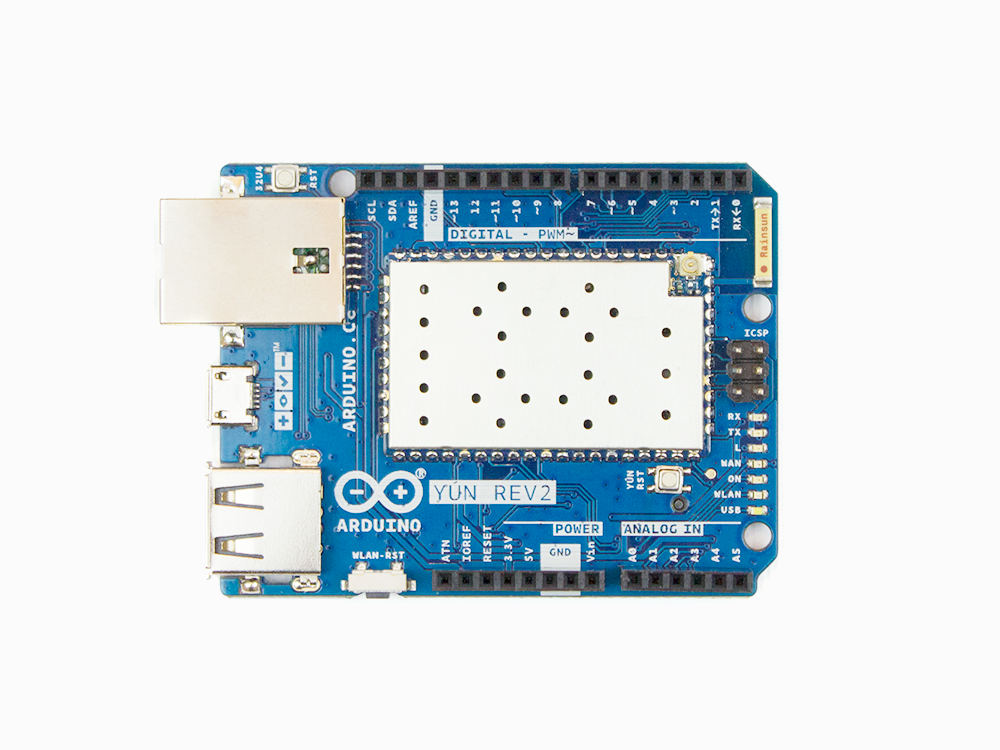
Arduino Yùn Rev.2 is here!

Since its launch in 2013, the Yùn–a small Linux machine and a microcontroller in a small Arduino form factor–found its way into hundreds of thousands of projects and professional applications. Last year, we decided that it was time for a refresh and began working hard to develop a true open-source design, with more compelling features and better overall software support.

The new board, which is expected to hit the market in the second half of April, will include enhanced functionality and compatibility with its predecessor.

Why a New Yùn

The Yùn enjoyed tremendous success; however, it ended up being affected by the internal issues we dealt with over the past couple of years and support has been quite intermittent.

For example, the board was never really an open-source product and the software had some challenges that we wanted to fix, especially from a security point of view.

What’s New in Rev.2

Hardware:  

  • Much better, more robust power supply
  • New Ethernet connector with a clever mounting solution that enables the use of all possible shields with no risk for accidental short circuits
  • Horizontal USB connector to save vertical space
  • Improved USB hub

Software: 

  • Software stack updated to OpenWRT latest version, including all patches
  • SSL support on the bridge Arduino / Linux bridge

Yùn Rev.2 is scheduled to begin shipping in April. Until then, you can stay up-to-date by clicking “NOTIFY ME” on our store. 

CTC Classics: Finding books with frickin’ laser beams!

CTC, a project from the 2015 edition

CTC stands for Creative Technologies in the Classroom, an initiative from Arduino Education aimed at helping teachers get up to speed with 21st century skills in the context of STEAM. We have been working with CTC since 2013, with our first experience in Castilla La Mancha, Spain. During a varying period of time, teachers are introduced to project-based learning as they run a full course with their students. At the end, teachers and students meet with their partners at a technology faire to show the result of an open-ended innovation process.

In this article series, I present projects made by students and exhibited at CTC faires. At those events, students come and pitch their experiments in front of hundreds of thousands of their peers from schools spanning all across their region. I select some of these projects and reinterpret them as a way to inspire other groups of students and their teachers in making new, interesting, user-centric, and thrilling projects.

What is CTC Catalunya and what makes it different?

CTC Catalunya is the longest of Arduino’s CTC projects, having had faires since 2015. Thanks to the generosity of the EduCaixa Foundation and the help from Cesire, Catalunya’s government department, we have reached out to as many as 200 public schools at the time of writing.

In order to achieve this, we designed a plan where the educators of different regions of Catalunya were trained in becoming trainers themselves, so that they could constitute their own regional support teams as a way to make the project sustainable over time. You can imagine that, after four years, there are many familiar faces. People have grown to like this project, and the CTC faire has become part of the educational landscape to the point that many teachers plan for it within their annual agendas.

What about the project I chose for this blog post 

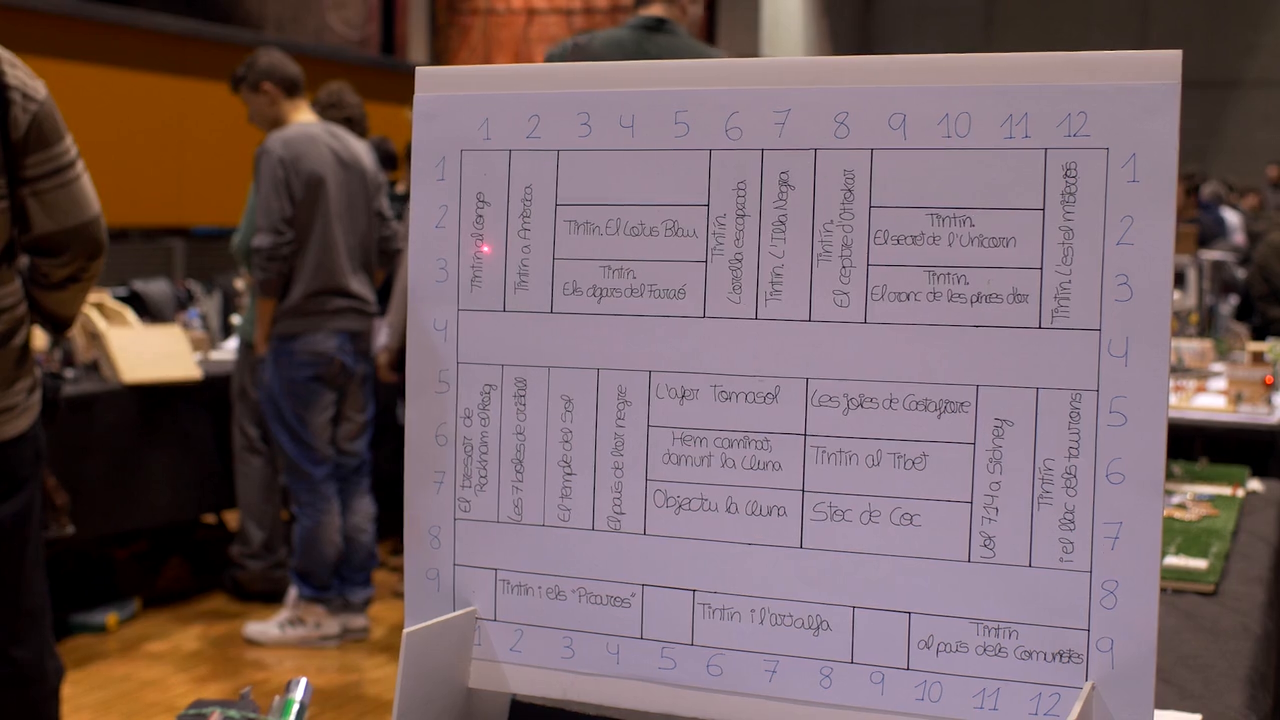
One of my favorite projects of all-time is a system that enables you to look for books on the shelf by means of a laser pointer. Imagine you want to find that one novel; how many times have you had to browse through hundreds of your books and were unable to locate it for a while? Even if you have a database of all of your books, you would still have to make sure you place them in a certain location and need to go looking for it.

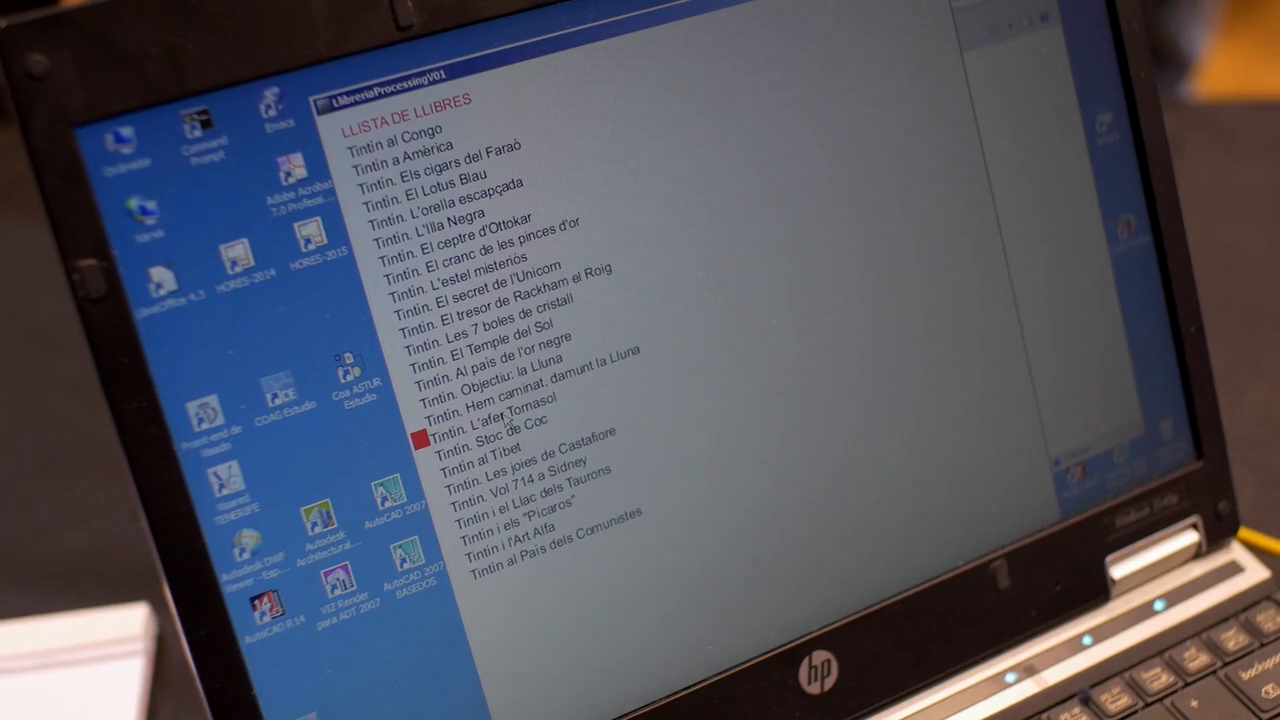
Two students at the CTC Catalunya Faire 2015 conceived the idea of a database of books that connected to an Arduino-controlled laser, which would point to a particular book on the shelf.

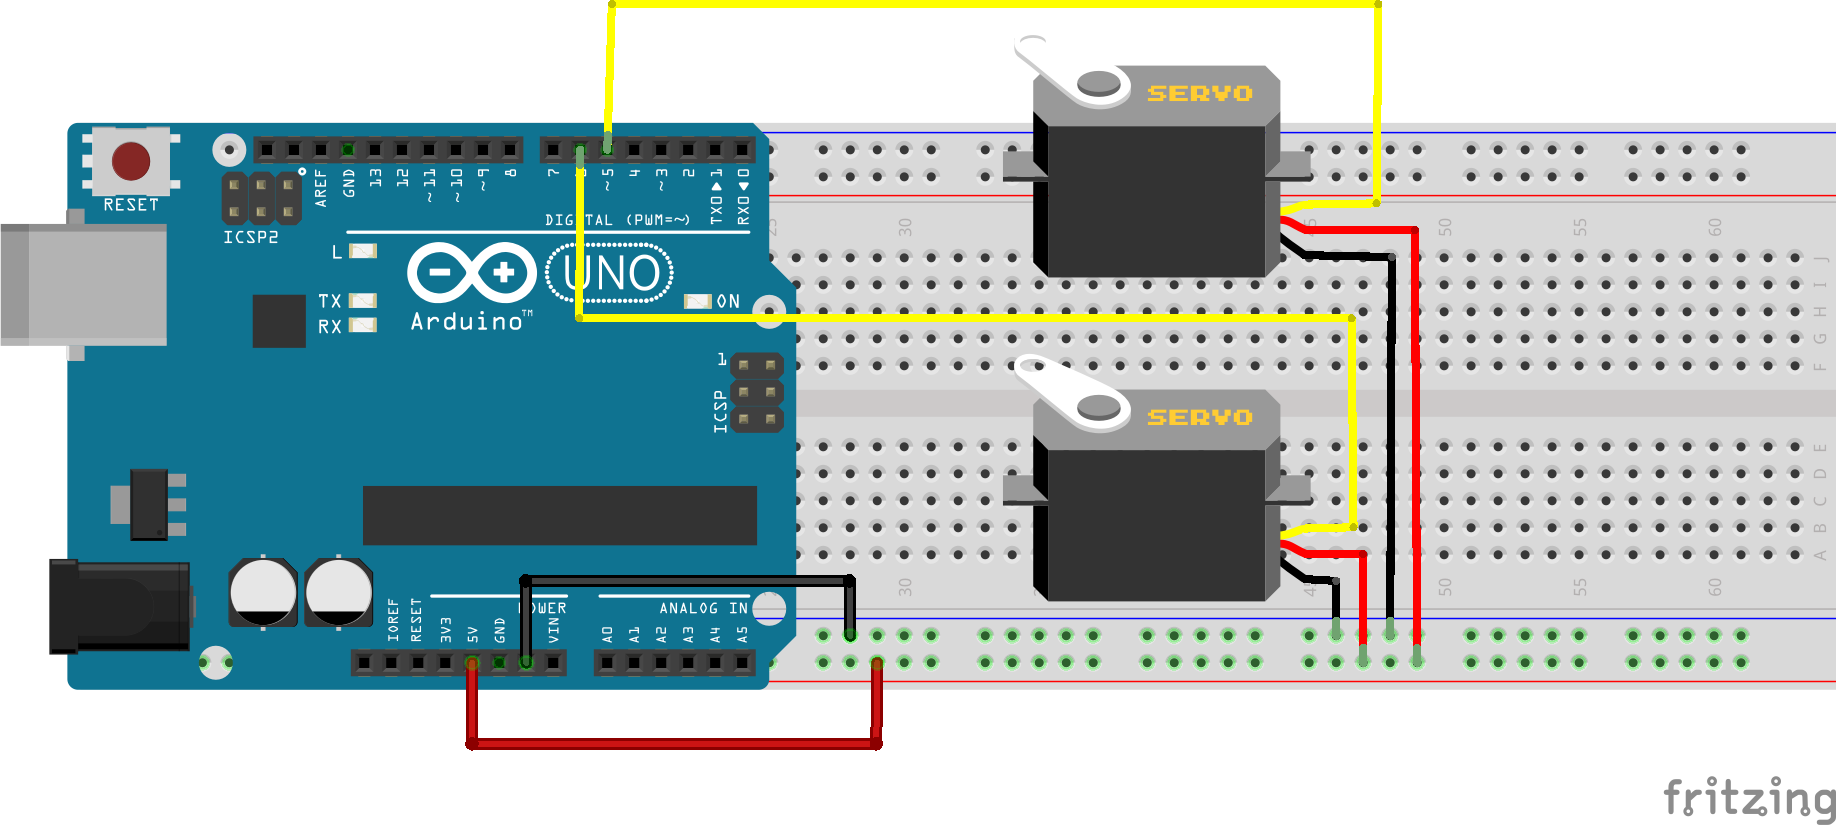
Schematic diagram: lasers, servo motors, and some code

As many years have passed since the project was presented, I don’t have documentation on how it was built. This is going to be a bit of the topic in this series. I am not looking at being super precise in replicating these projects; rather, my aim is provide some guidelines on how this could be made and inspire others to get the idea and improve it. If you want to see how I make things for real, I invite you to follow my livecast sessions every Thursday at 7pm CET. I’ll be implementing one project from scratch each month.

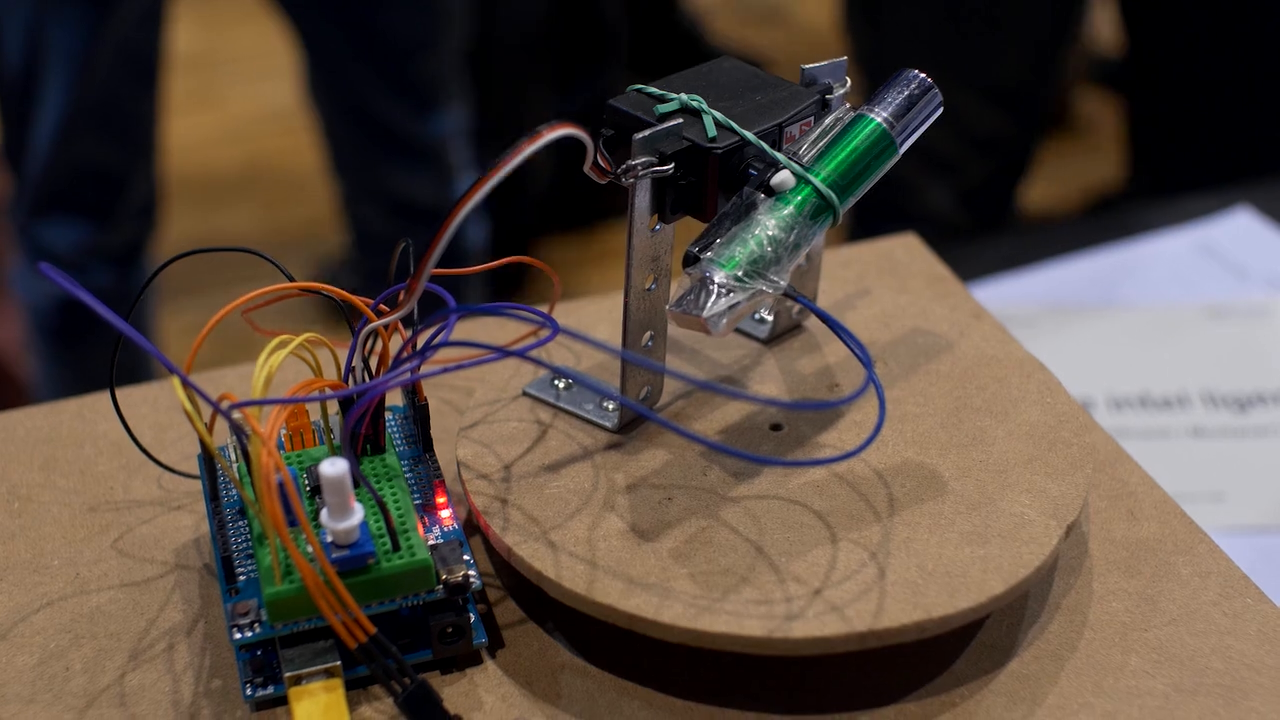
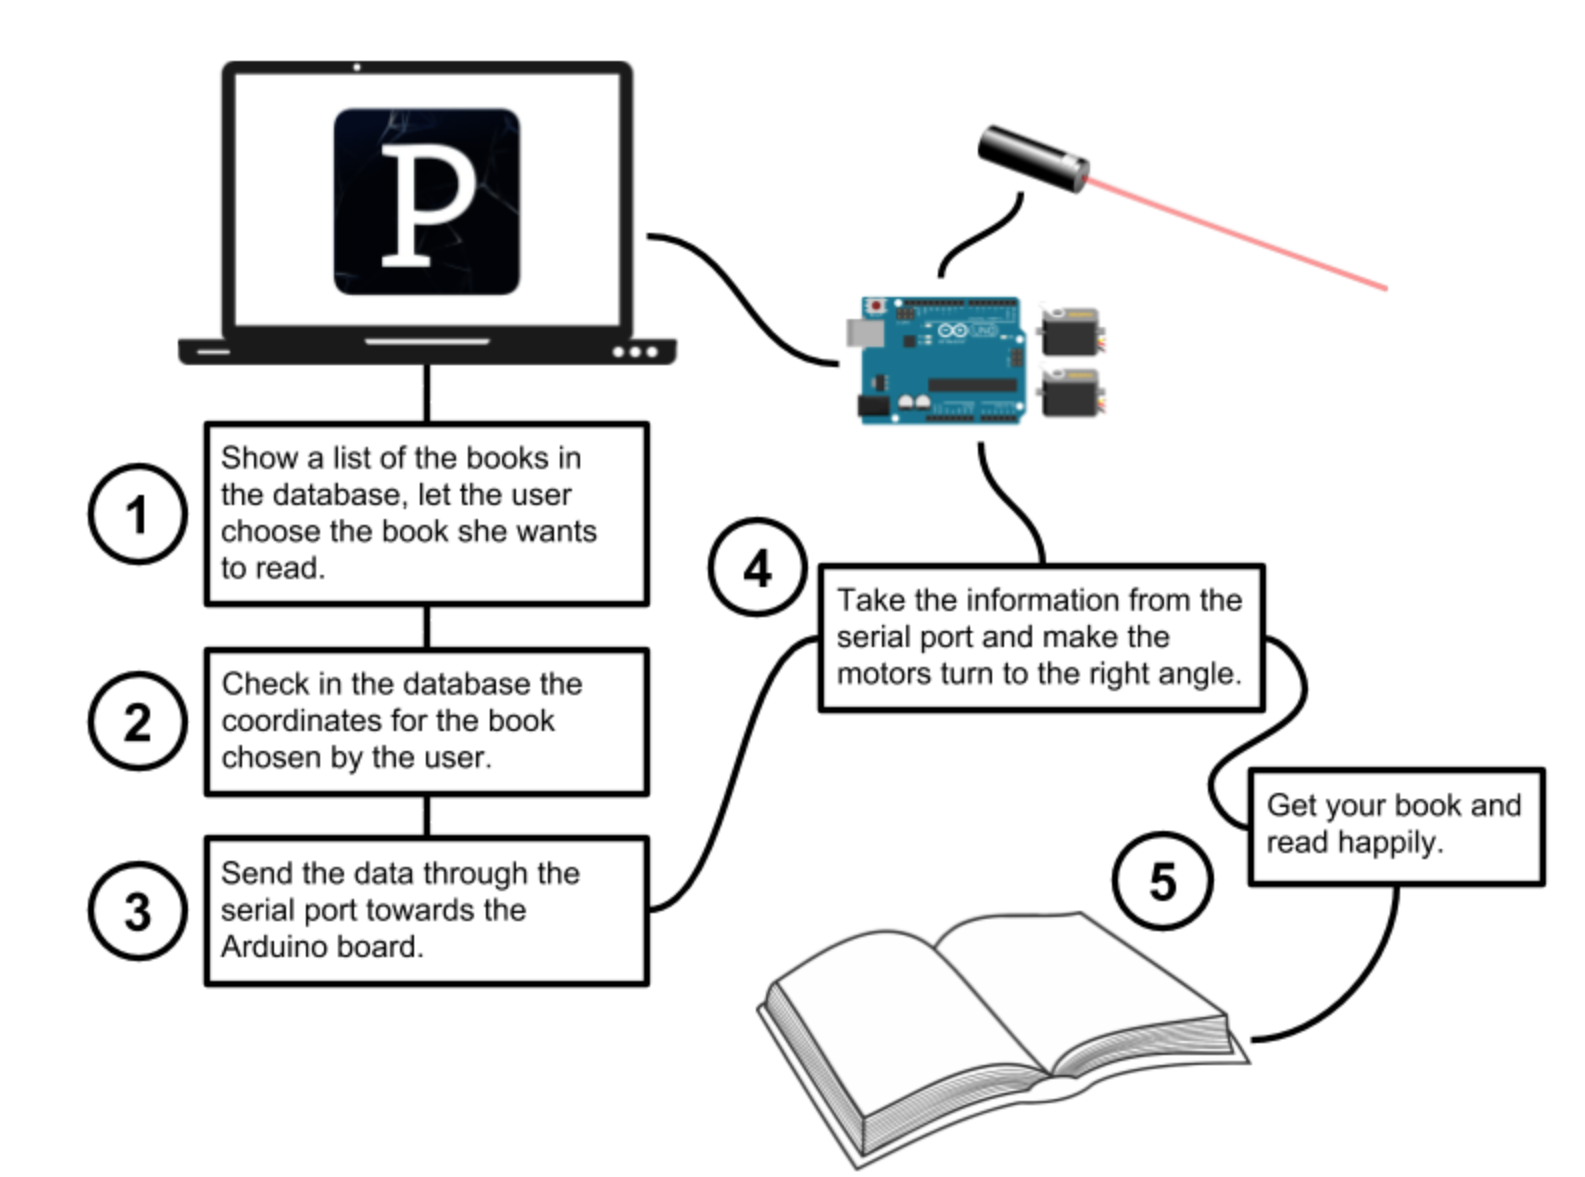
When it comes to my understanding on how this project was built, it is clear that the students used an Arduino Uno board, a Processing sketch, two standard servo motors, and a laser pointer. I have prepared a schematic for you to see how it could work, as well as a diagram that explains the basic interactions between the Processing code and the Arduino one.

(Here is where I have to apologize because of the diagram. I didn’t have a lot of time to enhance its appearance, but CC0 clipart images are your friend and let me make things quickly.)

An idea of how it works

Take a look at the flow chart above, which explains more about the project. The user will interact with the Processing sketch whenever he or she wants to search for a book. It is very likely the project that the students made had everything hardcoded in the program. In other words, the system was not letting you easily add new books to the database, but were stored in a text file that the Processing sketch would load upon boot.

The books were presented in the form of a dropdown list for you to choose from. Once you selected one of the items in the list, the Processing sketch would send the coordinates to the servo motors. Those coordinates also had to be stored in the same text file as the names of the books. With the coordinates, that had to be the angles for each one of the servos, the pointer would be directed towards the shelves, highlighting the location of the book.

Since this had to be shown at a faire where thousands of people would come by over a four-hour period, the students couldn’t prepare a much more complex presentation. This is why I have to make some assumptions about how far they went in their building. I also assume that they had to think through the ways to calibrate everything, since they didn’t have a lot of time to set up. The project worked flawlessly for the entire faire.
This is why I like it so much

At home we like books, we always have. When I was a kid, my parents had books in the living room, the dining room, mine and my brother’s room. As an adult, I have bought thousands of books and read every week. We own a 7m long bookshelf where books are sorted by color. When we discuss a project or think about possible ideas for what to build next, we look through our books. After a while, finding books is a time-consuming activity. I need one of these book-finding robots in my home!

Other projects with lasers?

You’ve likely seen at least one of the servo-controlled laser pointer projects for entertaining your cats here, here, or even here. Those are just one example of the fun things you can do with Arduino and lasers. In the context of CTC, there is actually a whole series of projects using laser diodes for creating music instruments. But that is an entirely different story, If you want to read about it, stay tuned for more adventures in CTC at the Arduino blog!

The CTC Caire was supported by Cesire at the Generalitat de Catalunya and the EduCaixa foundation.

pedalSHIELD MEGA is a programmable guitar pedal for your Arduino

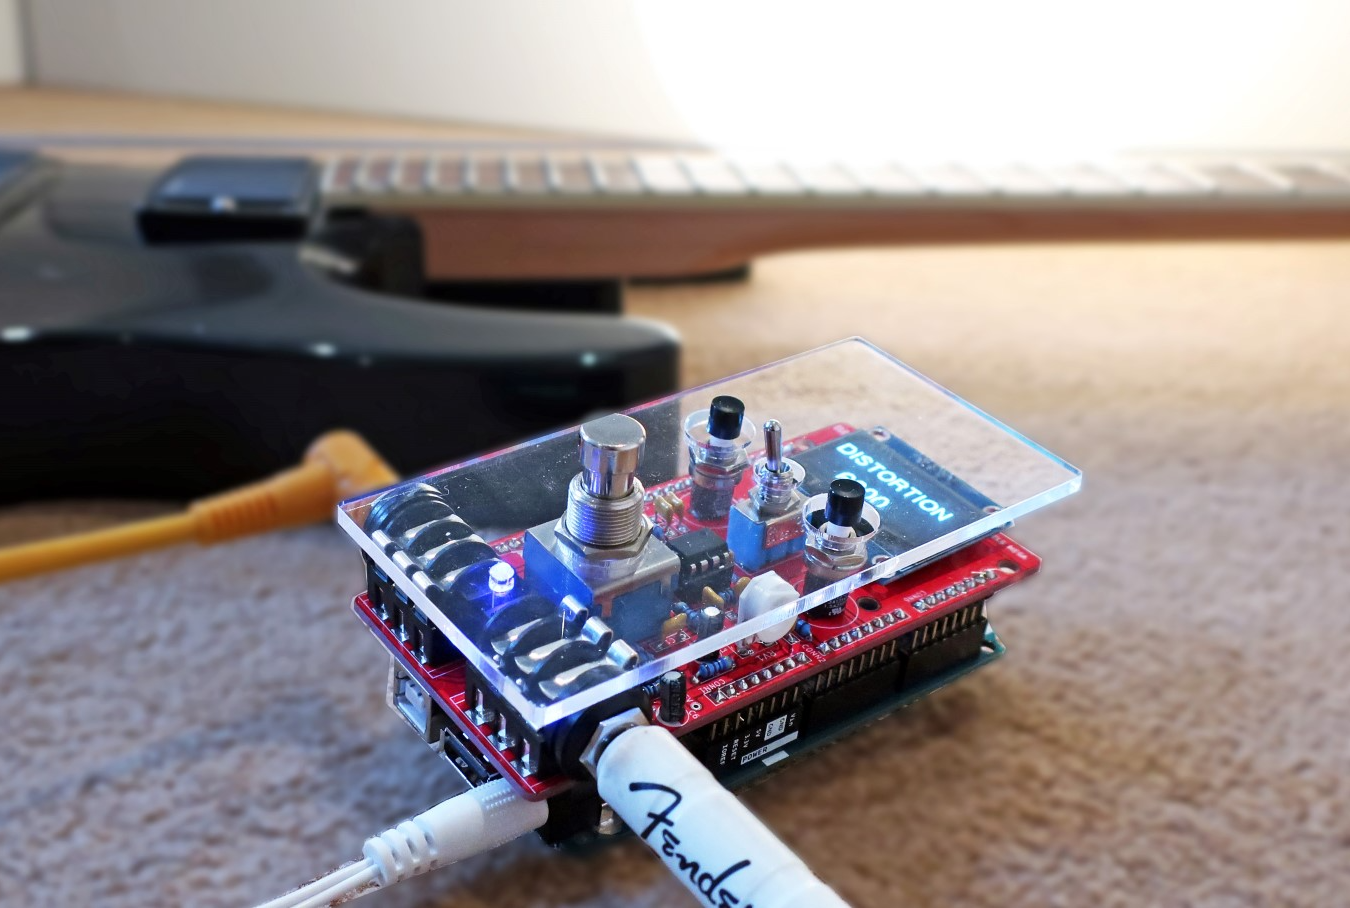
If you want to create new guitar sounds without having to redo your pedal wiring every single time, the pedalSHIELD MEGA from ElectroSmash could be just what you’re looking for.

The pedalSHIELD MEGA takes input from a guitar via a standard ¼-inch cable, and uses an Arduino Mega to process the sounds to your liking. This new sound is then output using two PWM pins for a 16-bit resolution.

The device, which is available in kit form or as a PCB, sits on top of the Mega as an amazing looking shield. In addition to a 3PDT true bypass footswitch, a toggle switch, and two pushbuttons, the pedalSHIELD MEGA features an OLED display for visual feedback. Once assembled, all you need to do for an entirely unique sound is program your own effects in the Arduino IDE!

This shield that is placed on top of an Arduino Mega has three parts:

• Analog Input Stage: The weak guitar signal is amplified and filtered, making it ready for the Arduino Mega ADC (Analog to Digital Converter).

• Arduino Mega Board: It takes the digitalized waveform from the ADC and does all the DSP (Digital Signal Processing) creating effects (distortion, fuzz, volume, delay, etc).

• Output Stage: Once the new effected waveform is created inside the Arduino Mega board, this last stage takes it and using two combined PWMs generates the analog output signal.

You can find more details on the pedalSHIELD MEGA here, and see it in action below!