Posts with «featured» label

Clean your whiteboard automatically with Wipy
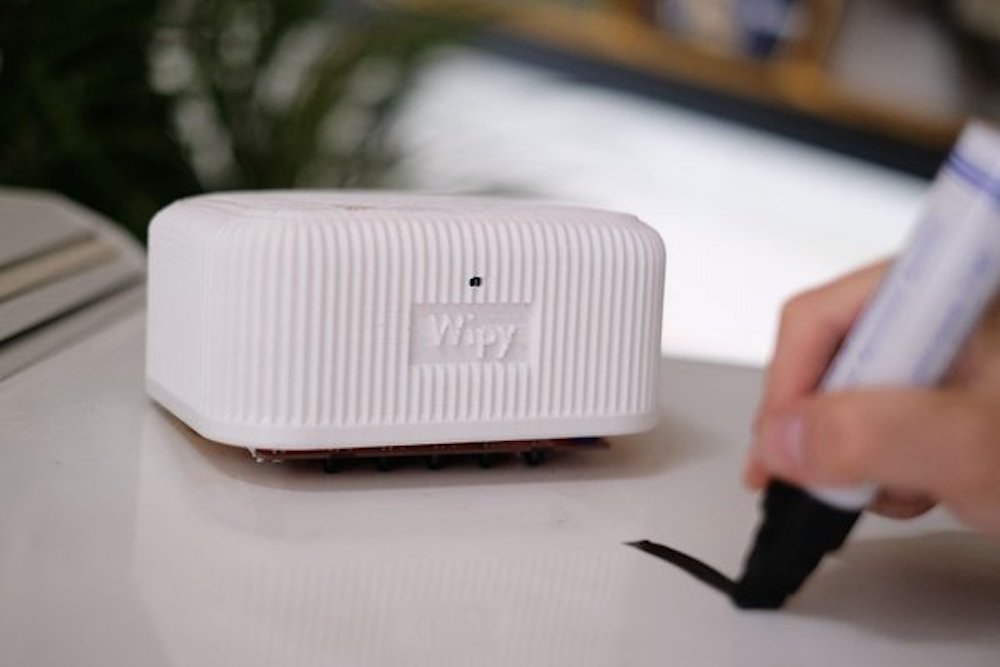
If you have to do a lot of drawing on a whiteboard, you also have to clean it. Why not have a robot do this instead? That’s the idea behind Wipy, an Arduino Uno-based robot that uses magnets to stick it to the board, plus grippy wheels and motors to power it across your scribbles.
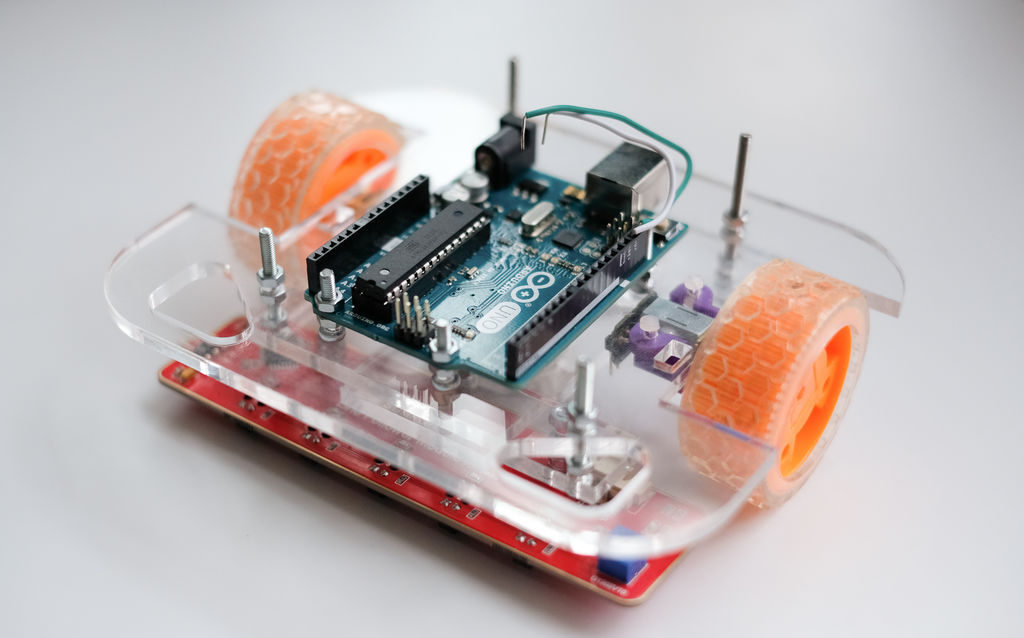
Wipy employs an array of IR sensors that enable it to act as a line follower, along with a time-of-flight (ToF) sensor to detect your hand on the board. While one might assume this sensing arrangement would prevent it from erasing your work-in-progress, it annoyingly allows it to start erasing immediately when you start drawing on the board. At least it has a cute LED face!

Did you ever get tired of cleaning the whiteboard? Have you ever wondered how much your life would improve if a robot could do this for you? You now have the chance to make this a reality with Wipy: the overly motivated whiteboard cleaner. Wipy will properly clean your embarrassingly bad drawings, and it will even do it with a cute smile. You don’t even need to activate it! It will just clean the board when you least expect it… Uhhh…*cough cough*…we, of course, mean: when you need it most!

– Our future friend will be able to stick to the board using magnets and is able to move through space using grippy wheels.

– It will be able to follow a line and erase it using a line-following sensor and a sponge.

– Wipy has the ability to measure the distance to your hand using a time-of-flight sensor.

– We will give Wipy a cute personality using a small OLED screen.

Automated plant tending with Arduino

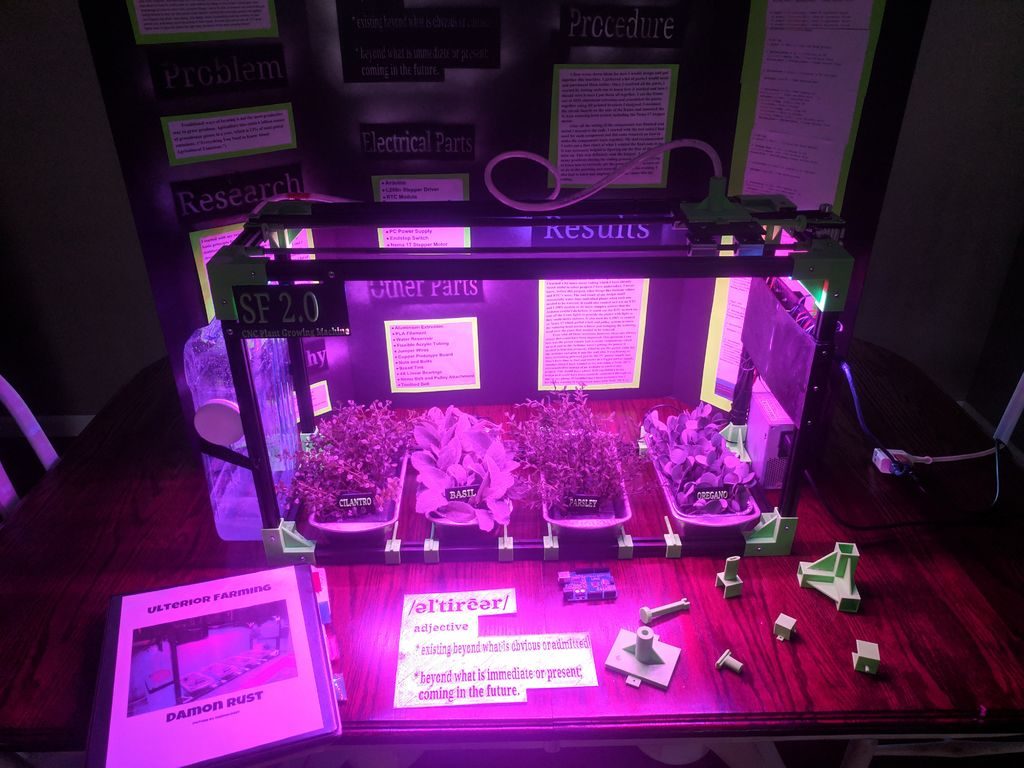
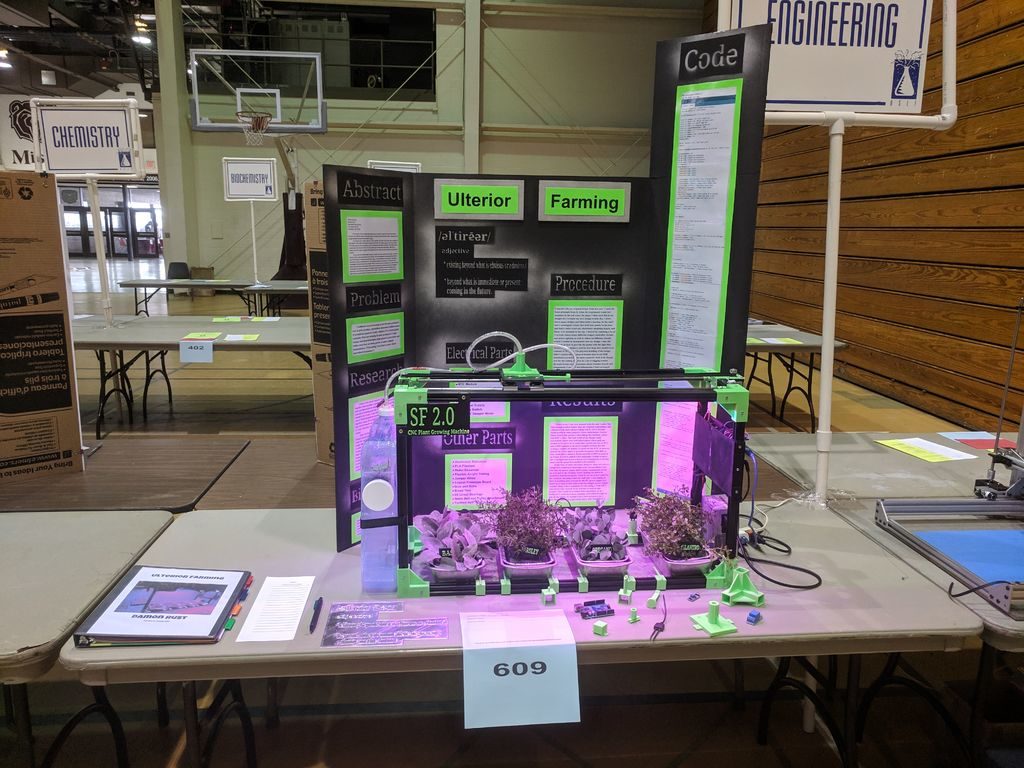
Do you like plants, but not so much the tending to and watering them? If that sounds like you, then you might be interested in your own CNC growing machine. The system—created by 15-year-old maker “daily3dprinting”—is controlled by an Arduino Uno, and uses a single stepper motor to pull a watering head into position based on hygrometer readings.

A relay is used to turn the grow light on at 6am and off at 8pm, and another to activate the unit’s water pump. A third relay is employed to power off the L298N stepper driver when not needed. 

The project took home second place in the math and engineering category at daily3dprinting’s high school science fair, and more info on the build is available in its write-up here.

Maker Faire Bay Area 2019: Call for volunteers

Planning to attend Maker Faire Bay Area this month? Arduino will be joining the festivities with a booth in partnership with Microchip — Expo Hall, Area 2 — and Massimo Banzi’s State of Arduino talk on Saturday at 2 pm on the Center Stage. We’re also looking for volunteers to welcome visitors, staff tables and displays, assist with one-on-one demos, and offer technical assistance when necessary.

Those who help us out will receive a one-day pass, so they can explore and enjoy everything happening around the faire grounds. Water, snacks, and an Arduino t-shirt will be provided, and we’ve even prepared a small gift to show our appreciation at the end of your shift.

If interested, please fill out this questionnaire and we’ll get back to you soon!

Bitty is a tiny Arduino-compatible drum machine/synth

There are a wide variety of ways to create electronic music. For a capable machine that fits in the palm of your hand and is loud enough to use outdoors, however, it’s hard to imagine a battery-powered device cooler than Bitty from Curious Sound Objects. 

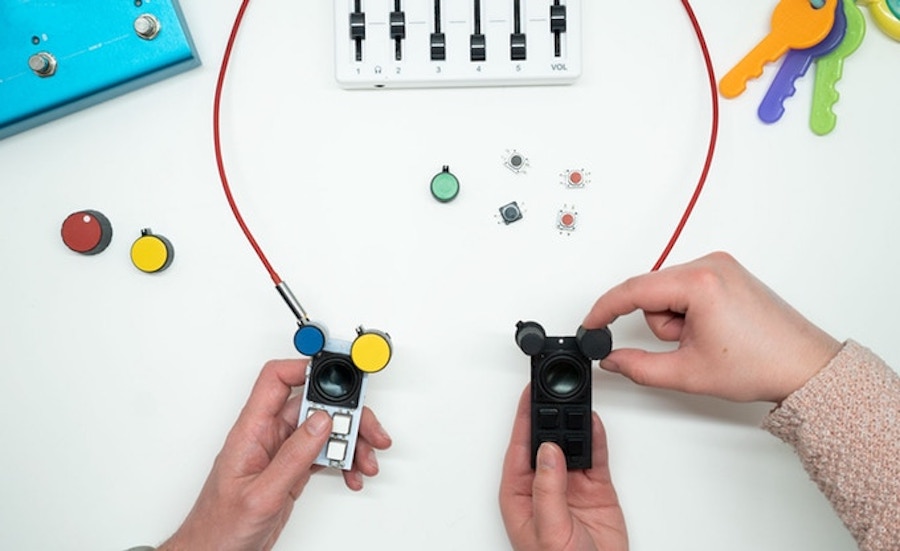
The pocket-sized drum machine and synthesizer, currently on Kickstarter, was prototyped using an Arduino Nano and will be fully Arduino-compatible when released. This means that in addition to changing the sound and interface around with readily-available sound packs—which include Theremin Bitty, Techno Bitty, Basement Bitty, Trap Bitty, Lofi Bitty, and Beach Bitty—it can be programmed with the Arduino IDE. The device can even run sound software written for other Arduino boards.

Bitty features four sample trigger buttons, a pair of knobs, and a speaker. Designed for entry-level EDM enthusiasts and studio musicians alike, you can play the drums and melodies manually, as well as trigger patterns to produce dance music or hip hop beats. These can be chosen via the left knob, while the right knob handles pitch, note selection, and arpeggiation.

Check it out in action below!


Use an LED matrix as a scanner

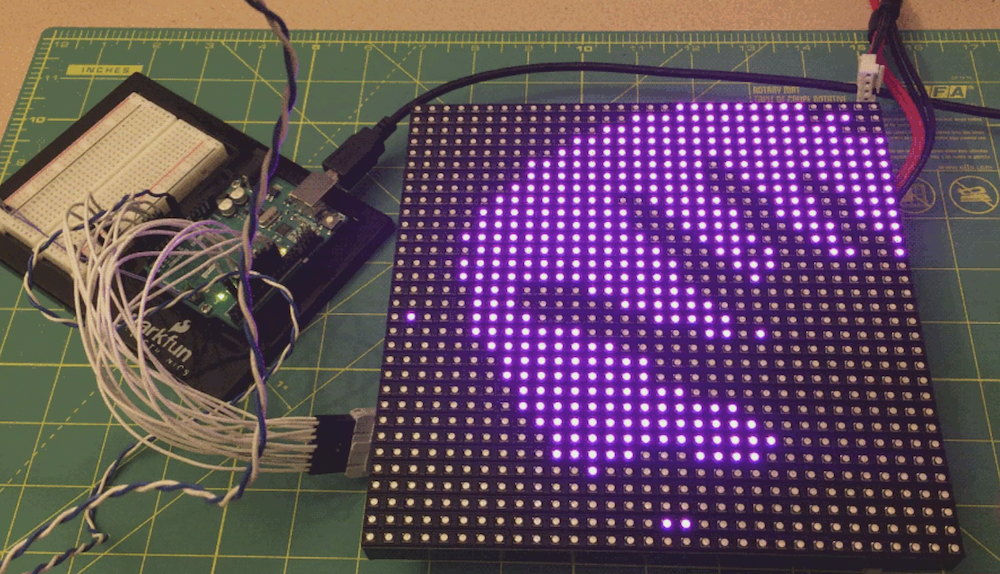
Consider that a digital camera uses an array of sensors to capture light from an object. Maker Marcio T, however, decided to turn this idea on its head and instead use an array of lights that are detected by a single sensor.

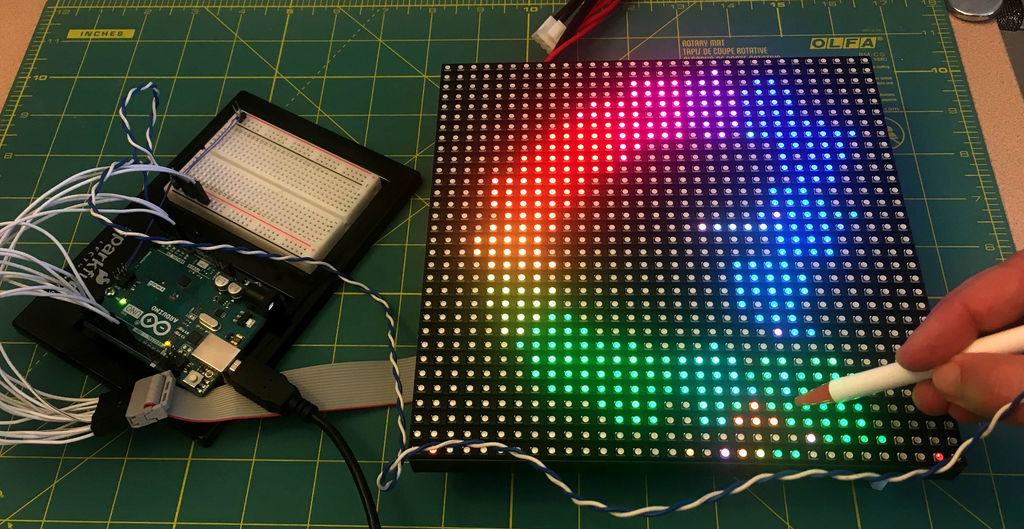
The way it works is that as each LED in a 32×32 matrix illuminates, a phototransistor picks up light if the path is clear or sees no change if the path is blocked. So when you put an object on the matrix, the sensor is able to get an accurate picture of it, enabling its Arduino Uno controller to then generate its silhouette. 

It’s a simple yet very clever hack, and if you pay close attention in the video below, you can see the lights scanning from the bottom to top before the image is produced.

Ordinary digital cameras work by using a large array of light sensors to capture light as it is reflected from an object. In this experiment, I wanted to see whether I could build a backwards camera: instead of having an array of light sensors, I have just a single sensor; but I control each of 1,024 individual light sources in a 32 x 32 LED matrix.

The way it works is that the Arduino illuminates one LED at a time, while using the analog input to monitor changes in the light sensor. This allows the Arduino to test whether the sensor can “see” a particular LED. This process is repeated for each of the 1,024 individual LEDs rapidly to generate a map of visible pixels.

If an object is placed between the LED matrix and the sensor, the Arduino is able to capture the silhouette of that object, which is lit up as a “shadow” once the capture is complete.

Arduino Blog 01 May 18:55

Programmable-Air is an Arduino Nano-based pneumatics kit

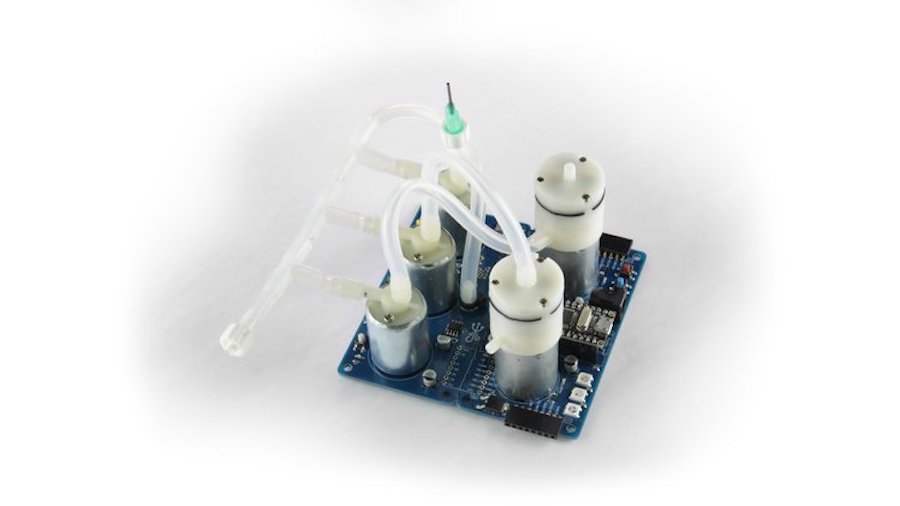
Arduino boards have been employed in all sorts of robotics and IoT applications, although working with air as a power source is less than straightforward. In order to make this experience easier, the Programmable-Air pneumatics kit puts everything you need for simple air power experimentation into one package.

It features pressure and vacuum pumps, as well as pneumatic valves and a pressure sensor. An Arduino Nano is implemented as the controller, and a custom library is available here, so programming should be a snap. 

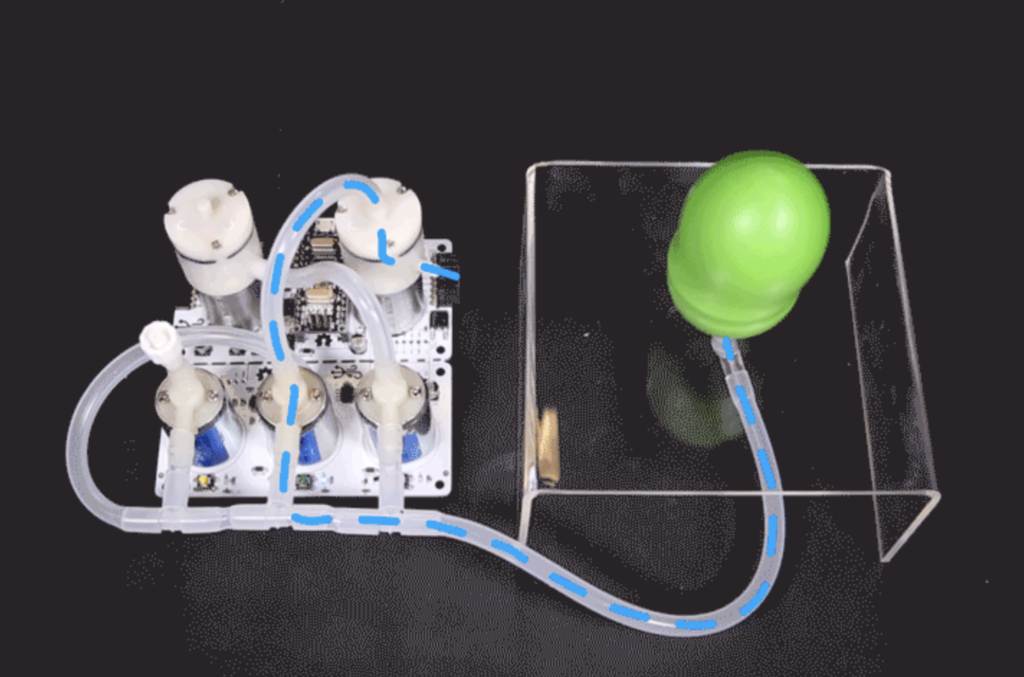
Programmable-Air has a built-in high-pressure pump, vacuum pump, pneumatic valves, pressure sensor, and an Arduino Nano. The output from Programmable-Air is a single tube that goes into your soft robot or pneumatic actuator. By controlling the motors and valves, you can push air in or out of the actuator, or let it exchange air with the atmosphere. All the while you get feedback about the state of the actuator through the pressure sensor.

The kit is coming soon to Crowd Supply, so be sure to sign up there to be notified when it goes live!

This device is a digital level, protractor, ruler, and roll measure all in one

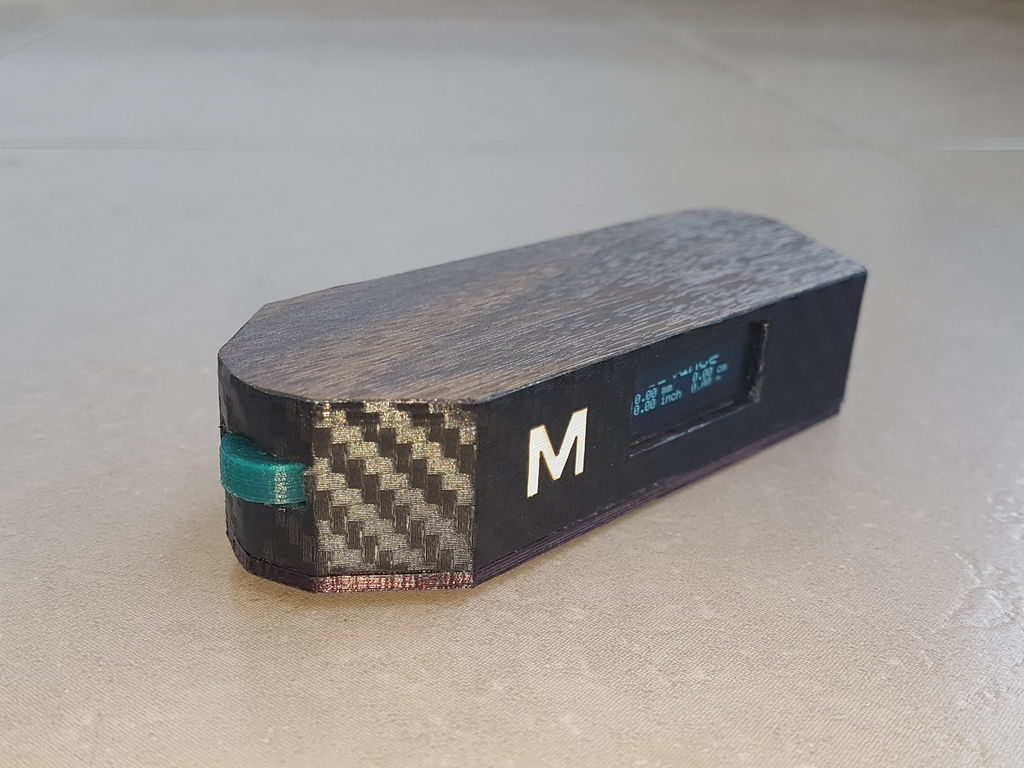
When you need to take a measurement for a project, there are a wide variety of off-the-shelf devices available. Or you can make one exactly to your specs, like Patrick Panikulam did with his “Digital Multi-Function Measuring Tool.”

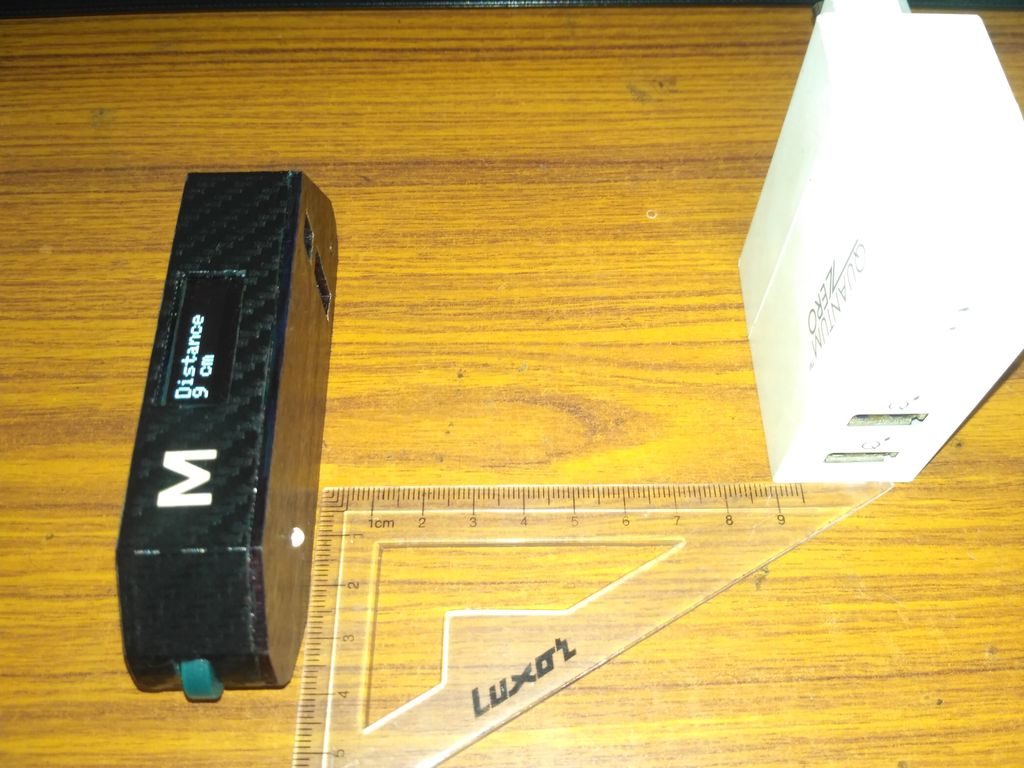
This Arduino-controlled gadget employs an MPU-6050 accelerometer / gyroscope that lets it act as a 2D level, as well as a digital protractor after zeroing it at a starting point. The unit also features straight-line measurement capabilities via an IR distance sensor, and even has an encoder/wheel that can measure rolled distance when that isn’t convenient.

Power is provided by a rechargeable battery, and the entire thing is packaged in a nice wood and carbon fiber facade. Check out the demo video below, or you can find more details on how to build your own here.


FPV RC racing with the MKR WiFi 1010

Off-the-shelf remote-controlled cars can be a lot of fun, but Clem decided to take things up several levels with his heavily modified rig. 

In the hack shown below, he outfitted an RC vehicle from the ’80s with an FPV camera, along with a MKR WiFi 1010. The WiFi-enabled MKR board was linked with a second ‘1010, controlled by a (formerly) broken PS1 racing wheel.

While old technology, this racing wheel is perfect for Arduino use, with steering, brake, and gas handled by potentiometers that are fed into analog inputs. The 2.4 GHz WiFi link between the MKR boards appears to work quite well when driving with an FPV headset, though “somehow” a wheel on the original car did manage to fall off during testing!

Clem scored a broken steering wheel for the PlayStation 1 (yes the first one) at a flea market. Thankfully it is broken so he decided to turn it into an RC transmitter for his old Remote controlled Car! Learn how to use the Arduino MKR WiFi 1010 to make your own transmitter and receiver from scratch! It even supports FPV head tracking! What features would you like to add into the system? 

See how fast you can run a 100m dash with this Arduino timer

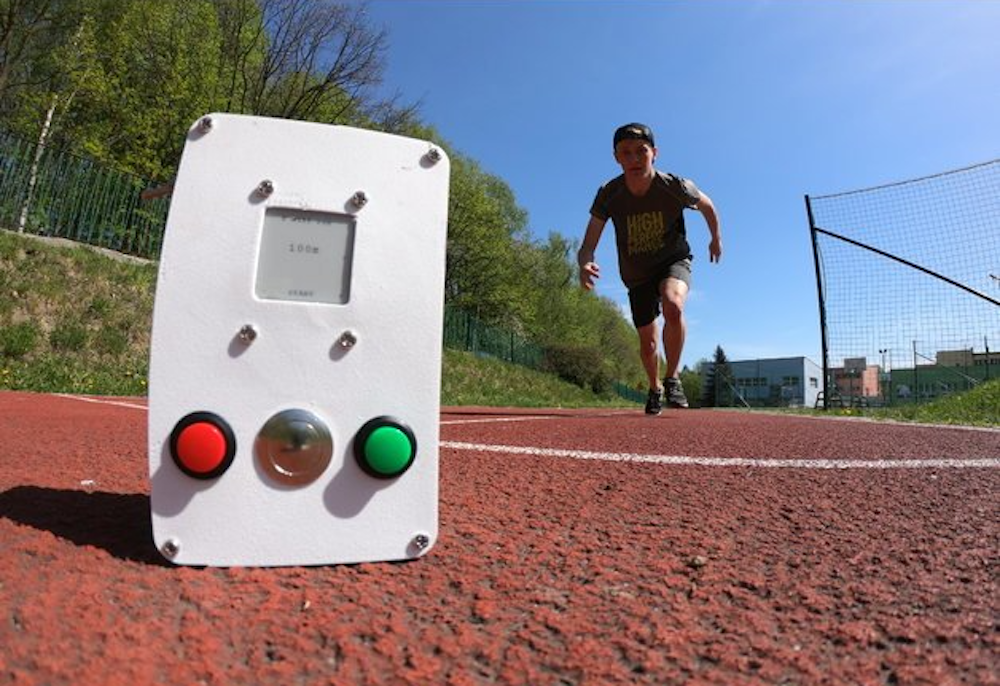
Nikodem Bartnik enjoys running, as well as making things, and he’s been able to combine both pursuits in the form of an ultrasonic race timer. 

The device is placed at the finish line and mounted to a tripod. Once a runner gets into position, the start of the sprint is signaled with the beep of a small speaker.

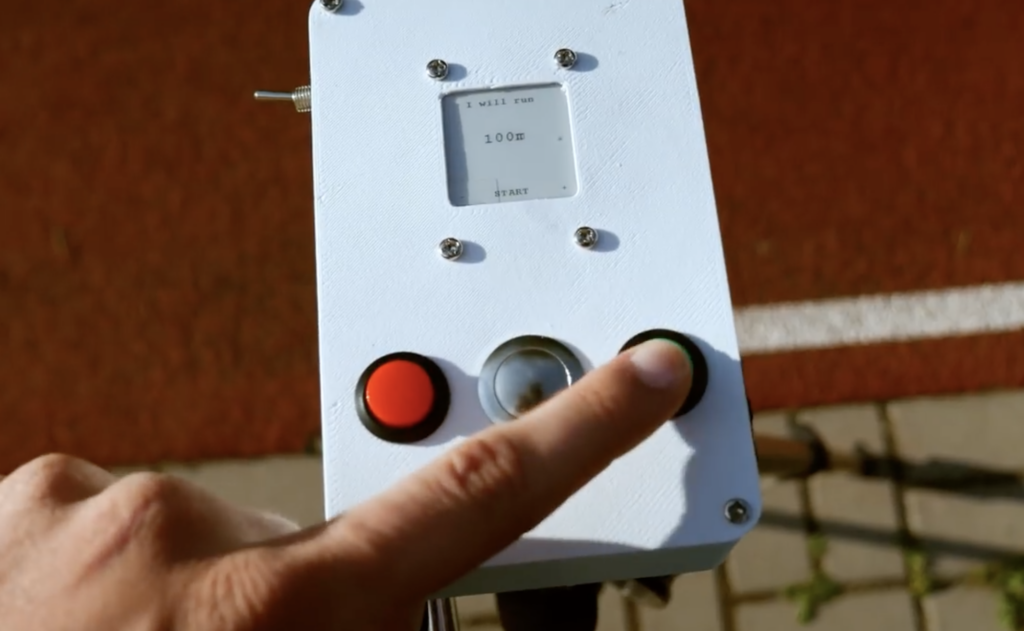
Everything is controlled by an Arduino Nano, while user feedback is provided via a small ePaper display. A pair of buttons also enable the runner to adjust the distance from 50m to 1km.  

Although Bartnik is still no Usain Bolt, he’s planning to practice and hopefully improve his 100m dash time. Code is available on GitHub if you’d like to build something similar, along with 3D print files for the enclosure on Thingiverse.

Scan objects in 3D with this Arduino-controlled photogrammetry rig

Pictures can be a great way to record an object or project, but typically only does so in one perspective. In order to capture things in three dimensions, you’ll need to be able to snap multiple photos and stitch them together with software.

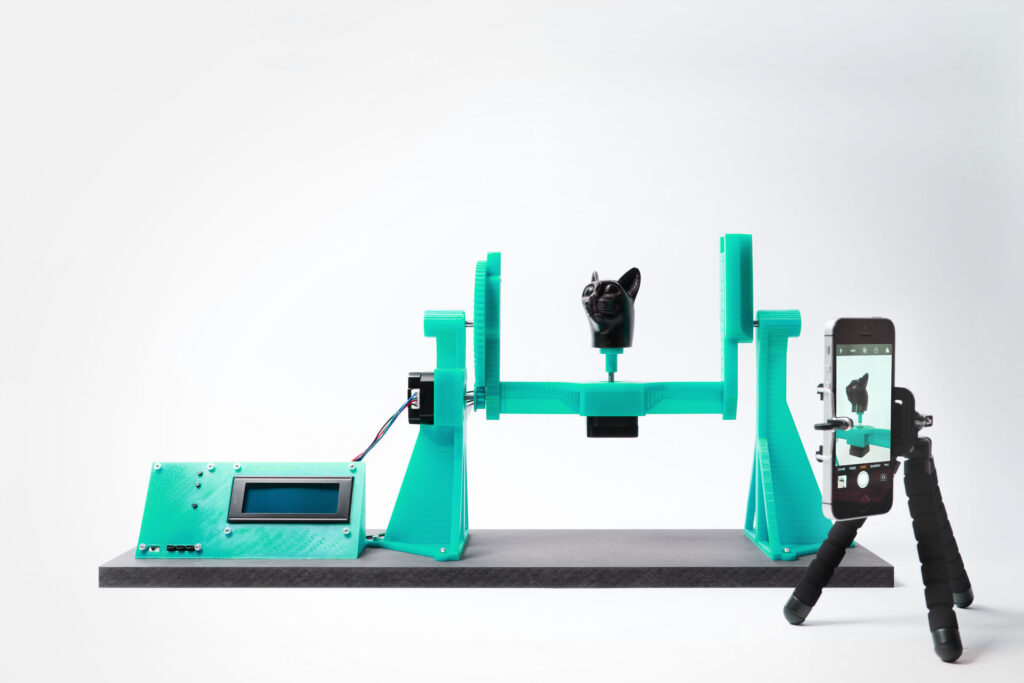
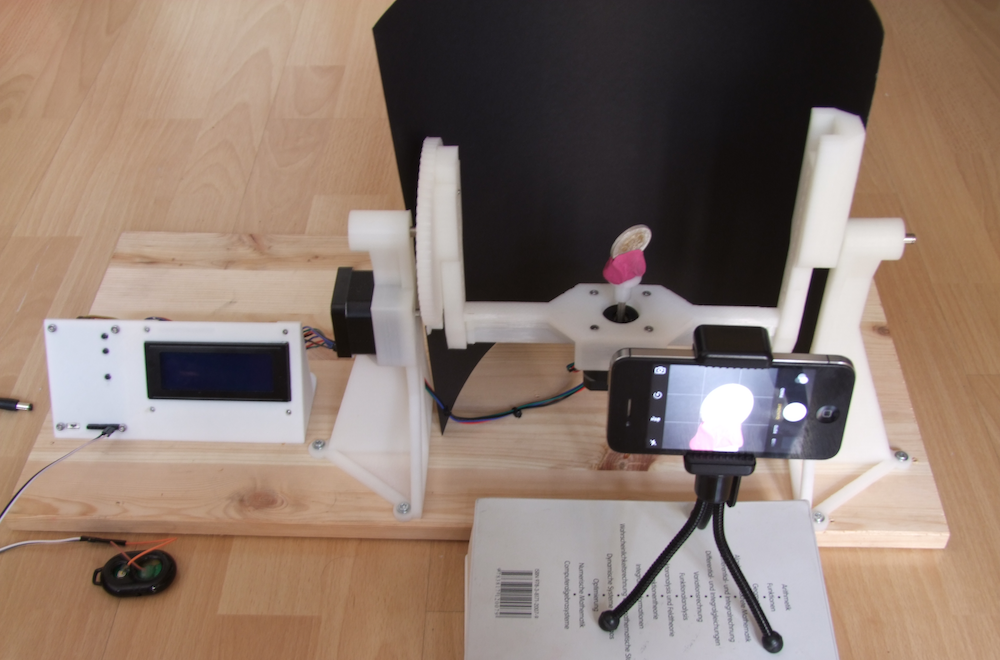
To take all the photos required for this process, “thomas_openscan” has come up with an automated device that rotates the object as needed, allowing him to capture images using a DSLR camera or even smartphone.

An early prototype is shown here, which actually moves a phone around the scanned object. The later, more refined version manipulates the object itself using an Arduino Nano and a pair of drivers to control a pair of bipolar stepper motors. 

More information is available here and over on Thingiverse, and can be purchased or built depending on your needs.