Posts with «featured» label

Rip current lighting system enhances water safety

Drowning is the third leading cause of accidental death in New Zealand, and the vast majority of lifeguard rescues are due to rip currents—hard to observe unless you’re already in peril. In order to help fix this problem, Victoria University of Wellington students Hannah Tilsley and Chamonix Stuart designed the “Nah Yeah Buoy” water safety system.
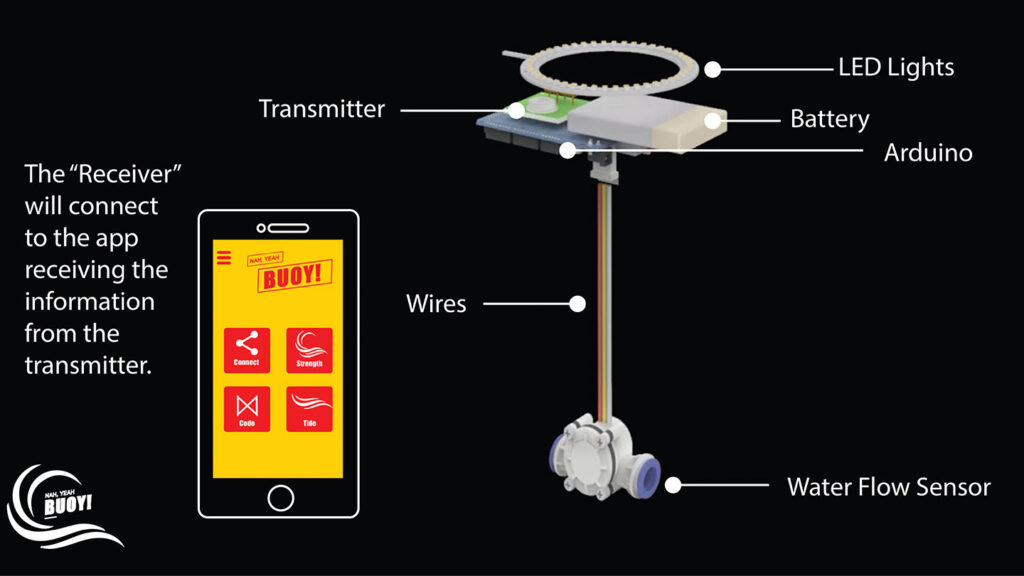
The system consists of a network of sensing buoys and a mobile app. The buoys feature a water flow sensor on their base to measure currents, and use an Arduino to control lights on the top to shine according to the water speed. Green means it’s safe to swim, yellow is for caution, and red indicates danger, in similar manner to how traffic lights. Additionally, two-way wireless communication sends alerts to lifeguards on the shore, who can override the lights to warn of danger when needed. 
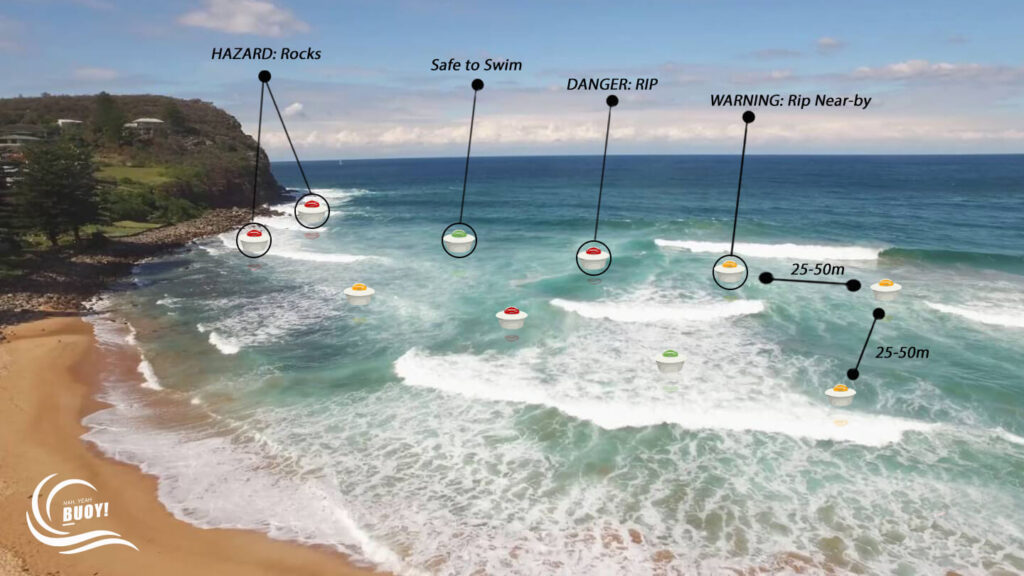
As seen here, the project was named a runner-up in the 2019 New Zealand James Dyson Award.

The “Nah Yeah Buoy” is an adaptive system for water safety designed to identify rip currents near beaches, visualise their locations and movements, and provide interactive alerts and warnings for lifeguards and water users.

Our “Nah Yeah buoy” consists of a network of sensing buoys and a mobile app for lifeguards. Rip currents are characterised by a localised strong flow of water that moves away from the shore at a typical speed of 0.5 to 2.5 meters per second. Each buoy of the network has a customised fluid flow sensor at its bottom to measure the strength/speed of the water as it flows through, and the value is compared to a set of thresholds by a built-in microcontroller real time. A high-intensity light placed on top then indicates the level of danger in three colours: green for “Yeah” (good to swim); orange for an alert; and red for “Nah” (do not swim). The buoys also transmit the information wirelessly to an app on the lifeguards’ mobile devices which allows them to adjust the thresholds as needed. The buoys are lightweight, very easy to install and individually manageable and form a network automatically.
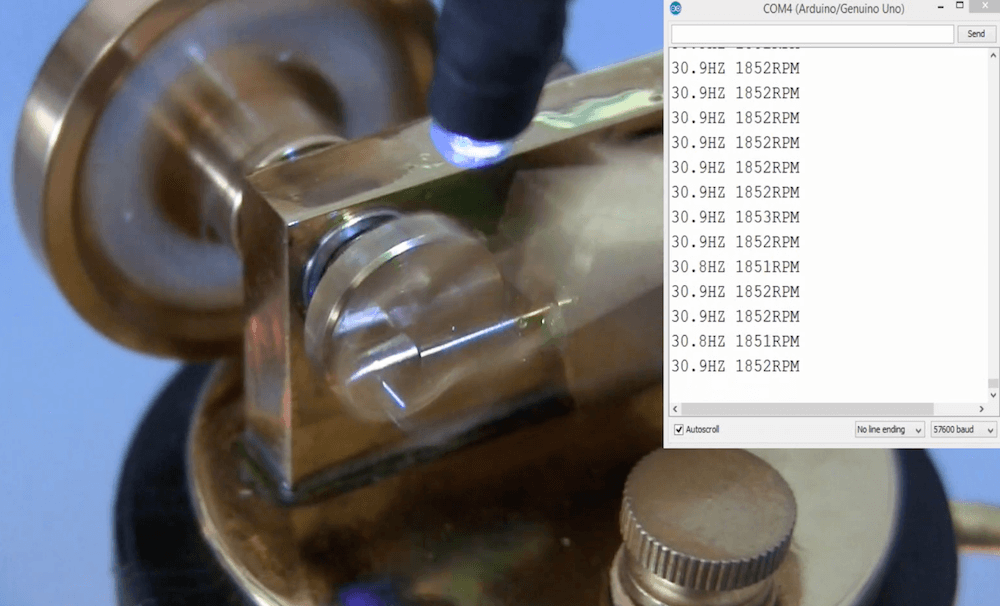
Measuring a mini steam engine’s speed with Arduino

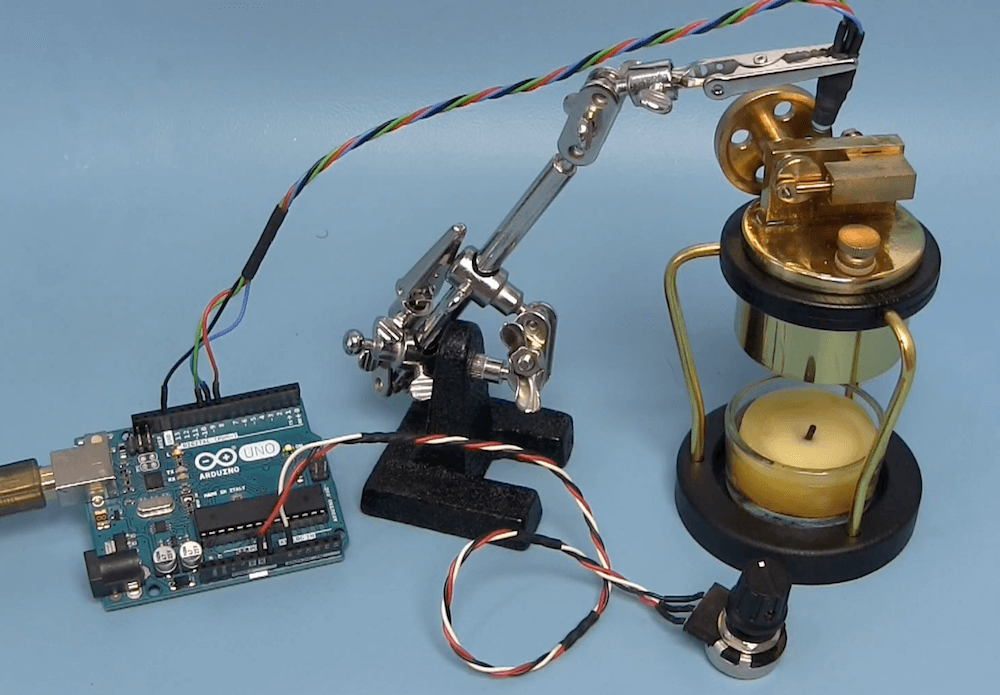
Joop Brokking has been experimenting with a miniature candle-powered steam engine. It’s an amazing little device, able to push a piston over and over to turn a flywheel, releasing the steam via a mechanically-controlled valve. But just how fast does it go?

Of course, there are a plethora of ways to determine its speed, but Brokking chose to do so using an Arduino Uno, a potentiometer and an LED that’s arranged over the piston assembly. 

The light source is programmed to pulse on and off, with a frequency that can be adjusted using the potentiometer. He then aligned this pulsing with the piston’s cyclic rate, visually “freezing” the device in time. This frequency and RPM numbers are output over the serial monitor, giving him a speed of around 1850 RPM.

Arduino Blog 30 Sep 16:08

These LEGO linkage walkers wander under Arduino control

YouTuber Oracid1 has developed a unique family of four-legged robots, dubbed “FiveBarQuads.”

The quadrupeds all feature ultrasonic sensing for navigation and a body made out of LEGO components — and as seen in the first video below, his latest (and largest) version is able to navigate quite nicely on its own. It’s even able to traverse a grate and maneuver around a potted plant, though chair legs are understandably a bit tricky.

The robots use an Arduino Uno for control along with a total of 16 micro servos in its shoulders (four each) in order to move the limbs. Two servos are employed to actuate each upper linkage for the legs, which are attached to bottom sections, and finally to the feet portion through a series of joints. This allows for an interesting locomotion capability that could be applicable in a variety of situations.

Arduino Blog 27 Sep 19:04

An interactive wall map with DMX programmable lights and visual ‘narration’

Non-profits can do great work, and in order to help others visualize the needs they serve and what they are doing, Jason Wolin came up with an amazing map for his organization.

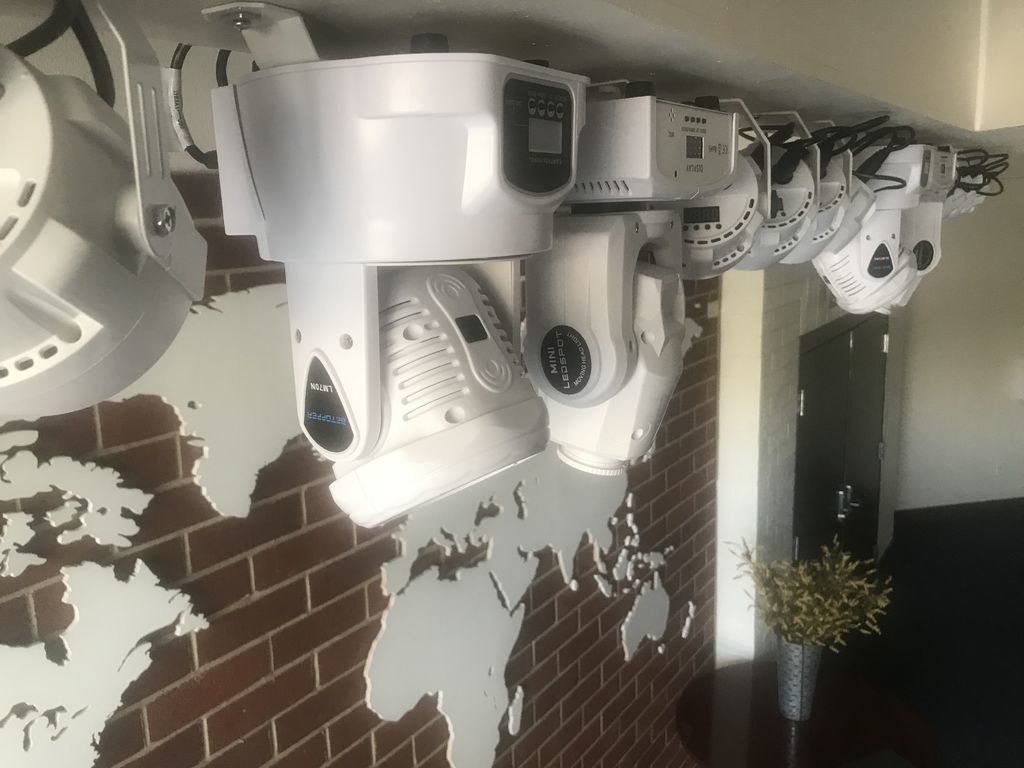
The massive map stretches down 14 feet of a brick wall, with the continents cut out of MDF, and a pair of accompanying LCD TVs that show data about different areas.

Three computers are used for control, two of which are used to play videos on each screen. The third handles overhead map lighting controlled via the DMX protocol to illuminate the map in various configurations. Each of the PCs are coordinated using a trio of Arduino Nanos, allowing video and lighting effects to be displayed in perfect sync.

Arduino Blog 26 Sep 21:14
arduino  dmx  featured  lighting  nano  smart map  

Cambridge-1 is a 4-bit homebrew 7400-based CPU

Richard of ARITH-MATIC had the idea to build a 4-bit computer based on 7400 series ICs (like the 74HC273, 74HC193, and 74HC125), but other responsibilities got in the way of this becoming a reality for quite some time. Finally, with the Retro Computer Festival at the Centre for Computing History in Cambridge, England held earlier this month, he went ahead and started the project in hopes of creating a working computer in under 30 days.

The resulting homebrew CPU is known as the ‘Cambridge-1,’ comprised mostly of 7400 series ICs, wiring, and an SRAM chip for storage carefully arranged on a set of breadboards. In addition to the other components, an Arduino Micro is also implemented. While not technically a retro device, the Arduino allowed him to “change the control logic on-the fly,” and gave him the flexibility to finish the project in his compressed time scale.

Arduino Blog 26 Sep 19:01

A 3D-printed scale for your kitchen counter

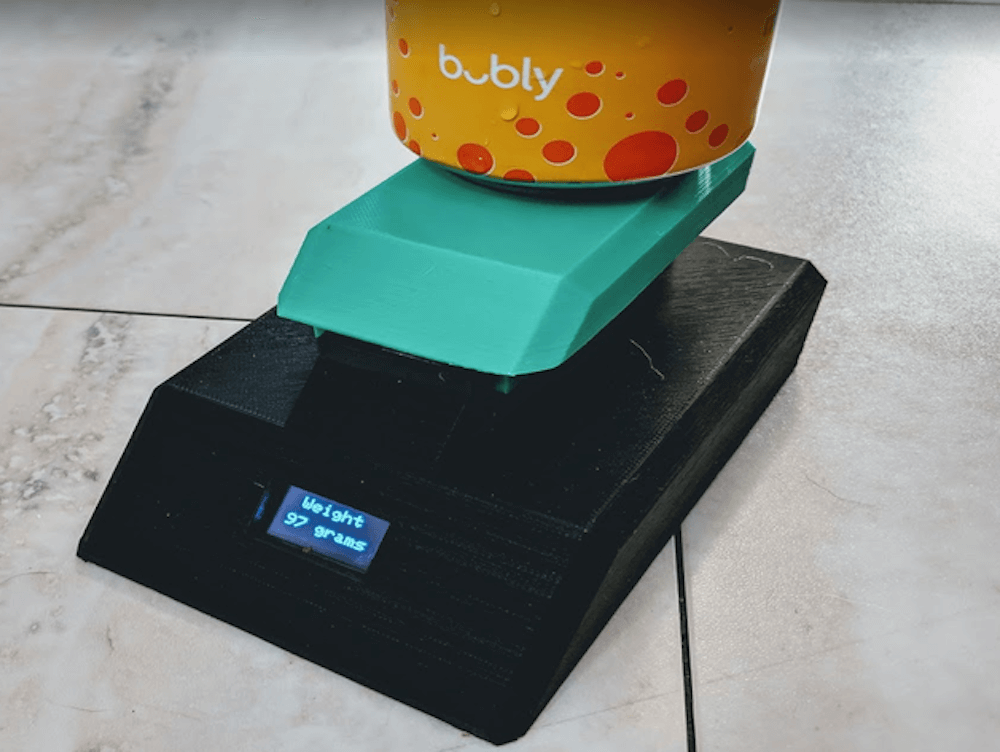
Do you need a small weight scale? You can of course buy one, or you could instead make your own 3D-printed device with a load cell and an Arduino, as shown in the below video by MN Maker.

In his setup, the load cell first sends readings to an HX711 breakout board, which converts this analog signal into a digital output that the Nano can easily interpret. The output is displayed on a 0.96” 128×64 OLED, with a button on the back to switch power on and off, and another to tare the scale to zero. 

Code for the project is available here, while print files can be found on Thingiverse.

Arduino Blog 25 Sep 20:14

Logging refrigerator temperature with Arduino

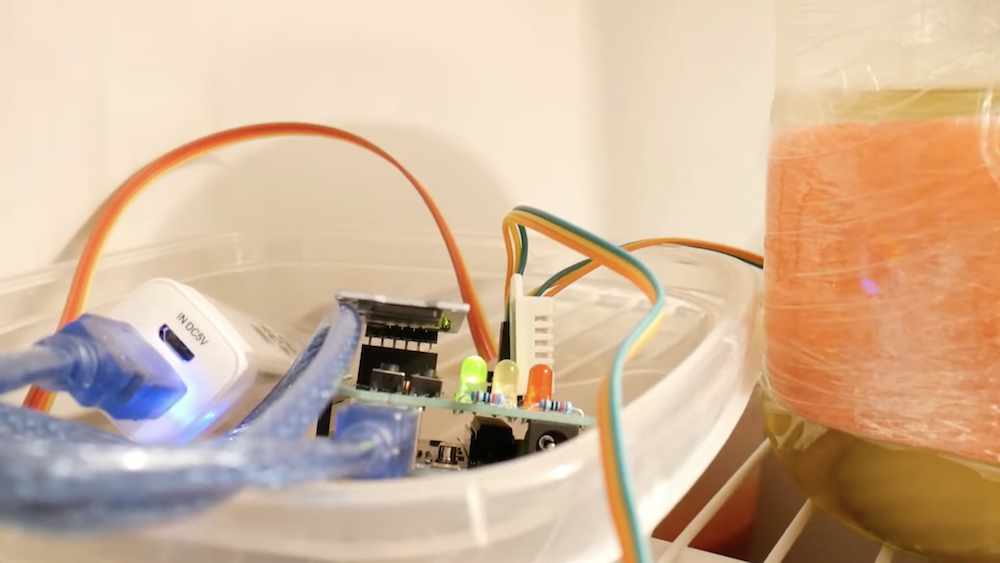
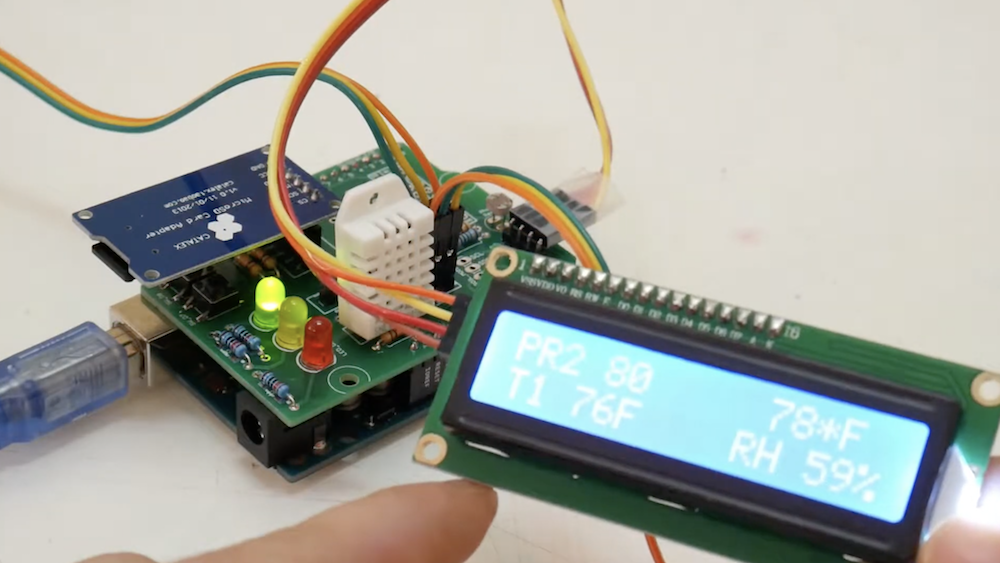
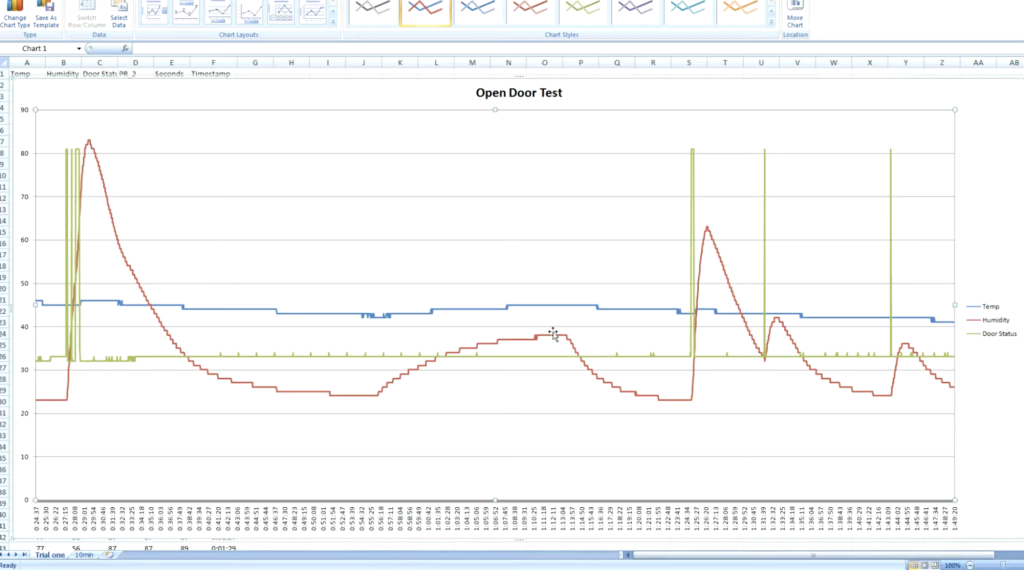
What really happens when you open the refrigerator door? Sure, you know intuitively that cold air escapes, but just how much? And how fast does the food inside actually heat up? To find out, Ryan Bates came up with his own data logging setup using an Arduino Uno, a custom sensor shield, and a microSD card reader.

His device uses a photoresistor to tell when the door has been opened, as well as a DHT22 temperature/humidity sensor to log the air temperature and door status. Along with this, TMP36 sensors are placed around the fridge to get a more granular look at temperatures, including one attached to a pickle jar. 

The results seen in the video below are quite interesting, and more information on the build can be found here if you’d like to try something similar.

Gigantic game of Operation powered by Arduino

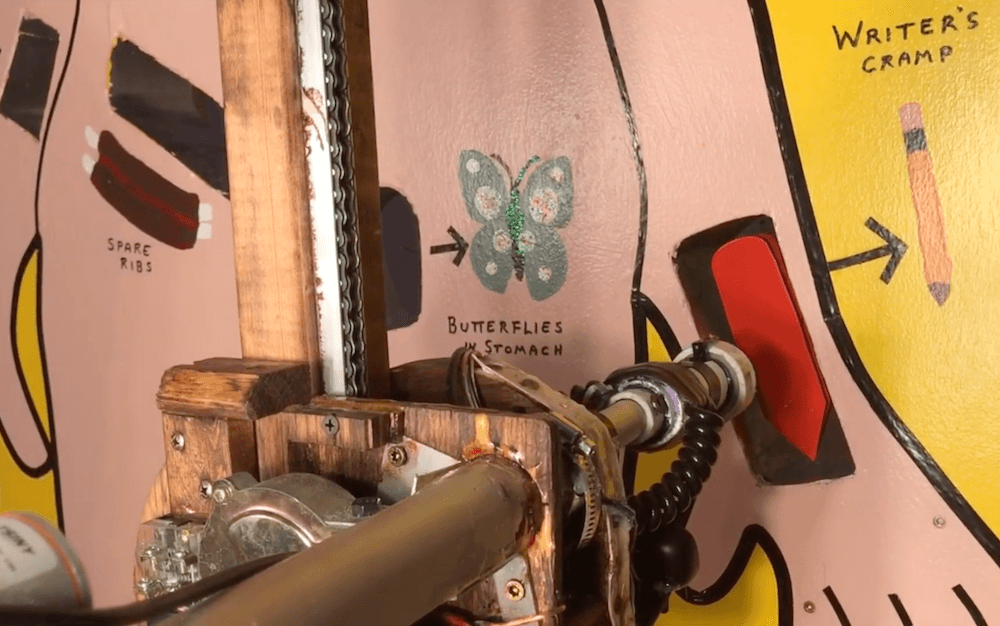
As a kid you may have played Operation, but certainly never anything like this nine-foot-tall version from SPOT Technology. This device is not only impressively large, but assists doctors in their surgical pursuits with a CNC gantry setup to pull out obstructions.

In the game, amateur surgeons control the system using a small arcade cabinet next to the patient (Sergio), moving a magnetic gripper with a joystick and buttons. A camera rides along and transmits images to the cabinet, hopefully leading to a clean extraction. If the gripper isn’t aligned correctly, a button on the plunger reports the doctors error, and Sergio’s nose lights up red to indicate a failed surgery. Two Arduino Megas are implemented, one on the CNC playfield itself, another in the cabinet.

The project will be on display at the Philadelphia Mini Maker Faire on October 6th if you’d like to see it in person.

Arduino Blog 24 Sep 20:25

This interactive machine makes art out of wine

Spilled wine may be a hassle to clean up, but you might also observe that it makes interesting patterns. Marketing firm KPS3 had the same sort of thought process when they created “The Santa Maria Swirl Machine” to promote the Santa Maria Valley wine industry.

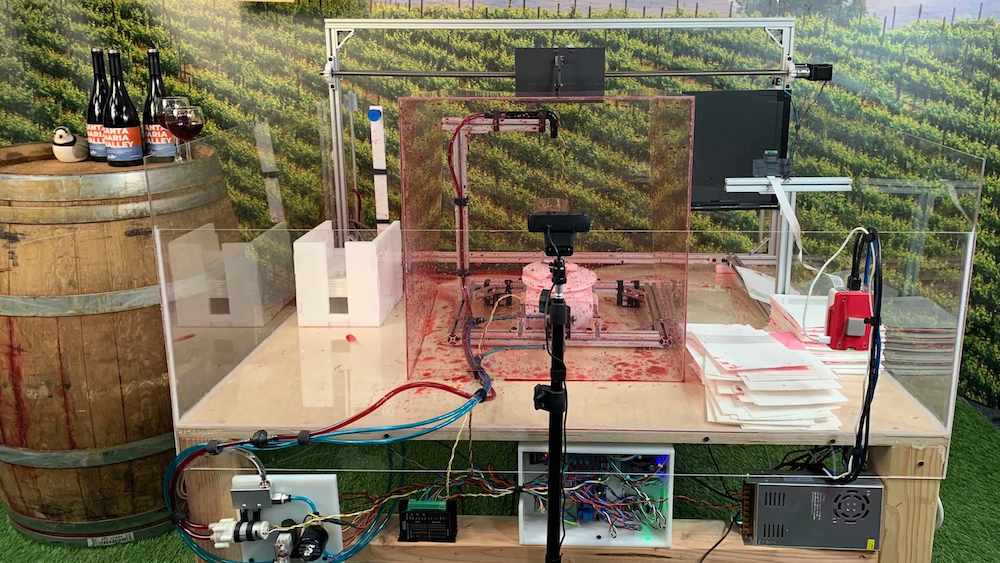
The machine takes the form of a tabletop display, where a vacuum gripper first picks up a piece of paper and transports it into a clear “swirl area.” A glass is then automatically filled with wine, spun up to speed, and flung at the paper in order to create art. 

Control hardware includes an Arduino Micro and a pair of Raspberry Pi boards, along with cameras are used to stream the process and take a picture of the resulting pattern. If this sounds interesting, you can sign up to make your own spill-art here. You can also read more about the project on TechRepublic:

Visitors to the website can watch the current splash art being made, or register to join the queue to use the service—once their turn arrives, they are given a full-screen view and options to control their creation. Specialized watercolor paper is picked up by a servo equipped with a suction cup attached to a venturi (itself attached to an air compressor), which proceeds to hand off to a custom gripper to hold the paper in place for the wine to be spilled. 

From there, the Arduino-controlled stepper motor turns the lead screw, moving the paper into the splash zone, and fills the glass to the user-selected level, and begins to swirl the glass at the user-selected speed. Once the proper speed is attained, an actuator tips the glass forward, spilling the wine onto the paper. All of this is streamed by two cameras, with the final result photographed by a third. This photo is then processed in Lambda to clean up the photograph, detecting corners, applying filters and branding for the Santa Maria Valley Chamber of Commerce.

DrumKid is a handheld aleatoric drum machine

Hearing live music is certainly enjoyable, but if the musician is using a drum machine, things can eventually get static. To add a bit more spontaneity into this class of robo-musician, Matt Bradshaw has created DrumKid — a handheld, battery-powered unit that uses random numbers to determine the rhythm and sound of a beat.

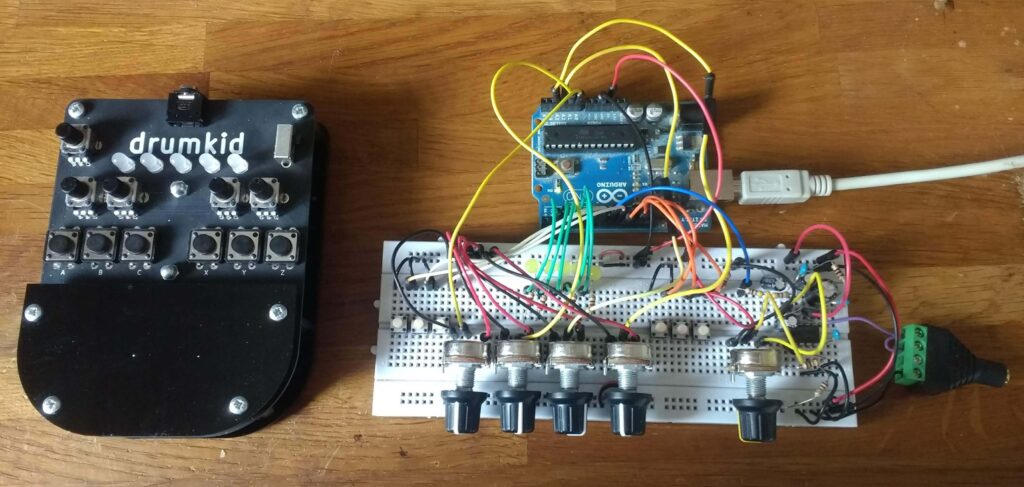
The device goes through a drum sequence, with a series of LEDs to indicate its progression, but also inserts randomly generated drum hits to the original beat. It features a variety of controllable parameters to alter how it sounds when played live via four knobs and six buttons.

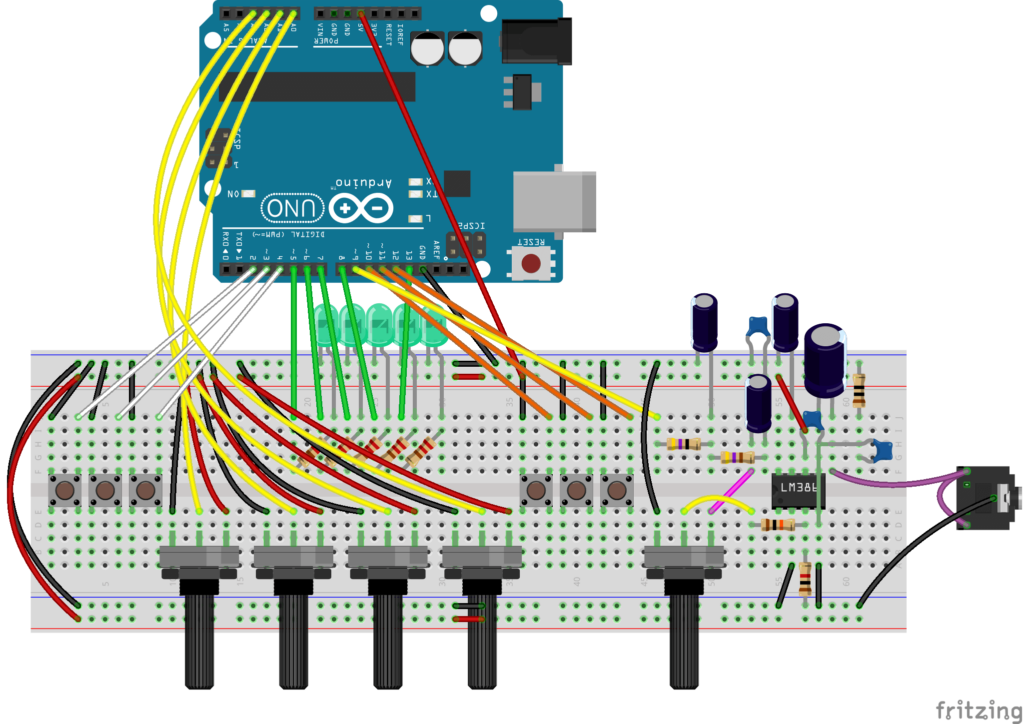
The DrumKid was developed on an Arduino Uno and breadboard, then transferred to a PCB for the final version that will be for sale later this year. More info on the build is available in Bradshaw’s project write-up, while code and design files are on GitHub if you’d like to make your own!

Arduino Blog 17 Sep 20:23