Posts with «raspberry pi» label

Don’t Take Photos of Your Arduino 101 Either, Its Light Sensitive

Wafer level chips are cheap and very tiny, but as [Kevin Darrah] shows, vulnerable to bright light without the protective plastic casings standard on other chip packages.

We covered a similar phenomenon when the Raspberry Pi 2 came out. A user was taking photos of his Pi to document a project. Whenever his camera flash went off, it would reset the board.

[Kevin] got a new Arduino 101 board into his lab. The board has a processor from Intel, an accelerometer, and Bluetooth Low Energy out of the box while staying within the same relative price bracket as the Atmel versions. He was admiring the board, when he noticed that one of the components glittered under the light. Curious, he pulled open the schematic for the board, and found that it was the chip that switched power between the barrel jack and the USB. Not only that, it was a wafer level package.

So, he got out his camera and a laser. Sure enough, both would cause the power to drop off for as long as the package was exposed to the strong light. The Raspberry Pi foundation later wrote about this phenomenon in more detail. They say it won’t affect normal use, but if you’re going to expose your device to high energy light, simply put it inside a case or cover the chip with tape, Sugru, or a non-conductive paint to shield it.


Filed under: Arduino Hacks
Hack a Day 06 May 00:01

Autograph: A String Art Printer

“String Art” is the name of the art form that transforms thousands of nails and just as many feet of thread into unique masterpieces. Some artists have developed techniques to create photorealistic string art works, but until now, there was no way around the tedious and time-consuming manufacturing process. Depending on the size, it can take months to complete a single piece by hand.

The threading process as shown in this video – (c) Laarco 2016.

Now, you might think, wouldn’t it be great to build a sophisticated “nail and thread”-machine that takes care of the whole assembly process, from placing the nails on the board to winding the string around the nails? The people behind Laarco, a design studio in London, UK, did exactly that. Their project “Autograph” is effectively a large scale “printer” for string art, capable of satisfying the increasing demand for this form of image reproduction.

While they are not shy to show their amazing results, mostly string-art-converted photographs of celebrities, we will probably not get a full documentation on the hardware and software behind Autograph. After all, it took them four years of development to build this fully automated machine, and they are about to turn their string boss-ness into a strong business: You can now buy their unique string art pieces starting at $1,100.

String path and height visualization – (c) Laarco 2016

Too expensive? Well, you can still build your own: The brain of the machine is a Raspberry Pi which sends commands to an Arduino Mega equipped with a 3D printer shield. The gantry design looks very similar to a popular low-cost CNC-mill, however, they added a custom tool head to position and uncoil the thread while keeping it under tension.

In preparation of an assembly pass, the nail positions are derived from Voronoi diagrams, an unknown mechanism then picks and places the nails into pre-drilled holes. During the threading run, the height of the tool head increases as the process progresses to avoid collisions with previous string segments.

We’ve seen drawing-bots, polar graphs and robotic artists in various forms in the past, but it’s probably safe to say that this is the first string art machine ever built. That said, enjoy the video:


Filed under: cnc hacks, Raspberry Pi
Hack a Day 28 Apr 12:01

Hack Your Pebble Steel to Control Your Raspberry Pi

If you already have a Raspberry Pi running a Node.js server, you're already on your way to controlling your home with a smartwatch.

Read more on MAKE

The post Hack Your Pebble Steel to Control Your Raspberry Pi appeared first on Make: DIY Projects and Ideas for Makers.

Arduino Comes To The Raspberry Pi, Linux ARM Devices

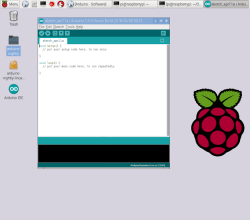
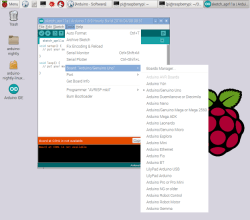
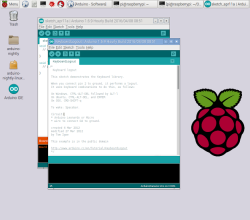
Arduino is the perfect introduction to microcontrollers and electronics. The recent trend of powerful, cheap, ARM-based single board Linux computers is the perfect introduction to computer science, programming, and general Linux wizardry. Until now, though, Arduino and these tiny ARM computers have been in two different worlds. Now, finally, there are nightly builds of Arduino IDE on the Raspberry Pi and other single board Linux computers.

The latest Arduino build for ARM Linux popped up on the arduino.cc downloads page early this week. This is the result of an incredible amount of work from dozens of open source developers across the Arduino project. Now, with just a simple download and typing ‘install’ into a terminal, the Arduino IDE is available on just about every single board Linux computer without having to build the IDE from source. Of course, Arduino has been available on the Raspberry Pi for a very long time with sudo apt-get install arduino, but this was an older version that cannot work with newer Arduino boards.

Is this distribution of the Arduino IDE the same you would find on OS X and Windows? Yep, everything is the same:

While this is really just arduino.cc improving their automated build process and putting a link up on their downloads page, it does make it exceptionally easy for anyone to set up a high school electronics lab exceptionally easy. The Raspberry Pi is almost a disposable computing device, and combining it with Arduino makes for a great portable electronics lab.


Filed under: Arduino Hacks, linux hacks, Raspberry Pi

Control Robots to Solve Puzzles in This Twitch-Style Robot Livestream

Robotics is a booming field that gets everyone excited, but when the talk comes to real life applications the response is a bit more tepid. Pundits tend to point to the “3 D’s”—dangerous, dirty and dull—but they often overlook a market with short term payoff: Entertainment. We are beginning to see some […]

Read more on MAKE

The post Control Robots to Solve Puzzles in This Twitch-Style Robot Livestream appeared first on Make: DIY Projects and Ideas for Makers.

6 of Our Favorite Drawbot Projects

Check out these awesome drawbot projects for creating your own robo-Picassos.

Read more on MAKE

The post 6 of Our Favorite Drawbot Projects appeared first on Make: DIY Projects and Ideas for Makers.

PWM on High Current(amp) Actuators

I'm trying to move up into the category I originally got into robotics for in the first place: bigger buddies!

I have a Raspberry Pi I'd like to use to control some linear actuators, which are 12v and lift about 225lbs. I'm unaware of their amp usage: a search for similar rated ones said ~4-5A. They were purchased from an online auto parts place, so it's unlikely they'd know.

read more

Remote Treat Dispenser Sends You Adorable Photos of Your Pet

Need a quick mood lift when you're missing your pet? This treat dispensing camera rig will text you a photo of your pet.

Read more on MAKE

The post Remote Treat Dispenser Sends You Adorable Photos of Your Pet appeared first on Make: DIY Projects and Ideas for Makers.

15 Fantastic Project Enclosures

Fight the drab tyranny of the beige box with these inspiring ideas for project enclosures

Read more on MAKE

The post 15 Fantastic Project Enclosures appeared first on Make: DIY Projects and Ideas for Makers.

Go Behind the Scenes of Installing an Interactive LED Art Exhibit

Nick Squires details his time spent using his maker skills to produce an interactive art installation and performance.

Read more on MAKE

The post Go Behind the Scenes of Installing an Interactive LED Art Exhibit appeared first on Make: DIY Projects and Ideas for Makers.