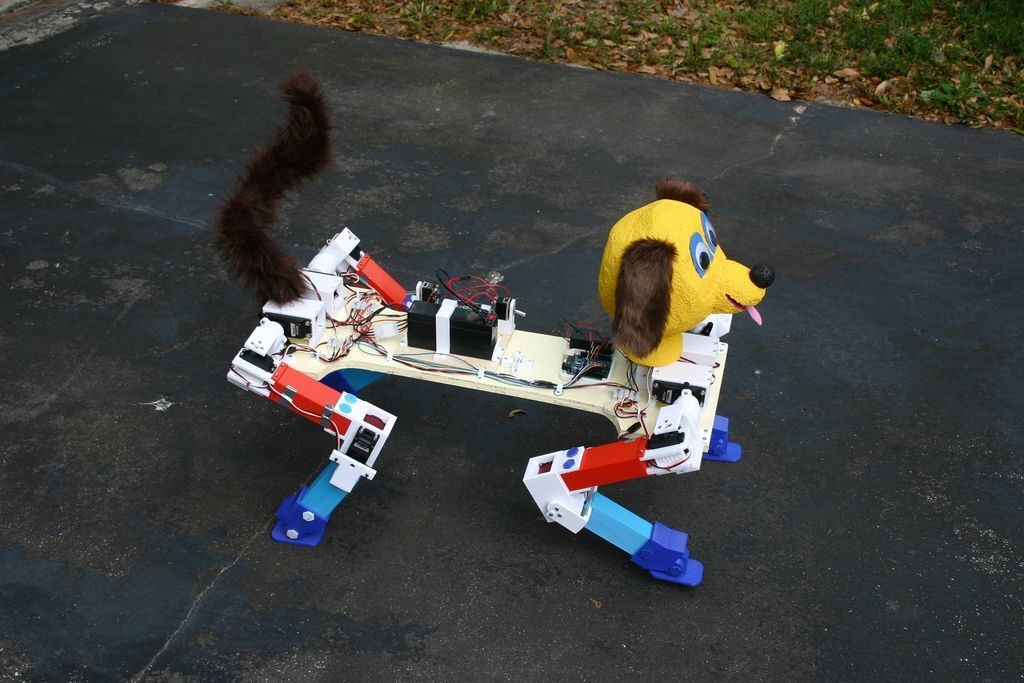
Would you like a dog? Would you like a robot dog? If so, then this build by Michael Rigsby could be a great starting point.
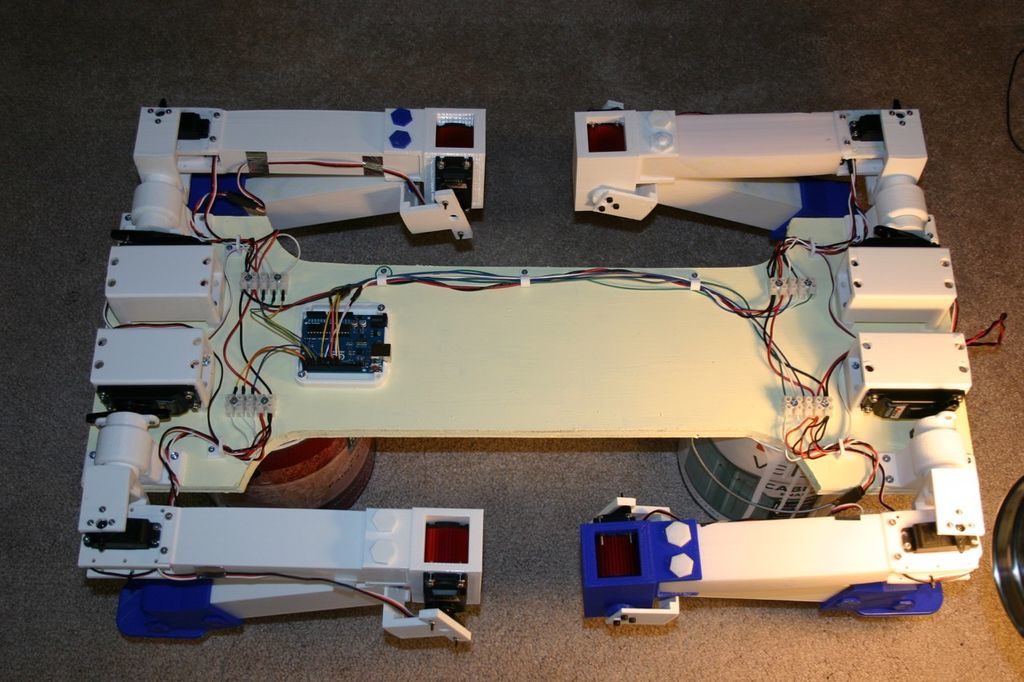
Rigbsy’s robotic pet features four servo-driven legs, with two-axis shoulder movement, as well as an articulated knee joint. As seen in the video below, it’s capable of picking itself up off the ground, and can then walk using a slow side-to-side gait.
An Arduino Uno uses the majority of its I/O pins to control the legs, and as of now, it travels forward with no directional control or sensor input.
Instructions for the project, along code and 3D print files, are available in Rigsby’s write-up.
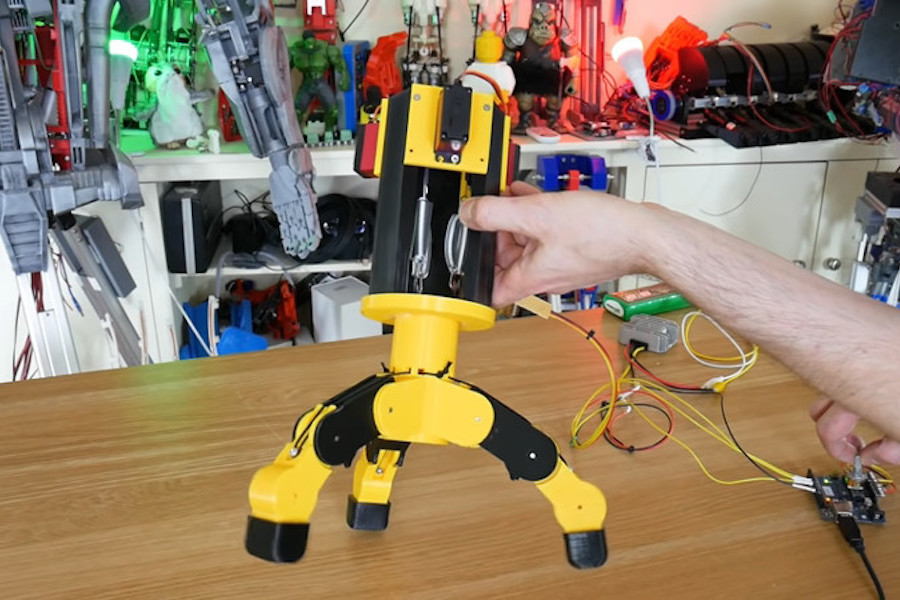
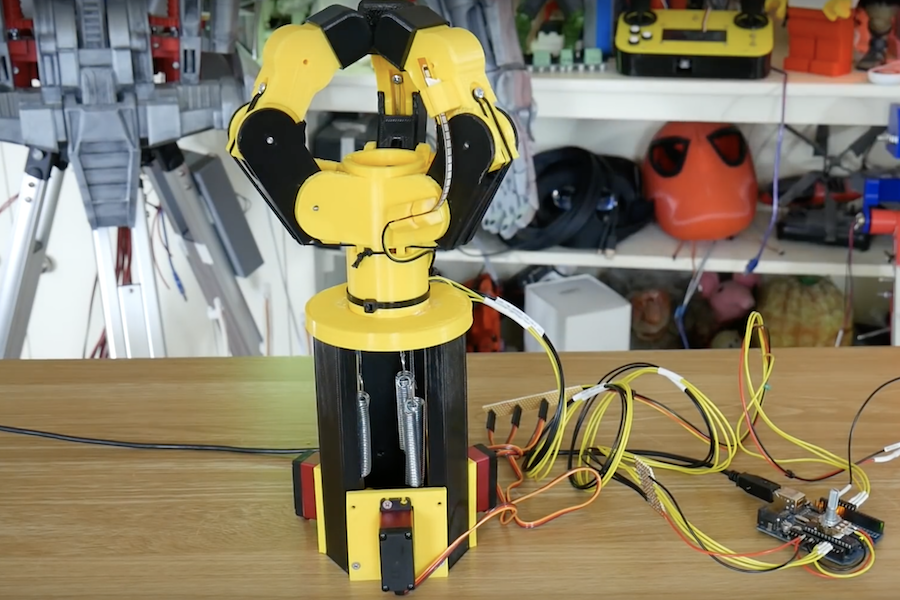
In a variety of robotic situations, you’ll need some sort of gripper. In this project, James Bruton attempts to create a force-controlled, three-fingered assembly using an Arduino Uno along with a trio of servos.
Instead of directly controlling the grip fingers, the 3D-printed device is held open with bungee cables. When it’s time to clamp everything down, the servos wind up the cables attached to the inside of the fingers, similar to how human tendons work.
To correlate servo inputs to grip force, he uses a series of springs to allow some amount of compliance, as well as flex sensors attached to the fingers themselves to measure the resulting positions. Arduino code for the build is available here.
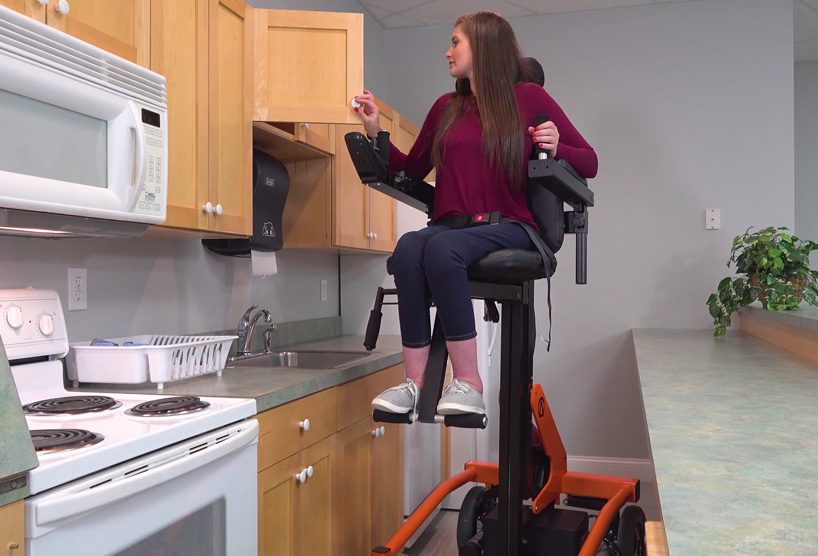
The AbleChair by Advanced Fitness Components is nominally a wheelchair, but it’s capable of so much more.
The versatile wheelchair’s enhanced abilities include elevating the user to standing height or lowering for easy transfers. Additionally, the seating assembly can be flattened and positioned parallel to the ground, and even vertically as needed. This vertical position allows it to act as a gait training aid for those that are learning to walk, and the variety of positions has a number of health benefits.
The system itself is powered by Arduino along with brushless motors and sensors, while a joystick, touchscreen, and an Android app are used for control.
Riding a bicycle can be a great way to get around, and/or even to get some needed exercise. When you mix in automobile or foot traffic, though, things get a bit more complicated. This could be blamed, in part, on the fact that bikes don’t have the same running lights, turn or brake signals as motorized vehicles.
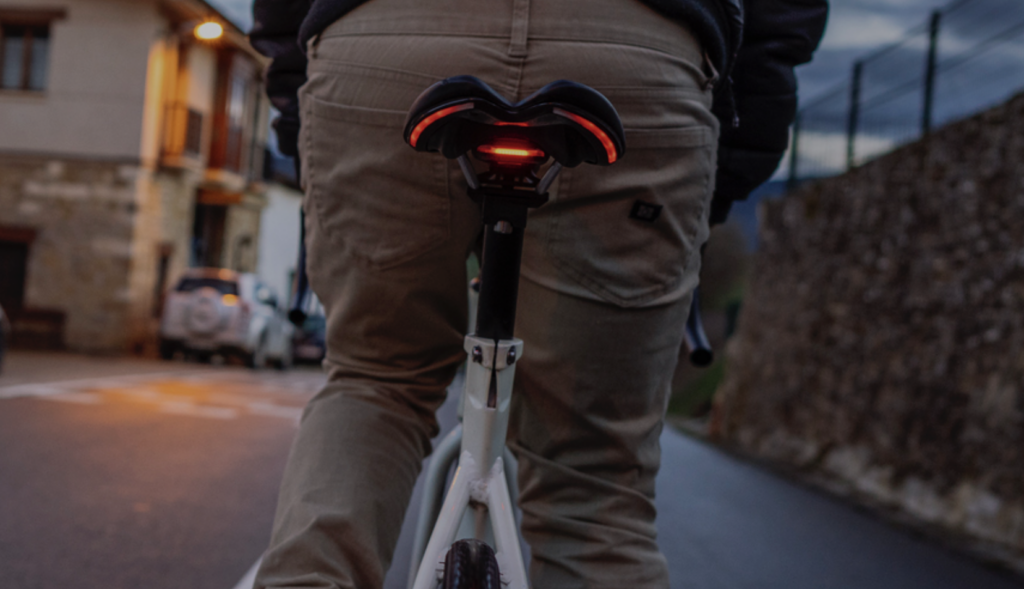
To address this problem, BLINK!’s patented Integrated Lighting System (iLS) has been designed to provide a visible communication solution that’s easily understandable by other road users.
This custom saddle—which was prototyped using an ATmega328P-based Arduino— features lighting for 270º visibility, and brightens automatically for braking when deceleration is detected. In addition, iLS includes a pair of remotely activated turn signals. This allows the rider to indicate direction changes without removing his or her hand from the handlebars to awkwardly point.
BLINK! has been embedded into a wide range of saddles and installation should be fairly straightforward. Not only will it certainly help enhance road safety, iLS will look fantastic while doing so.
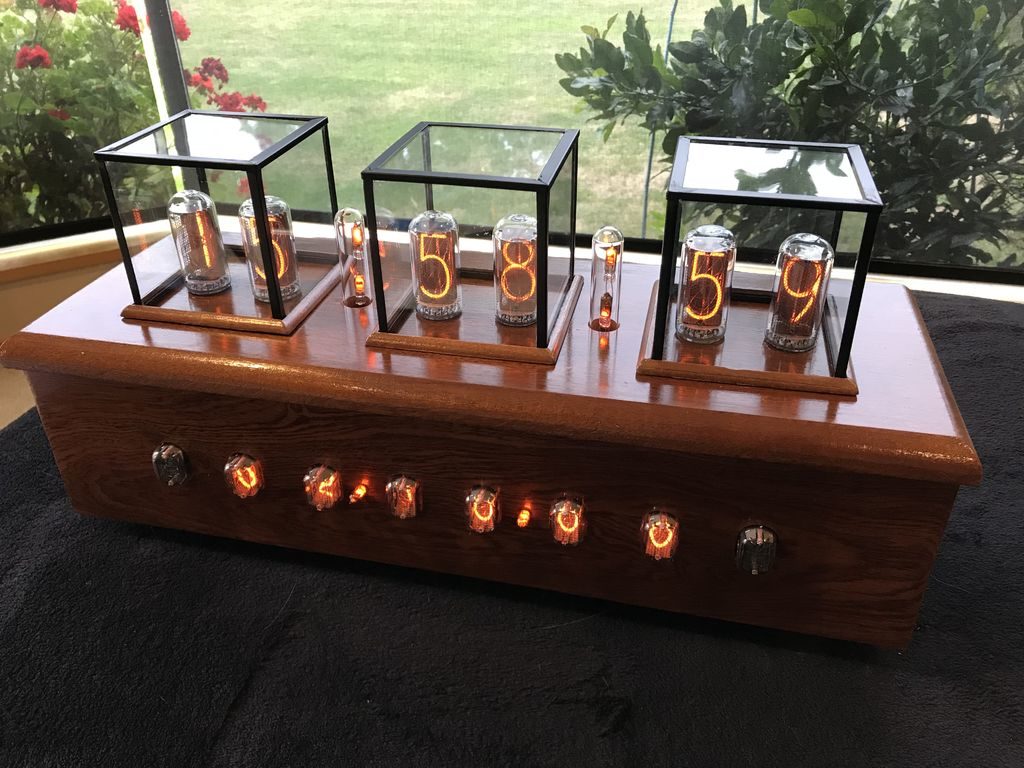
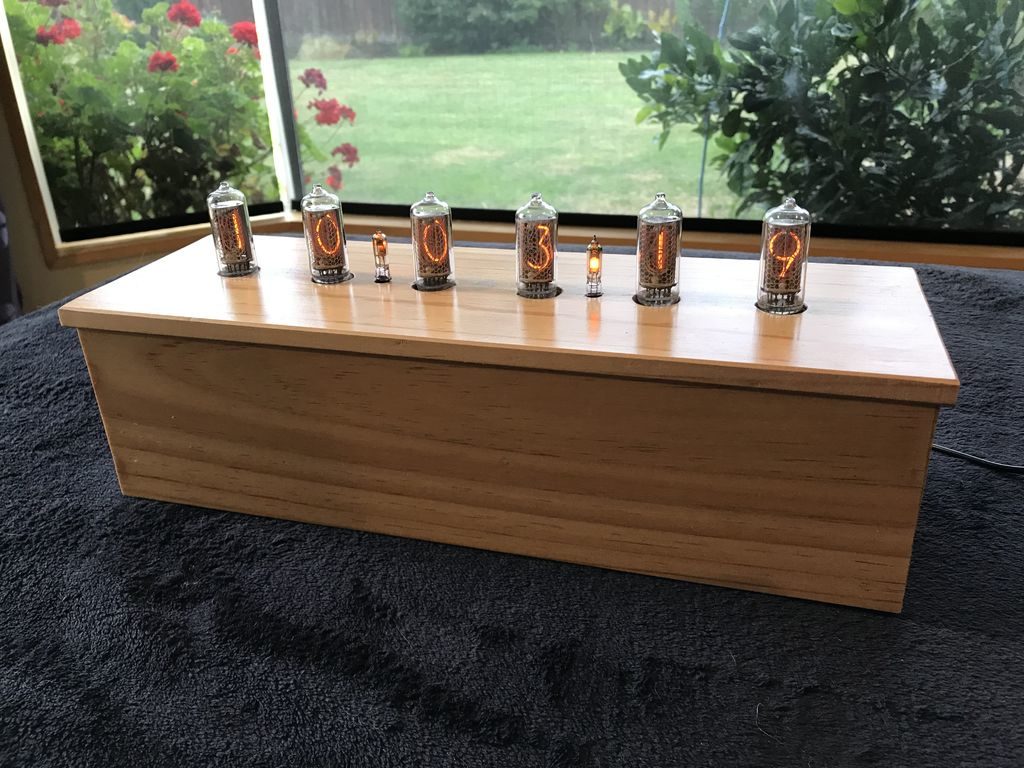
Nixie tubes require electricity in the range of 180VDC, making them challenging to work with. Maker Christine Thompson, however, decided to take Nixie art to a new level, creating a clock with three different types of tubes!
This clock, or perhaps more accurately “info display,” shows the time and date with six IN-18 tubes mounted on the top. In the front, six IN-12A and two IN-15A tubes are also available to show time, date, pressure, temperature, and humidity.
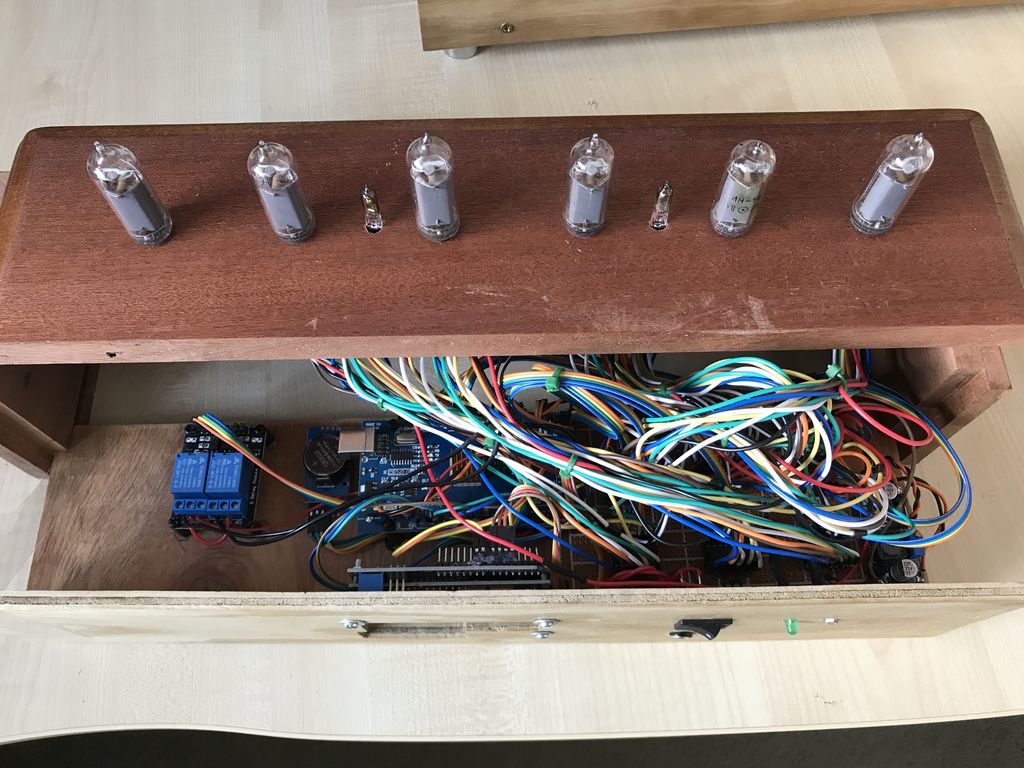
A pair of Arduino Mega boards are used to control this retro-inspired contraption, along with an array of wiring, perf board, and other components, stuffed inside a very nice wooden enclosure.
This is my first Nixie styled clock I have constructed. The clock actually consists of two clocks, the first being a 6 x IN-18 tube clock which is mounted on the clock’s top and displays both time and date. The second clock, this time based on 6 x IN-12A and 2 x IN-15A nixie tubes displays at the front of the clock and can display, time, date, pressure (with units and trend), temperature (both Centigrade and Fahrenheit) and, humidity (with units and trend). The time and date are separated with two single neon lamp-based separators, while only one of these lamps is displayed, to represent a decimal point, when the pressure, humidity or temperature is displayed. Both these clocks use “Direct/Static Drive” to power the displays and are based on two Arduino Mega 2560 boards. The fourteen tubes are driven by 12V to 170V DC to DC boost power supplies and 14 x K155 IC chips. The clock also powers two sets of Neon Lamps which switch off while the clock goes through its cathode cleaning cycle which happens at 19, 39 and 55 minutes past each hour. This cathode cleaning cycle consists of all six tubes displaying the digits 0 through 9 in sequence 6 times.
In addition the clock will sound a chime at 15, 30, 45 and 60 minutes. At the 60 minute chime the hour chime is also sounded. The chimes are standard MP3 files using a simple MP3 player controlled by the Arduino mega. In order to save on tube life all tubes are switched off automatically when the light level in the room dims to a predefined level, this is achieved using a LRD resistor located at the back of the clock. To help dissipate any heat build up both Arduino Mega ICs have copper heat fins attached and a 5V fan draws air out of the clock, cool air entering through a hole in the bottom plate.
The user can adjust the time, date, chimes, and chimes volume using one of two 16×2 LCD displays, located at the back of the clock. The BME280 temperature, humidity, and pressure sensor is mounted on the back of the clock so as to not be affected by the clock’s internal temperature.
A demo is seen in the video below, while more info and Arduino code can be found in the project’s write-up.
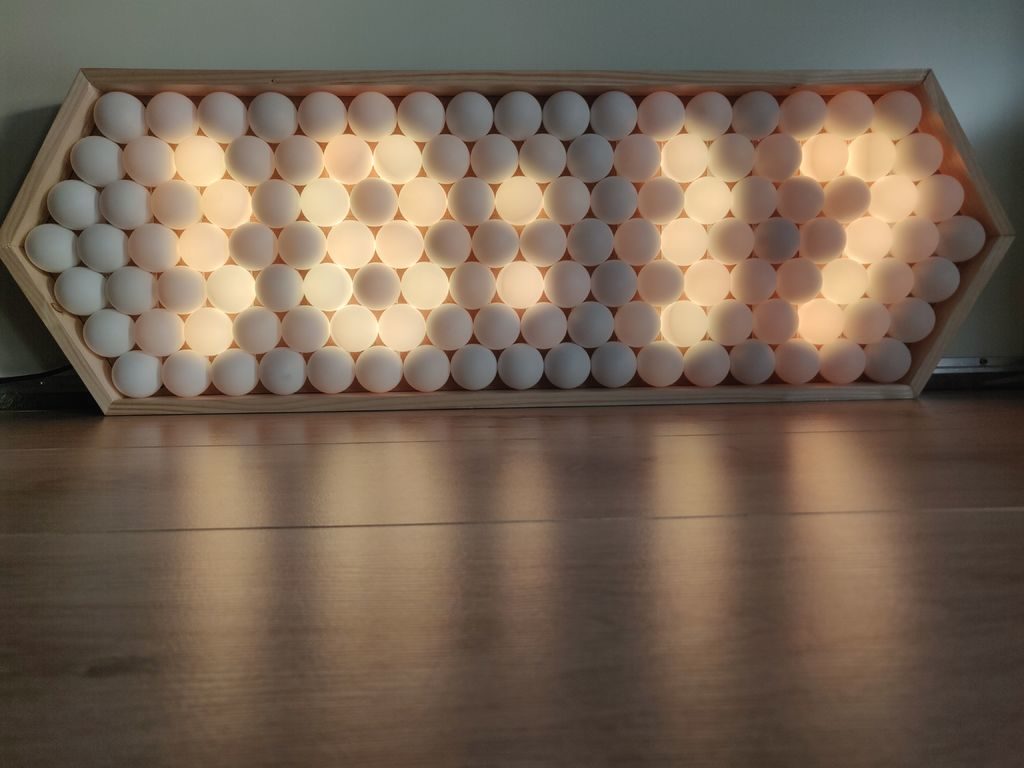
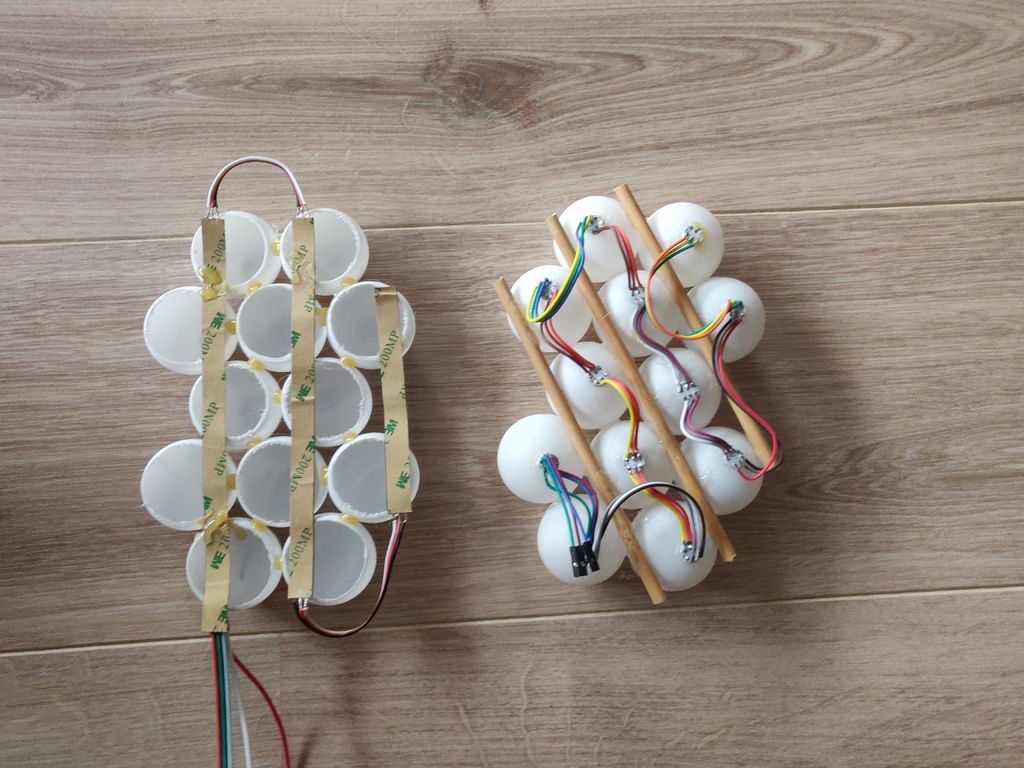
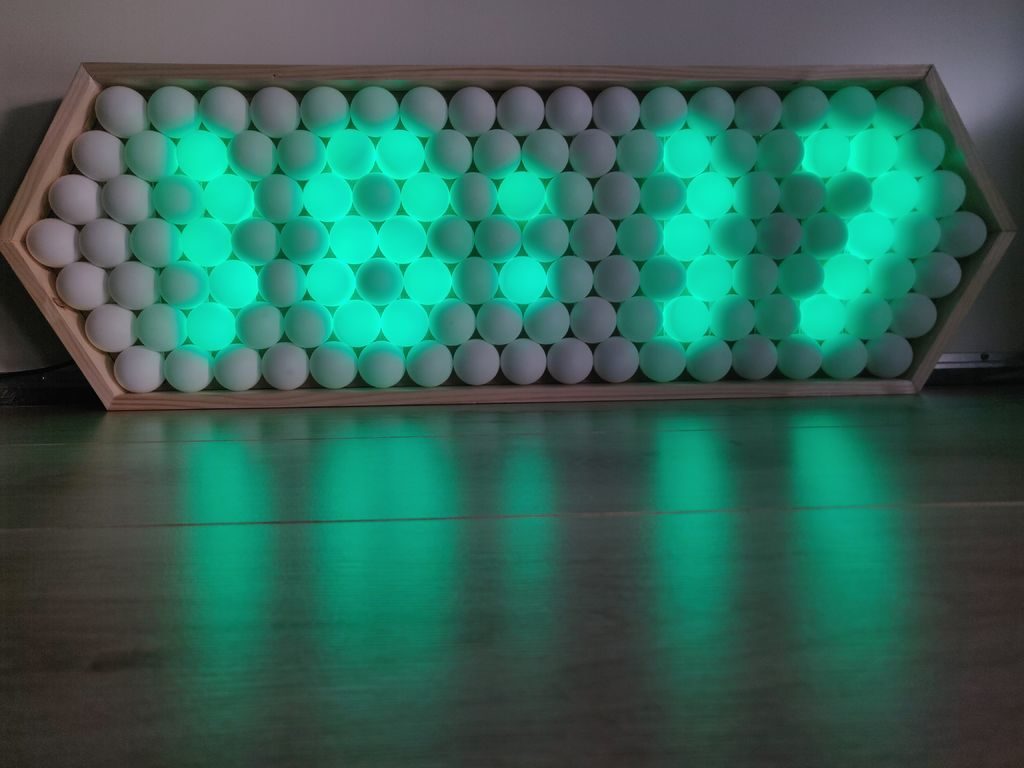
Ping pong balls have long been known as excellent LED diffusers, but few have taken this technique as far as Thomas Jensma. His colorful clock features 128 LEDs, arranged in an alternating pattern, and housed in a stretched-out hexagonal wood frame.
For control, the device uses an Arduino Nano, along with a RTC module for accurate timekeeping. Demos of the clock can be seen below, cycling through numbers and testing out the FastLED library.
Code for the build is available in Jensma’s write-up. This also includes tips on using table tennis balls as diffusers, as well as how to create an orderly array out of these spheres—useful in a wide range of projects.
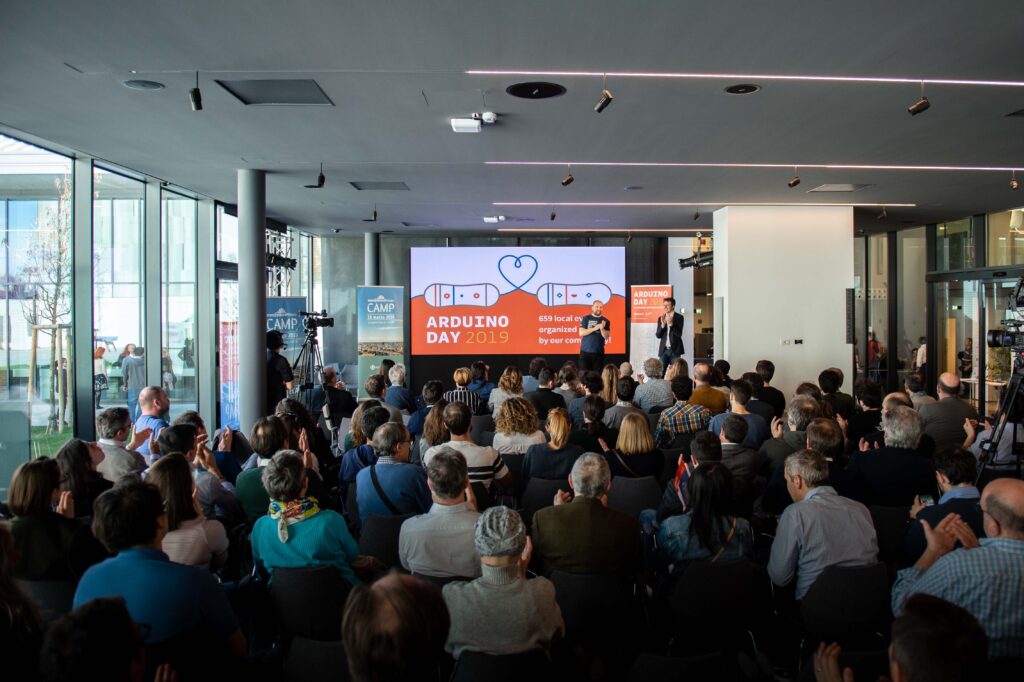
This year’s Arduino Day, held on March 16th, consisted of 659 celebrations across 106 countries with talks, project exhibitions, open activities, workshops, live demos, hackathons, and Ask the Expert sessions.
The Official Arduino Day event took place in Milan, in collaboration with Manifattura (see photos), where Massimo Banzi and Fabio Violante unveiled some important figures on Arduino, including the number of IDE downloads over the last year (28M), active users (863K), and Forum contributors (762K). They also presented the latest additions to the MKR family — the MKR GPS Shield, the MKR RGB Shield, the MKR ENV Shield and the MKR THERM Shield — as well as announced the development of the Vidor Visual Composer.
Were you unable to join us in Italy or tune in to the Arduino Day live stream? Well, we’ve got some good news. You can watch the event in its entirety below, including the AMA with Massimo Banzi!
We are immensely proud of the amazing success of Arduino Day 2019, and we want to THANK all of the communities that helped make this special occasion possible. Already looking ahead to next year? Mark your calendars, because Arduino Day 2020 will be taking place on March 21st. In the meantime, don’t forget to share any images or videos of your Arduino Day fun with the hashtag #ArduinoD19!
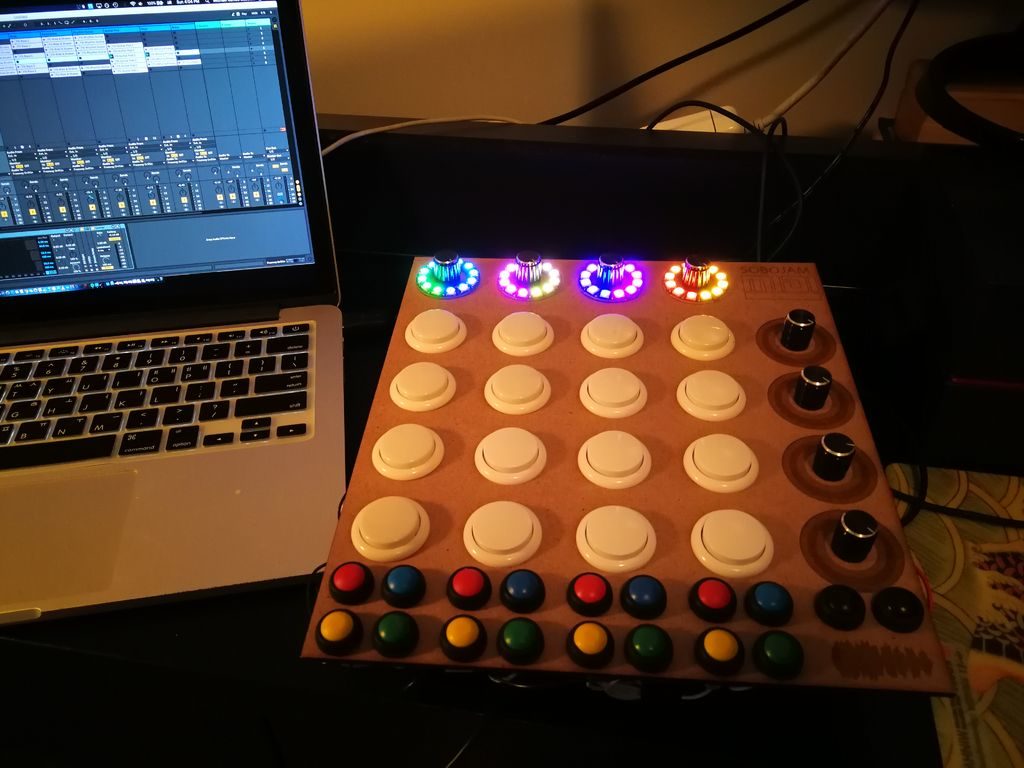
Michael Sobolak was inspired by the hardware dedicated to Ableton digital audio software, along with the DIY MIDI Fighter pads that others have constructed, to make his own light-up version.
His device is cut out of ¼-inch MDF, housing a 4×4 array of main buttons, 18 smaller buttons on the bottom and eight potentiometers, four of which are surrounded by NeoPixel rings.
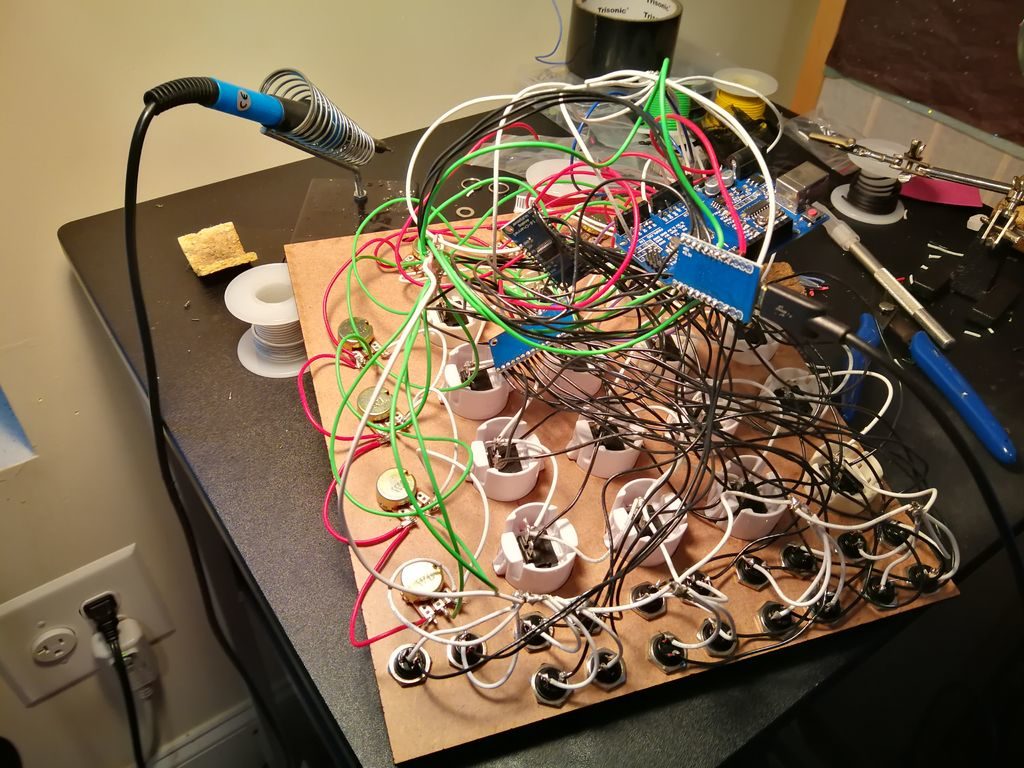
To handle this massive array of inputs, he turned to the use of multiplexers, creating a spaghetti-like—though functional—wiring arrangement hidden underneath. The pad uses an Arduino Uno to control the NeoPixels, while a separate board is tasked with the MIDI interface.
You can see Sobolak’s project crank out music in the video below, with LEDs that react to potentiometer input settings.
Arduino boards are used in a wide—massive even—variety of projects. Sometimes, however, all you need is something to give your project the ability to blink an LED, sound an alarm, or accomplish some other simple task.
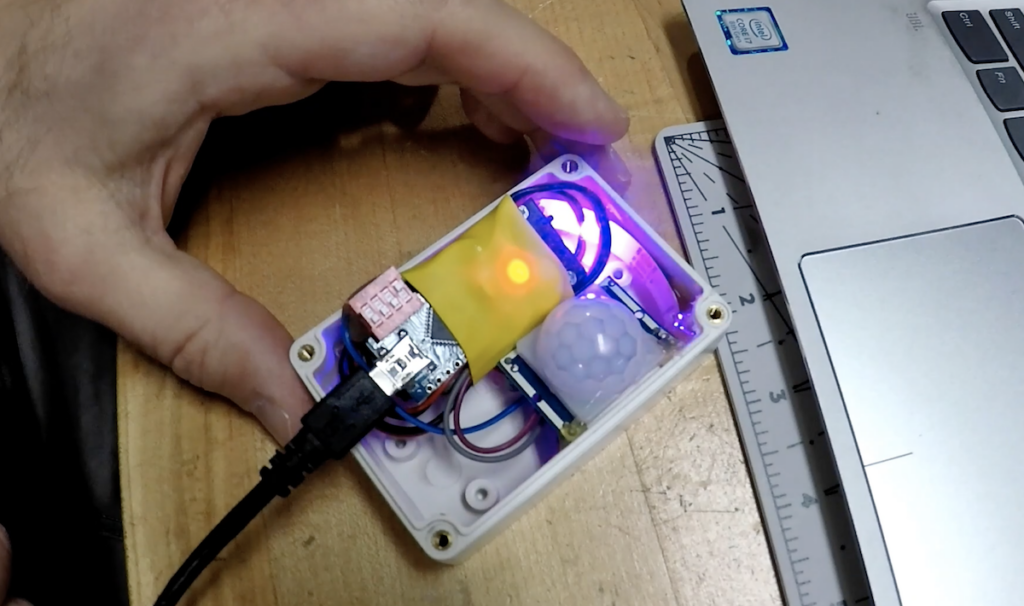
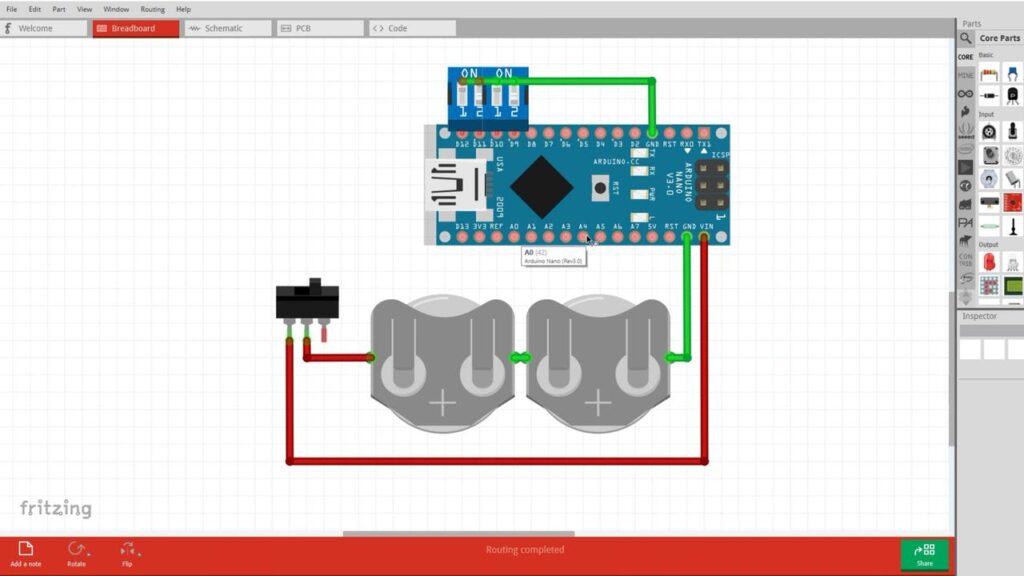
For this purpose, maker Jeremy S. Cook has developed a sort of standard method for using these devices, with a 4-position DIP switch soldered to inputs D9-D12, and a double-CR2032 battery pack attached with shrink wrap.
This standardization makes for a very compact setup that can be implemented in a project very quickly. The configuration also highlights the use of “INPUT_PULLUP” in Arduino code, with switches wired to ground. Cook’s technique avoids floating inputs without the need for external resistors.
Arduino Day is quickly approaching and we are blown away by the amazing support of the Arduino community, with over 620 events in more than 100 countries scheduled for March 16th.
As recently announced, the Official Arduino Day (register here)—directly organized by the Arduino team—will be held in Milan at the Milano Luiss Hub for Maker and Students, in collaboration with Manifattura Milano Camp.
The agenda of the official event includes an exhibition of Arduino projects, free kids activities, several keynotes by Arduino team members, and last but not least, an ‘Ask Me Anything’ with Massimo Banzi. The talks and the AMA will be live streamed via Arduino homepage, YouTube, and Facebook.
Here’s a look at the Official Arduino Day’s program:
11 AM (CET): Doors open and exhibition of Arduino projects, in collaboration with WeMake
2:30 – 5:30 PM: EDU activities for children ages 5 to 15
1:45 – 3:15 PM: Talks by local makers, in collaboration with WeMake (in Italian)
3:30 – 5:30 PM: Keynotes by the Arduino team. These sessions will be streamed on Arduino’s homepage, YouTube, and Facebook.
3:30 – 3:35: Welcome by Massimo Banzi and Fabio Violante
3:35 – 3:50: The State of Arduino with Massimo Banzi and Fabio Violante
The AMA will also be streamed on the Arduino homepage, YouTube and Facebook. Have a question? Please register on the Arduino Forum and submit it by 6:45 PM (CET) at this link.
We look forward to celebrating Arduino Day with everyone! In the meantime, don’t forget to share your events on social media using the hashtag #ArduinoD19.
Mancano poche ore ad Arduino Day, e siamo grati ed emozionati per l’incredibile supporto della nostra Community, che organizzerà nella giornata del 16 Marzo 2019 oltre 620 eventi in oltre 100 nazioni.
Come annunciato di recente, Official Arduino Day, ovvero l’evento direttamente organizzato dal team Arduino (registrazione qui) si terrà a Milano presso Milano Luiss Hub for Maker and Students (Via Massimo D’Azeglio, 3 – zona Porta Garibaldi), in collaborazione con Manifattura Milano Camp.
L’agenda dell’evento ufficiale include una mostra di progetti Arduino, delle attività edu per bambini/e teenager dai 5 ai 15 anni, un programma di talk con il team Arduino e, infine, una sessione di Ask Me Anything con Massimo Banzi. Le talk e l’AMA saranno trasmessi in streaming sull’homepage di Arduino e sui canali Youtube e Facebook .
Ecco il programma di Official Arduino Day a Milano:
11.00 AM: Open Day e mostra di progetti Arduino, in collaborazione con WeMake
1.45 – 3.15 PM: Community Talk a cura di maker locali, in collaborazione con WeMake
2.30 – 5.30 PM: Attività educative per bambine/i e teenager. Le attività sono gratuire e continuative, non serve prenotazione.
5-8 anni: Laboratorio di pasta modellabile conduttiva Anche i più piccoli possono giocare con l’elettricità! Con la pasta modellabile si può dare spazio alla manualità e alla creatività, con (in più) la magia dei led!
8-12 anni: Laboratorio di tinkering “Voglio Fare l’Inventore” Oggi tutti possono fare gli inventori! Flussi di energia, luci, suoni e movimenti non sono mai stati così facili da realizzare. Programmando con i sensori e attuatori, si possono costruire un’elica, un semaforo e addirittura un braccio robotico.
12-15 anni: Laboratorio di robotica “mBot and basic robotics” I robot sono tutti intorno a noi, non solo umanoidi ma anche automobili ed elettrodomestici! Con un’ app, cacciaviti e un pizzico d’ingegno, è possibile imparare le prime mosse per dargli vita e controllarli!
3.30 – 5.30 PM: Talk con Massimo Banzi e Arduino team. Le talk saranno disponibili via streaming sui canali social Arduino.
3.30 – 3.35: Welcome con Massimo Banzi e Fabio Violante
3.35 – 3.50: The State of Arduino con Massimo Banzi e Fabio Violante
Anche l’AMA (Ask me anything) sarà trasmesso in streaming sulla homepage di Arduino e sui canali Youtube e Facebook. Vuoi fare una domanda? Per favore, registrati sull’Arduino Forum e invia la tua domanda entro le 6.45 cliccando qui.
Non vediamo l’ora di festeggiare Arduino Day, nel frattempo non dimenticarti di condividere il tuo evento sui social con l’hashtag #ArduinoD19.