Posts with «arduino» label

Arduino Polygraph Shows How It’s Done
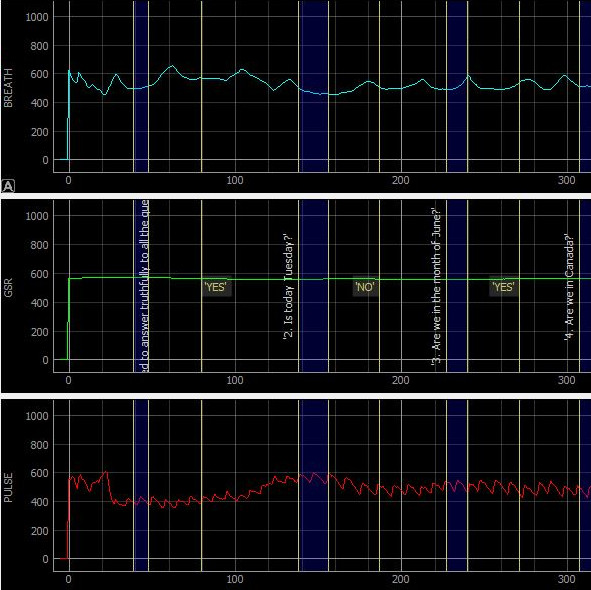
Sometimes, a project comes along that makes a good reference design for anyone doing similar work. In this particular case, it’s a DIY USB polygraph-like machine by [Juangg] using an Arduino and sensors on the hardware side, and a Python front end for data visualization. It’s even complete with 3D printed enclosure and sensor elements.

[Juangg] designed it to use three sensors: a pulse sensor, a breath sensor, and one to measure Galvanic Skin Response (GSR). The pulse sensor uses a piezo element pressed against a fingertip to detect changes in pressure resulting from blood flow. It can be picky about placement, but finding sweet spot can yield remarkably good readings. The breath sensor works on a similar principle but uses a 3D printed fixture to hold the sensor between a strap and the subject’s chest, so that breathing in and out can be detected. The GSR sensor is a voltage divider used to measure small changes in skin conductivity. How well does it all work? That depends on what one is looking to get out of it, but the documentation and design files are available from the project page and the GitHub repository if anyone wants a reference for similar work.

The polygraph may have a mixed reputation, but it makes a good project that demonstrates just how messy biometrics can be from an engineering perspective. And in case you missed it, here’s a reminder that Wonder Woman and the polygraph have much more in common than you might realize.
Minimalist Mate Maker Keeps You Caffeinated

Americans love their coffee. The Brits adore their tea. In South America, the number one way to get through the day is with yerba mate, a tea made from the yerba plant. It is typically shared in a social setting, with one person preparing the beverage for everyone to enjoy. Although caffeine certainly deserves a ceremony, it never needs one. Hit the streets and you’ll see people everywhere with a thermos under one arm, keeping water hot and ready to refill the cup of mate in their hand.

The Stanley vacuum thermos is quite a popular choice for drinkers on the go, but the Argentinian government recently placed new restrictions foreign imports. [Roni Bandini] decided to build a minimum viable mate machine so he always has perfectly hot water on tap.

An Arduino Nano heats the water and displays the rising temperature on an LCD screen. When the temperature is just right, the display asks for your cup. An ultrasonic sensor detects the cup and dispenses a certain amount of water determined in the sketch. Yerba leaves can be used a few times before losing their flavor, so the machine keeps track and lets him know when it’s time to replace them. You can sip on a brief demo after the break.

Let’s say you don’t have perfectly-prepared mate, and it always comes out too hot. That’s better than too cold, but still not ideal. Why not make a temperature-sensing coaster that alerts you when it has cooled to perfection?

Full control of your TV using Alexa and Arduino IoT Cloud

We’re excited to announce that the official Arduino Amazon Alexa skill now supports television control.

You can now securely connect your TV set to Alexa using Arduino IoT Cloud and a few lines of code.

Here are some of the features which will be available to you:

  • Power on/off
  • Switch channel
  • Volume up/down/mute
  • Switch input sources

The easiest way to operate any kind of television is to act as if we were its very own clicker. In order to do so, we’ll show you how to capture the commands from the remote and play them back via Arduino (the TV will never know what hit it).

We’ll then create an Arduino IoT Cloud Thing with a TV property, and adapt the generated code to our needs. Finally, we’ll configure Alexa to access and control our TV.

Afterwards, we’ll be able to ask things such as:

  • “Alexa, turn the volume up on TV.”
  • “Alexa, mute TV” or “Alexa, unmute TV.”
  • “Alexa, next channel on TV.”

The complete step-by-step guide is available on our Project Hub.

Share your creativity with us! Our community means a lot to us, so we would love to see what you create. Make sure you document and post your amazing projects on the Arduino Project Hub and use the #ArduinoAlexa hashtag to make it discoverable by everyone!

Have fun playing with Alexa and IoT Cloud. If you have questions and/or build this project, let us know in the comments below.

Make’s Guide to Boards Has a Hidden Secret!

Want to see something super cool? Go grab your copy of Make: Vol. 68 and download the Digi-Key AR Guide to Boards app, then put them together to watch real magic happen. 

Read more on MAKE

The post Make’s Guide to Boards Has a Hidden Secret! appeared first on Make: DIY Projects and Ideas for Makers.

Optical Communication Using LEDs Alone

We’re all used to the humble LED as a ubiquitous source of light, but how many of us are aware that these components can also be used as photodiodes? It’s something [Giovanni Blu Mitolo] takes us through as he demonstrates a simple data link using just a pair of LEDs and a couple of Arduinos. It’s a showing off his PJON networking layer, and while you’d need a bit more than a couple of LEDs on breadboards for a real-world application, we still think it’s a neat demonstration.

PJON itself is very much worth a look, being an implementation of a robust and error-tolerant network for Arduinos and other small microcontroller platforms. It has a variety of communication strategies for various different media, and as this LED demonstration shows, its strength is that it’s capable of working through media that other networks would balk at. Whether it’s controlling home automation through metal heating ducts or providing an alternative to LoRa at 433 MHz, it’s definitely worth a second look. We’ve mentioned it before, but remain surprised that we haven’t seen it more often since. Take a look, the video is below the break.

Hack a Day 22 Dec 09:00

HeyTeddy is a conversation-based prototyping tool for Arduino

Programming an Arduino to do simple things like turn on an LED or read a sensor is easy enough via the official IDE. However, think back to your first experiences with this type of hardware. While rewarding, getting everything set up correctly was certainly more of a challenge, requiring research that you now likely take for granted.

To assist with these first steps of a beginner’s hardware journey, researchers at KAIST in South Korea have come up with HeyTeddy, a “conversational test-driven development [tool] for physical computing.” 

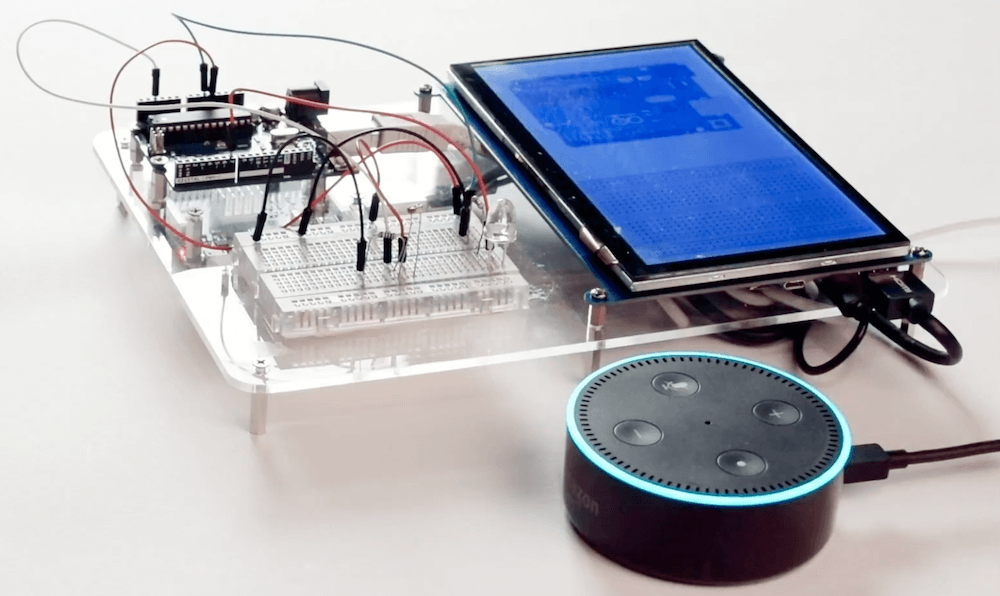
As seen in the video below, HeyTeddy’s voice input is handled by an Amazon Echo Dot, which passes these commands through the cloud to a Raspberry Pi. The system then interacts with the physical hardware on a breadboard using an Arduino Uno running Firmata firmware, along with a 7” 1024 x 600 LCD touchscreen for the GUI. Once programmed, code can be exported and used on the board by itself.

Those wishing to learn more can check out the entire research paper here. 

HeyTeddy is a conversational agent that allows users to program and execute code in real-time on an Arduino device without writing actual code but instead operating it through dialogue. This conversation can either be based on voice or text (through a Web chat). Commands spoken to HeyTeddy are parsed, interpreted, and executed in real-time, resulting in physical changes to the hardware. For example, the “write high” command configures an I/O pin to behave as a digital output with its internal state set to high (e.g., a 5V logic level), making driving an LED possible. Hence, the user does not need to write any code, compile it, deal with errors, and manually upload it on the hardware.

Furthermore, HeyTeddy supervises the user’s choices, preventing incorrect logic (e.g., writing an analog value to a digital pin), guiding the user through each step needed to assemble the circuit, and providing an opportunity to test individual components through separate unit tests without interrupting the workflow (i.e., TDD functionalities). Finally, the user has the option of exporting the issued commands as a written code for Arduino (i.e., an Arduino sketch in C++, ready for upload). 

Programming Arduinos With Voice Commands

Programming is a valuable skill, though one that can be daunting to learn. Throw hardware in the mix, and things ratchet up another level again. However, there are many projects that have sought to reduce the level of difficulty for newcomers. HeyTeddy is a new project that allows users to program an Arduino with voice commands, and the help of on-screen tutorials.

It’s a system that initially sounds cumbersome, but through smart design, is actually quite streamlined. Users can talk to the system, which uses an Amazon Alexa device for natural language voice recognition. This enables HeyTeddy to respond to questions like “how do I use a flex sensor?” as well as direct commands, such as “Set pin 10 to 250”.

The demo video does a great job of demonstrating the system. While the system is not suited to professional development tasks, its has value as an educational tool for beginners. The system is able to guide users through both hardware setup on a breadboard, as well as guide them through tests when things don’t work. Once their experience level builds, code can be exported to the Arduino IDE for direct editing.

It’s a great tool that has plenty of promise to bring many more users into the hardware hacking fold. It’s out of the workshop of [MAKInteract], whose work we’ve seen before. Video after the break.

Hack a Day 20 Dec 09:00

Interactive Core Memory Shield Helps Explains The Past

[Andy Geppert] sends in his incredibly clever interactive core memory shield. 

In a great display of one hacker’s work being the base for another’s, [Andy] started out with [Jussi Kilpelainen]’s core memory shield for Arduino.  As he was playing with the shield he had a desire to “see” the core memory flipping and got the idea to add an LED matrix aligned behind the individual cores.

The first iteration worked, but it only showed the state that the Arduino believed the core memory to be in. What he really wanted was a live read on the actual state. He realized that an Adafruit Featherwing 8×8 matrix display also fits behind the core memory. Now the LEDs update based on the read state of the core memory. This allows him to flip the individual bits with a magnetic stylus and see the result. Very cool.

You can see a video of it working after the break.

Build your own tracking and GoTo mount for DSLR astrophotography

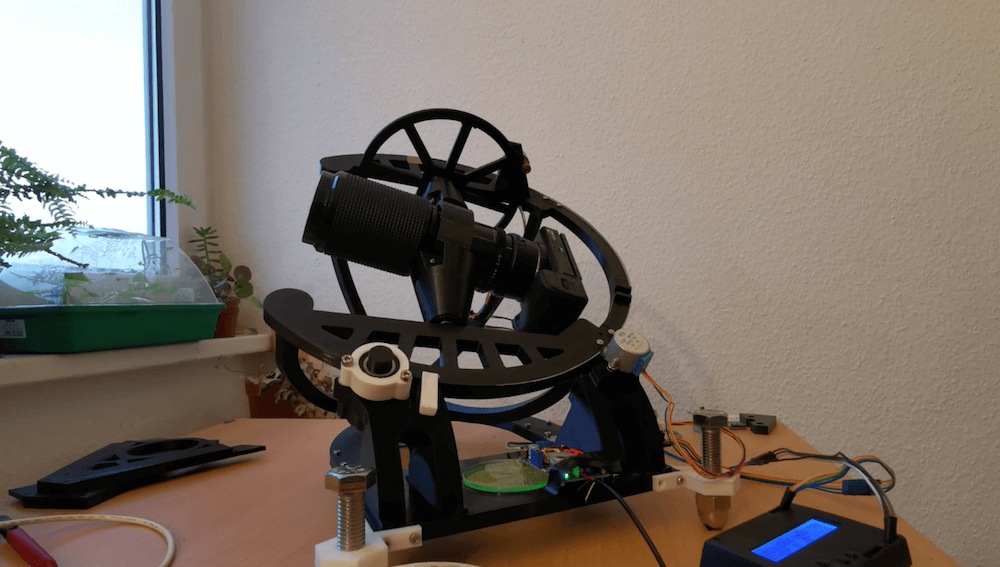
Astrophotography can be challenging, in a large part because your subject matter — or your base, the Earth rather — is constantly moving. In order to take excellent long exposures of far-off objects, Redditor intercipere came up with a beautiful 3D-printable, star-following mount that holds and rotates a DSLR camera.

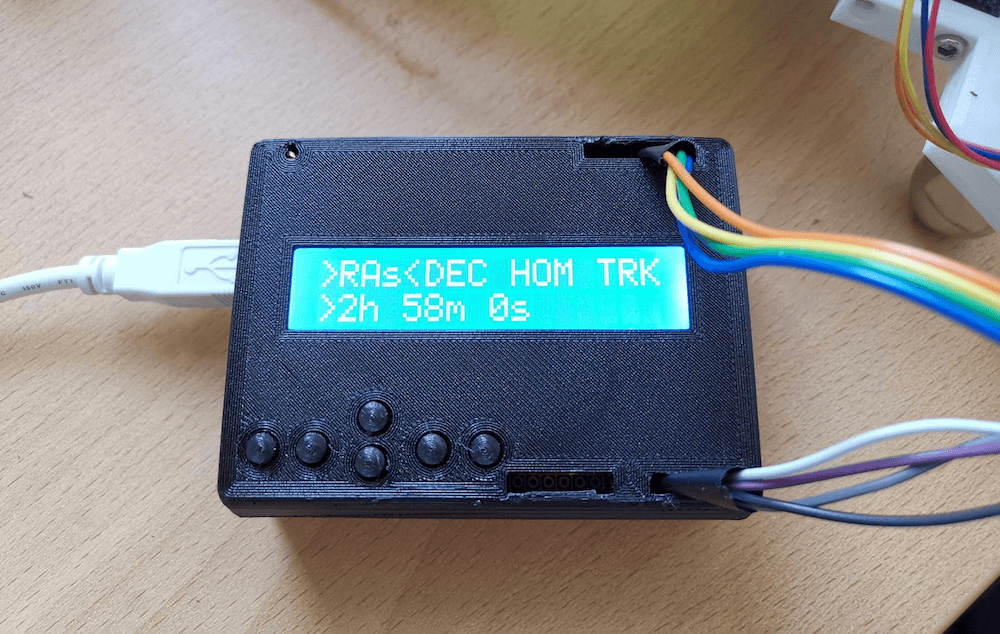
Now intercipere can simply input the RA/DEC coordinates and the device will automatically move to a desired target in the sky.

Motion is handled by an Arduino Uno and two small stepper motors, with a 16×2 LCD shield user interface. The rig is capable of tracking for at least four minutes, producing this photo of the Andromeda galaxy with a cheapo lens from a heavy light polluted area.

Take your X-Plane 11 experience to new heights with this 3D-printed simulator

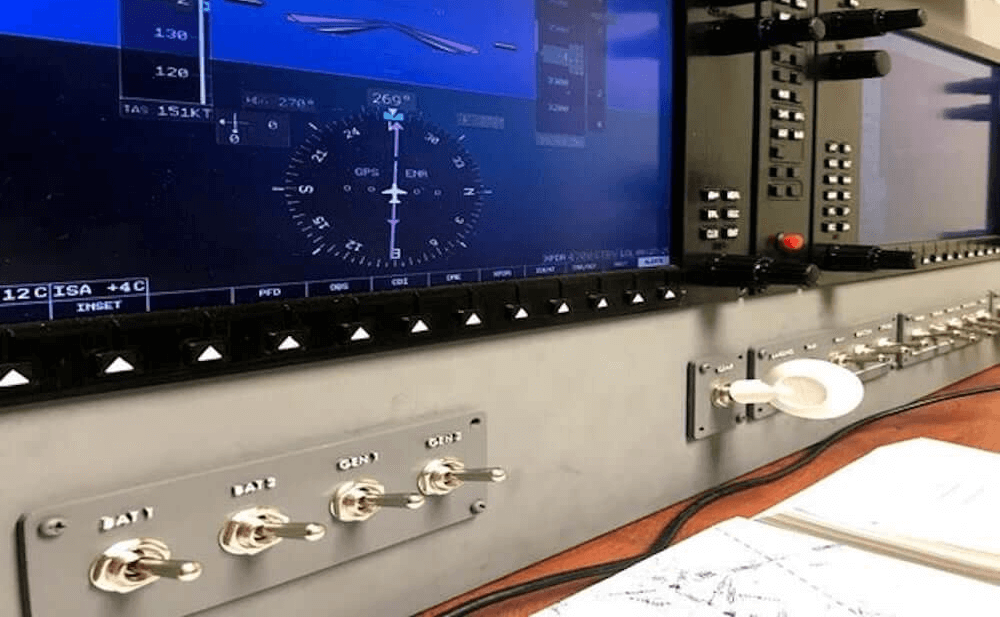
Apparently not satisfied to simulate flights on a single PC monitor, Ryan H came up with his own custom, 3D-printable cockpit setup for the Garmin G1000 avionics suite that uses a 12.1” LCD panel for flight data and a large number of additional inputs. The system is designed around the X-Plane 11 flight simulator, all controlled by an Arduino Mega with SimVim firmware.

The auxiliary display/inputs assemblies use the Arduino as an interface, enabling it to handle 32 tactile switches plus one standard and five dual rotary encoders via five CD74HC4067 16-channel multiplexers.

Build cost is around $250 per screen. 3D-print files and other information are available on Thingiverse.