Posts with «arduino» label

Bluetooth Record Player Puts a New Spin On Vinyl
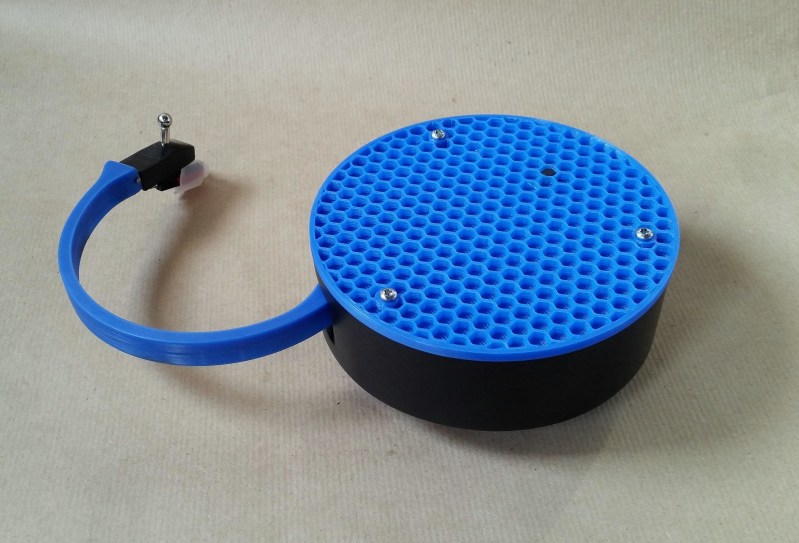
You know, we were just discussing weird and/or obsolete audio formats in the writers’ dungeon the other day. (By the way, have you ever bought anything on DAT or MiniDisc?) While vinyl is hardly weird or (nowadays) obsolete, the fact that this Bluetooth record player by [JGJMatt] is so modern makes it all the more fantastic.

Not since the Audio-Technica Sound Burger, or Crosley’s semi-recent imitation, have we seen such a portable unit. But that’s not even the most notable part — this thing runs inversely to normal record players. Translation: the record stands still while the the player spins, and it sends the audio over Bluetooth to headphones or a speaker.

Inside this portable player is an Arduino Nano driving a 5 VDC motor with a worm gear box. There really isn’t too much more to this build — mostly power, a needle cartridge, and a Bluetooth audio transmitter. There’s a TTP223 touch module on the lid that allows [JGJMatt] to turn it off with the wave of a hand.

[JGJMatt] says this is a prototype/work-in-progress, and welcomes input from the community. Right now the drive system is good and the Bluetooth is stable and able, but the tone arm has some room for improvement — in tests, it only played a small section of the record and skidded and skittered across the innermost and outermost parts. Now, [JGJMatt] is trying two-part arm approach where the first bit extends and locks into position, and then a second arm extending from there and moves around freely.

Commercial record players can do more than just play records. If you’ve got an old one that isn’t even good enough for a thrift store copy of a Starship record, you could turn it into a pottery wheel or a guitar tremolo.

Arduino Announces The Uno Mini Limited Edition

What an incredible journey the Arduino concept has been. Remember when we proclaimed that The Arduino is Here To Stay after they sold 10 thousand units? Well, now they’ve sold over 10 million, and they want to celebrate. They are announcing the Arduino Uno Mini Limited Edition. A pint sized nod to the ubiquitous Arduino […]

The post Arduino Announces The Uno Mini Limited Edition appeared first on Make: DIY Projects and Ideas for Makers.

MAKE » Arduino 24 Nov 14:27

Arduino + Ham Radio = Texting

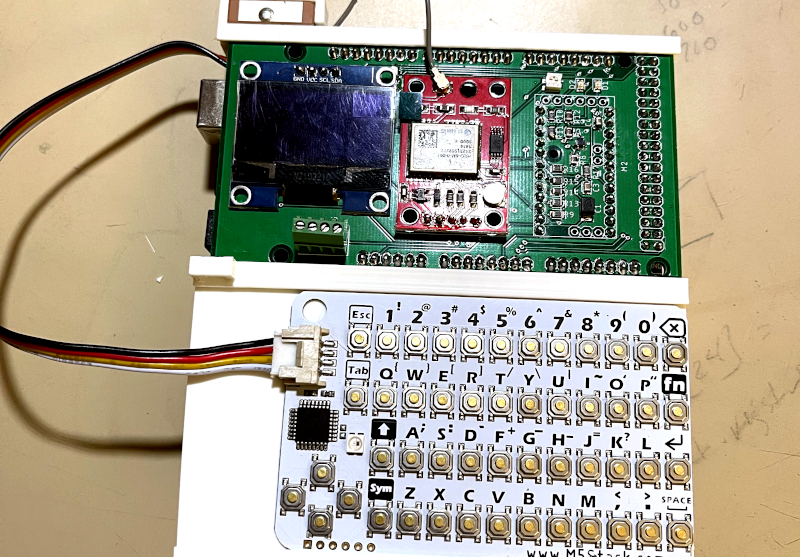
Over on the Spectrum web site, [Dale] — a relatively new ham radio operator — talks about his system for sending text messaging over VHF radios called HamMessenger. Of course, hams send messages all the time using a variety of protocols, but [Dale] wanted a self-contained and portable unit with a keyboard, screen, and a GPS receiver. So he built one. You can find his work on GitHub.

At the heart of the project is MicroAPRS, an Arduino firmware for packet radio. Instead of using a bigger computer, he decided to dedicate another Arduino to do everything but the modem function.

You can probably figure out the rest. A $10 GPS, a battery pack, a charge controller, and a few user interface parts like an OLED screen and a keyboard. In addition, there’s an SD card to store messages.

Of course, we couldn’t help but notice that our cell phone has a keyboard, screen, GPS, and storage. We might have been tempted to work out a way to connect the radio to it by Bluetooth. But we have to admit the little HamMessenger setup is cool-looking and probably lasts longer on a charge than our phone, too.

Run UNIX On Microcontrollers With PDP-11 Emulator

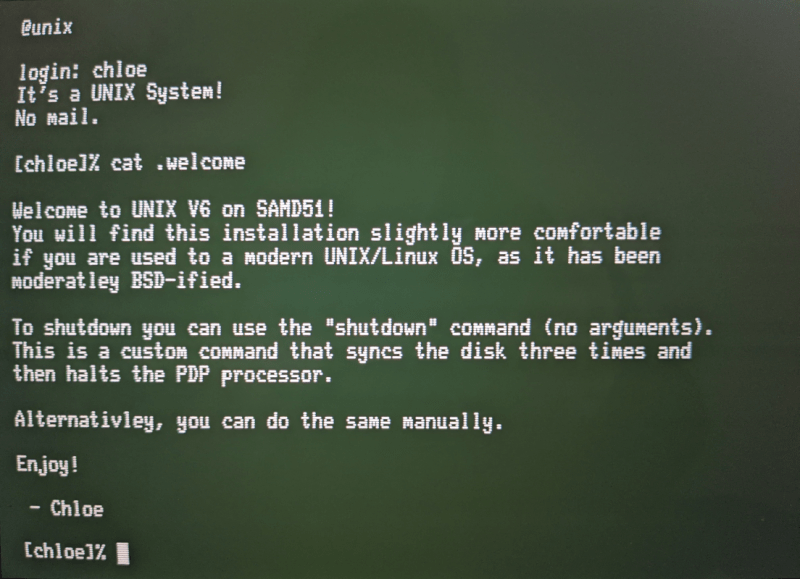
C and C++ are powerful tools, but not everyone has the patience (or enough semicolons) to use them all the time. For a lot of us, the preference is for something a little higher level than C. While Python is arguably more straightforward, sometimes the best choice is to work within a full-fledged operating system, even if it’s on a microcontroller. For that [Chloe Lunn] decided to port Unix to several popular microcontrollers.

This is an implementation of the PDP-11 minicomputer running a Unix-based operating system as  an emulator. The PDP-11 was a popular minicomputer platform from the ’70s until the early 90s, which influenced a lot of computer and operating system designs in its time. [Chloe]’s emulator runs on the SAMD51, SAMD21, Teensy 4.1, and any Arduino Mega and is also easily portable to any other microcontrollers. Right now it is able to boot and run Unix but is currently missing support for some interfaces and other hardware.

[Chloe] reports that performance on some of the less-capable microcontrollers is not great, but that it does run perfectly on the Teensy and the SAMD51. This isn’t the first time that someone has felt the need to port Unix to something small; we featured a build before which uses the same PDP-11 implementation on a 32-bit STM32 microcontroller.

Binaural Hearing Modeled with an Arduino

You don’t have two ears by accident. [Stoppi] has a great post about this, along with a video you can see below. (The text is in German, but that’s what translation is for.) The point to having two ears is that you receive audio information from slightly different angles and distances in each ear and your amazing brain can deduce a lot of spatial information from that data.

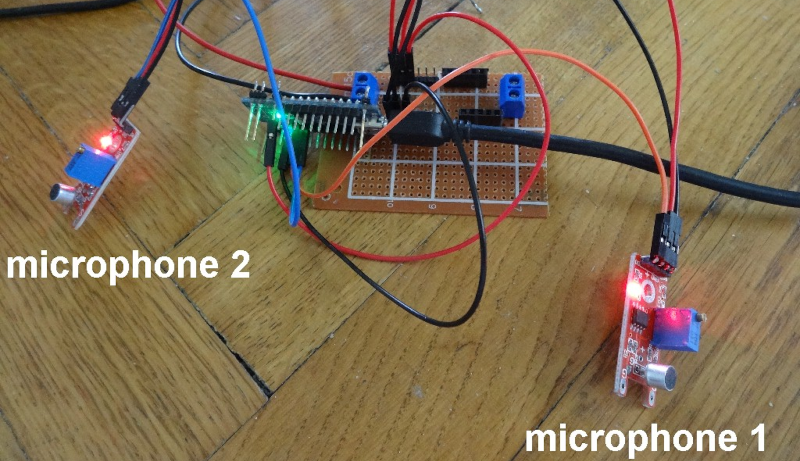
For the Arduino demonstration, cheap microphone boards take the place of your ears. A servo motor points to the direction of sound. This would be a good gimmick for a Halloween prop or a noise-sensitive security camera.

Math-wise, if you know the speed of sound, the distance between the sensors, and a few other pieces of data, you wind up with a fairly simple trigonometry problem. In non-math terms, it is easy to get a feel for why this works. If the sound hits both microphones at once, it must be coming from straight ahead. If it hits the left microphone first, it must be closer to that microphone and vice versa. If the sound were right in line with both microphones but closer to the left, the time delay would be exactly due to the speed of sound over the distance between the sensors. If the time is less than that, the sound must be somewhere in between.

The microphone modules have both analog outputs and digital outputs. The digital output triggers if the sound level exceeds a limit set by a potentiometer. By using these modules, the circuit is trivial. Just an Arudino, the two modules, and the servo motor.

Now imagine that you wanted all this spatial detail to come through your headphones. Recording binaural audio is a thing. You can 3D print a virtual head if you are interested. We’ve seen projects for this several times.

Machine Learning Shushes Stressed Dogs

If there’s one demographic that has benefited from people being stuck at home during Covid lockdowns, it would be dogs. Having their humans around 24/7 meant more belly rubs, more table scraps, and more attention. Of course, for many dogs, especially those who found their homes during quarantine, this has led to attachment issues as their human counterparts have begin to return to work and school.

[Clairette] has had a particularly difficult time adapting to her friends leaving every day, but thankfully her human [Nathaniel Felleke] was able to come up with a clever solution. He trained a TinyML neural net to detect when she barked and used and Arduino to play a sound byte to sooth her. The sound bytes in question are recordings of [Nathaniel]’s mom either praising or scolding [Clairette], and as you can see from the video below, they seem to work quite well. To train the network, [Nathaniel] worked with several datasets to avoid overfitting, including one he created himself using actual recordings of barks and ambient sounds within his own house. He used Eon Tuner, a tool by Edge Impulse, to help find the best model to use and perform the training. He uploaded the trained network to an Arduino Nano 33 BLE Sense running Mbed OS, and a second Arduino handled playing sound bytes via an Adafruit Music Maker Featherwing.

While machine learning may sound like a bit of an extreme solution to curb your dog’s barking, it’s certainly innovative, and even appears to have been successful. Paired with this web-connected treat dispenser, you could keep a dog entertained for hours.

Low-Cost Computer Gesture Control with an I2C Sensor

Controlling your computer with a wave of the hand seems like something from science fiction, and for good reason. From Minority Report to Iron Man, we’ve seen plenty of famous actors controlling their high-tech computer systems by wildly gesticulating in the air. Meanwhile, we’re all stuck using keyboards and mice like a bunch of chumps.

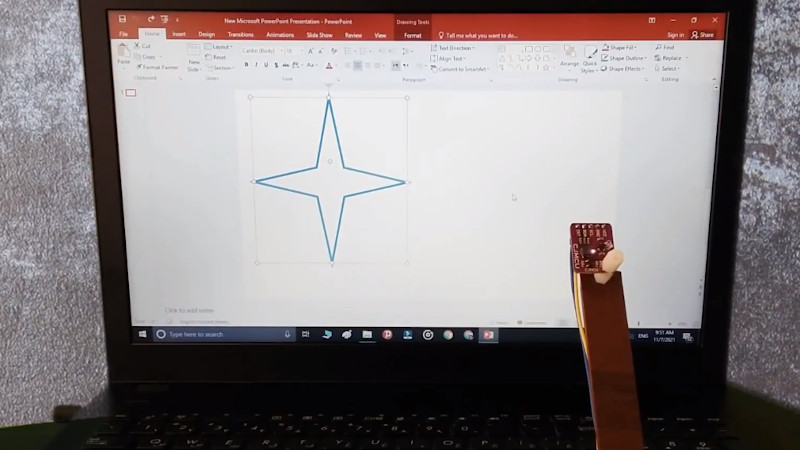
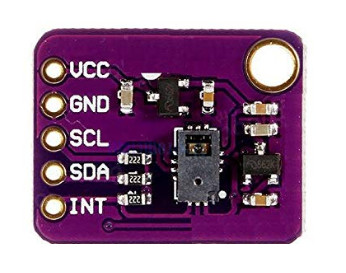
But it doesn’t have to be that way. As [Norbert Zare] demonstrates in his latest project, you can actually achieve some fairly impressive gesture control on your computer using a $10 USD PAJ7620U2 sensor. Well not just the sensor, of course. You need some way to convert the output from the I2C-enabled sensor into something your computer will understand, which is where the microcontroller comes in.

Looking through the provided source code, you can see just how easy it is to talk to the PAJ7620U2. With nothing more exotic than a switch case statement, [Norbert] is able to pick up on the gesture flags coming from the sensor. From there, it’s just a matter of using the Arduino Keyboard library to fire off the appropriate keycodes. If you’re looking to recreate this we’d go with a microcontroller that supports native USB, but technically this could be done on pretty much any Arduino. In fact, in this case he’s actually using the ATtiny85-based Digispark.

This actually isn’t the first time we’ve seen somebody use a similar sensor to pull off low-cost gesture control, but so far, none of these projects have really taken off. It seems like it works well enough in the video after the break, but looks can be deceiving. Have any Hackaday readers actually tried to use one of these modules for their day-to-day futuristic computing?

Flip-Dot Oscilloscope is Flippin’ Awesome

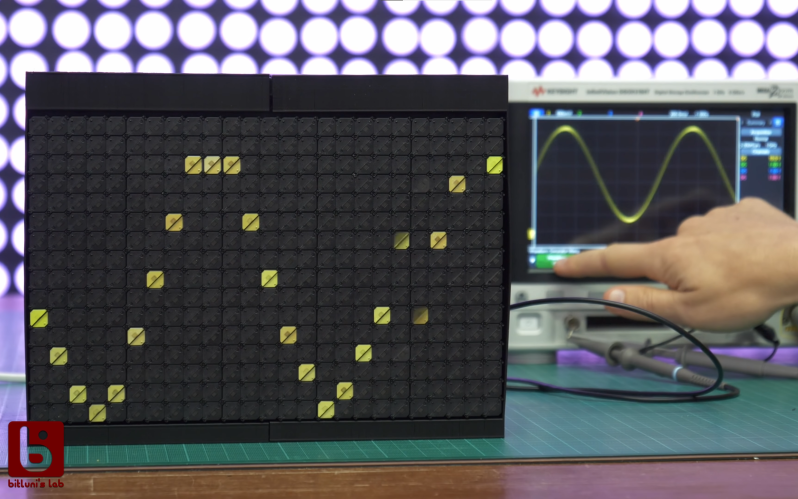
Oscilloscope displays have come a long way since the round phosphor-coated CRTs that adorned laboratories of old. Most modern scopes ship with huge, high-definition touch screens that, while beautiful, certainly lack a bit of the character that classic scopes brought to the bench. It’s a good thing that hackers like [bitluni] are around to help remedy this. His contribution takes the form of what may be both the world’s coolest and least useful oscilloscope: one with a flip-dot display.

Yup — a flip-dot display, in all it’s clickedy-clacky, 25×16 pixel glory. The scope can’t trigger, its maximum amplitude is only a couple of volts, and its refresh rate is, well, visible, but it looks incredible. The scope is controlled by an ESP32, which reads the analog signal being measured. It then displays the signal via an array of driver ICs, which allow it to update the dots one column at a time by powering the tiny electromagnets that flip over each colored panel.

Even better, [bitluni] live-streamed the entire build. That’s right, if you want to watch approximately 30 hours of video covering everything from first actuating a pixel on the display to designing and assembling a PCB to drive it, then you’re in luck. For the rest of us, he was kind enough to make a much shorter summary video you can watch below. Of course, this scope doesn’t run Doom like some others, but its probably only a matter of time.

Thank to [Zane Atkins] for the tip!

Hack a Day 09 Nov 12:00

Adafruit AVRProg Grows UPDI Interface Support

Making a small number of things with an embedded application is pretty straightforward, you usually simply plug in a programmer or debugger dongle (such as an AVRISP2) into your board with an appropriate adaptor cable, load your code into whatever IDE tool is appropriate for the device and hit the program button. But when you scale up a bit to hundreds or thousands of units, this way of working just won’t cut it. Add in any functional or defect-oriented testing you need, and you’re going to need a custom programming rig.

Adafruit have a fair bit of experience with building embedded boards and dealing with the appropriate testing and programming, and now they’ve updated their AVR Programming library to support the latest devices which have moved to the UPDI (Unified Programming and Debug Interface) programming interface. UPDI is a single-wire bidirectional asynchronous serial interface which enables programming and debugging of embedded applications on slew of the new AVR branded devices from Microchip. An example would be the AVR128DAxx which this scribe has been tinkering with lately because it is cheap, has excellent capacitive touch support, and is available in a prototype-friendly 28-pin SOIC package, making it easy peasy to solder.

The library is intended for use with the Arduino platform, so it should run on a vast array of hardware, without any special requirements, so making a custom programming jig out of hardware lots of us have lying around is not a huge hassle.

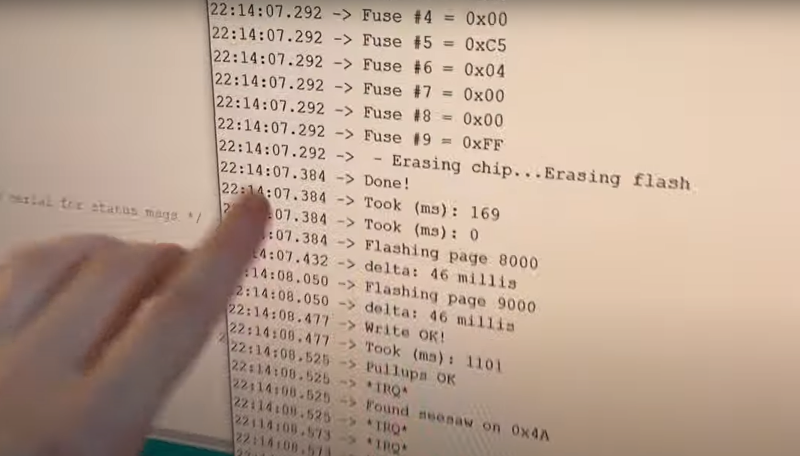
Adafruit provide a few application examples in the project GitHub to get you going, such as this ATTiny817 example that wipes the flash memory, sets appropriate fuses and drops in a bootloader.

The UPDI code was taken from the [brandanlane’s] portaprog which is hosted on the TTGO T-Display ESP32 board from Chinese outfit LilyGo, which is also worth checking out.

A little while ago we saw how the AVR Multitool, the AVRGPP learned to speak UPDI, and since we’re on programming interfaces, its possible to get the cheap-as-chips USBasp to speak TPI as well.


Hack a Day 08 Nov 16:30

Annoy Yourself into Better Driving with This Turn Signal Monitor

Something like 99% of the people on the road at any given moment will consider themselves an above-average driver, something that’s as statistically impossible as it is easily disproven by casual observation. Drivers make all kinds of mistakes, but perhaps none as annoying and avoidable as failure to use their turn signal. This turn signal monitor aims to fix that, through the judicious use of negative feedback.

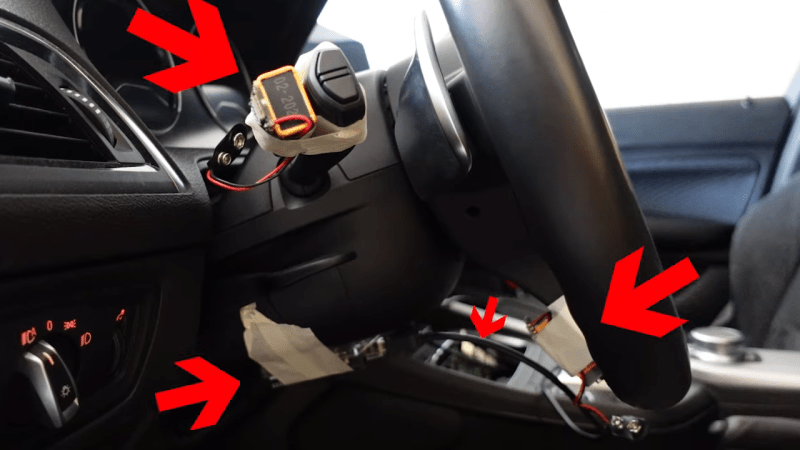
Apparently, [Mark Radinovic] feels that he has a predisposition against using his turn signal due to the fact that he drives a BMW. To break him of that habit, one that cost him his first BMW, he attached Arduino Nano 33 BLEs to the steering wheel and the turn signal stalk. The IMUs sense the position of each and send that over Bluetooth to an Arduino Uno WiFi. That in turn talks over USB to a Raspberry Pi, which connects to the car’s stereo via Bluetooth to blare an alarm when the steering wheel is turned but the turn signal remains untouched. The video below shows it in use; while it clearly works, there are a lot of situations where it triggers even though a turn signal isn’t really called for — going around a roundabout, for example, or navigating a sinuous approach to a drive-through window.

While [Mark] clearly built this tongue firmly planted in cheek, we can’t help but think there’s a better way — sniffing the car’s CANbus to determine steering angle and turn signal status comes to mind. This great workshop on CANbus sniffing from last year’s Remoticon would be a great place to start if you’d like a more streamlined solution than [Mark]’s.

[via Tom’s Hardware]

Hack a Day 07 Nov 15:15