Posts with «arduino» label

A Unique Microphone Preamp

We live in a world in which nearly any kind of gadget or tool you can imagine is just a few clicks away. In many respects, this has helped fuel the maker culture over the last decade or so; now that people aren’t limited to the hardware that’s available locally, they’re able to create bigger and better things than ever before. But it can also have a detrimental effect. One has to question, for instance, why they should go through the trouble of building something themselves when they could buy it, often for less than the cost of the individual components.

The critic could argue that many of the projects that grace the pages of Hackaday could be supplanted with commercially available counterparts. We don’t deny it. But the difference between buying a turn-key product and building an alternative yourself is that you can make it exactly how you want it. That is precisely why [Sam Izdat] created this truly one of a kind microphone preamplifier. Could he have bought one online for cheaper? Probably. Could he have saved himself an immense amount of time and effort? Undoubtedly. Do we care? Not in the slightest.

The amplifier is based on the Texas Instruments INA217 chip, with an Arduino Nano and 128×64 OLED display providing the visualization. [Sam] was able to find a bare PCB for a typical INA217 implementation on eBay for a few bucks (see what we mean?), which helped get him started and allowed him to spend more time on the software side of things. His visualization code offers a number of interesting display modes, uses Fast Hartley Transforms, and very nearly maxes out the Arduino.

But perhaps no element of this build is as unique as the case. The rationale behind the design is that [Sam] wanted to compartmentalize each section of the device (power supply, amplifier, visualization) to avoid any interference. The cylindrical shapes were an issue of practicality: the compartments were constructed by using a hole saw to make wooden discs, which were then glued together and hollowed out. The case was stained and coated with polyurethane, but due to some slightly overzealous use of glue and fillers, the coloring isn’t uniform. This gives the final piece a somewhat weathered look, in sharp contrast to the decidedly high-tech looking display.

Overall, this build reminds us of the modular 3D printed amplifier we saw earlier in the year combined with these speaker-integrated Arduino VU meters.
Tubby Bot a Wifi/Smartphone controlled two wheeled bot – STEP BY STEP GUIDE

Let's Make Robots 05 Jul 20:09
arduino  esp8266  wifi  

The Smaller, Tinier Arduino Platform

While many of the Arduino platforms are great tools for gaining easy access to microcontrollers, there are a few downsides. Price and availability may be the highest on the list, and for those reasons, some have chosen to deploy their own open-source Arduino-compatible boards.

The latest we’ve seen is the Franzininho, an Arduino Gemma-like board that’s based on the ATtiny85, a capable but tiny microcontroller by Atmel in a compact 8-pin configuration. This board has everything the Gemma has, including a built-in LED and breakout pins. One of the other perks of the Franzininho over the Gemma is that everything is based on through-hole components, making the assembly much easier than the surface mount components of the Gemma.

It’s worth noting that while these boards are open source, the Arduinos are as well. It’s equally possible to build your own 100% identical Arduino almost as easily. If you want more features, you can add your own by starting from one of these platforms and do whatever you want with it, like this semi-educational Atmel breakout board.

Thanks to [Clovis] for the tip!

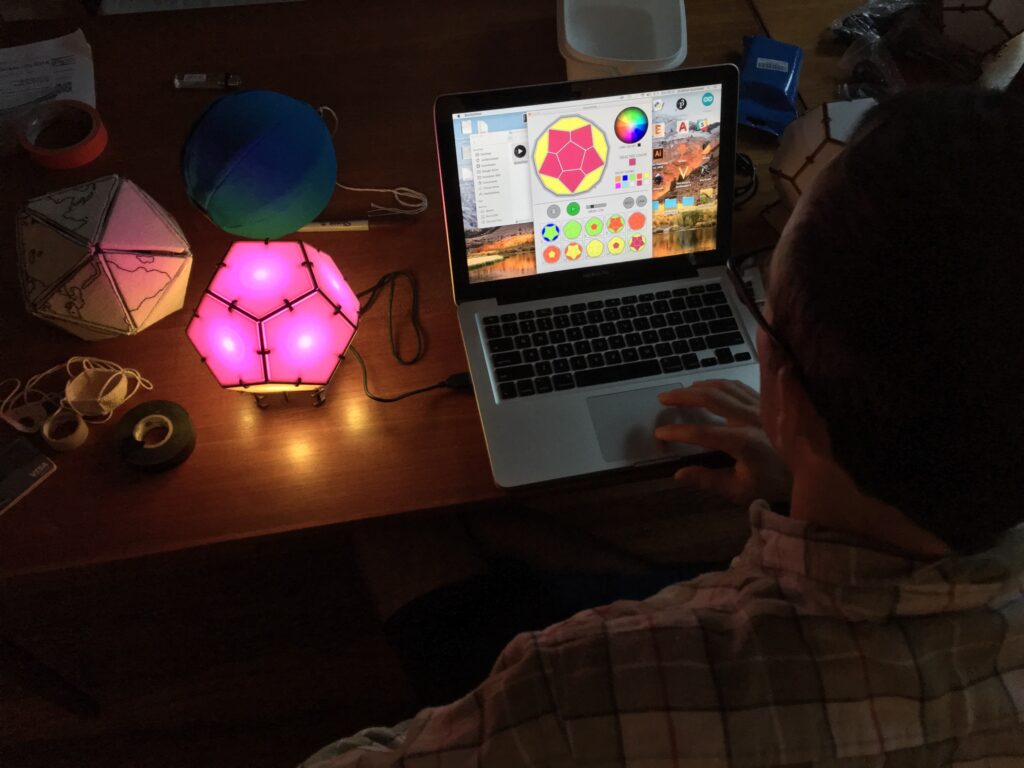
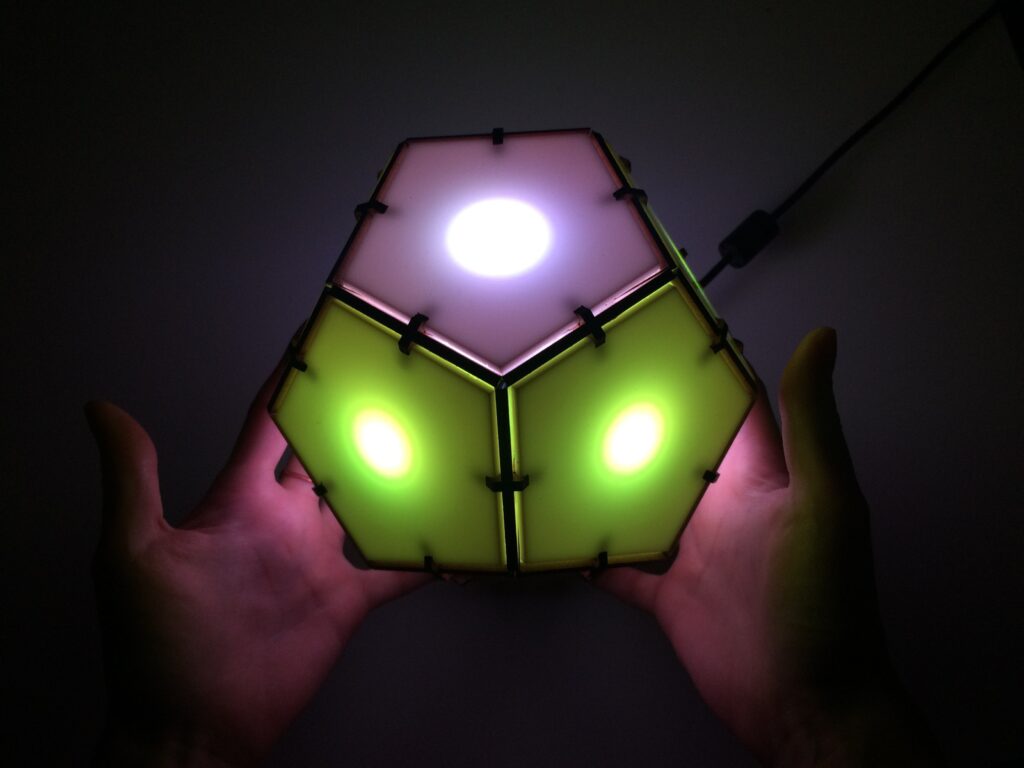
Bucky Glow is an Arduino-controlled LED dodecahedron

After successfully building a gigantic geometric interactive light structure, Jonathan Bumstead decided to do things in a more approachable manner, creating a more a reasonably-sized dodecahedron controlled by an Arduino Nano. The device, named “Bucky Glow,” uses 11 RGB LEDs to light up each side with the exception of the bottom pentagon section.

While it doesn’t have its own light, the base does have a few interesting tricks of its own, with both an opening for programming the Arduino, along with female headers that allow you to access 11 of its I/O pins. This means that you can hook up your own sensors to create your own interactive contraption without designing everything from scratch, and an app interface is even available if you’d like to forgo programming, at least initially.

The Bucky Glow is an interactive LED dodecahedron consisting of 11 LEDs, which are controlled with an Arduino Nano. Using the Arduino programming environment, you can create endless light-up patterns. The Bucky Glow also includes break-out header pins, so you have access to eleven digital I/O pins, a TX (transmit) pin, a RX (receive) pin, reset pin, and ground pin. These pins enable you to connect the Bucky Glow to sensors (e.g. capacitive touch, infrared, ultrasonic), motors, MIDI jacks, and any other electronics you can think of. There are tons of unique ways to make the Bucky Glow musical and interactive.

More info on the Bucky Glow can be found in Bumstead’s write-up here, and kits are on sale via the demo video’s description.

Roboshield Helps Your Robot Walk and Talk

The joy of building robots comes from being able to imbue them with as much or as little personality and functionality as you wish during the design and build process. While creative flair and originality is always a good thing, there’s a lot of basic needs many robots have in common with each other, so where possible it’s good to avoid reinventing the wheel so more time can be spent on more advanced features. Roboshield aims to help make the basics easy so you can let your robot freak flag fly!

At its core, it’s an Arduino shield that packs in a host of hardware to get your robot up and running. As far as motion is concerned, a PCA9685 module is used to allow the control of 8 servos, plus there’s a TB6621FNG dual motor speed controller that offers both speed control and forward/reverse. That’s enough to get your electronic buddy scooting about the floor and waving its arms in the air.

The party piece, however, is the Vstamp text-to-speech module. This device produces a beautiful cliche electronic voice, which your robot is legally required to use to recite Asimov’s Laws of Robotics. Overall, it’s a tidy project that can take the hassle out of getting your robot design up and running, leaving you to focus on the fun bits like death rays and tractor beams. We can’t wait to see it powering the next wave of sassy DIY robots.

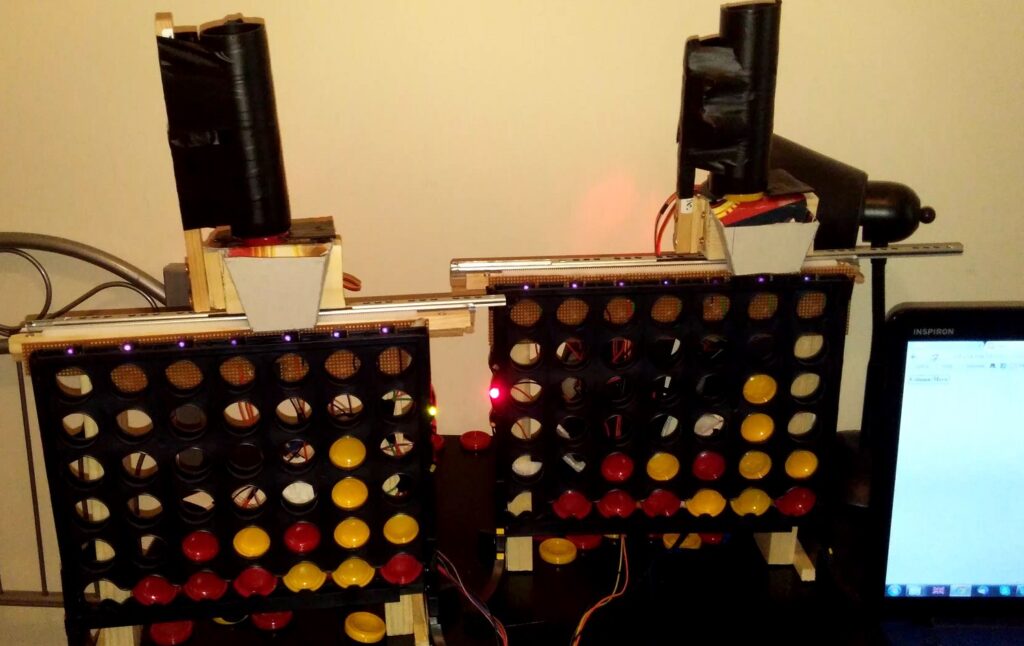
Robotic Connect Four lets you play remotely

In order to restore some tactile feeling to remotely-played board games, maker “lyudatan” created a pair of Arduino Uno-based Connect Four robots. 

When a player makes a move by dropping a disc into a slot, this is recorded by an IR proximity sensor on the first board. The data is then transmitted via an Ethernet shield to a web server.

The second board uses a stepper motor to position discs above the correct slot, and drops them using a servo motor. This process is repeated until the game is done, allowing two players to play the game at a distance.

Code for the project is available here.

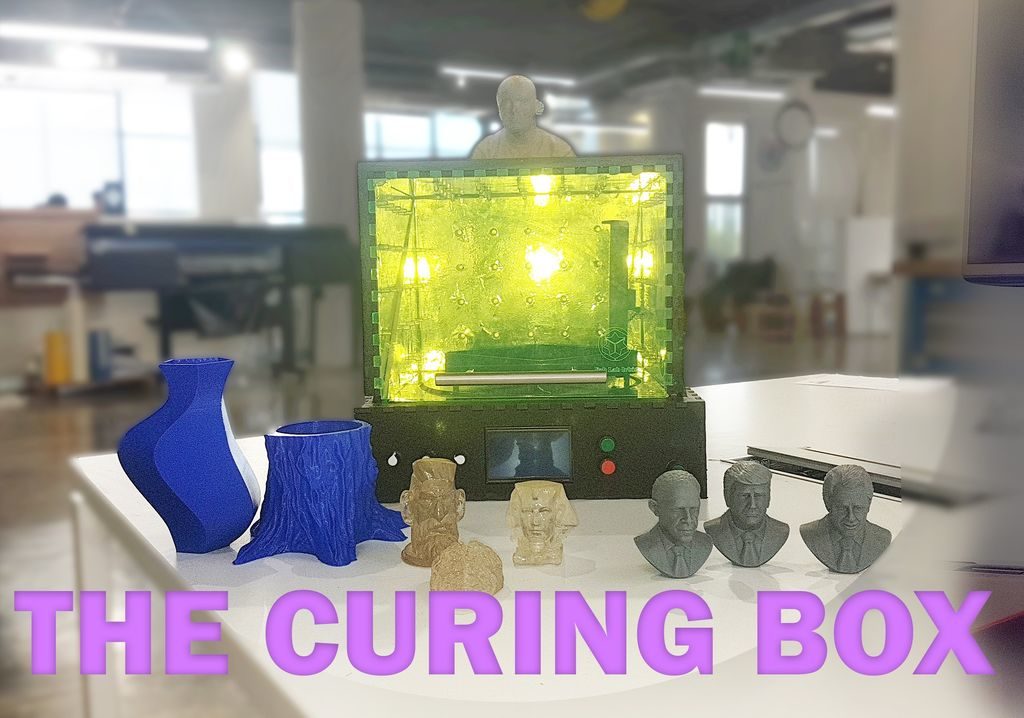
An auto-curing chamber for SLA prints

If you have a 3D printer, it’s probably the fused deposition modeling (FDM) type that deposits melted material onto a bed, eventually building up whatever you had in mind. Stereolithography (SLA) printers, however, work in the opposite way using light to solidify liquid material, which is then pulled out of a vat. 

While an interesting process, one consideration is that after generating the print, materials, especially those that are biocompatible, must be left alone under the proper light and temperature conditions in order to solidify fully.

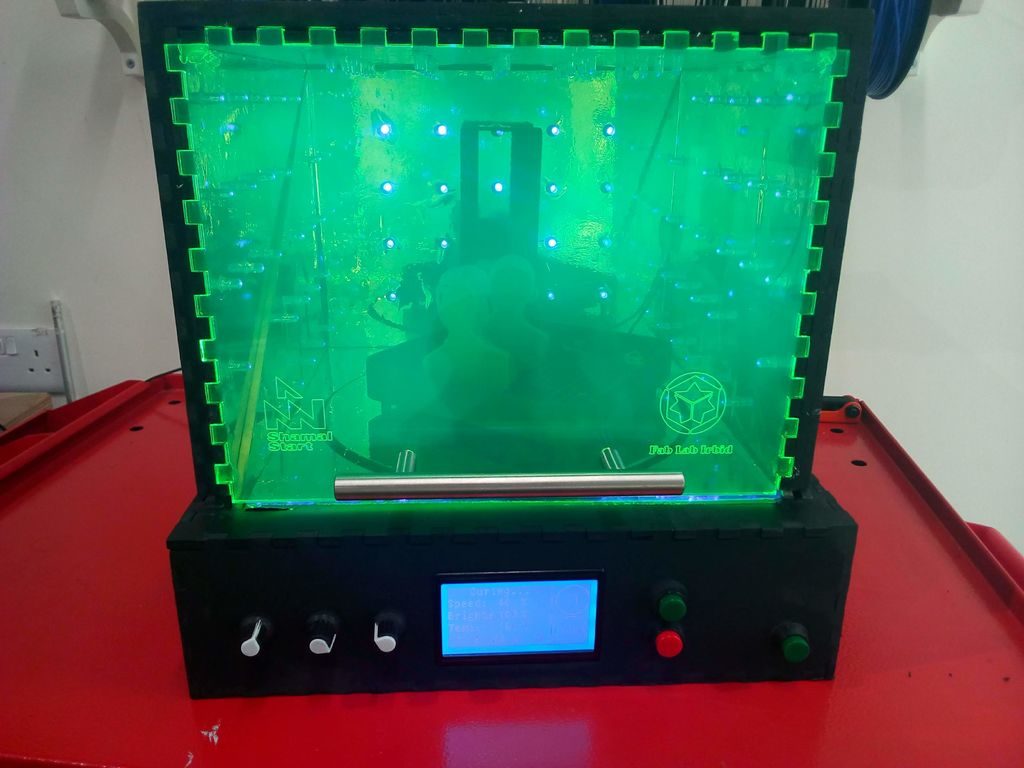
To help with this task, makers at Fablab Irbid designed their own Arduino Uno-based “Post-Curing Box.” It features UV LEDs and a rotating platform, along with a temperature sensor for monitoring conditions. Brightness, rotation, and cure time are set with a simple user interface consisting of an LCD screen, knobs, and buttons. 

This project not only produces ideal conditions for finished parts, but certainly helps with the temptation to poke around—especially since you can see in with its partially translucent viewing window!

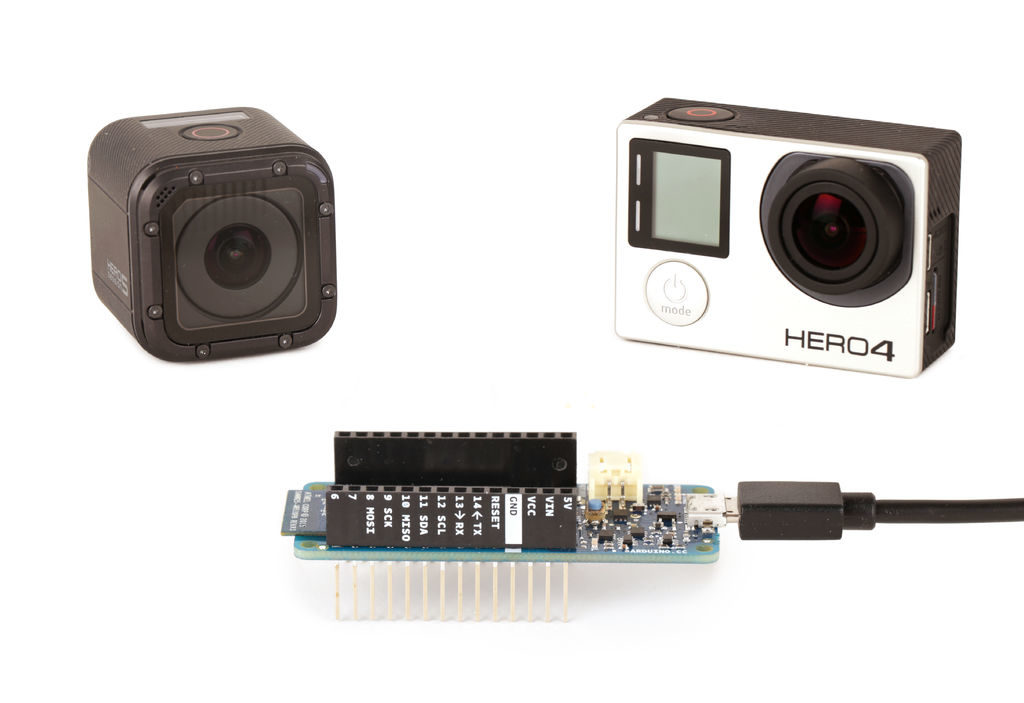
Control your GoPro wirelessly with an Arduino MKR1000

As Arduino boards have revolutionized what people can make at home, you might say that GoPros have done the same thing for portable cameras. Later generations of these devices even feature WiFi capabilities, so with the proper programming, Arduinos like the MKR1000 can be used for control!

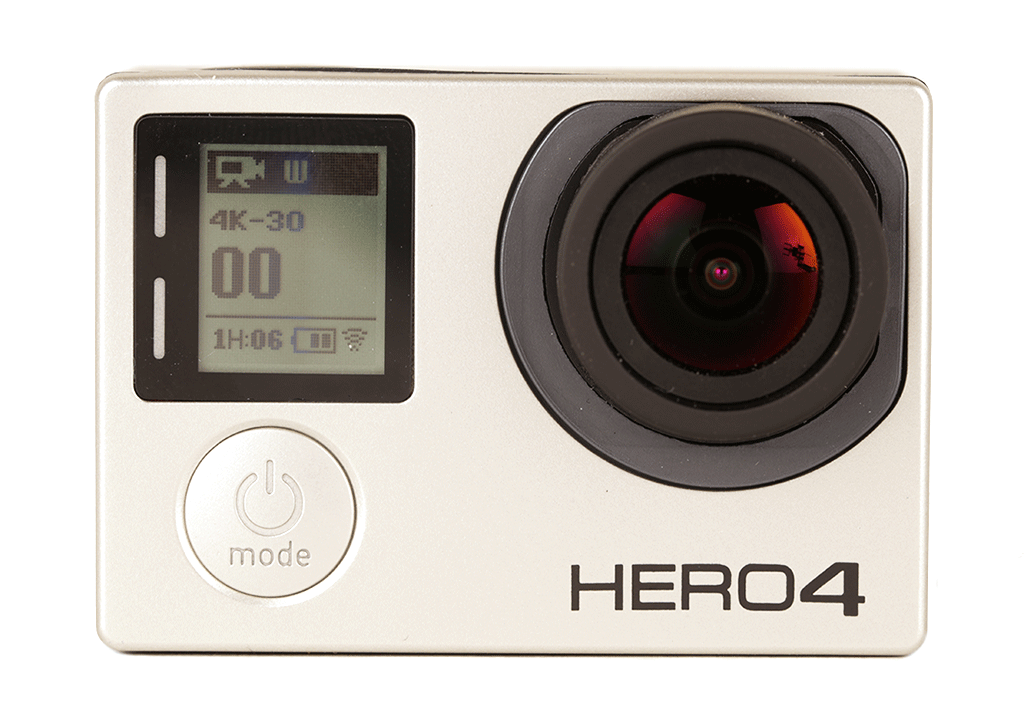
In this project write-up, maker Randy Sarafan (AKA “randofo”) takes us through how he was able to set up a MKR1000 to communicate with a Hero 4 as well as a Session 5, including sending a “magical” Wake-on-LAN signal to power up the Session camera. 

While he’s not the first to control a GoPro using an Arduino, it’s certainly more elegant than methods like hot-wiring a remote or even recording your own voice to speak commands to it remotely!

Aquarium Controller Starring Arduino Gets A Long Video Description

There’s an old saying that the cobbler’s children have no shoes. Sometimes we feel that way because we stay busy designing things for other people or for demos that we don’t have time to just build something we want. [Blue Blade Fish] wanted to build an Arduino-based aquarium controller. He’s detailed the system in (so far) 14 videos and it looks solid.

This isn’t just a simple controller, either. It is a modular design with an Arduino Mega and a lot of I/O for a serious fish tank. There are controls for heaters, fans, lights, wave makers and even top-off valves. The system can simulate moonlight at night and has an LCD display and keys. There’s also an Ethernet port and a Raspberry Pi component that creates a web interface, data storage, and configures the system. Even fail safes have been designed into the system, so you don’t boil or freeze expensive fishes. No wonder it took 14 videos!

We really liked the moonlight which has 32 LEDs with custom switching and a shift register. In front of the LEDs is — surprise — a picture of the moon. We wondered how it would be with a 3D-printed lilthophane which might diffuse the LEDs more. Because of the shift register, it is simple to control all the lights with just a few pins.

Apparently, giving fish an idea of the ambient lighting outside is important to people who keep fish. Because of the safeguards, a bad software bug isn’t going to boil his fish. Despite the looks, apparently neither will this upcycled fish tank.

Insta-Hue LED Party Heels

Control the color of these LED party shoes and matching bracelet wirelessly with Adafruit’s handy app

Read more on MAKE

The post Insta-Hue LED Party Heels appeared first on Make: DIY Projects and Ideas for Makers.