Posts with «arduino» label

Updating a 1999 Saab with an Arduino

Unless your car is fresh off the lot, you’ve probably had the experience of riding in a newer car and seeing some feature or function that triggered a little pang of jealousy. It probably wasn’t enough for you to run out and sign yourself up for a new car loan (which is what the manufacturer was hoping for), but it was definitely something you wished your older model vehicle had. But why get jealous when you can get even?
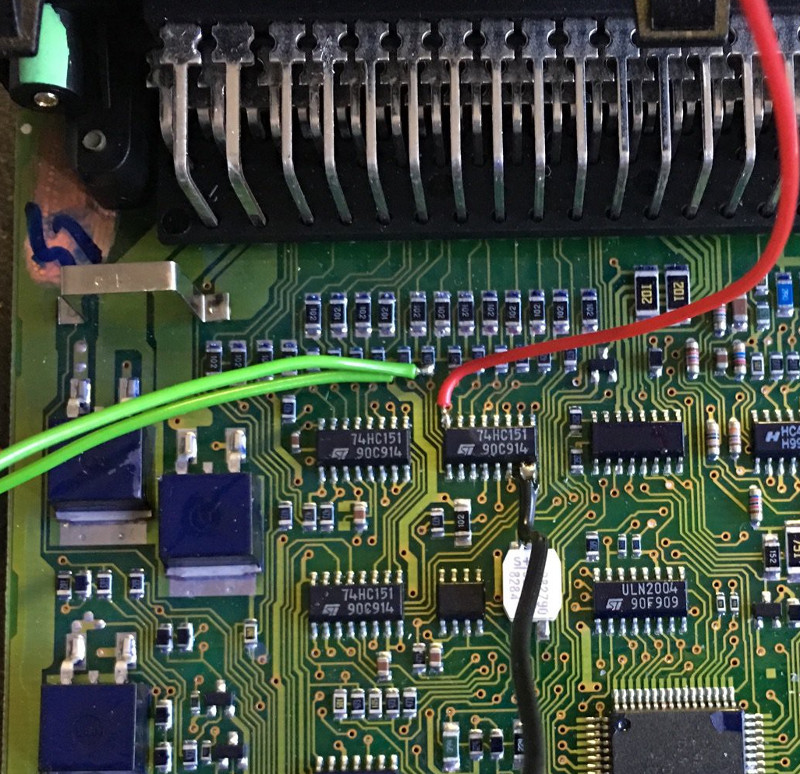
[Saabman] wished his 1999 Saab 9-5 had the feature where a quick tap of the turn signal lever would trigger three blinks of the indicator. Realizing this was an electronic issue, he came up with a way to retrofit this function into his Saab by adding an Arduino Pro Micro to the vehicle’s DICE module.

The DICE (which stands for Dashboard Integrated Central Electronics) module controls many of the accessories in the vehicle, such as the lighting and wipers. In the case of the blinkers, it reads the state of the signal lever switches and turns the blinkers on and off as necessary. After poking around the DICE board, [Saabman] found that the 74HC151 multiplexer chip he was after: the state of the blinker switches could be read from pins 1 and 2, and he’d even be able to pull 5 V for the Arduino off of pin 16.

After prototyping the circuit on a breadboard, [Saabman] attached the Pro Micro to the top of the 74HC151 with some double sided tape and got to work on refining the software side of the project. The Arduino reads the state of the turn signal switches, and if they flick on momentarily it changes the pin from an input to an output and brings it high for three seconds. This makes the DICE module believe the driver is holding the turn lever, and will keep the blinkers going. A very elegant and unobtrusive way of solving the problem.

Hackers aren’t complete strangers to the garage; from printing hard to find parts to grafting in their favorite features from other car manufacturers, this slick Saab modification is in good company.

Check the weather on this Arduino-controlled split-flap display

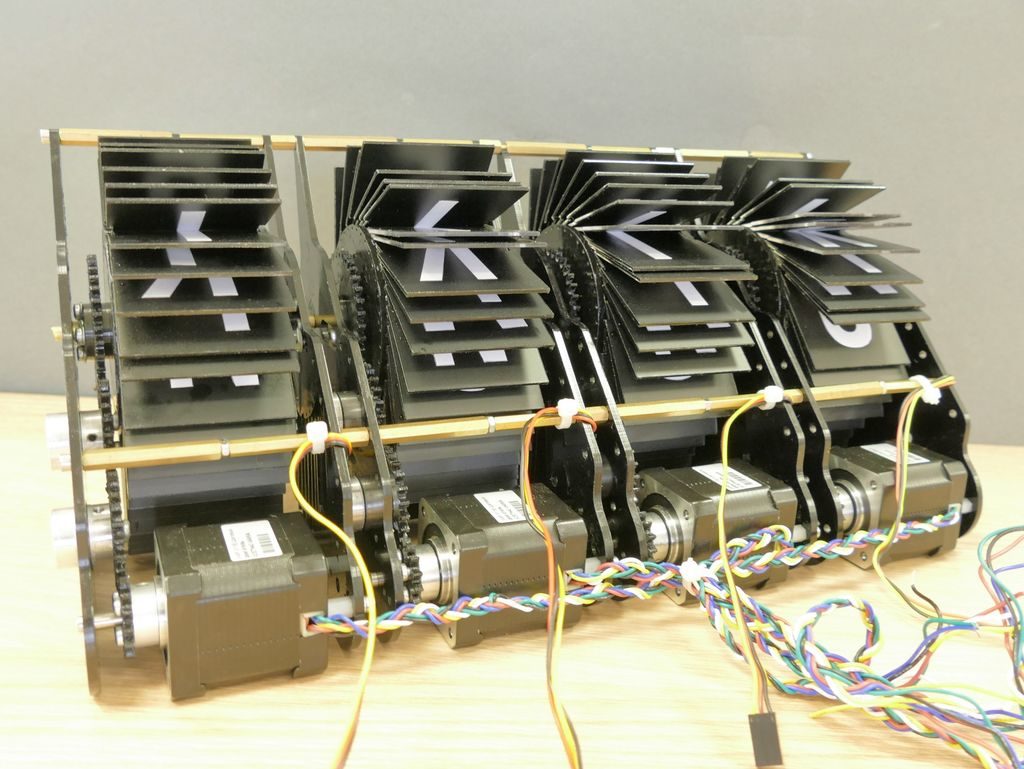
Split-flap displays show information using characters changed by an electric motor. While they’ve largely been replaced by more modern means, hobbyists like “gabbapeople” have been keeping this this technique alive, in this case as a four-character weather display.

The device is built using laser-cut plexiglass, and uses four individual servos to actuate the character flaps. Control is accomplished using an Arduino Mega programmed in the XOD visual programming environment, along with the requisite driver modules. Weather data is pulled from the AccuWeather API. 

You can see it flapping away in the video below, displaying the weather in abbreviations such as “ICLO” for intermittent clouds, as well as the temperature in degrees Celsius.

Automatic Sunglasses, The Electromechanical Way

These days, photochromic lenses are old-hat. Sure, it’s useful to have a pair of glasses that automatically tints due to UV light, but what if you want something a little more complex and flashy? Enter [Ashraf Minhaj]’s SunGlass-Bot.

The build is simple, beginning with an Arduino Pro Mini for reasons of size. Connected to the analog input is a light-dependent resistor for sensing the ambient light level. This reading is then used to decide whether or not to move the servo which controls the position of the lenses. In low light, the lenses are flipped up to allow clear vision; in brighter light, the lenses flip down to protect the eyes. Power is supplied by a homebrew powerbank that it appears [Ashraf] built from an old phone battery and a small boost converter board. All the files to recreate the project are available on Github, too.

It’s a fun build that [Ashraf] shows off in style. While this may not be as effortless as a set of Transition lenses or as quick as a welding mask filter, it has a certain mechanical charm that wouldn’t be out-of-place in a certain sci-fi aesthetic.

Hungry for more? Check out these self-blending sunglasses we featured a while back. Video after the break.

Automate motor winding with Arduino

When you want to make a mobile robot, DC motors can be a great choice. We normally accept that they can be purchased for a few dollars each, but what if you want to make your own?

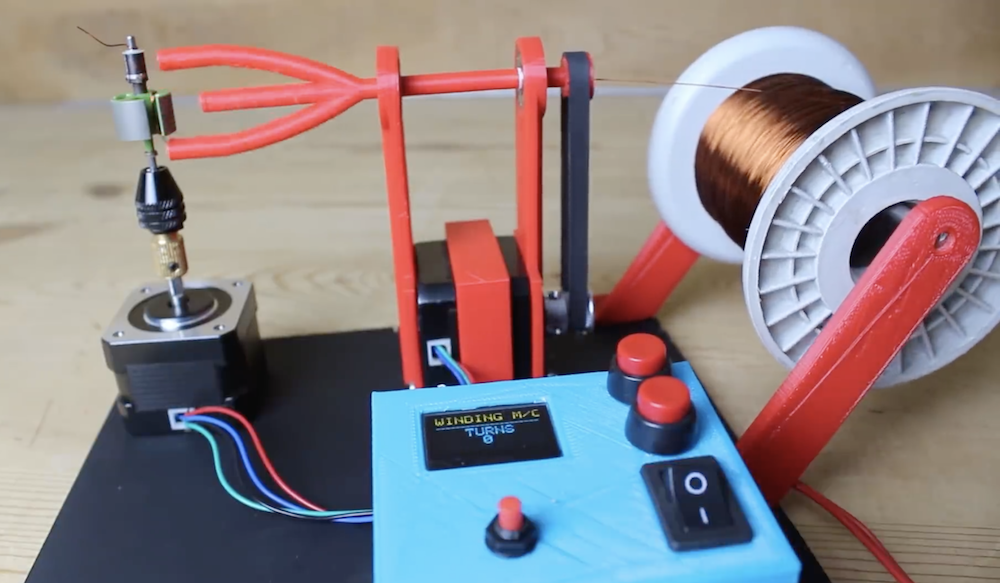
In order to assist with the winding process for a self-built—or at least self-wound—motor, Mr. Innovative created an… innovative fixture with two stepper motors and an Arduino Nano for control. 

The bare motor armature is held in a vertical orientation by one stepper, while the other winds wire using a hollow 3D-printed feeder mechanism. User interface consists of an OLED screen and buttons that let you select the number of windings and another to advance the armature to the next coil location. 

Arduino code and electrical drawings can be found here, and 3D-printed parts are available on Thingiverse.

Feed Barbie with the J’ai faim! mechatronic game

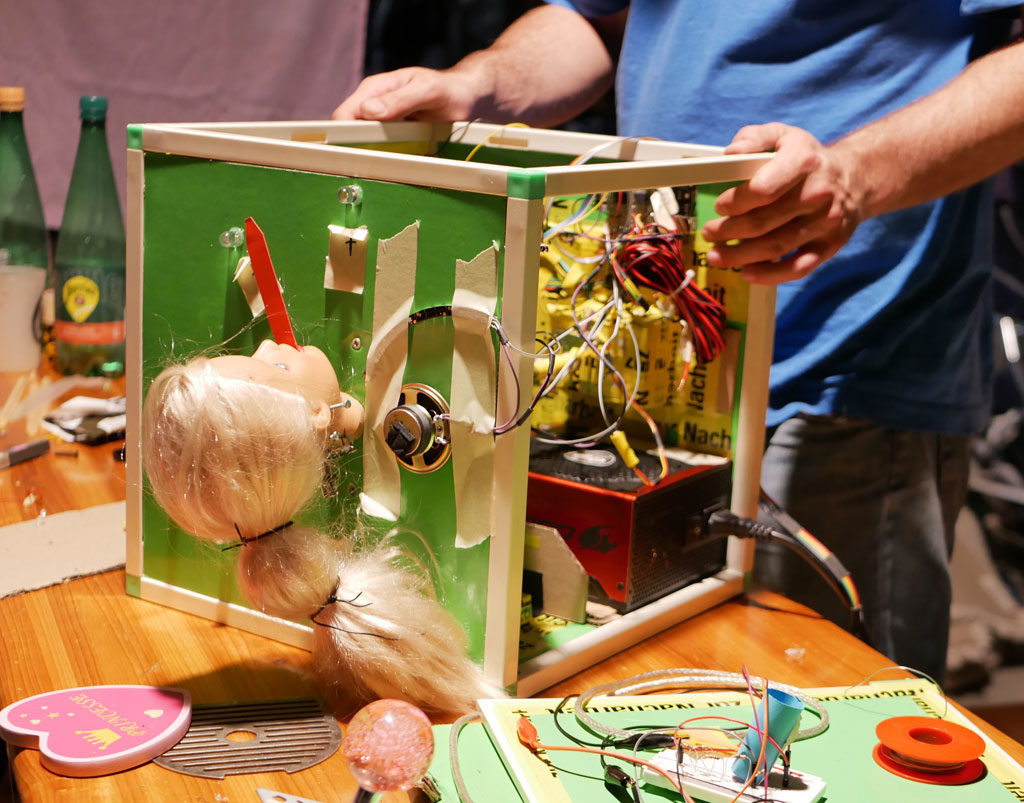
According to this project’s write-up, while some struggle to get enough nourishment, those in more developed countries often aspire to consume too little food. As an apparent commentary on this situation, Niklas Roy and Kati Hyyppä have created a mechatronic game called J’ai faim!, French for “I’m hungry!”

In this Arduino-controlled game, participants rotate a Barbie head to point her comically over-sized tongue over a piece of sushi lit up by an LED. When in position, the player fires her solenoid-actuated tongue using the joystick, and if the correct sushi is eaten the score progresses from “starving” to “well fed.” 

You can see the game—reminiscent of a very strange version of whack-a-mole—in the video below.

Generating waves with Arduino

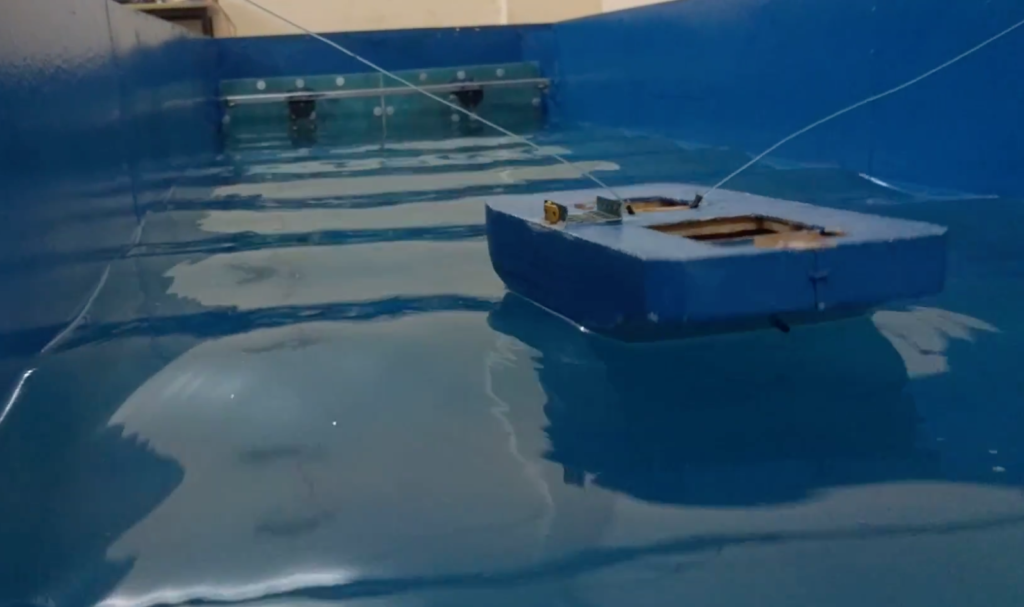
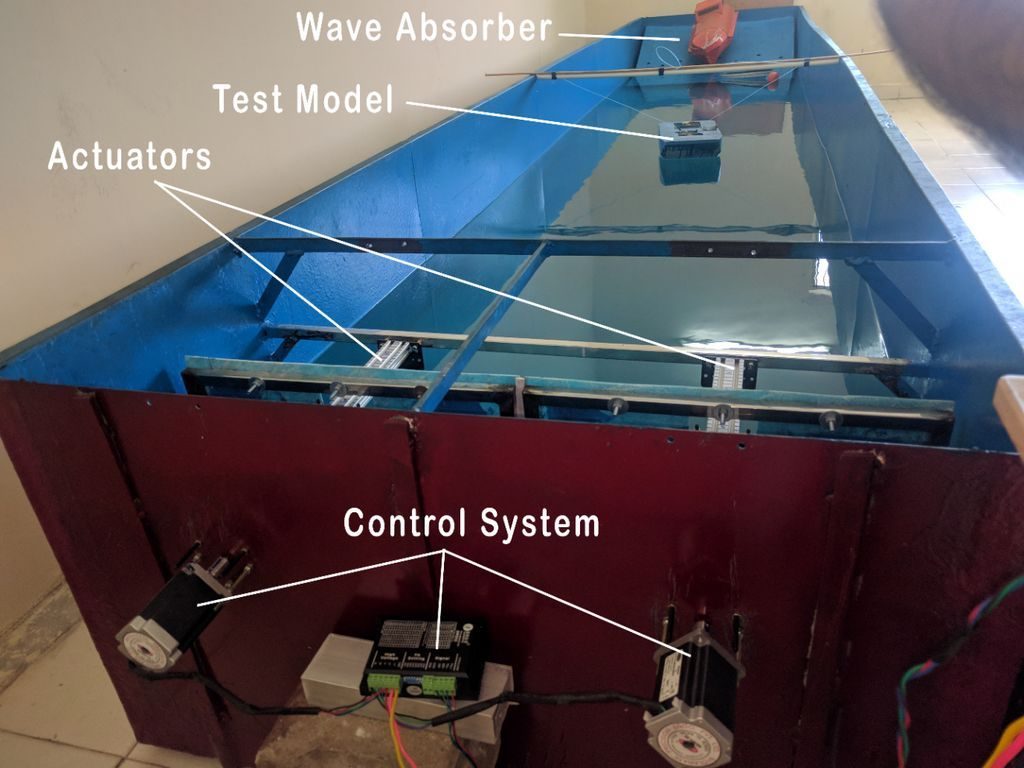
Need a wave generator to test out your latest boat, barge, or submarine design, but can’t quite afford one? If so, then you might consider Subham Bhatt’s DIY tank that he was able to construct for around $1,200 USD. 

Bhatt’s device features a pair of stepper motors and lead screws that push a stainless steel paddle through the water, producing waves formed to his precise specifications. An Arduino Mega is used for control, along with a single stepper driver to power both motors. 

User interface is provided through the Arduino IDE’s serial interface, set up to take commands via a simple text-based menu system. 

Develophead takes (some) of the work out of film photography

Today, if you take a photograph, more than likely it’s digital. This presents many advantages over its film counterpart, but many serious photographers still use the format in order to produce just the right effect. Pablo Zárate is one such photographer, and combined this passion with Arduino and 3D printing knowledge to produce the “Develophead.”

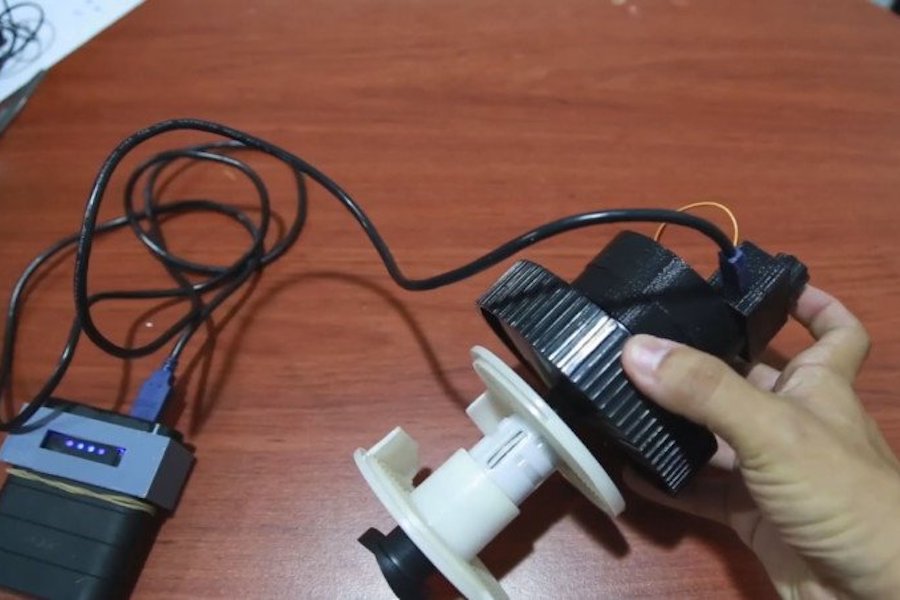
Develophead is meant as an augmentation to AP brand developing tanks, adding an automatic agitation function. This previously had to be done by hand, including 16 minutes of manipulation in the case of C41 rolls. 

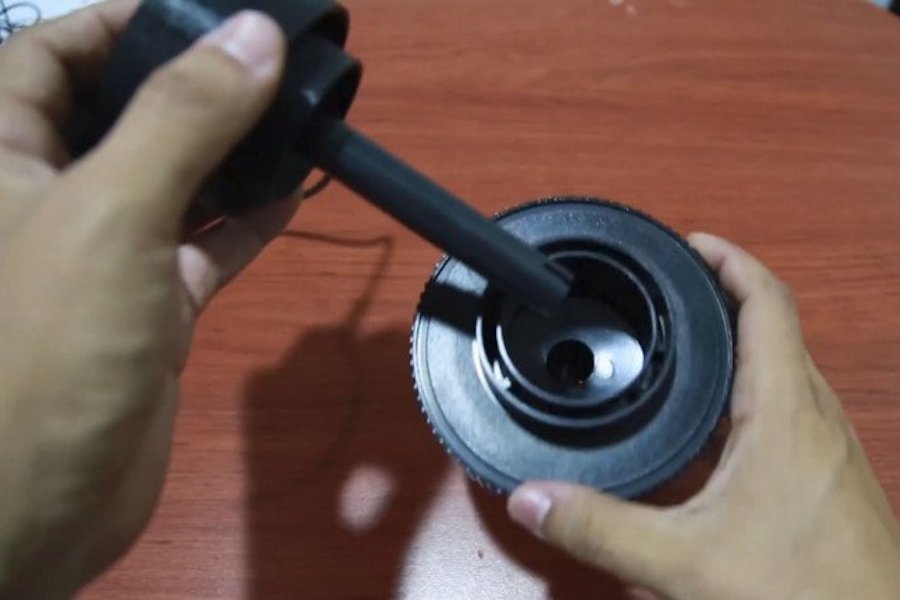
Develophead is built on Arduino Nano and uses a 5-volt power source. It’s a cap that fits onto the top of a development tank, inserting an agitation rod into the hole that chemicals are poured into and out of. Turn the cap on and the rod begins to turn the film reel back and forth. A knob on the top of the cap lets you adjust the speed/intensity of the agitation.

As of now, this labor-saving device is meant for AP Classic development tanks, but  Zárate has released the plans on GitHub and hopes others will help expand on this concept.

Notable Board Books are an Arduino-powered way to enjoy music

Annelle Rigsby found that her mother, who suffers from Alzheimer’s, is delighted to hear familiar songs. While Annelle can’t always be there to help her enjoy music, she and her husband Mike came up with what they call the Notable Board Book that automatically plays tunes.

The book itself is well laid-out, with song text and familiar photos printed on the pages. Electronics for the book are in a prototype state using an Arduino Uno and an Adafruit Sound Board to store and replay the audio bits.

Page detection is handled by an array of photocells, and it is meant to turn on automatically when picked up via a series of tilt switches. When a switch is triggered, a relay can then hold the book on until the song that is playing is done, or for a predetermined amount of time.

A time-telling web powered by Arduino

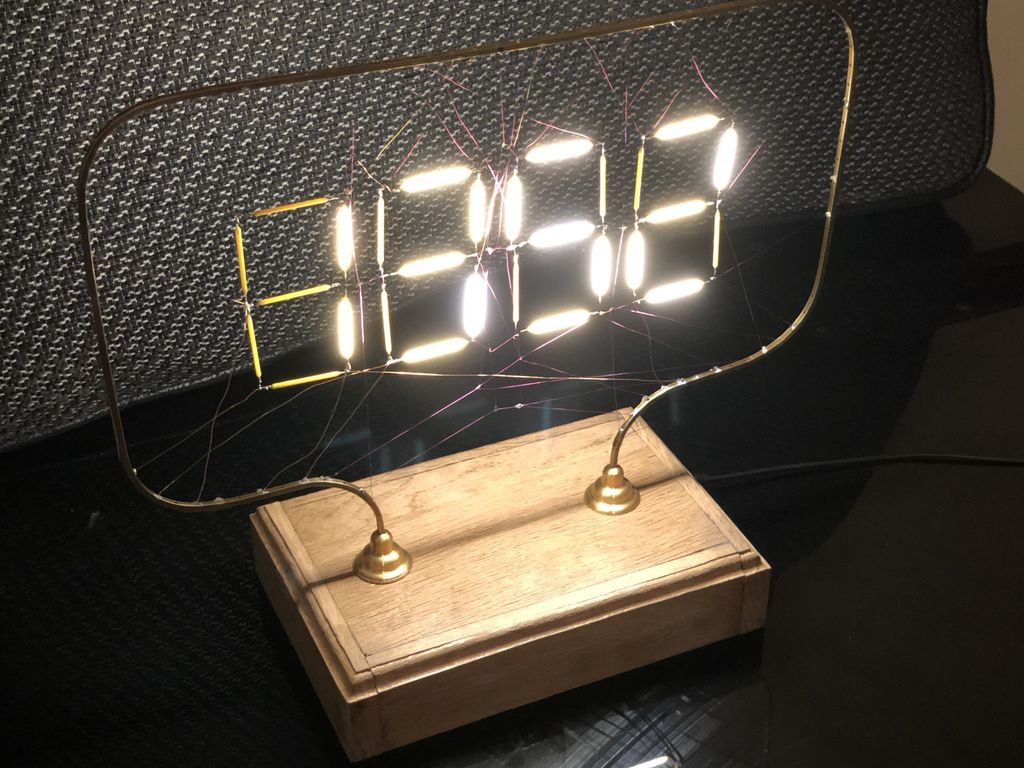
Flament bulbs, commonly known as Edison bulbs, contain a variety of interesting LED lights. So interesting, in fact, that maker Andy Pugh decided to take these individual components up and turn them into a 7-segment display clock.

While making a clock isn’t an uncommon hacker pursuit, this Arduino-controlled device uses a series of wires to both power and support the clock’s four digits from a bent brass frame. This gives it a decidedly web-like appearance, so much so that Pugh notes it’s reminiscent of the cobweb writing in the book Charlotte’s Web. 

The clock also features the ability to sync the time via radio signals, though this functionality appears to still be in the experimental phase. 

Code for the build can be found here, and you can see it cycling through numbers in the video below.

Ingenious marble clock runs on Arduino

Arduino boards and custom clock builds seem to be a great match, as illustrated by Görkem Bozkurt’s recent project. 

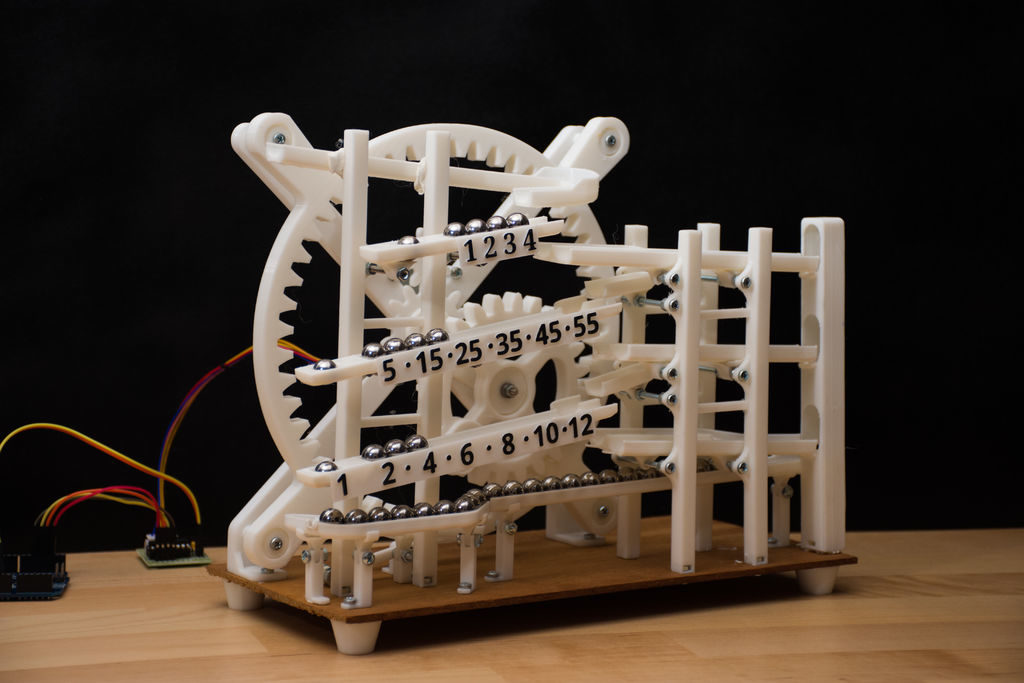
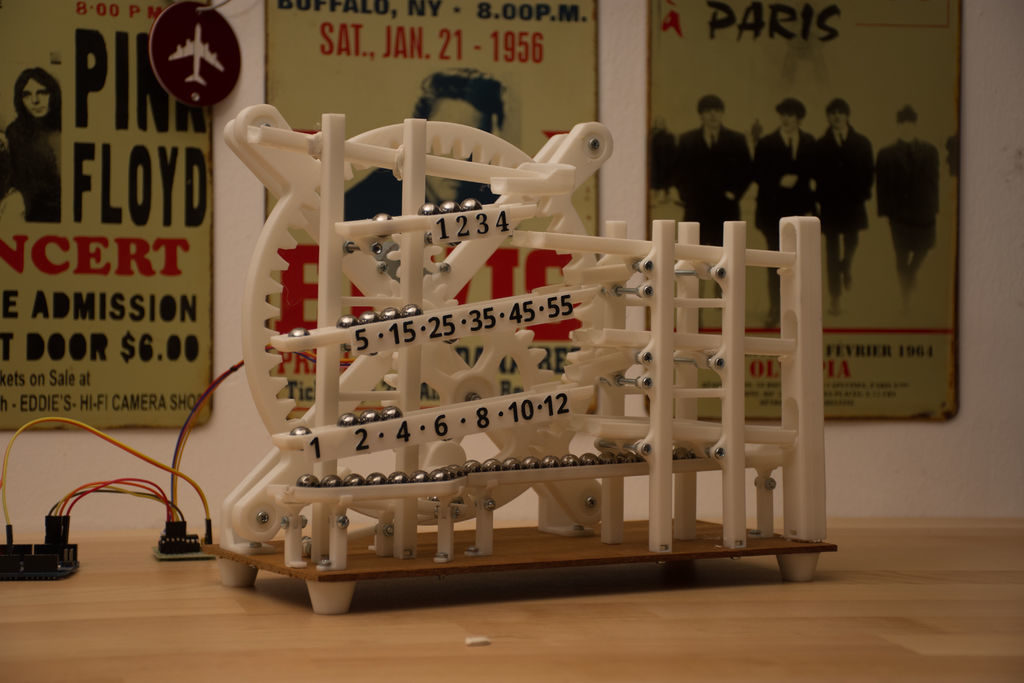
His 3D-printed marble clock uses a stepper-driven gear mechanism to lift 11mm steel spheres to the device’s top chute. The spheres then roll down to a five-minute rail, which empties when filled and transfers a single marble to another minute rail, graduated in five-minute increments up to 60. This then fills the hour rail in a similar process, letting you tell the time of day, or simply be mesmerized by its movement.

The main gear mechanism is powered by a small stepper motor, controlled by an Arduino Uno for timekeeping.

If you’d like to build your own, code is available on Bozkurt’s write-up, as well as the needed print files.