Posts with «arduino uno» label

A four-factor lockbox
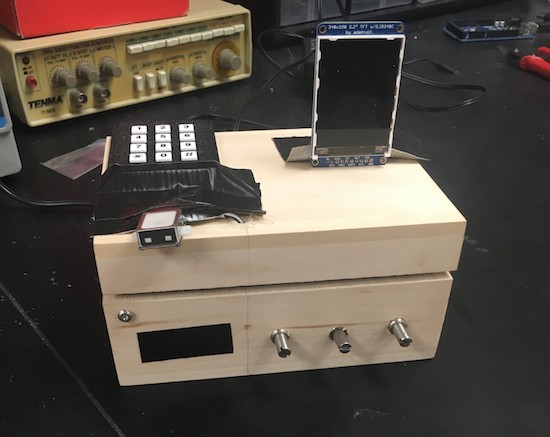
If you really don’t want someone messing with your valuables, a programmable box may be just what you need!

Locking mechanisms generally work using one method—a key, for example—to keep them secure, or perhaps two in certain circumstances. This box, designed as a final project for an electrical and computer engineering class at Cornell, instead makes the user go through four steps to get to the “treasures” inside.
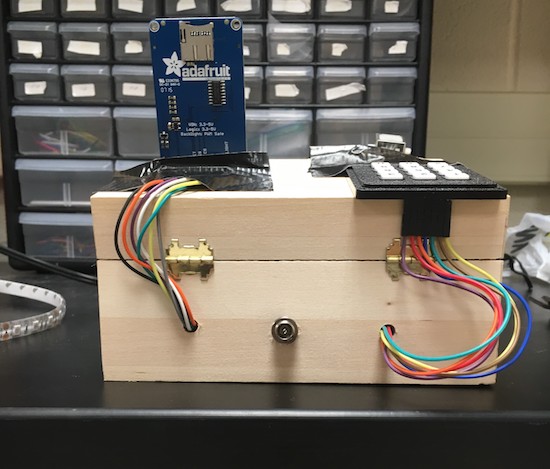
Once the user has input the correct code, set potentiometers to the correct position, knocked on the box in the correct sequence, and finally scanned his or her fingerprint, a solenoid unlatches the box’s. It seems like a great project for an ECE class. On the other hand, the unit is wooden, so if you did forget the authentication procedure, it wouldn’t be too hard to manufacture a literal back door!

A cool idea nevertheless, and certainly something that could help protect your snacks or other items from a sneaky roommate. You can see more about this lockbox on the Cornell-hosted project page.

Dad builds an Arduino Hot Wheels drag strip for son

If you want to eliminate arguments about which toy car is fastest, we’ve got just the project for you.

When one’s kid has a birthday, most people go to the store and buy a gift. Phil Tucker instead decided to build something unique for his two-year-old, an automated Hot Wheels drag strip with an electronic start gate and timer. Like many other gravity race setups, when released, the cars roll to the bottom of a slope.

Tucker’s design, however, releases the cars automatically using a servo and hinge at the press of a button. It then detects the winner using infrared LEDs and light dependent resistors, displaying the results on a miniature marquee. The entire system is controlled by an Arduino Uno.

You can find more on this DIY drag strip here, and see it in action below!

This robot is a cool new way to use cassette tapes!

Though tape players persisted in vehicles for much longer than needed, cassettes are pretty much an obsolete format. That doesn’t mean they can’t be useful, as this project by Moscow-based media artist ::vtol:: shows.

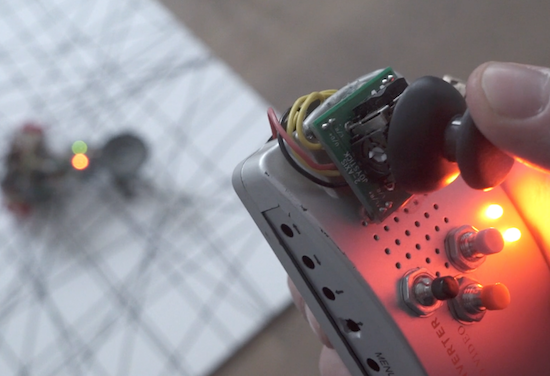
His interactive robot, dubbed “pzr-10,” traverses a canvas littered with unwound tape, while two heads read the data off of it. Using an Arduino Uno, this data is then transmitted to the built-in loudspeaker and played aloud. Audio can be looped and processed in various ways, giving the user a unique audio experience!

A customized remote operates the robot. The controller is equipped with an Arduino Nano and a joystick that guides pzr-10, while buttons manipulate the sound.

You can read more about the robotic installation on ::vtol::’s page.


Arduino Blog 16 Dec 22:14

Create the ultimate Christmas jumper with Arduino

We’ve seen plenty of Arduino-equipped holiday sweaters over the years, but none as teched-out as this one. Last Christmas, UK-based Makerspace fizzPOP and electronics retailer Maplin teamed up to create quite the fun and festive jumper.

The aptly named “Ultimate Christmas Jumper” features an Uno, a Mega, an Adafruit FLORA, four 8×8 LED panels, some NeoPixels, a portable 10,000mAh power bank, as well as a pair of electret microphone amplifiers that enable it to react to sounds.

A sewn-on, 3D-printed fireplace holds the display, which as you can see in the video below, flashes a series of holiday images ranging from Santa, to Rudolph, to season’s greetings.

Want to wear one to your next party? Lucky for you, fizzPOP and Maplin have put together a video tutorial to help get you started!

Stage Bench is an Arduino-based live controller table

Manuel Lukas, a student at the University of Applied Science Mainz, and Sascha Lukas, a student at Cologne University of Music, together make up the German pop band Wyoming. As part of an interdisciplinary project, the duo decided to combine their love for both design and music into one live MIDI controller that’s bigger than commonly available commercial devices, but due to its size, more comprehensible for the audience.

The result? A DJ table, dubbed “Stage Bench,” that doubles as an instrument.

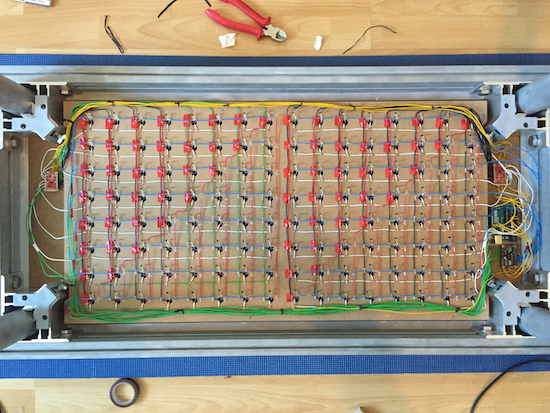
Stage Bench is based on an Arduino Uno which interacts with two matrices, a 128-LED matrix and a 128-button matrix, via a pair of shields. The connection to the computer is managed by serial communication and corresponds with a self-programmed patch in Max/MSP, which also sends MIDI data to any preferred DAW to play instruments or samplers.

Check out Stage Bench in Wyoming’s music video below!

Build an Arduino-powered, voice-activated clock

Using the MOVI voice recognizer and synthesizer Arduino shield, this DIY clock can respond to your querries.

We’re all familiar with the various brands of voice assistants, but most of them require Internet access in order to do anything useful. This project, however, employs the MOVI shield by itself to respond to a user’s request for the time or date, and can even set a timer or initiate a countdown. The clock replies back in a nice robotic tone with the piece of information the user was asking for.

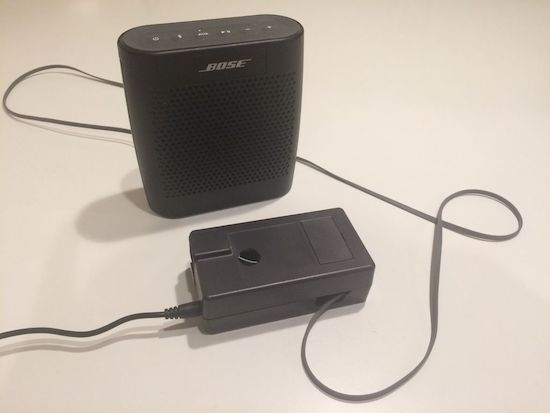
The voice-activated clock also features an Arduino Uno, an RTC module, a speaker that plugs into the MOVI’s headphone jack, and a power supply. Although an interesting build as is, much more functionality could be added to the system, allowing for a custom device to suit your needs!

You can learn more about the project on its page here!

More Blinky = More Better – The WS2812FX Library

The WS2812 is an amazing piece of technology. 30 years ago, high brightness LEDs didn’t even exist yet. Now, you can score RGB LEDs that even take all the hard work out of controlling and addressing them! But as ever, we can do better.

Riffing on the ever popular Adafruit NeoPixel library, [Harm] created the WS2812FX library. The library has a whole laundry list of effects to run on your blinkenlights – from the exciting Hyper Sparkle to the calming Breathe inspired by Apple devices. The fantastic thing about this library is that it can greatly shorten development time of your garden-variety blinkables – hook up your WS2812s, pick your effect, and you’re done.

[Harm]’s gone and done the hard yards, porting this to a bevy of platforms – testing it on the Arduino Nano, Uno, Micro and ESP8266. As a proof of concept, they’ve also put together a great demonstration of the software – building some cute and stylish Christmas decorations from wood, aluminium, and hacked up Christmas light housings. Combining it with an ESP8266 & an app, the effects can be controlled from a smartphone over WiFi. The assembly video on YouTube shows the build process, using screws and nails to create an attractive frame using aluminium sheet.

This project is a great example of how libraries and modern hardware allow us to stand on the shoulders of giants. It’s quicker than ever to build amazingly capable projects with more LEDs than ever. Over the years we’ve seen plenty great WS2812 projects, like this sunrise alarm clock or this portable rave staff.
As always, blink hard, or go home. Video after the break.


Filed under: Arduino Hacks, Holiday Hacks, led hacks

An Arduino round word clock

After considering building a square word clock, Maker Roald Hendriks and his sister came up with something a bit more unique!

Clocks, being decorative, useful and easily hackable, have been targets for creative types, likely from when they were first invented. You’d think maybe all ideas for new clocks have been exhausted. Fortunately, human ingenuity never seems to run dry, and this latest device tells time using Arduino Uno-controlled LEDs.

Outer numbers on the modified IKEA PUGG wall clock illuminate to indicate the hour, while words on the inside represent the minutes. These minutes are literally spelled out in Dutch phrases reveal the particular time, but if you don’t speak the language, the position of the LEDs should give you some clue as to what is going on.

You can read more about the project on its website, and watch a demo below!

Adding an “extra sense” with rangefinders

Using ultrasonic sensors attached to a person’s arm, researchers have found a way to let you “feel” distant objects.

The concept of this project is surprisingly simple, but as shown in the test video below, seems to work quite well. Using an Arduino Uno to coordinate everything, when rangefinders see a nearby object, like a wall, the system triggers the corresponding vibrators. This allows someone to sense what is nearby without seeing or touching it.

An obvious use case for something like this would be to help visually-impaired people navigate. Perhaps it could also serve in an application where you need to pay attention to something you can’t quite see, sort of like how an animal’s whiskers warn them of danger before contact is made.

The idea is to have a set of rangefinders in armbands that point outwards around your body. Each armband also has vibrators in that vibrate against your skin at an increasing frequency as the range from each sensor gets smaller. The left armband covers your left-side surroundings, and the right your right-side.

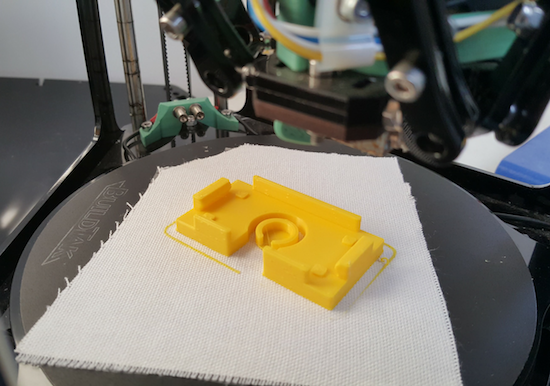
You can see more details on this sensor assembly on RepRap Ltd’s page, including how its case was printed directly on fabric!

This wireless game controller looks like a rug

Cut in the shape of a gamepad, this controller sits on the floor for kids to enjoy!

Maker Jegatheesan Soundarapandian had gotten bored with computer games, and decided he, or rather his daughter, needed a new way to interact with the PC. What he came up with was a controller covered in cloth, with switches embedded between this covering and a wooden base.

Switches were made out of CDs and aluminum foil, which could be a good technique for others experimenting with unique interface devices. Control is accomplished with an Arduino Uno that communicates with a PC via a Bluetooth module.

Ready to play games and run apps by foot? Check out the project’s page on Instructables!