Posts with «microcontroller» label

Using Solar Air Heating to Dry Clothes

About a month ago, [Greenhill Forge] built a few solar panels to collect energy from the sun. Unlike solar photovoltaics, which turn sunlight directly into electricity, these were designed to gather solar thermal energy with air. These types of panels can gather a tremendous amount of energy for a very low cost, and although the first video only went into the theory of their operation, his latest video actually shows us how to use that energy in a practical way.

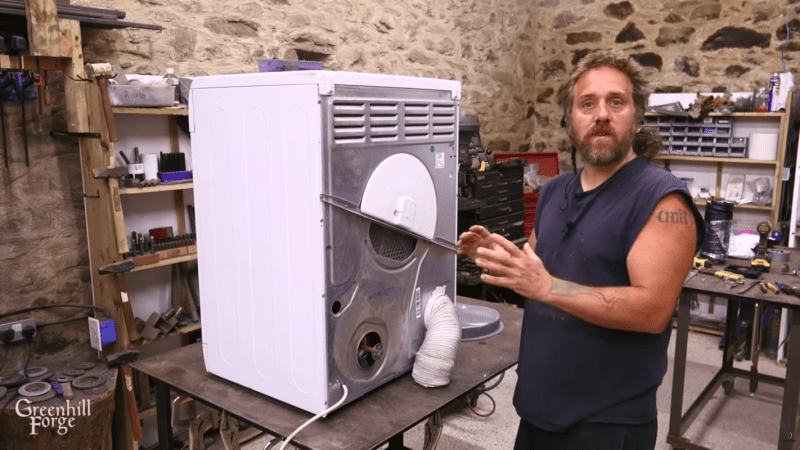
The video starts by building a new solar panel, using upgraded materials and building methods compared to the previous versions which should improve the efficiency. There’s some data analysis of the performance, but at the end of the video [Greenhill Forge] actually hooks one of these up to a clothes dryer to explore its real-world efficacy. This process involves disconnecting the electric heater, removing one of the blower fans, and building a new flange to accept the heated air from the solar panel. A microcontroller keeps an eye on the incoming air temperature and controls a fan to try to hit the target temperature.

After an hour of drying, the test clothing was completely dry, with the only electricity used to turn the drum in the dryer. This is more than an order of magnitude of reduction in the power needed to dry clothes, which is fairly impressive. [Greenhill Forge] also notes that systems like these could augment off-grid systems not only for clothes drying but for home heating, greenhouse heating, or drying out various crops and that they could reduce strain on an electrical system that otherwise relies on resistive heating methods. There are many ways of building these panels, so be sure to check out his first video for ideas.

Medication Reminder Uses Only One Button

As anyone who takes medicines regularly will attest to, the days have a tendency to blur together, making it hard to remember if you did something like take that day’s dose or not. There are plenty of products available to help keep track of medication reminders but many are overly complicated, so [Jeroen] built this one which keeps simplicity and usability as its core design principle.

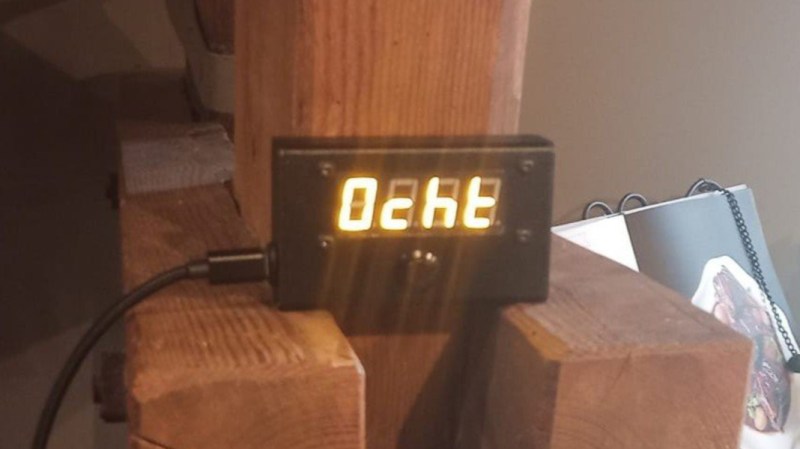
[Jeroen] calls it the MedMinder, and it’s a small, compact, rectangular device with a four-character display meant to sit on a countertop. When it’s time to take a medicine, the display will show that medicine’s four-letter code until the user pushes the single button under the display, signalling that they’ve taken their dose. If many different medications have to be taken at the same time, it displays the first priority until the button is pushed, and then displays whichever one is next after that.

Programming is a little less straightforward, as the medications need to be added to the source code and uploaded to the Arduino that sits at the center of this build, but with the source code available this isn’t too difficult for someone with minimal experience with microcontrollers.

In an idealized world, technology should make our lives simpler or easier, and this small device goes a long way towards helping with that goal. Especially for an important but mundane task that can be surprisingly easy to lose track of. Although we glossed over the accuracy of this device’s clock in this article, we do have a comprehensive guide for selecting the right real-time clock for microcontrollers like this.

TV Remote Uses Floppy Disks

Famously, the save icon on most computer user interfaces references a fairly obsolete piece of technology: the venerable floppy disk. It’s likely that most people below the age of about 30 have never interacted with one of these once-ubiquitous storage devices, so much so that many don’t recognize the object within the save icon itself anymore. [Mads Chr. Olesen]’s kids might be an exception here, though, as he’s built a remote control for them that uses real floppy disks to select the programming on the TV.

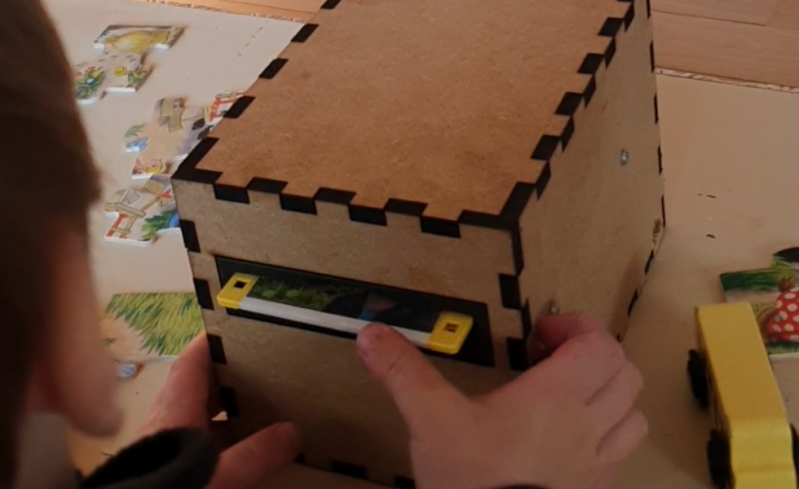
This project partially began as a way to keep the children from turning into zombies as a result of the modern auto-play brainrot-based economies common in modern media. He wanted his kids to be able to make meaningful choices and then not get sucked into these types of systems. The floppy disk presents a perfect solution here. They’re tangible media and can actually store data, so he got to work interfacing a real floppy disk drive with a microcontroller. When a disk is inserted the microcontroller wakes up, reads the data, and then sends out a command to stream the relevant media to the Chromecast on the TV. When the disk is removed, the microcontroller stops play.

Like any remote, this one is battery powered as well, but running a microcontroller and floppy disk drive came with a few challenges. This one is powered by 18650 lithium cells to help with current peaks from the drive, and after working out a few kinks it works perfectly for [Mads] children. We’ve seen a few other floppy disk-based remote controls like this one which replaces the data stored on the magnetic disc with an RFID tag instead.

Programming the Oxocard Connect with Arduino

NanoPy is the standard IDE for Oxocard projects. However, thanks to the ESP32 microcontroller at the heart of the Oxocard, programming with C++ via the Arduino IDE is also a viable development option. Here's how to get started...

The post Programming the Oxocard Connect with Arduino appeared first on Make: DIY Projects and Ideas for Makers.

Guide to Boards 2026: No Computer Required

Microcontrollers and single board computers continue to get better as 2026 barrels toward us with more power and more capabilities that are perfect for amping up your next build.

The post Guide to Boards 2026: No Computer Required appeared first on Make: DIY Projects and Ideas for Makers.

Laser Harp Sets the Tone

In many ways, living here in the future is quite exiting. We have access to the world’s information instantaneously and can get plenty of exciting tools and hardware delivered to our homes in ways that people in the past with only a Sears catalog could only dream of. Lasers are of course among the exciting hardware available, which can be purchased with extremely high power levels. Provided the proper safety precautions are taken, that can lead to some interesting builds like this laser harp which uses a 3W laser for its strings.

[Cybercraftics]’ musical instrument is using a single laser to generate seven harp strings, using a fast stepper motor to rotate a mirror to precise locations, generating the effect via persistence of vision. Although he originally planned to use one Arduino for this project, the precise timing needed to keep the strings in the right place was getting corrupted by adding MIDI and the other musical parts to the project, so he split those out to a second Arduino.

Although his first prototype worked, he did have to experiment with the sensors used to detect his hand position on the instrument quite a bit before getting good results. This is where the higher power laser came into play, as the lower-powered ones weren’t quite bright enough. He also uses a pair of white gloves which help illuminate a blocked laser. With most of the issues ironed out, [Cybercraftics] notes that there’s room for improvement but still has a working instrument that seems like a blast to play. If you’re still stuck in the past without easy access to lasers, though, it’s worth noting that there are plenty of other ways to build futuristic instruments as well.

What’s New in the Microchip Maker Space

Join the Wizard of Make, Microchip's Bob Martin for an update on the latest developments in the Arduino / Maker Space ecosystem.

The post What’s New in the Microchip Maker Space appeared first on Make: DIY Projects and Ideas for Makers.

The Dar es Salaam Hacker Scene and Gamut Detection

We’re on a sort of vacation in Tanzania at the moment and staying in a modest hotel away from the tourist and government district. It’s a district of small shops selling the same things and guys repairing washing machines out on the sidewalk. The guys repairing washing machines are more than happy to talk. Everybody’s amazingly friendly here, the hotel guy grilled us for an hour about our home state. But I really didn’t expect to end up in a conversation about computer vision.

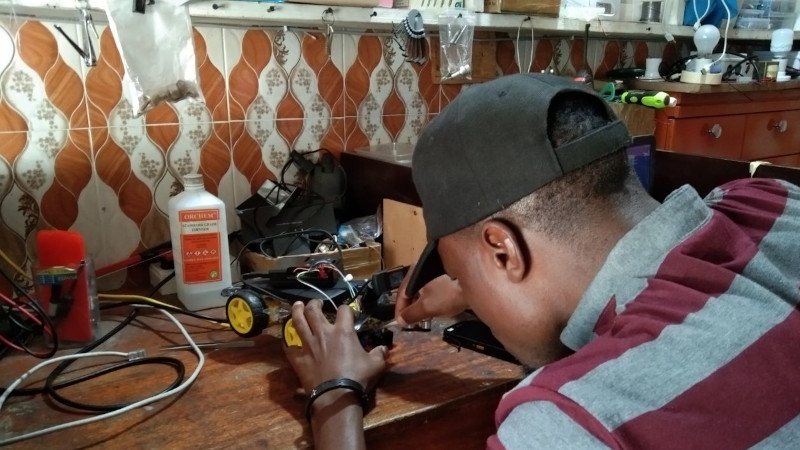
In search of some yogurt and maybe something cooler to wear, we went on a little walk away from the hotel. With incredible luck we found a robotics shop a few blocks away. Mecktonix is a shop about two meters each way, stuffed full of Arduinos, robots, electronics components, servos, and random computer gear, overseen by [Yohanna “Joe” Harembo]. Nearby is another space with a laser engraver and 3D printer. The tiny space doesn’t stop them from being busy. A constant stream of automotive tech students from the nearby National Institute of Transport shuffle in for advice and parts for class assigned projects.

In between students, Joe demos an autonomous car he’s working on. In classic hacker fashion, he first has to reattach the motor driver board and various sensors, but then he demos the car and its problem –  the video frame rate is very slow. We dive in with him and try to get some profiling using time.monotonic_ns(). He’s never done profiling before, so this is a big eye opener. He’s only processing one video frame every 4.3 seconds, using YOLO on a Pi 3, and yup, that’s the problem.  I suggest he change to gamut detection or a Pi 4.

Gamut Detection

If you’re not familiar with gamut detection, it’s one of the simplest of all computer vision techniques, so it’s easy to implement on slow processors and almost trivial to code. Basically, it’s “look for a color”.  If you want your robot to follow you, wear a lime green T shirt. Now the robot just has to look for lime green. Same for catching a ball or following a line. The algorithm is simple – convert each pixel to HSV, where hue corresponds to the direction around the color wheel,  saturation corresponds to how concentrated the color is, and value how bright. Brightness depends on the lighting, so you can throw value away and just set limits for H and S. Anything within those limits is part of our target. The box formed by those limits is our “gamut”.

There are a couple speedups you can apply as well. First, ask yourself how much resolution you need from the camera. If you only want to track a green T shirt that’s never less than 24 pixels on screen, turn the resolution down by a factor of six each way and look for four-pixel T shirts. You now have 1/36th as much data to process and your algorithm runs 36 times faster. If you can’t control the camera resolution, you can shrink the image or just sample every nth pixel. Second, you can often ask for a YUV or YIQ image from the camera. Discard Y and set your limits in IQ or UV coordinates. It’s about the same as HSV.

Joe’s eating this up – he’s had limited chances to talk with somebody else who is into computer vision. As we write this, he’s still trying with YOLO, but at lower resolution. If it doesn’t work he’ll try gamut detection. And it’s not his only project. Passenger carrying motorcycles called pikipikis are common here. A student has a project to enforce passengers wearing a helmet, and we fiddle with the student’s project.

The Dar es Salaam Scene

There’s other tech happening in Tanzania too. A few blocks away is [Ruta Electronics], a similar sugar cube sized shop developing smart meters. Everything from cases to PCB etching happens in the tiny shop. Downtown there are a few tech startups. There’s a fab lab, mostly oriented towards children. And on a quiet side street off the main drag, there’s a tiny shop with three guys who are hacking like crazy.

For us, we’ve had a chance to make a friend from a different culture and play with a robot car together — what could be better?  When you’re traveling, are you on the lookout for other hackers or hackerspaces? It’s worth the effort and brings our community together in a way that even the internet can’t.

Apple III Slows Down to Smell the Roses

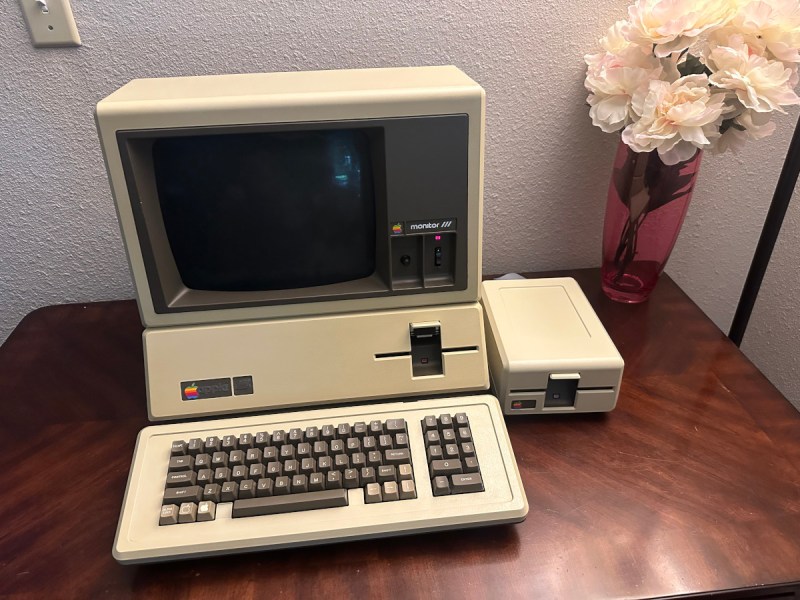
The most collectible items in the realm of vintage computers often weren’t the most popular of their era. Quite the opposite, in fact. Generally the more desireable systems were market failures when they first launched, and are now sought out because of a newly-appreciated quirk or simply because the fact that they weren’t widely accepted means there’s fewer of them. One of the retro computers falling into this category is the Apple III, which had fundamental hardware issues upon launch leading to a large recall and its overall commercial failure. [Ted] is trying to bring one of these devices back to life, though, by slowing its clock speed down to a crawl.

The CPU in these machines was a Synertek 6502 running at 1.8 MHz. With a machine that wouldn’t boot, though, [Ted] replaced it with his own MCL65+, a purpose-built accelerator card based on the 600 MHz Teensy 4.1 microcontroller in order to debug the motherboard. The first problem was found in a ROM chip which prevented the computer loading anything from memory, but his solution wouldn’t work at the system’s higher clock speeds. To solve that problem [Ted] disabled the higher clock speed in hardware, restricting the system to 1 MHz and allowing it to finally boot.

So far there haven’t been any issues running the computer at the slower speed, and it also helps keep the computer cooler and hopefully running longer as well, since the system won’t get as hot or unstable. This isn’t [Ted]’s first retrocomputing rodeo, either. His MCL chips have been featured in plenty of other computers like this Apple II which can run at a much faster rate than the original hardware thanks to the help of the modern microcontroller.

Custom Calculator Brings Us Back To The 70s

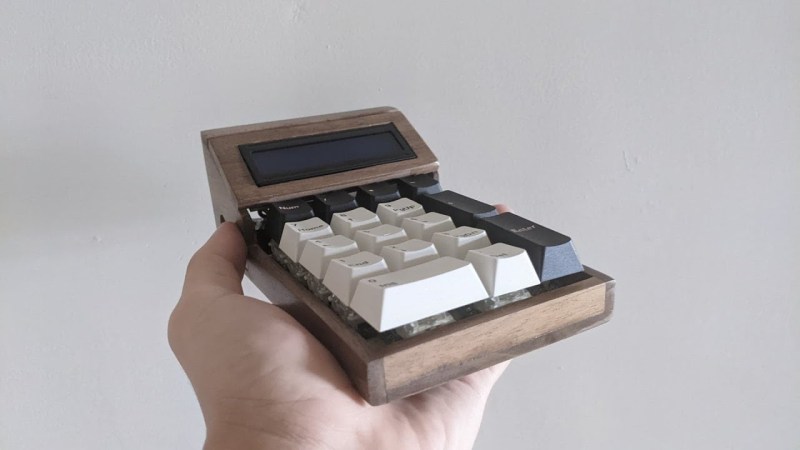
There are certain design aesthetics from every era that manage to survive the fads of their time and live throughout history. Ancient Greek architecture is still drawn upon for design inspiration in modern buildings, the mid-century modern style from the 60s still inspires various designs of consumer goods, and the rounded, clean looking cars from the 90s are still highly desirable qualities in automotive design. For electronics, though, we like this 70s-inspired calculator that [Aaron] recently built.

The calculator hearkens back to the days of calculators like the HP-29C with its large buttons and dot-matrix display. [Aaron] built the case out of various woods with a screen angled towards the user, and it uses a LCD display similar to those found in antique calculators. The brain of the calculator is an Arduino which fits easily into the case, and [Aaron] also built the keyboard from scratch with Cherry MX-style mechanical keys soldered together into a custom shape.

The software to run the calculator is fairly straightforward, but we are most impressed with the woodworking, styling, and keyboard design in this build. [Aaron] is also still ironing out some bugs with the power supply as it uses a DC-DC converter to power the device from a single lithium battery. For those who are more fond of early 2000s graphing calculators instead, be sure to take a look at this graphing calculator arcade cabinet.