Posts with «3d printing» label

Retrofit your old appliances with new controls
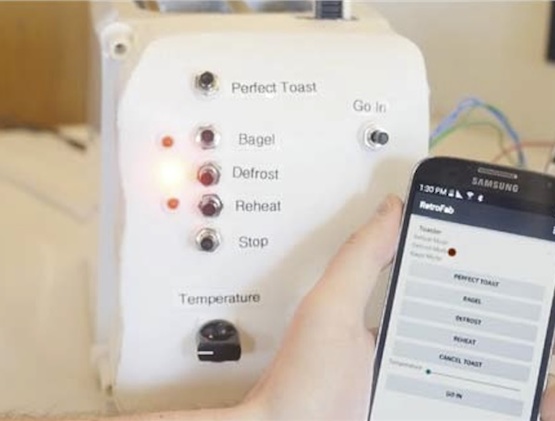
Unfortunately, home appliances aren’t a one-size-fits-all sort of thing. What works for some may not always work so well for others. With this in mind, Raf Ramakers and the Autodesk Research team have developed a system that will enable you to retrofit your everyday devices with new controls that better suit your needs. RetroFab provides even the most non-tech-savvy users with a design and fabrication environment through which they can easily repurpose their existing physical interfaces with the help of 3D scanning, printing and basic electronics.

We present RetroFab, an end-to-end design and fabrication environment that allows non-experts to retrofit physical interfaces. Our approach allows for changing the layout and behavior of physical interfaces. Unlike customizing software interfaces, physical interfaces are often challenging to adapt because of their rigidity. With RetroFab, a new physical interface is designed that serves as a proxy interface for the legacy controls that are now operated using actuators. RetroFab makes this concept of retrofitting devices available to non-experts by automatically generating an enclosure structure from an annotated 3D scan. This enclosure structure holds together actuators, sensors as well as components for the redesigned interface. To allow retrofitting a wide variety of legacy devices, the RetroFab design tool comes with a toolkit of 12 components.
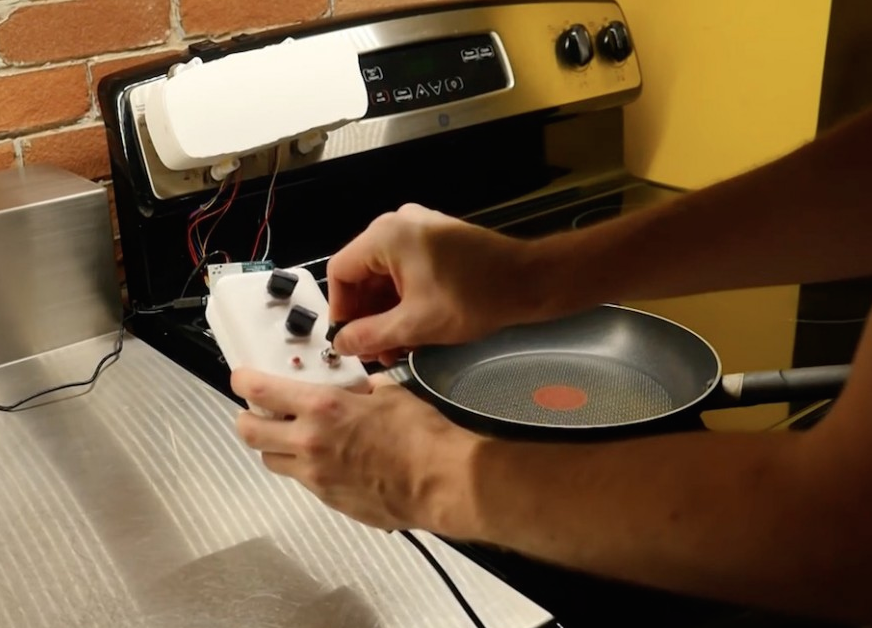
After loading the 3D scan, you can highlight and select the device’s controls on the model. The system then creates a 3D-printable rendering and offers redesign suggestions. From there, RetroFab automatically generates a housing that fits over the original interface and holds a series of actuators, motors, LEDs and other components, which are all connected to an Arduino.

The individual Arduino microcontrollers that control the enclosure structures run a generic firmware that handles the GPIO pins as well as the wireless communication. Even for retrofitted devices that do not intercommunicate, user input and sensor data from the retrofitted interface is first transmitted from the Arduino microcontroller to the central PC. This module then decides to turn on specific RetroFab actuators and sensors, controlled by the same or a different Arduino microcontroller. This approach makes it possible to change the behavior and interconnect retrofitted devices even after the design and fabrication is completed.

Using its accompanying mobile app, RetroFab also lets you easily interconnect and remotely control your gadgets — whether it’s setting the time on a retrofitted alarm clock or turning off a light switch right from your phone. You can read all about the project in its paper here, or watch the video below.

Can Your Really 3D Print a Working Robotic Lawnmower?

Need the lawn mowed? Print out a robotic lawnmower. Have a big yard? Print two?

Read more on MAKE

The post Can Your Really 3D Print a Working Robotic Lawnmower? appeared first on Make: DIY Projects and Ideas for Makers.

15 Fantastic Project Enclosures

Fight the drab tyranny of the beige box with these inspiring ideas for project enclosures

Read more on MAKE

The post 15 Fantastic Project Enclosures appeared first on Make: DIY Projects and Ideas for Makers.

Wirelessly Controlled 3D Printed Hand

Primary image

What does it do?

Simply using a hand from an opensource robot called Inmoov and controlling it through the use of a glove and XBees. The full size robot of the hand can be found at InMoov.fr


Cost to build

Embedded video

Finished project

Complete

Number

Time to build

Type

URL to more information

Weight

read more

Wirelessly Controlled 3D Printed Hand

Primary image

What does it do?

Simply using a hand from an opensource robot called Inmoov and controlling it through the use of a glove and XBees. The full size robot of the hand can be found at InMoov.fr


Cost to build

Embedded video

Finished project

Number

Time to build

Type

URL to more information

Weight

read more

New Project: 3D Print a Supersized Seven-Segment Clock

Building your own clock is practically a rite of passage as a Maker. 3D-print this Arduino-based desktop clock with a jumbo seven-segment LED display that glows from within.

Read more on MAKE

The post 3D Print a Supersized Seven-Segment Clock appeared first on Make: DIY Projects, How-Tos, Electronics, Crafts and Ideas for Makers.

Automating a bubble blaster with Arduino Micro


Thomas Renck is a coder and a maker. He went to Disneyland, saw a bunch of little kids having fun with bubble guns and realized that a bubble blaster is a sure way to measurably improve joy and happiness in life.

Back home, it took only two hours to create and add-on to automate the bubble blaster using a 3d printer, Arduino Micro and a servo:

On his blog you can find the tutorial, the sketch and the 3d files to make one yourself and bring more happiness in your life too!

A spider quadrobot built with Prusa and Arduino Pro Mini

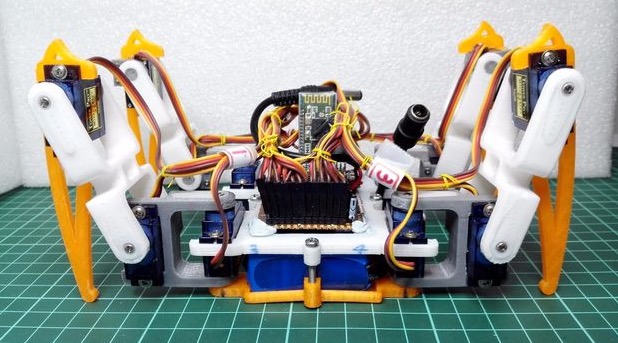
It takes 14 steps, a Prusa i3 3D printer and a lot of soldering to build Spider Robot v3.0, a quad robot running on Arduino Pro Mini.  That’s what told us  RegisHsu, a maker who shared his project’s tutorial on Instructables and the 3d printable files on Thingiverse.

It took 12 months of work to build the robot and it reached the fourth generation of  design, that you can explore on his blog  if you are interested in its history:

This is my first project for the 4 legs robot and it took me about 1 year development.
It is a robot that relies on calculations to position servos and pre-programmed sequences of legs. I’m doing this is because of it could be fun and educational for 3D design/printing and robot control.

The robot allows cool customizations like adding IR detection:

A DIY smartwatch designed by a kid for kids

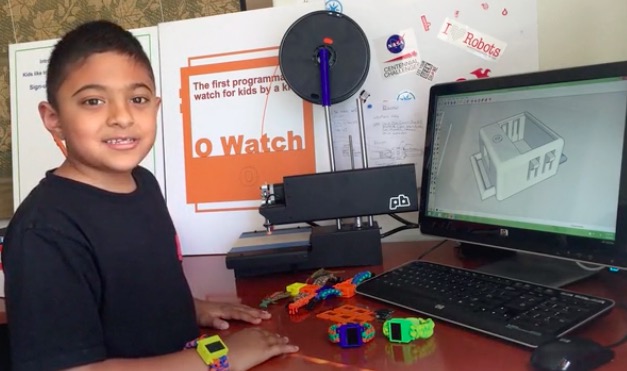
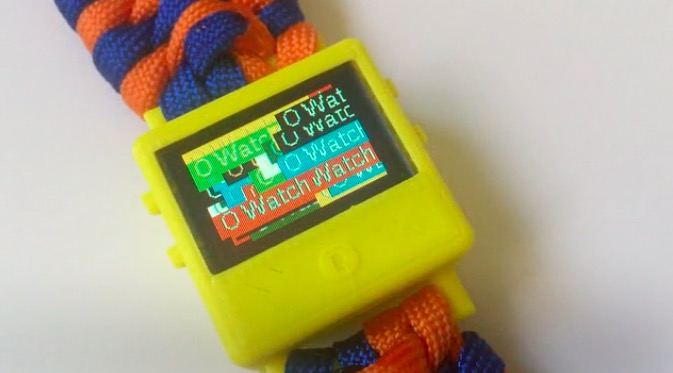
Omkar is a special 8 years old who created a wearable device called O Watch: an Arduino Zero-based smartwatch kit for kids. The project, recently kickstarted, allows young people to learn programming, 3D printing and a bit of craft while making their own smartwatch and customizing it. The kit will be released with a series learning tools including a kid-friendly website with easy tutorials, examples and a community to share creations.

He’s not new to DIY tech and learning as he’s been doing a few workshops to teach Arduino to other kids and likes it when they get excited about making Arduino projects. Omkar told us:

I was first interested in robots. But my dad got me started with projects that light up LEDs that were easier to learn and code myself. (ps: my dad did not let me get a robot kit at first :).

I decided to do a wearable project because there were many of them I saw in the news and I thought they were cool. I wanted to make a smartwatch so that I could wear it myself and share my project with my friends in school.

If you are a kid and are new to making, O Watch could be a great starting point as you’ll learn about coding, 3d printing, craft and also sharing. The Arduino IDE will be your  primary programming tool for the watch, the case can be 3D printed in a color of your choice and you’ll experiment on how to knot yourself a cool band to wear it.

What are you waiting for? You have just a few days to back the project on Kickstarter and have an O Watch delivered to your home!

Arduino Blog 08 Sep 23:03

3D Print Your Own Stepper Motor

Learn how one Maker created his own stepper motor using a 3D printer, an Arduino, and a few materials picked up from the hardware store.

Read more on MAKE

The post 3D Print Your Own Stepper Motor appeared first on Make: DIY Projects, How-Tos, Electronics, Crafts and Ideas for Makers.