Posts with «arduino» label

Physics class progress

The physics class that I’m doing with my son and another home schooler is going a bit slowly.  The other student couldn’t make it again this week (Stanford early admission deadlines, and he needed the time to polish his application essays).

My son and I compared answers to the Chapter 2 problems I’d assigned (see Physics Lab 2).  We’d each made some careless errors (in one, I’d neglected to take a square root, though I’d written the right formula, in another, I’d forgotten to add the sideways movement during acceleration, in a third, my son had forgotten to divide by 2 at one point).  In short, neither of us were doing “A” work—we knew what we were doing, but were being inexcusably sloppy in the computations (me more so than my son). I’ll have to do better on Chapter 3.

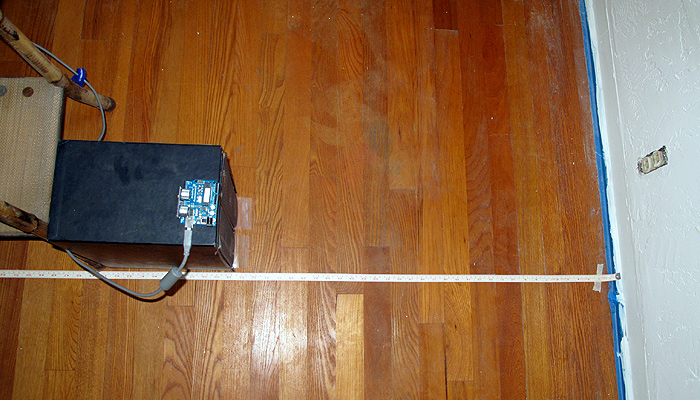
I think that I won’t assign any exercises in Chapter 3 this week, to give the other student a chance to catch up.  Instead, I’ll ask my son to finish the data-acquisition code for the ultrasonic rangefinder.  I wrote some simple code running on the Arduino for gathering the data, and he was going to write a Python program (using PySerial) to record the data and output it in a format suitable for plotting with gnuplot.

Our goal is to finish at least the Newtonian mechanics (Chapters 1–13 of Matter and Interactions) before the AP Physics C exam (afternoon of 14 May 2011), which gives us time for a little over 2 weeks per chapter.  That seems like a fairly leisurely pace right now, but perhaps the chapters get harder.  If we finish earlier, it might be worthwhile to do some timed practice with released tests, which are available at AP Central – The AP Physics C: Mechanics Exam. The Mechanics part of the exam is only 90 minutes (it is followed by the other half of Physics C, which we probably will not get to, unless we double our pace). I think that I’ll take the exam along with the two students, risking the embarrassment of them doing better than me.

Assignment for this week:

  • Finish the assignments from the previous posts (the text about how ultrasonic rangefinders work, the problems and program from Chapter 1, the problems and program from Chapter 2).
  • For my son only: get the data acquisition program working, so that we can do a lab recording something actually moving.  (We might try video recording it at the same time and comparing Tracker with the ultrasonic rangefinder as a data source.)
  • Read Chapter 3.

Arduino code for recording from rangefinders:

// Kevin Karplus
// 30 Sept 2011
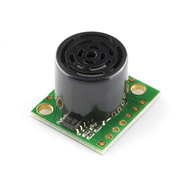
//  Using the Ping))) or maxbotix ultrasonic rangefinder
//  to acquire (time_stamp, time_of_flight) pairs and send them over a
//  serial line to a laptop.

// From the documentation:
//   Bidirectional TTL pulse interface on a single I/O pin
//    can communicate with 5 V TTL or 3.3 V CMOS microcontrollers
//   Input trigger: positive TTL pulse, 2 μs min, 5 μs typ.
//   Echo pulse: positive TTL pulse, 115 μs minimum to 18.5 ms maximum.

// As a kluge, the Ping))) is plugged into pins GND,13,12.
// The output pin 13 can provide 40mA of current to the Ping))),
// which only requires about 35mA.

const uint8_t Ping_pin=12;
const uint8_t Vdd_pin=13;

const uint8_t Maxbotix_pin=2;

// speed of sound in air in m/s, as a function of temperature
// in degrees Celsius.
// BUG: currently humidity is ignored, but the speed of sound
//      is higher in more humid air.
inline float speed_sound_t(float temp_C, float relative_humidity=0.0)
{
  // return 331.3 + 0.606 *temp_C; // linear approx
    return 20.0457 * sqrt(temp_C+273.15);
}

float temp=20.0;  // temperature in degrees Celsius
float speed_sound;  // estimated speed of sound in meters/sec
float half_speed_cm_microsec;  // half the speed of sound in cm/microsecond

void setup()
{   pinMode(Vdd_pin, OUTPUT);
    digitalWrite(Vdd_pin, HIGH);
    pinMode(Ping_pin, OUTPUT);
    digitalWrite(Ping_pin, LOW);

    pinMode(Maxbotix_pin, INPUT);
    Serial.begin(115200);

    speed_sound=speed_sound_t(temp);
    half_speed_cm_microsec = speed_sound *0.5 * 100. * 1.e-6;
    Serial.print("Assuming temperature of ");
    Serial.print(temp);
    Serial.print(" gives speed of ");
    Serial.print(speed_sound);
    Serial.println("m/s");

    Serial.println("Arduino Ready");

}

// read_ping returns the time in microseconds for one echo pulse
// There seems to need to be a 1 msec delay needed between read_ping()
// calls (200 microseconds does not seem to be enough).
//
// Reads are very unreliable if the target is close than about 8cm.
unsigned long read_ping(void)
{   // request a reading
    digitalWrite(Ping_pin, HIGH);
    delayMicroseconds(10);
    digitalWrite(Ping_pin, LOW);
    // Now there is a 750 microsecond hold off
    pinMode(Ping_pin, INPUT);

    unsigned long tof= pulseIn(Ping_pin, HIGH);
    pinMode(Ping_pin, OUTPUT);
    digitalWrite(Ping_pin, LOW);
    return tof;
}

// read_maxbotix returns the time in microseconds for one echo pulse
//
// Reads are very unreliable if the target is close than about 16cm,
// but seem more consistent than the Ping))) for longer distances.b

unsigned long read_maxbotix(void)
{
    return pulseIn(Maxbotix_pin, HIGH);
}

bool send_Ping_data=0;
bool send_Maxbotix_data=0;
void loop()
{
     if (Serial.available())
     {  char c=Serial.read();
        switch(c)
        {  case 'b':
            send_Ping_data=1;
            send_Maxbotix_data=0;
            break;
           case 'm':
             send_Ping_data=0;
             send_Maxbotix_data=1;
             break;
           case 'e':
             send_Ping_data=0;
             send_Maxbotix_data=0;
             break;
        }
     }

     // For both sensors, report when the measurement was made,
     // the time of flight for the pulse to go and return,
     // and the computed distance for
     // Both are reported in milliseconds.
     // The time of measurement is corrected by half the time of flight,
     // so that it approximates the time at which the pulse bounced off the object.
     if (send_Ping_data)
     {   unsigned long time_of_flight=read_ping();
         unsigned long when_measured=micros();
         delay(1);   // wait a millisecond to let sensor recover
         Serial.print(when_measured-time_of_flight/2);
         Serial.print("\t");
         Serial.print(time_of_flight);
         Serial.print("\t");
         Serial.println(time_of_flight*half_speed_cm_microsec);
     }
     if (send_Maxbotix_data)
     {   unsigned long time_of_flight=read_maxbotix();
         unsigned long when_measured=micros();
         Serial.print(when_measured-time_of_flight/2);
         Serial.print("\t");
         Serial.print(time_of_flight);
         Serial.print("\t");
         Serial.println(time_of_flight*half_speed_cm_microsec);
     }

}


Tagged: AP physics, Arduino, high school, physics, rangefinder, Tracker, ultrasonic sensor

DIY Sonar for the Blind

This is one of those simple concepts which makes you think “Why didn’t I think of that?”  The entire sonar unit is attached to a wearable glove and as the user sweeps their arm back and forth, the device can detect anything from one inch to 10 feet in size.

Two servomotors apply pressure to the top of the hand when obstructions are detected. The closer the object is, the more pressure is applied. The response time is in milliseconds, allowing a blind person to navigate easily around obstacles or find items on a table, for example.

Top Sonar Projects

Hack n Mod 06 Oct 18:59
arduino  blind  radar  sensor  sonar  

Physics Lab 2

The Physics Lab 1 post described a first experiment using ultrasonic rangefinders.  The students have not really done the Wikipedia-style writeup of how an ultrasonic rangefinder works that I wanted.  I’m not sure whether to push for that or to let it slide—it is important to develop technical reading and writing skills, but they have not yet gotten to the point in the physics course where they could actually derive the speed of sound equation.  The speed of sound in a gas is only vaguely referred to in Chapter 12 of Matter and Interactions, though there is quite a bit on the speed of sound in a solid.

I ended up buying two different ultrasonic rangefinders:

Both of these rangefinders provide a pulse-width output that can be measured with the Arduino pulseIn function call.  The measurement is provided in microseconds, but seems to have a slightly coarser resolution, with measurements spaced about 5 microseconds apart.  To convert round-trip time into round-trip distance, we have to multiply the time in seconds by the speed of sound in meters/second.

There is an online calculator for the speed of sound as a function of temperature, pressure, and humidity, which gives a citation for the calculation (from the Journal of the Acoustical Society of America), but does not give a clear statement of calculation actually used.  The same calculator (at least citing the same source) is also available from UK’s National Physical Lab.  I used a simpler approximation (without humidity or pressure corrections) from Wikipedia’s Speed of Sound article:

On Friday, we did the lab itself:

  1. Hook up the rangefinder to the Arduino and program the Arduino to keep taking measurements and reporting them to the serial line. (I wrote the Arduino program myself, but my son is working on a Python program to record a series of measurements from the Arduino, which will be needed for the next lab.)

    The setup for Lab 1. The Ping sensor is plugged directly into the Arduino, which sits on top of a copy of the OED, to get it far enough from the floor that we don't detect the floor rather than the wall.

  2. Calibrate the sensor by placing it at carefully measured distances from a hard wall and recording the readings.  Repeat at several different distances.  (Record temperature, humidity, and barometric pressure, if possible.)  Here are the measurements made by the students, taking just the midpoint of the range observed:

# MaxBotix LV-MaxSonar-EZ Calibration
# Distance (centimeters)    Delay Time (microseconds)
10                818
20                1075
30                1515
40                2299
50                2887
60                3470
70                4060
80                4645
90                5231
100               5815

# Parallax Ping))) Sensor Calibration
# Distance (centimeters)    Delay Time (microseconds)
10                735
20                1215
30                1800
40                2405
50                3015

They had a lot of trouble getting consistent readings for the Ping))) sensor.  I think that this may have been due to trying to take the measurements without pausing enough between them, so I added an extra millisecond delay after each Ping))) measurement, and my son and I collected new data today.  We modified the setup slightly, so that instead of using a tape measure on the floor, we measured from the wall to the front of the Ping))) sensor with a steel tape measure.  Here are the measurements we made:

# Ping))) calibration data
# 1 October 2011
# Arduino report several (usually 6) measurements for each distance
# We recorded the actual distance, the minimum and maximum reported time of flight,
# and the minimum and maximum distance reported by the Arduino.
# The reported distance assumed 343.21m/sec speed of sound, and that the time of flight
# was twice the distance.
#distance(cm)  min_tof(usec) max_tof(usec) min_cm max_cm
10    616    624    10.57    10.71
20    1225    1230    21.02    21.11
30    1786    1818    30.65    31.20
40    2385    2391    40.93    41.03
50    2939    2962    50.44    50.83
60    3540    3542    60.75    60.78
70    4065    4089    69.76    70.17
80    4610    4729    79.11    81.15
90    5240    5265    89.92    90.35
100    5833    5858    100.10    100.53
110    6444    6446    110.58    110.62
120    7018    7050    120.43    120.98
130    7575    7582    129.99    130.11

These measurements were fairly consistent (though the variation is larger than I’d like).  I did notice that the Ping))) sensor could get fooled rather badly when an object disappeared from its field of view.  For example, when pointing the sensor at the ceiling from my benchtop, the distance is reported as a fairly consistent 177±0.5cm.  Waving an object in front of the sensor got reasonable readings, but removing the object caused the sensor to get stuck reporting 50.5±1cm, though there was nothing at that distance.  Sometimes the sensor returned to the 177cm reading, sometimes to the 50cm reading, and I’ve not been able to figure out what causes the difference.  The MaxBotix sensor has different dropout problems, sometimes missing the echo and reporting a very long distance, but generally seems to be a little more stable.


What to do before next week’s lab

  1. Plot the sensor readings vs. the actual distance.
  2. Do linear regression to get a predictor of actual distance given sensor reading.  (Caveat: need to plot distance vs. readings rather than readings vs. distance to get best fit for calibration.)  What is the relationship between the speed of sound and the slope of the line?
  3. What is the accuracy and precision of the measurements?  What range of distances can be measured? Is the accuracy better expressed in terms of absolute error (±5mm, for example) or relative error (±1%, for example)?
  4. Fix the Arduino program to get better estimates of the distances from the sensors, if possible.
  5. Get a recording program working to record a series of measurements of a moving object.

What to do in next week’s lab

  1. Redo the Maxbotix calibration the same way we redid the Ping))) calibration, collecting min and max time of flight and using better distance measurements.
  2.  Use either the Ping))) or the Maxbotix sensor to record the movement of a simple object away from the sensor and plot the motion.
  3. Write a Vpython program that simulates the motion, using only a few constants, not a table of positions or velocities (that is, approximate the motion as constant velocity or constant acceleration).  The simple object could be a small vehicle made from Lego (motorized or not), a mousetrap car, a rolling ball, a falling ball, or whatever else is easy to measure.

Other homework

  • Read Chapter 2.
  • Work problems 2P38, 2P40, 2P62, 2P63, 2P66, and 2P69.
  • Do computational problem 2P72.

Tagged: Arduino, engineering education, Matter and Interactions, physics, rangefinder, science education, ultrasonic sensor

Physics Lab 1: ultrasonic rangefinders

We had the first official meeting of the home-school physics class today.  It was just my son and me. Originally we were going to have a second student, but he was busy with college application essays, and asked if he could start next week instead.  My son compared his and my solutions to problems 1P89, 1P97, 1P98, and 1P117 (all the non-computational problems from Chapter 1 of Matter and Interactions).  We got all the same results, but I had left out the units on one of the intermediate steps on one problem—a bad habit that I will try to break, as I agree with John Burk that one should tell the full story of the number, throughout a computation.

In Physics Lab 1, I outlined the first experiment for my home-school physics students and me to do, using an ultrasonic rangefinder.

Here is what I proposed:

  1. Hook up the rangefinder to the Arduino and program the Arduino to keep taking measurements and reporting them to the serial line.
  2. Calibrate the sensor by placing it at carefully measured distances from a hard wall and recording the readings.  Repeat at several different distances.  (Record temperature, humidity, and barometric pressure, if possible.)
  3. Plot the sensor readings vs. the actual distance.
  4. Do linear regression to get predictor of actual distance given sensor reading.  (Caveat: need to plot distance vs. readings rather than readings vs. distance to get best fit for calibration.)
  5. Modify Arduino code to use the calibration parameters to provide better distance measurements.
  6. Re-calibrate using new code.  What is the accuracy and precision of the measurements?  What range of distances can be measured? Is the accuracy better expressed in terms of absolute error (±1cm, for example) or relative error (±5%, for example)?
  7. Open-ended: Experiment with detecting different targets (maybe flat targets from wall size down to the size of a quarter, maybe targets of different materials, maybe spherical targets).  What effect does target size, shape, material,  … have on range and accuracy of the measurement?

What we actually did:

My son and I each picked one of the rangefinders (I bought a Maxbotix LV-MaxSonar-EZ2 and a Ping))) sensor), and separately wrote Arduino code to read them. He chose to use the Maxbotix in the pulse-width mode, which is uncalibrated, but which has the greatest resolution.  I used the Ping))) sensor, which has a similar pulse-width mode.  The biggest difference is that the Ping))) needs to be triggered, while the Maxbotix repeats the measurement several times a second.  He had to solder a header onto the Maxbotix in order to connect it up, while I could cheat a little and plug the Ping directly into the Arduino board.  We could probably arrange to have both sensors on the Arduino at once, but have not tried that.

Both of us failed to get busy-wait loops with digitalRead() to work, but we both managed to get pulseIn() to work.  He just reported time in microseconds (then he had to go off to his improv class).  I spent a little more time adding a computed speed of sound (with temperature correction, but not humidity correction), to report distances in cm.  The repeatability of the Ping))) seems pretty good: about ±1mm, but I’ve not tried to calibrate the accuracy yet.  I don’t know whether the limit on the resolution is the coarseness of the pulseIn() measurement of time or variation in the pulse width output by the sensor.

For next week:

My son still needs to do more work on the prelab writeup about how an ultrasonic rangefinder works, so I hope that both students will have drafts of that for next week.  Also assigned for next week is a Vpython programming assignment (Exercise 1p123).

In lab next week we’ll compare our programs for 1p123, then do some calibration experiments with the rangefinder, or try using it to record a series of time and distance measurements for a moving object, or try learning to use Tracker to do video analysis.


Tagged: Arduino, engineering education, Matter and Interactions, physics, rangefinder, science education, Tracker, ultrasonic sensor

New board designed

I’ve just sent a new set of boards for fab.  The HexMotor rev2.3 boards have several new features: LEDs for +5v and +6.25v, a reset button, 16-bit shift register instead of 8-bit, servo outputs connected to pins 13, 7, 2, 9, 10 (rather than to the pins used for PWM).  The new board should be able to do either 6 PWM motors or 4 PWM motors, 5 servos, and 2 non-modulated reversible motors.

I’m also making some breakout boards for the MPXHZ6250A pressure sensors from Freescale Semiconductor, which will require doing some SMD soldering.  At least the design uses gull-wing pins, which can (supposedly) be hand soldered.  One of the breakout boards also has a place for mounting an ADXL335 accelerometer, which may be more difficult to solder.  I don’t think I want to spend the money for a hot-air rework station, and I’m a bit dubious about my ability to solder using a toaster oven.

The pressure sensors are tiny!  My original suggestion to the robotics club was to drill a hole in the dry box and superglue the pressure sensor to the inside of the box (after the pressure sensor had been attached to the breakout board, of course).  Now I’m not so sure that there will be enough glue area to hold firmly enough.  Perhaps a dab of some sealant on the outside of the box might help, if we can keep from plugging the hole in the sensor.

The breakout board that I think that the robotics club will end up using puts a pressure sensor on one side and headers for a piggyback ADXL335 breakout board on the back.  that way there only need to be one set of wires for connecting the analog inputs and power to the sensors.

One limitation of the Arduino for use with this combination of sensors is that the accelerometer is a 3v part and the pressure sensor is a 5v part. We’ll have to set up the analog-to-digital converter on the Arduino to have a 5v range, which reduces the precision of the acceleration readings.

I’ve also bought some other sensors (not for the underwater vehicle, but for physics class and dry robotics): a couple of ultrasonic rangefinders.  More on those in a separate post, after I’ve had a chance to play with them.


Tagged: accelerometer, Arduino, H-bridge, motor controller, pressure sensor, Printed circuit board

Arduino Musical Note Recognition – Pushing the limits.

Second project based on Arduino Uno and FFT code.    (First one : Project 1.)
Short description ( EDITED: Project stopped. I lost my inspiration and working on visual recognition now, I decided to publish a code, so someone else could find it useful and continue research. ).

Main array size is 1024 bytes, real / imaginary 512 / 512, output 256 bins (only half real part, other half is mirror).  Sampling rate 4 kHz, upper note B6 (1975.5 Hz) on yellow line – right side led, lower note C3 (130.8 Hz) on red line – left side led.  Frequency resolution is approximately 7.8 Hz per bin. Processing and sampling are running in parallel. Sampling array size is 256. After data captured (256 x 0.25 msec = 64 msec) they transfered to processing array 1024, missing 256 real samples is “zero padded”, and sampling continue w/o interruption.  I did zero padding on a purpose to get “response time” of led matrix as fast as possible, so real-time 1/16 notes could be visually distinguished the same time,  as they played.

After computational cycle is completed (~36 msec), main program executes “cognitive core function” to differentiate between notes / tones, that have to be displayed on LED matrix.

 In order to minimize error rate of this process, Masking Shadow Theory (MST) was developed. Masking shadow for each note is calculated in several steps and result is compared with notes magnitude in the cycle. If magnitude is less than shadow, than led corresponding to this note wouldn’t  lights up. There are five steps for now, but as I say, work in progress. 
Step 1 (masking shadow 0):  noise floor, which is common for all notes. 
Step 2 (masking shadow 1):  shadow from neighboring notes, that includes 8   notes on left and right side, in inverse proportion to their distances. 
Step 3 (masking shadow 2):  shadow from the note, which is located 1 octave below. Or in other words, cross check if current bins value isn’t second harmonic from sounding note 1 octave below  it. 
Step 4 (masking shadow 3):  similar to step 3, the only difference is, cross check if current bin (note) isn’t third harmonic from sounding note below  it. 
Step 5 (masking shadow 5):  similar to step 3 and 4,  cross check if current note isn’t fifth harmonic from sounding note below  it.

Masking shadow is multiplied by notes specific coefficients after steps 3 – 5, to accommodate significantly richer spectral content for lower octaves.  Formula for calculation of the coefficients, is the trickiest   part of all project. What I’ve discovered, coefficient not just varying between notes / tones, they dynamically varying during “life-time” of the tone.

25 Sept. 2011 

There are two variables have been considered: speed, octave range. Third one, “not technical” – is a price for the project. 
 Octave range is defined by  RAM memory available on chip. 2K on UNO. As maximum processing array size is must be power of 2 ( FFT Radix-2 ), array couldn’t be more than  1024 bytes, next value – 2048 is size of all RAM, that obviously couldn’t be taken. Size of array defines maximum quantity of frequency bins at the output 1024 / 4 = 256. Divided by 4 as there is real / imaginary part, and only half real part is present data. What is interesting, that musical octave is nothing else than doubling of the tones frequency, so it follows binary arithmetic rules… If I will count from high side, the upper octave would occupied half of all 256 bins, from bin 256 to bin 128. Simply because frequency / musical tone spaced logarithmically (LOG_2), and bins spaced equally. Next octave takes half what left over, from bin 128 to bin 64. Third octave 64 to 32, and fourth 32 to 16. Can I go more down ? No. There are 12 notes in each octave. It means, that after fourth octave counting down , I arrived to location where bins and tones spaced almost in sequence, bin 16 – C3, bin 17 – C3#, bin 18 – D3. Well there is four more ( 15, 14, 13, and 12 ), but it doesn’t change much, as it only 1/3 of octave and only would complicate multiplexing LED display.
This is why variable octave range = 4. Summing up, increasing octave range by 1 ( to 5 octaves ) would require double memory size (2K processing array, still possible with chip 4K), by 2 ( to 6 octaves ) – four times more memory (4K processing array).

Arduino mega board has 8K RAM, would it be better to design project with it? In first, it cost more money. In second, it has the same CPU performance, and as you will see below, to have more memory w/o faster CPU doesn’t make any sense. CPU wouldn’t be able to process bigger volume of data in time.

Now lets have a look at speed variable. Following math (and design itself), is greatly depends on it. In order to get at least 1/16 note to be visually “alive”, all cycle ( sampling , pre-processing, FFT, post-processing ) has to be completed for less than 64 msec. My impression is, when timing a little bit longer, LED display looks like it shows something, that was played last Saturday night. Invisible real-time connection between “light” and “music” become broken.
Octave range variable ( 4 octave to be specific ), especially low notes starting from C3, begging for 8 Hz resolution, as it equals to distance between C3 and C3#. And consequently, for 128 msec sampling frame duration. So, there is a contradiction. To solved this , zero padding was introduced, which help to keep sampling window down to 64 msec, the same time frequency resolution not very far from 8 Hz. To make real-time life show, sampling must continue w/o interruption. Even more, it has to be “overlapped”, as pre-processing (windowing) would cut off beginning and ending of the sampling pull. All three other functions ( FFT, pre- and post-processing ) have to go in parallel and must be completed in the same time frame 64 msec. Arduino platform has 8-bit microprocessor, with low horse power engine under hood. This is why 8-bit math was selected instead of 16-bits ( which would save me a lot of troubles ). Troubles, I’m talking about, are very low dynamic range when integer math and 8 – bit comes together in FFT. Integer math, which gives nice time performance, puts really hard constrain on dynamic range, just because it performs “scaling” before and after every “butterfly”. And every scaling procedure brings in rounding error, which grows enormously, as there are 2304 butterfly (9216 round operation) for N = 512 FFT. Special attention must be payed, to keep rounding error under control, the same time not to increase calculation time too much or integer math would not make any sense. What I find out, there is  an excellent algorithm to make “symmetrical” 1/2 bit rounding, but it almost doubles calculation FFT timing, which I obviously, could not afford. So, I choose other path, to increase dynamic range. Compression algorithm on the input data. The easiest way to do it, is “clipping”. Set couple lines in the code:
             if ( x[i] >  127 )  x[i] =  127; 
             if ( x[i] < -127 )  x[i] = -127; 

and all good. Not quite. It will do a great job for any other signal (vibration from accelerometer for example), except music…..
Clipping generates a very high level of harmonics, and ones again , it couldn’t be afford, as it just undermine basic idea of the project – MUSICAL note recognition.
 
 Summary: Scaling extends dynamic range of integer FFT on 24 dB ( 4 bits ).

8- bit FFT dynamic range is +36 dB;
scaling                               +24 dB;
noise                                 -   3 dB;     
———————————————————–
Overall                                 57 dB.   


Link to download a scketch:


Arduino_Musical_Notes_Recognition


Physics Lab 1

I asked physics teacher John Burk for advice on putting together labs for homeschooling my son in calculus-based physics using the Matter and Interactions book (see School decisions part 3 on the decision to homeschool).  He was kind enough to pass on my request to the readers of his Quantum Progress blog: The ideal lab experience for a homeschooled student.  He also gave me a suggestion for a piece of lab equipment we could use for a number of experiments in Newtonian mechanics: an ultrasonic rangefinder.

This post is my first attempt at a physics lab assignment for my son. (Note: we are also hoping to use tech writing this year to satisfy some of his English requirements, so the assignment is a bit heavier on the writing than might otherwise be appropriate for a physics class.)  The exploration in this lab is more engineering than physics, but familiarity with measuring tools is a good place to start, I think.

I welcome feedback and suggestions, particularly from those who have taught physics!

Lab 1: ultrasonic range finder

Prelab

Research how an ultrasonic range finder works (note: as of 25 Aug 2011, the Wikipedia article is a terrible stub—other sources will be needed).

Write: Write a paragraph or two explaining how an ultrasonic rangefinder works.  This should be at a reading level and level of detail suitable for replacing the current Wikipedia stub. Explain what determines the precision, accuracy, and range of the range finder.  How frequently can it measure the range? How is the speed of sound involved?  What does that depend on … ? Why do some have one transducer and others have two?  Audience: new robotics club members (technically interested high school students without prior knowledge of physics or electronics).

Bonus audience: if the writeup is good, it can replace the current Wikipedia stub.

Read the product information (and data sheets when possible) for at least 3 different (cheap) range finding modules like the following three four (added one more 1 Sept 2011):

Choose one of the range finders for us to buy.

Write: justify the choice in writing, doing a comparison of the advantages and disadvantages of each choice.  Give URLs as citations for data used in making the choice.

Sketch out in pseudocode the program needed to read the sensor on the Arduino using a simple busy loop.  What will determine the precision and sampling rate of the measurements?  What will the code do if there is no object in range of the sensor?

Advanced option: sketch out pseudocode for using interrupts instead of a busy loop.

The Lab Proper

  1. Hook up the rangefinder to the Arduino and program the Arduino to keep taking measurements and reporting them to the serial line.
  2. Calibrate the sensor by placing it at carefully measured distances from a hard wall and recording the readings.  Repeat at several different distances.  (Record temperature, humidity, and barometric pressure, if possible.)
  3. Plot the sensor readings vs. the actual distance.
  4. Do linear regression to get predictor of actual distance given sensor reading.  (Caveat: need to plot distance vs. readings rather than readings vs. distance to get best fit for calibration.)
  5. Modify Arduino code to use the calibration parameters to provide better distance measurements.
  6. Re-calibrate using new code.  What is the accuracy and precision of the measurements?  What range of distances can be measured? Is the accuracy better expressed in terms of absolute error (±1cm, for example) or relative error (±5%, for example)?
  7. Open-ended: Experiment with detecting different targets (maybe flat targets from wall size down to the size of a quarter, maybe targets of different materials, maybe spherical targets).  What effect does target size, shape, material,  … have on range and accuracy of the measurement?

Tagged: Arduino, engineering education, Matter and Interactions, physics, rangefinder, science education, ultrasonic sensor

Poor Man's Colour Detector (Part 2) - The project

In this project we will be detecting the colour of 3 different Mega Blok colours (Red, Yellow and Green). We will be using an Arduino UNO connected to  2 LEDs (one Yellow and one Red LED) as light detectors, and an RGB LED to illuminate the subject. We will use a Photocell to account for varying ambient light levels. 

The signals from the LED light sensors will be sent to a Processing.org program via a Serial command. The computer program will make use of my Neural Network to classify the pattern of results and hopefully provide the correct colour "answer". The program should change the colour of the computer screen background to coincide with the colour of the Mega Blok.

The Video


Parts Required:

  • Arduino UNO...........x1   
  • Red LED .................x1
  • Yellow LED.............x1
  • 330 Ohm resistors... x 5  (for the LEDs)
  • Photocell .................x1
  • 10K Ohm resistor....x1   (for the Photocell)
  • Around 11 wires and a Breadboard (or two) to put it all together


Here is the Fritzing Sketch:   (made with Fritzing)


The Arduino Code

Load the following code into the Arduino.


arduino code Arduino: Colour Detector

01
02
03
04
05
06
07
08
09
10
11
12
13
14
15
16
17
18
19
20
21
22
23
24
25
26
27
28
29
30
31
32
33
34
35
36
37
38
39
40
41
42
43
44
45
46
47
48
49
50
51
52
53
54
55
56
57
58
59
60
61
62
63
64
65
66
67
68
69
70
71
72
73
74
75
76
77
78
79
80
81
82
83
84
85
86
87
88
89
90
91
92
93
94
95
96
97
98
99
100
101
102
103
104
105
106
107
108
109
110
111
112
113
114
/* Define the pin for the PhotoResistor */
#define PhotoR_Pin 0

/* Define the pins for the Red LED Sensor */
#define Red_LED_Sensor_POS 4
#define Red_LED_Sensor_NEG 5

/* Define the pins for the Yellow LED Sensor */
#define Yellow_LED_Sensor_POS 7
#define Yellow_LED_Sensor_NEG 8

/* Define the pin for the RGB LED torch */
#define RGB_LED_RedPin 11
#define RGB_LED_GreenPin 10
#define RGB_LED_BluePin 9

/* Controls the brightness of the RGB LED */
int intensity=255;


/* Define the maximum cycles/time allowed for each LED to capture light */
long max_darkness=80000;


void setup(){
/* Setup the RED LED Sensor */
pinMode(Red_LED_Sensor_POS,OUTPUT);
digitalWrite(Red_LED_Sensor_POS,LOW);

/* Setup the YELLOW LED Sensor */
pinMode(Yellow_LED_Sensor_POS,OUTPUT);
digitalWrite(Yellow_LED_Sensor_POS,LOW);

/* No need to setup the RGB LED Pins */

/* Turn on Serial Protocol */
Serial.begin(9600);
}

void loop()
{
byte byteRead;

/* check if data has been sent from the computer: */
if (Serial.available()) {

/* read the most recent byte (which will be from 0 to 255): */
byteRead = Serial.read();

if(byteRead==0){

/* Turn off if the byte Read was 0 */
set_RGB_LED(0,0,0,false);

}else{

/* set the brightness of the LED and then take readings: */
set_RGB_LED(0,0,0,false);
photoR_Read();
set_RGB_LED(0,0,0,true);
set_RGB_LED(intensity,0,0,true);
set_RGB_LED(0,intensity,0,true);
set_RGB_LED(0,0,intensity,true);
}
}
}

void photoR_Read(){
int ambiLight = analogRead(PhotoR_Pin);
ambiLight = map(ambiLight, 0, 900, 0, 50);
ambiLight = constrain(ambiLight, 0, 50);

/* Print the Ambient light level to the serial port */
Serial.println(ambiLight);
}

void set_RGB_LED(int redInt, int greenInt, int blueInt, boolean takeReadings ){
/* set the brightness and colour of the RGB LED: */
analogWrite(RGB_LED_RedPin, redInt);
analogWrite(RGB_LED_GreenPin, greenInt);
analogWrite(RGB_LED_BluePin, blueInt);

/* If takeReadings is true - then take Readings. */
if(takeReadings){

/* Read the amount of Yellow light */
read_LED('Y', Yellow_LED_Sensor_NEG);

/* Read the amount of Red light */
read_LED('R', Red_LED_Sensor_NEG);
}
}

void read_LED(char LED_Colour, int LED_Pin){

/* Charge the LED by applying voltage in the opposite direction */
pinMode(LED_Pin,OUTPUT);
digitalWrite(LED_Pin,HIGH);

/* Read the amount of Light coming into the LED sensor */
long darkness=0;
int lightLevel=0;
pinMode(LED_Pin,INPUT);
digitalWrite(LED_Pin,LOW);

while((digitalRead(LED_Pin)!=0) && darkness < max_darkness){
darkness++;
}

lightLevel=((max_darkness-darkness)+1)/80;

/* Print the light level to the serial port */
Serial.println(lightLevel);
}


The Processing Code:

The processing code is very long:
Please visit this link to copy and paste the code into your Processing sketch.
http://www.openprocessing.org/visuals/?visualID=34210

Make sure to select "Source Code" when you get there: (as displayed below)


If you have any problems with accessing the code - please let me know in the comments section of this blog.


This sketch utilises a simple feed forward Neural Network (that I developed from scratch). For more detailed information about this neural network please navigate through my previous blog postings.

Neural Network


So there you go, a simple idea, a simple outcome, and a lot of "stuff" happening in the background.
I am sorry. This project is not basic, but hopefully someone out there will get some use out of it.

Have fun !

ScottC

Makers Factory Meetup report

I went to the  Santa Cruz New Tech Meetup on Friday 12 Aug 2011 to find out more about the Makers Factory that is starting in Santa Cruz in November.  (I blogged about the Makers Factory already.)  Details about the event are on the meetup web page.

At the meetup they confirmed that they will not be getting the sort of expensive shop equipment that places like TechShop (over the hill) have.  The initial setup will be suitable for mechatronics work, similar to what Gabriel Elkaim teaches in the Mechatronics class at UCSC.  Gabriel was the fifth of five speakers at the MeetUp and provided a nice overview of the Mechatronics class.

What the Makers Factory will have are low-cost 3D printing machines (which I suspect will not be useful for much, but are fun toys), a laser cutter, a vinyl cutter, and some electronics equipment (soldering stations and some oscilloscopes, I guess).  They’ll probably also get some board shears.  I think I talked them out of trying to do their own PC board fabrication, in favor of ordering boards from some place like 4pcb.com.  You can probably do a class full of small boards as one $145 order from 4pcb.com (even without a .edu address) and give each person 4 copies of their board.  The 2-week turnaround time is fine for a class. It would probably take longer than that to make your own using low-cost tools in a classroom setting with only a few hours of class time a week, and the quality would be much worse.  I’d also hate to be the one in charge of getting rid of the hazardous waste produced by PC board etching.

I brought my HexMotor board with me to the MeetUp and showed it off to a few people, including Gabriel Elkaim, who was properly polite about it.  He also told me about the new PC boards he had just sent out for fab—they are redoing the electronic cockroaches that are used for the first lab in Mechatronics, since the old ones have started acquiring too much damage.  The problem is that students were much more inventive in discovering ways to damage the boards than originally expected, so the new design has a lot more protection circuitry.

I did get a chance to talk with Chris Yonge, who will be running Makers Factory.  It sounds like he is interested in having me teach an Arduino programming class and PC board design using free tools. I recommended Eagle for PC board design, even though it is not open-source, because it is fairly mature, the free version is enough for classes and hobbyists, it runs on both PCs and Macs, it has an adequate auto-router, and the licensed version is still fairly cheap.

There are open-source projects for PCB design, like FreePCB, which runs only on Windows and has no auto-router, KICAD which runs under Linux and Windows (but not Mac OS X, I believe), and many others.  There is a good list at http://www.olimex.com/pcb/dtools.html.  The general consensus of the hobbyist community seems to be that currently Eagle is most fully featured and robust free PCB editor, and that none of the open-source projects comes close yet.  Since I need Mac OS X software, and most of the open-source software is for Linux, my choices are more restricted still.  I don’t know what sort of computers Makers Factory is planning to get for classes—but they should choose software as much as possible that is platform independent.


Tagged: Arduino, Makers Factory, Meetup, open source, Printed circuit board

Board fully populated and tested

Top view of the HexMotor rev 1.3 board fully populated.

I got the board fully populated yesterday, plus I made a heat sink out of a piece of ¼” × ¾” aluminum bar stock.  The heat sink makes an enormous difference.  Before using it, running a small motor at low power for 20–30 seconds was enough to make the H-bridge uncomfortably hot.  Now running the same 12v motor stalled at full current (3A) for a full minute raises the temperature only to 100ºF.

The motor got warmer than that, and I think I burned it out, since it no longer runs and has a 400kΩ resistance.  I’m not really surprised—it was a cheap door-lock actuator, and only intended to be used with fraction of a second pulses.  Further testing will require a more robust motor.

As you can see from the photo, the screw terminal for motor 4 (second from the bottom) is a bit crooked—I’ll have to unsolder it and straighten it.  For the HexMotor 2 board, I’ll use slightly smaller holes so alignment is easier.

The thermal grease I used (Cooler Master IceFusion High Performance Thermal Compound 40G RG-ICF-CWR2-GP) was more liquid than I expected, especially since it comes with a little spatula for applying it.  I had to put on a fairly thick layer, because the aluminum extrusion was not very smooth, and when I tightened the bolts the stuff oozed out making a sticky mess. Next time, I’ll sand the aluminum smooth first and use much less thermal grease.

Closeup, showing the excess thermal grease puddling under the H-bridges, where it is very difficult to wipe off.

This closeup photo, in addition to showing the pooled excess thermal grease, shows the header pins with shorting jumpers to configure the H-bridges for either lock antiphase or sign-magnitude control.  (Because of the last-minute change from TLE-5205 to TLE-5206 chips, the silk-screen labeling of the header pins is wrong—this board is actually configured for sign-magnitude throughout not lock antiphase.

The photos also show that I did not leave room for the heat sink between the electrolytic capacitors.  The HexMotor 2.0 board will fix this problem also.

The HexMotor software now can handle 3 different boards: the HexMotor rev 1.3 board shown here, the Adafruit Motor Shield, and the HexMotor rev 2 board, which I am just about done fussing with the design for.  I’ve only tested with an Arduino Duemilanove board, but the software should work with an Arduino Mega as well.


Tagged: Arduino, H-bridge, heat sink, motor controller, Printed circuit board, thermal grease